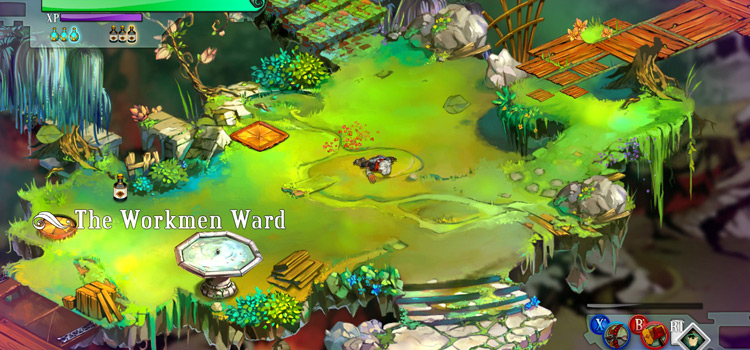
You’ll start at the center of a crossroads with a fountain nearby. There’s also the Skyway right next to where you landed, but it’s not yet active.
You may notice that there are four roads going in different directions. You’re free to choose which path to take first, and you’ll have the chance to explore the others in turn. For this walkthrough we’ll provide a suggested path, but you can choose to wander elsewhere.
West: Squirt Steppes
As you enter this area, you’ll meet a bunch of green Squirts with some of the regular blue ones. The green variants can’t actually hurt you and will run away from you instead. But they give you 5xp compared to the blue ones’ 1xp.
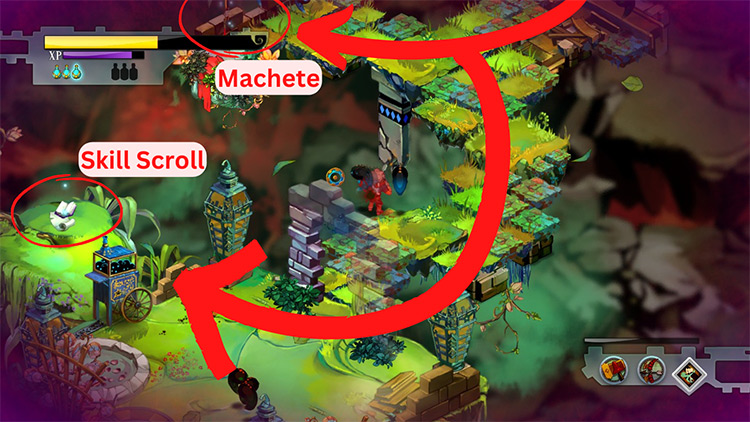
Step 1: You’ll come across a fork on the road. Follow the top one and you’ll find the War Machete.
Step 2: Proceed down the other path of the fork.
You’ll encounter an Elephant Squirt. It’s a large Squirt variant that has more health than the normal ones. Despite its size, it behaves like a normal Squirt, charging and tackling you head on.
There’s also a corn bin in the area. Smash it and grab the Secret Skill scroll behind it.
Step 3: Head back to the crossroads where you’ll be ambushed by another Elephant Squirt and its posse. Defeat them and drink from the fountain to recover any lost health.

Weapon: War Machete
The Machete’s the second of three melee weapons in the game.
It’s the fastest one, and you can also throw it by holding down the attack button. Much like the Bow, you can do a Power Shot by throwing it once you see the flash.
Secret Skill: Squirt Lure
This summons a friendly green Squirt who’ll attack and distract nearby foes. They’ll persist until they get killed. However, they’ll only linger around the spot where you’ve summoned them. They won’t accompany you beyond that.
South: Scumbag Alley
Step 1: Head down south and you’ll meet green-tinted small Scumbags. Like with the green Squirts, they’ll avoid you. However, the blue goo that they leave behind can hurt you. It also slows you down.
That said, they can actually fall down the abyss and die.
Stand your ground and these particular Scumbags will do just that shortly.
Step 2: Proceed down the road and break through the rubble to enter the next block.
A regular blue Scumbag named Gerschel resides here.
Unlike the Scumbags from the Prologue, Gerschel attacks like a Squirt. He’ll charge at you while leaving a trail of the corrosive blue goo. He also has a Squirt corn bin at the north corner of his block. Deal with that first before you turn to Gerschel.
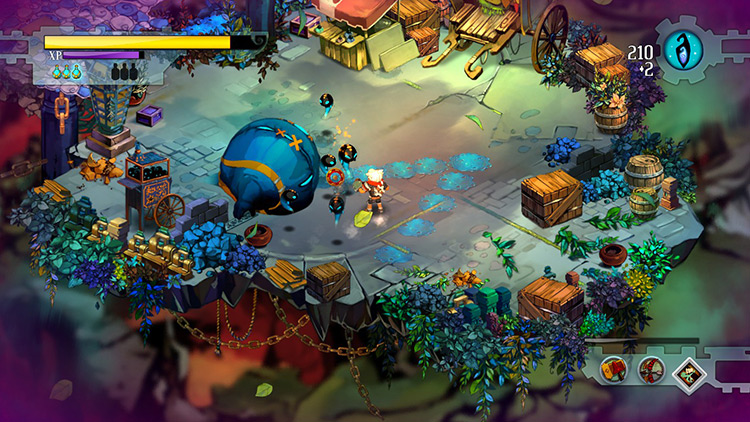
Step 3: Once he’s gone, break all the boxes, stalls, and wagons here.
They’ll give you fragments. But aside from those, there’s nothing else to loot in Gerschel’s haunt.
So go back to the crossroads and a green Squirt will unburrow itself by the entrance. It’ll drop a “Something Sharp” upgrade material for the Machete.
East: The Forge
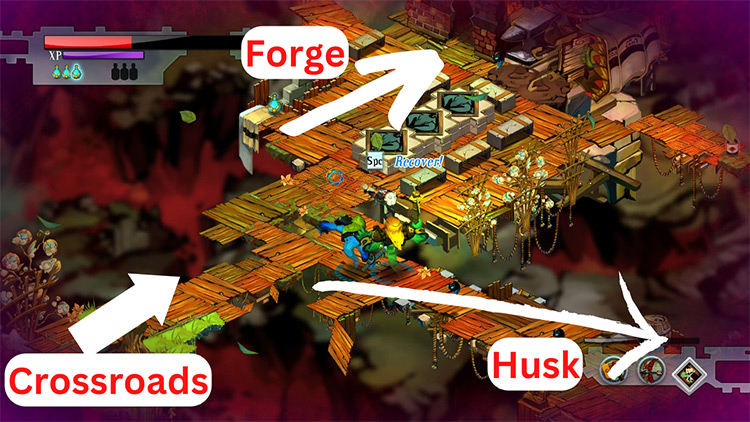
Step 1: East leads to the local Forge. It can upgrade your weapons, so head there next.
On the way, you’ll reach an outdoor dining area with tables and benches.
There’s a medium-sized Gasfella with two smaller ones lounging nearby. The big one’s attack can knock you to the air, and it’s unblockable. At the end of the row of tables, there are also a couple of Squirts. They’re just loitering near the door to the Forge.
Step 2: Deal with all of them and enter the building. You likely have one upgrade material for each of your weapons and enough fragments to cover them.
If you haven’t attempted the Breaker Barracks proving ground yet, it’s highly recommended that you pick the penetration upgrade for your Bow.
Tip: After purchasing an upgrade tier for a weapon, you can always switch to the other upgrade buff for free in the Forge.
Once your business is done, walk to the upturned wagon outside the Forge and destroy it to get some fragments. There’s also a black tonic on the plank protruding near the wagon. Take it then make your way back.
Step 3: Back at the area’s entrance, make a detour to the right. This wooden walkway leads to the ashen husk of Percy the Snitch.
Dust him, and a yellow Gasfella and their pet Squirt will attack you.
Dust them too and then return to the crossroads. Yet another Gasfella awaits you there, so beat them up and head north to the remaining path.
North: The Foreman’s Villa
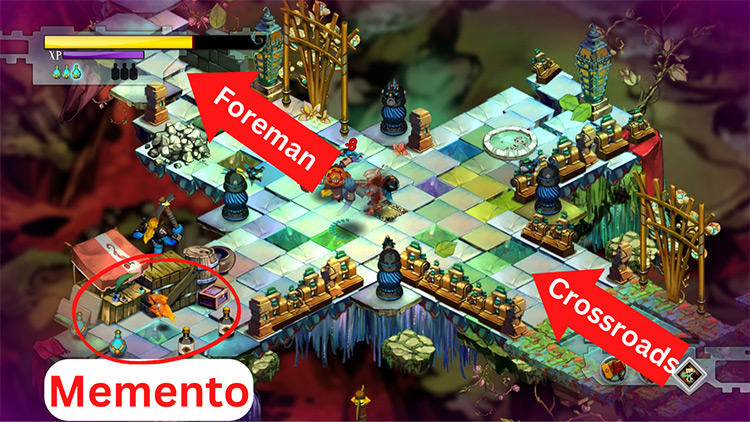
Step 1: As you walk north, some Turrets and Gasfellas will ambush you at the intersection. Destroy them. The right road leads to nowhere, but the left one has the Ragged Hood memento which you can grab.
Then take the road leading north from the intersection.
You’ll come upon a scenic residence with the Core inside a cage. The Foreman will then show up and engage you in a duel.
Boss: The Foreman

A ring of Gasfellas also surround you, but they’ll remain stationary. They’ll only attack if you get close to them.
Even then, they’ll just throw you back into the arena.
It’s best to stand your ground against the Foreman and hack away at him. He attacks you by spinning around, but you can block him. Like your Whirl Wind, his momentum propels him forward, which gives you a chance to shoot him from behind.
After you kill him, the other Gasfellas will celebrate your victory. It seems they were abused by the Foreman and are glad to be rid of him. They’ll leave after showing you their gratitude.
Step 2: The Core can also be taken now, so grab it and go. On your way back, a yellow Gasfella attacks you. Seems like they didn’t get the memo.
Bonk them to let them know who’s the new boss in town.
Note: If you have any unfinished business in the other parts of this level, now’s the best time to resolve them.
Once you clear a level, you won’t be able to go back to it.
So in that case, all items you’ve missed will need to be purchased from the Lost-and-Found.
Step 3: At the crossroads, the Skyway will now be open to you. Use it to return to the Bastion.
Home: The Bastion
Back at the Bastion, offer the Core to the Monument. This opens up another building slot. You’ll also now be able to build your own Forge and upgrade your weapons there.
Aside from that, talk to the Stranger about the Ragged Hood memento. A Squirt will appear next to him. This is your first “pet”.
Interacting with them makes them do a short animation. They add flavor and decor to your home but nothing else… yet.
Once you’re ready to move on, go to the Bastion’s Skyway.
Two more levels have become available, and both are necessary to move the plot forward. But you can take them on in any order.
For this walkthrough, the next part will be in the Sundown Path.

-
Bastion
- The Workmen Ward: Bastion Walkthrough Part 1
Related Posts:
 Point Lemaign: Bastion Walkthrough Part 11
 The Tazal Terminals: Bastion Walkthrough Part 17
 Burstone Quarry: Bastion Walkthrough Part 14
 Roathus Lagoon: Bastion Walkthrough Part 10
 Langston River and Prosper Bluff: Bastion Walkthrough Part 7
 The Wild Outskirts: Bastion Walkthrough Part 8
 Jawson Bog: Bastion Walkthrough Part 9
 The Melting Pot: Bastion Walkthrough Part 3