Think of Mount Zand as the literal peak of your adventures in the Wilds. It features many of the creatures you’ve faced, as well as a noticeable gradation of terrain.
It’s also the final level exclusive to the Wilds.
Past this point, you’ll be stepping into Ura territory.
So expect the creatures to fight you with tooth and nail to maintain their hold on Mount Zand.
Section 1: Lunkhead’s Thicket
You start at the southern end of a massive area covered with thick vegetation. The undergrowth hides many dangers — mostly Lunkheads and swampweeds.
You’ll see hints of the white petals of the latter as you move across the difficult terrain, so be vigilant.
For the Lunkheads, you can sense them by the thumping of their hops. If you’re using a controller with vibration enabled, you’ll feel the ground shake too. Their hops also make them briefly visible above the bushes.
Once you spot one, melt it with your Bellows.
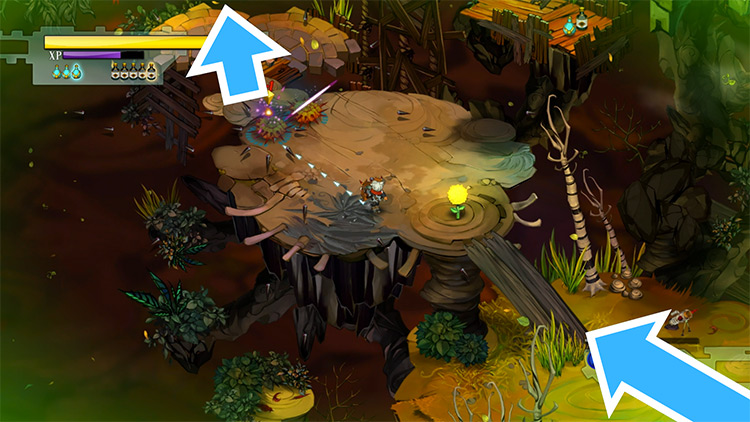
Step 1: There are four landmarks that can help you navigate this area.
- First, there’s the wooden post due north of you. From there, go west to where there’s a small square clearing. A Bootlicker and a Lunkhead will attack you when you reach it.
- If you go south from there, you can find fragments and apples at the edge of the bushes.
- Lastly, north of the post are more fragments. Collect them and return to the post.

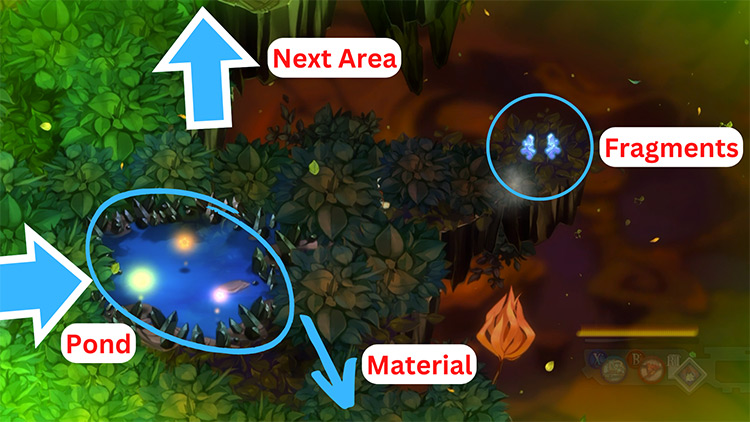
Step 2: East of the post is a pond. You can find health items at its southern edge, and if you go further east from it, you’ll find even more fragments.
The next area’s north of the pond, but before you go there, you should diverge to the south first.
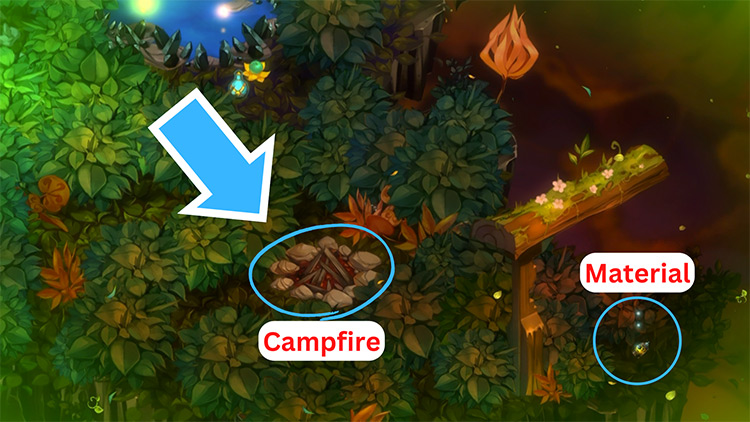
Step 3: You’ll find a campfire south of the pond. To the right of this landmark is another wooden post. There, you can get a Something Greasy for your Dueling Pistols. Pick it up then you can now proceed north from the pond.
Section 2: Bombard’s Climb
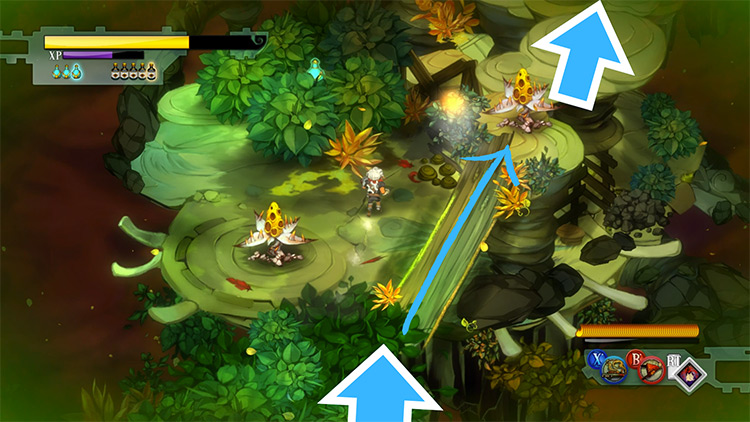
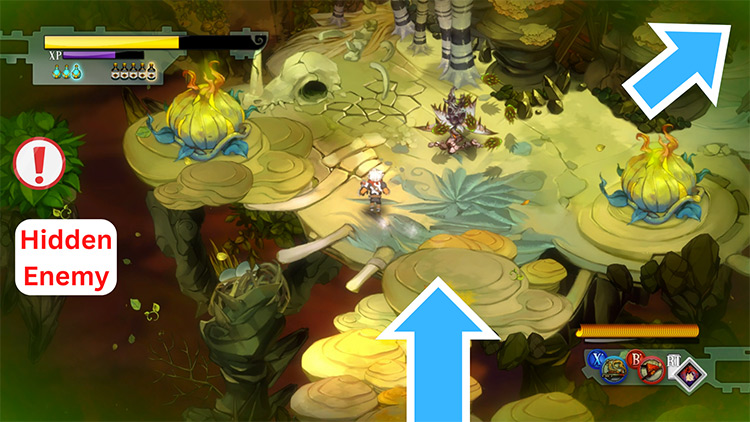
Step 1: The bushes will give way to some badlands with lots of plateaus. The initial clearing has two Wallflowers — one on the low ground; the other’s up top.
There’s a plank to your right that connects to the plateaus. Get up there after killing the enemies and continue north. You’ll reach a fork with a Pincushion in the middle – burn it down.
Step 2: Go right from the fork. You’ll enter the mini-lair of a small Anklegator.
This one’s like Queen Anne, except with less HP. You’ll get at least 300 XP and plenty of fragments if you kill it.
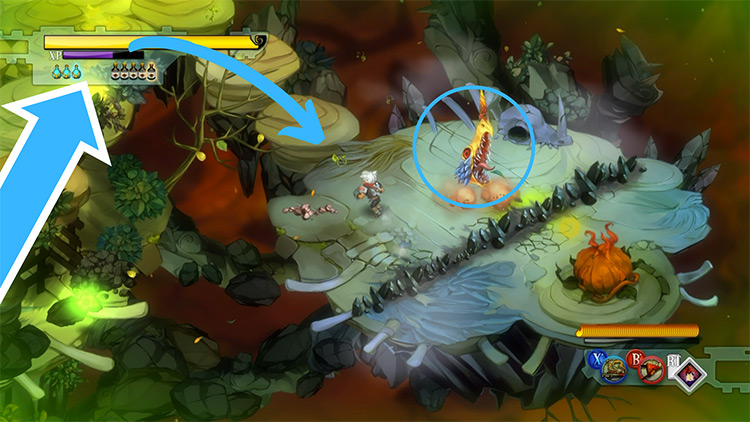
There’s also a red Stinkweed on the other half of the lair. You can’t reach it due to the rocks bisecting the lair’s center, so use a ranged weapon to kill it.
Once it’s gone, a Wallflower will emerge near the entrance. Defeat it, then go back to the fork and take the other road.
Step 3: The next clearing has a couple of Stinkweeds and a black Wallflower. There’s also a Pincushion hidden in the bushes at the far left side.
Burn them all, then head up the plank behind the rightmost Stinkweed.
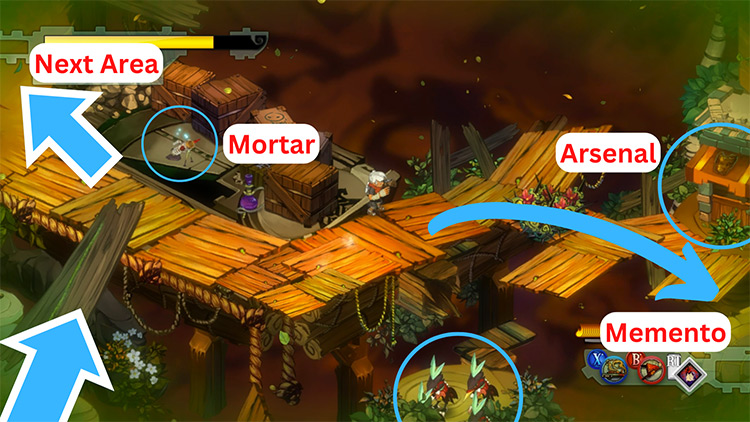
Step 4: You’ll be on a wooden walkway built around a salvaged ferry. On top of the ferry are some crates and a new weapon — the Galleon Mortar.
Pick that up and try it on the four Peckers roosting on an island to your right. If you continue in that direction, you can find an Arsenal. There’s also the “Fine Gramophone” memento near it.
After picking it up, a Pincushion will appear right outside the Arsenal. Deal with it as you see fit.
Enter the Arsenal if you need to replace one of your weapons. It’s recommended that you keep the Mortar equipped.
Many enemies are clustered together in this level. This makes them ideal targets for bombardment.
For your sidearm, you’ll want another ranged weapon, preferably something fast. You may find it hard to get into melee against this level’s bosses.
Weapon: Galleon Mortar
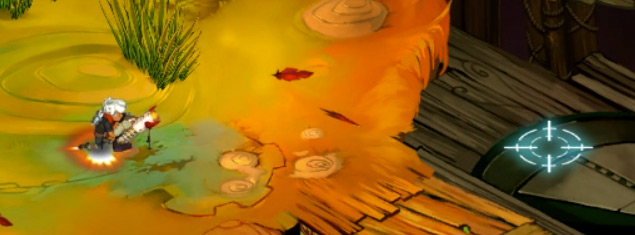
The Mortar lobs an energy orb over an arc. To do this, hold the attack button to move the targeting reticle forward. Release it to launch an orb. It’ll explode on impact, dealing splash damage in and around the target. Note that this can also hurt you if you’re near the explosion.
The Mortar can kill most enemies in one shot. It’s precise and powerful. Plus, it can also do Power Shots, like all aimed weapons.
Step 5: After your detour to the Arsenal, head west from where you found the Mortar. You’ll enter another clearing with three Wallflowers. They’re grouped close together; one Mortar strike will kill all three.
When they’re gone, head up the plank behind them. The next floor has a yellow vineapple and two Pincushions blocking the path forward. Blast them and continue forward.
Step 6: The next area’s an unfinished construction project. The Narrator deduces that the creatures have been building their own Bastion. They’ve barricaded the structure’s west half, and Wallflowers guard each corner.
A Bootlicker will also appear on the plank connecting the east half.
Past that point, only a couple of Stinkweeds remain.
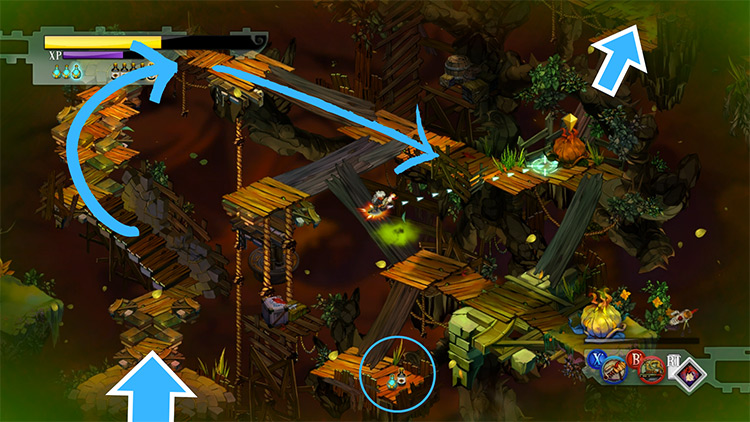
There is also a pair of tonics on the bottom floor. With your Mortar, breach through their security and ascend to the next area.
Step 7: On the next floor, you’ll see a big Pecker sleeping on an island to your right. Make sure it never wakes up with one Mortar strike.
As you continue forward, six Pincushions will rally along a long island above you. Their concentrated fire’s dangerous to your health. You’re protected by a thin fence, but it’ll fall during their first volley.
So act fast and counterattack with your Mortar.
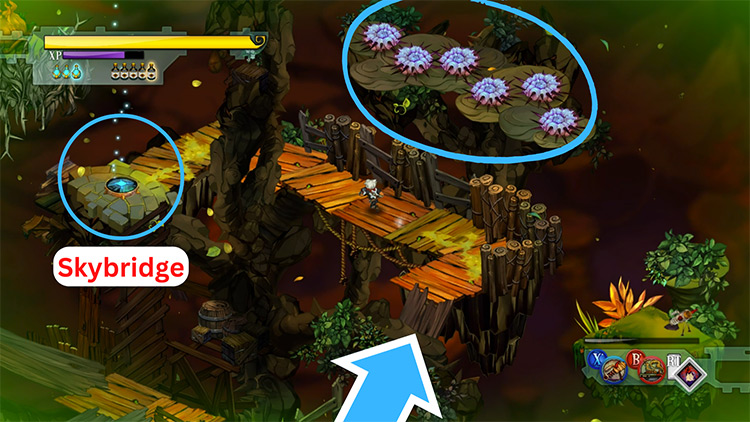
At the end of the path, one more Stinkweed will attack you near a Skybridge. Kill it then use the Skybridge.
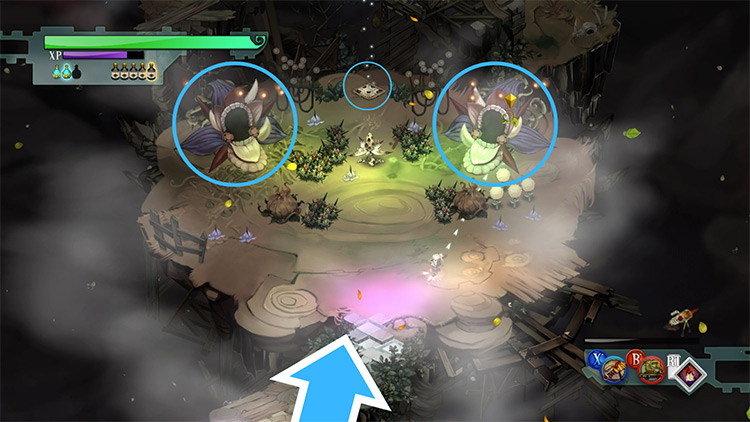
Section 3: Twin’s Peak
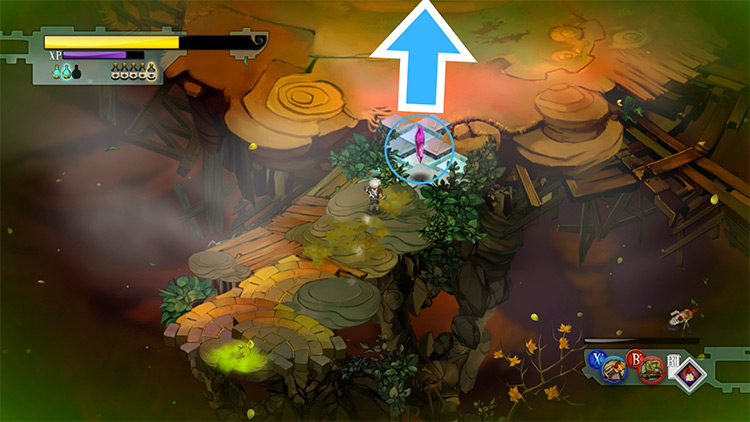
Step 1: The Skybridge will throw you to the highest plateau of the level. The Shard’s a few steps north of you. Take it and continue going north.
You’ll face yet another creature that you haven’t encountered in some time.
Step 2: Two Lungblossoms take their post on the sides of the Skyway. These two are much fiercer than the one in Jawson Bog.
Their large barbed spikes shoot up from their mouths and rain down on you like wicked missiles.
They also have a posse of Wallflowers, red Stinkweeds, and Pincushions to keep you busy. There are even some vineapples and stabweeds around each of them.
That said, this battle is optional. The Skyway’s already open.
You only need to plow through the Wallflower at their center to use it. But then again, you’d earn a lot of fragments and XP for killing them. If that’s your goal, then here’s your strategy:
- Always keep moving to avoid their spike barrage.
- Use your secondary weapon to clear out the small fry.
- When the Lungblossoms’ pause their attack, lob a Mortar at them.
It takes at least 3–4 Mortars to kill one Lungblossom. When that happens, defeating the other will be a piece of cake.
The area won’t be as crowded anymore, and you have more room to run around. After you’ve done that, go ahead and use the Skyway to return home.
Home: The Bastion
Back at the Bastion, insert your new Shard into the Monument.
You’ll get another chance to enhance a building. You only have two options left, so pick whichever one you need.
Aside from that, you may have noticed that the Gramophone has been set near the Pecker. You can use it to change the Bastion’s background music. You should also talk to Zia and Rucks to hear their thoughts about it.
For your preparations, it’s recommended that you turn off your invoked idols.
The next story level ends with a challenging battle against new enemies. Their unfamiliar attacks may catch you off-guard. And if you take too long to defeat them, it’ll result in permanent damage to your home.
It’s not severe nor game-breaking, but it may affect you emotionally.
When you’re ready, go to the Skyway to find a choice between these two levels:
- Boundless Bay
- Burstone Quarry
As usual, the first option is a proving ground. This one’s for the Galleon Mortar, and you’re tasked with killing as many Squirts as possible in five Mortar shots.
It’s an easy and quick challenge.
You may also already have the material to upgrade the Mortar. Upgrade its blast radius so you can ace the test. It should only take a couple of minutes.
Once you’re done there (or if you want to put it off for later), then go to Burstone Quarry to continue the story.
-
Bastion
- Mount Zand: Bastion Walkthrough Part 13
Related Posts:
 Point Lemaign: Bastion Walkthrough Part 11
 Roathus Lagoon: Bastion Walkthrough Part 10
 Langston River and Prosper Bluff: Bastion Walkthrough Part 7
 Burstone Quarry: Bastion Walkthrough Part 14
 Jawson Bog: Bastion Walkthrough Part 9
 The Wild Outskirts: Bastion Walkthrough Part 8
 Cinderbrick Fort: Bastion Walkthrough Part 6
 How To Upgrade Weapons in Bastion (Full List)