Geographically, the Quarry lies within the Ura region. It used to be owned by the Ura too, before Caelondia bought it from them. Caelondia exploited its resources and prospered from it. In fact, the Cores and Shards you’ve been collecting all came from the Quarry.
After the Calamity, the pests and plants of the place ran rampant and unchecked. The enslaved Gasfella workforce were also left to their own devices.
They continue to mine the Quarry, ignorant of their freedom.
As such, this is the only level where you’ll meet foes from all three regions.
Section 1: Earthbender
Step 1: From your starting point, go north while clearing away the obstacles and debris. A natural stone arch marks the entrance to the Quarry.
Under that arch, you’ll encounter a Rattle-tail. Kill it and take the large fragment from the ledge to your left.
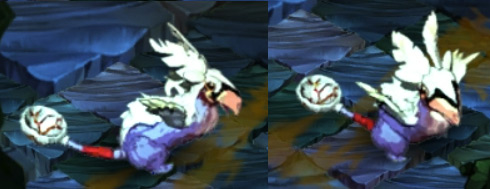
Enemy: Rattle-tail
These overgrown fowls are the first and only animal-type enemy you’ll meet in the Ura region. They’re considered pests by the Caelondians, while some Ura keep them as pets.
Rattle-tails will try to keep their distance from you. After running for a few seconds, they’ll hide underground. While burrowed, they’ll throw large obsidian rocks at you, then they’ll emerge again. Their rocks have an extreme range, so you’ll want to close in on them as fast as possible. You can still hurt them even while they’re underground.
After that, go along the path to the right of the arch, and defeat the Pincushions blocking your way.
Step 2: A Gasfella’s hard at work at the next junction. You can find more of its kind around the level, and they all won’t attack you. They’ll only turn hostile if you take the tiny fragment attached to their tail. That single cent isn’t worth the bother, so leave those poor workers alone.
A couple of Stinkeyes are also burrowed here plus a black Wallflower on a rock to the right. If you go down to the right of the Stinkeyes, you’ll find a fragment behind the mushrooms.
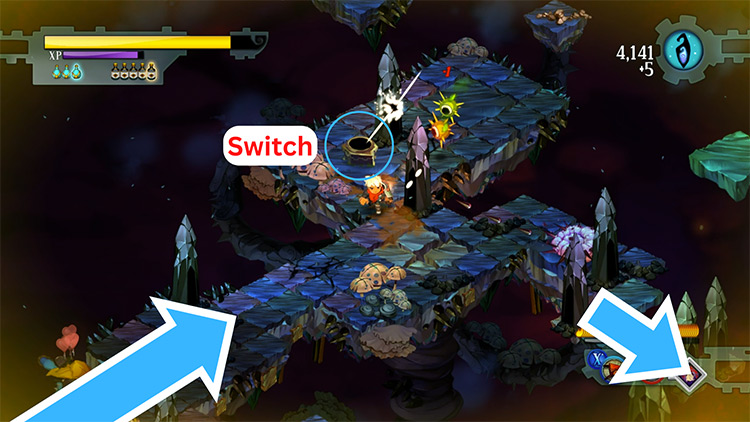
Aside from that, there’s also a switch at the center of the junction. Pressing it rearranges the stalagmites around the area.
At first, it seems like this doesn’t matter, but it does close up a path ahead. Don’t worry though; the next switch will open that path up again, so head north to do that.
Step 3: When you reach the second switch, you’ll see two more burrowed Stinkeyes flanking a fragment. A Pincushion down the right will be aiming for you too.
After killing them, a green Wallflower will emerge north of the switch. Defeat it, then press the switch.
This opens the path to the far right. It’s actually the same one that you’d closed with the first switch. This correlation demonstrates how the rock puzzles of this level work.
Now that you understand that, continue down the path to get to the next area.
Step 4: You’ll stumble upon another Gasfella. This one’s in the line of fire of a nearby Pincushion. After it gets hit a few times, it’ll attack its assailant. You can help it if you’d like, but be careful not to take its fragment. Otherwise it’ll also attack you.
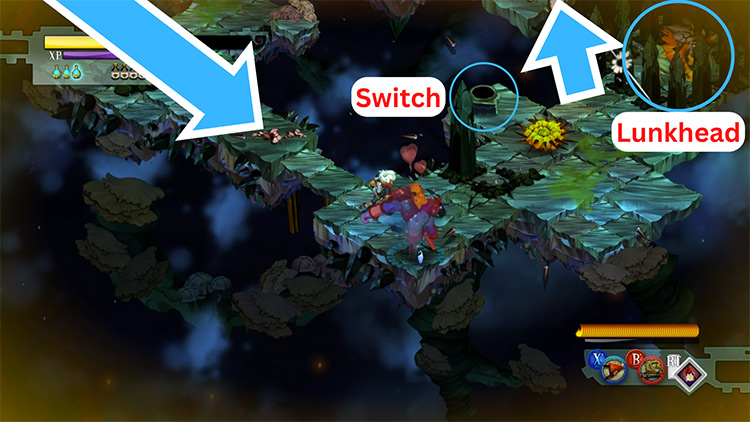
Apart from those two, a Lunkhead’s also here. It’s trapped inside a rock formation.
If you have the Bellows, you can burn it before you release it. If not, press the switch to your left to lower the rocks. Kill it then resume your journey.
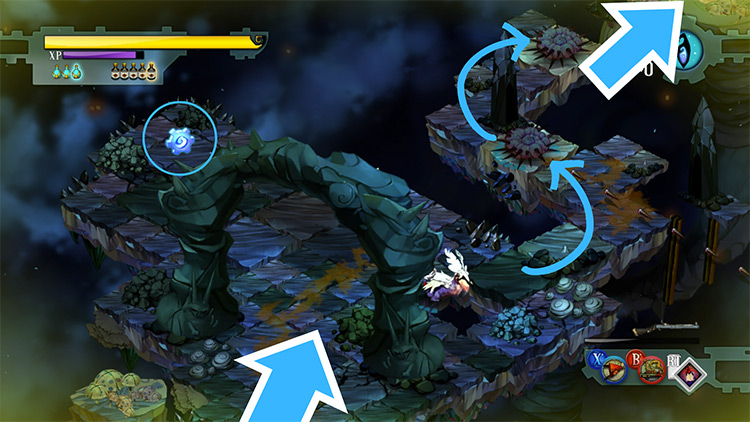
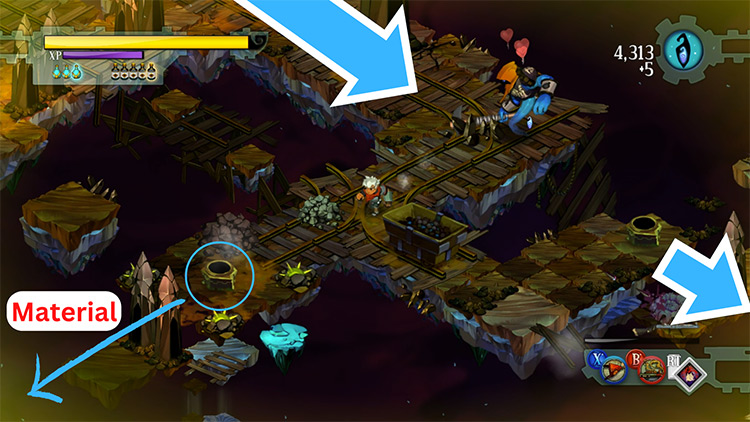
Step 5: When you arrive at the next switch, a blue Wallflower will appear behind you.
Defend yourself against it but don’t press the switch yet. Take the fragment and tonic to its left, then keep going north from it to reach a crossroads. Only the left path is open.
Head there to defeat a Rattle-tail and find another fragment-and-tonic pair.
After that, you should now press the switch. Doing so closes the left path, but opens the one in front of you and the one to your right. The one in front of you leads to more Stinkeyes, a Rattle-tail, and a fragment.
Clear that area, then head down the path leading east from the crossroads.
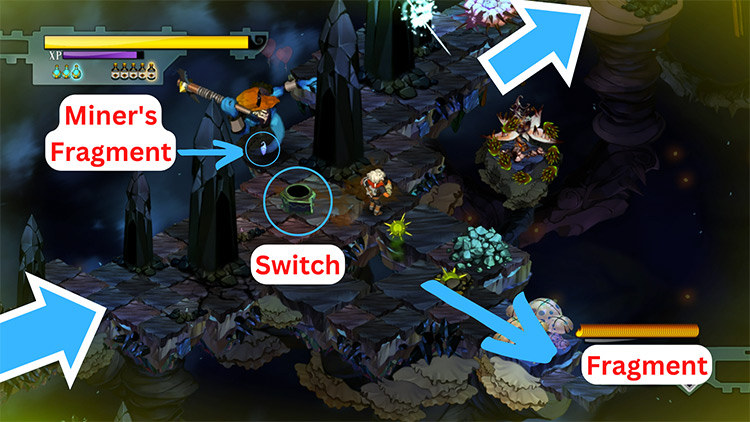
Step 6: You’ll reach another Gasfella beside a minecart track. In front of it is a switch.
This connects to the nearby rock formations and to the ones in the next area too. Press it to raise the rocks near you.
You can use those as cover since a pair of Pincushions will be firing at you from up ahead. Shoot back between their barrages.
There’s also a tonic and a fragment at the ledge to your left. If you take those, a Bootlicker and a green Wallflower will surround you. Defeat them all then go to the Arsenal on your right.
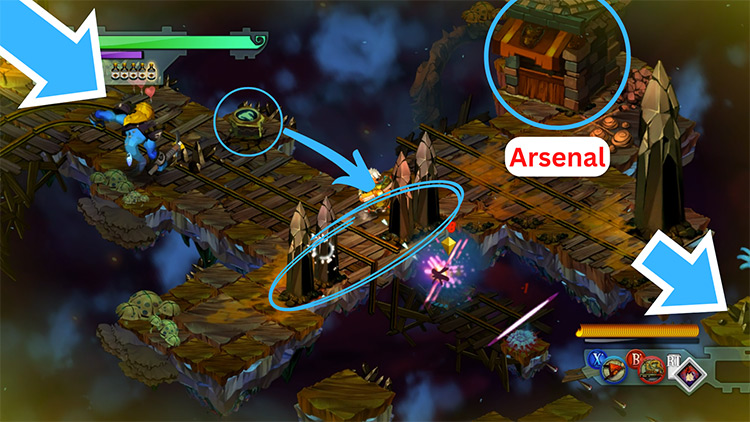
Tip: It’s recommended that you equip the Bellows if you haven’t yet. It can make the upcoming boss fight much easier. For your secondary, you’ll want your best weapon that can clear a room quickly or can defeat enemies in one shot.
Something like the Bow and its “Dancing Shot” Secret Skill will do. You’ll need it for a fight after this level.
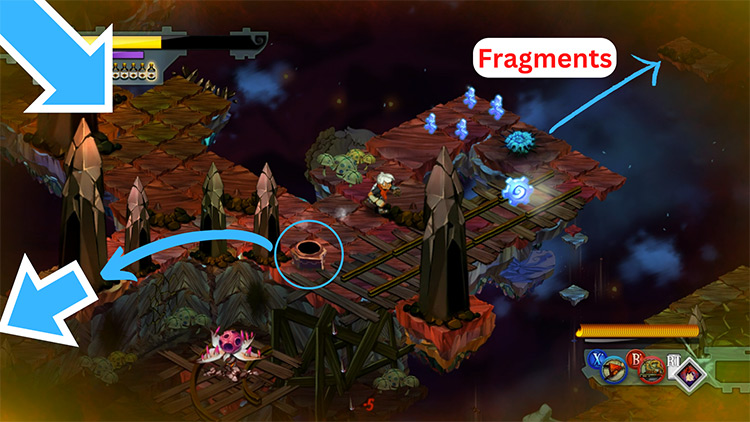
Step 7: Follow the tracks leading away from the Arsenal. Go past the Gasfella at the bend. Up ahead is a junction with a minecart and a switch surrounded by burrowed Stinkeyes.
Take the path leading to the switch and press it, and kill the Stinkeyes as well. The rocks beside the switch will lower.
Head down there and you’ll find a nest of Stinkeyes, some vineapples, and a Something Stringy for your Bow. Grab the material and burn everything else.
Back at the minecart junction, the other path will be closed. Press the junction switch again to re-open it then go there.
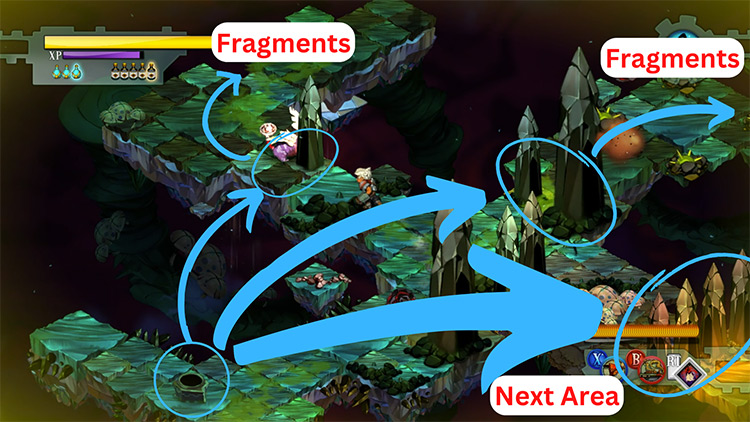
You don’t need to press the next switch, but you should kill the Pincushions guarding the path.
After that, continue east while grabbing the fragments along the way.
Step 8: When you get to the next switch, you’ll see a pink Wallflower to your south. Further south of it is a Pincushion laying suppressive fire on the switch. The switch connects to the rock cover next to it, so only press it after you’ve dealt with the two enemies.
If you go east of it, you’ll find a hoard of fragments watched over by a fierce Pincushion.
The ledge behind it also has more fragments and another Pincushion.
Clear this area, then head west from the switch.
Step 9: The next area starts with a fork. The left road only leads to a deadend with Stinkeyes and a black tonic. Go there if you need it.
Otherwise, keep going south from the fork.
Burn the black Wallflower and Pincushion that are in your way. Beside the Pincushion is a switch, which opens the way to the boss after you press it.
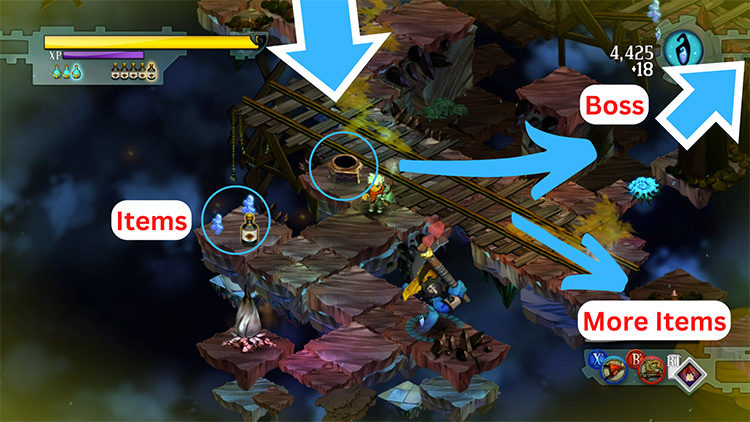
The small path below the switch has two fragments and a black tonic. A green Wallflower and a Gasfella are also there.
Apart from those, there’s also a Pincushion to the far right of the switch. It guards the entrance to the boss area.
Past that and further east, a Lunkhead lurks at the end of the rails. Its room has a couple of fragments and a health tonic.
After defeating the monsters and taking those items, head into the boss’s chamber.
Section 2: Earthshaker
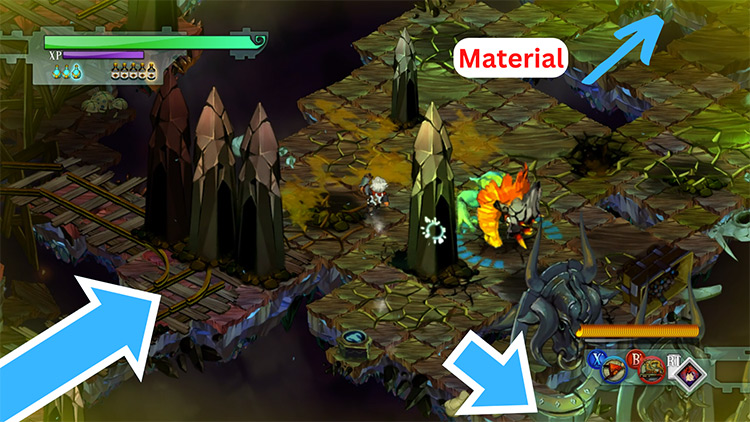
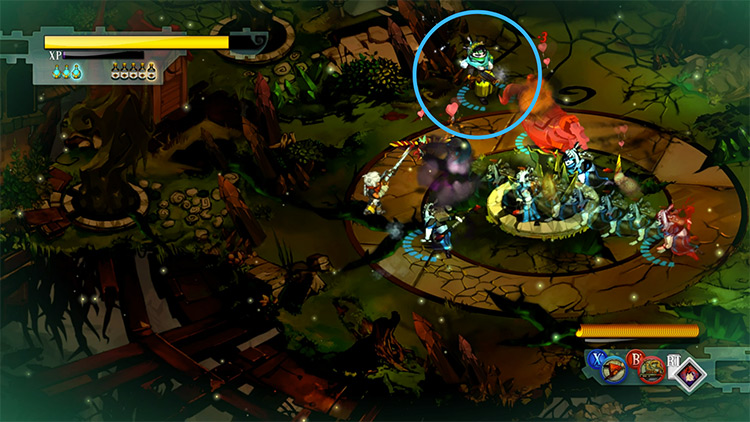
Step 1: As you enter the arena, you’ll meet Sir Lunky — a gigantic Lunkhead.
He’s sturdier and meaner than his regular counterparts.
He still attacks you by hopping, but he’ll have backup in the form of a Rattle-tail and two Pincushions. They’ll appear over the course of the battle.
There’s a switch near the entrance. It only rearranges the rocks inside the area, which doesn’t affect the battle that much. There are also items at the far end of the lair, including a Something Coarse for your Musket. Pick them up when you get the chance.
As for Sir Lunky, there are two ways you can deal with him:
Method A: The conventional one is to do a fair fight. It helps if you have the Bellows so you can damage him despite his armor. He hops faster than normal Lunkheads though, so keep your cool and don’t mess up your evasive rolls.
Method B: This alternative is easier and quicker. Sir Lunky can fall off the area if you lure him near the edges. Get him close enough to a cliff, and wait for him to hop to his doom. However, you won’t get any fragments from him using this method.
Whichever way you choose, don’t waste any black tonics against him. You’ll need those for later.
Step 3: Once Sir Lunky’s gone, the gate leading east will open.
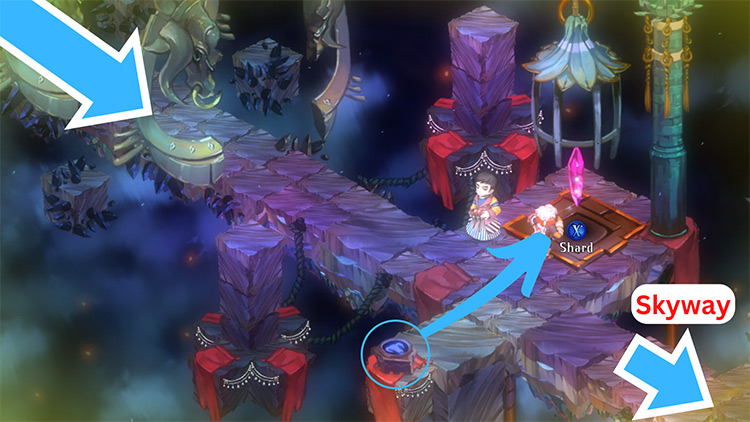
Go through it to find Zulf waiting for you. He’s right next to a caged Shard.
Speak with him, and he’ll warn you about the Ura attack on the Bastion. After learning that, press the switch opposite of Zulf to lift the cage.
Grab the Shard and run east to find a Skyway. Use it to return to the Bastion.
Home: The Bastion
Step 1: You start at the outskirts south of the Bastion. There are already three Ura Warriors waiting for you here.
As soon as you land, the first will lunge at you. Immediately raise your shield and defend yourself. You may find it hard to use the short-ranged Bellows against them due to their speed. Use your secondary weapon instead.
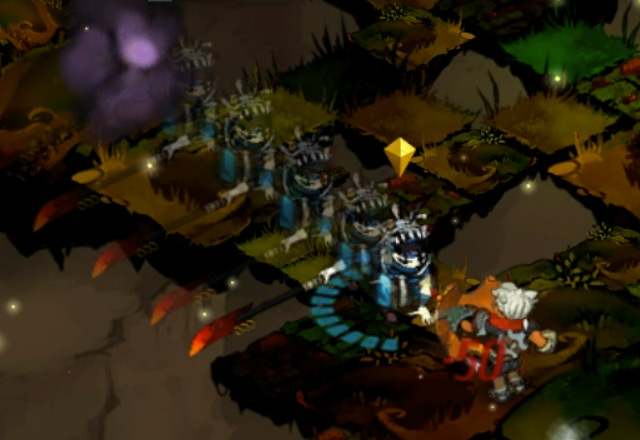
Enemy: Ura Warrior
The Ura are the only human enemies in the game. They’re more agile and intelligent than any foe you’ve faced. They’re so fast that they leave afterimages when they move. If they get hit, they’ll leap back away from you.
So, you should never compete with an Ura’s speed. They’ll keep hounding you if you try to be evasive. Instead, hold your ground and use your shield. They can be stunned, and then they’ll be vulnerable.
Different Ura Warriors wield various weapons, which determines their attack pattern:
- Halberdiers dash to your side before delivering a quick thrust.
- Gunners remain stationary while firing bursts of three shots. They can still dash away if they get hurt.
- Crossbow-wielding Marksmen behave like Gunners, except they fire five shots instead of three.
- Swordsmen have shorter dashes than Halberdiers. But they’re more tenacious in their attacks.
Once you’ve killed the second Warrior, the third will flee into the Bastion and seal the entrance. You’ll have to take the path to your right.
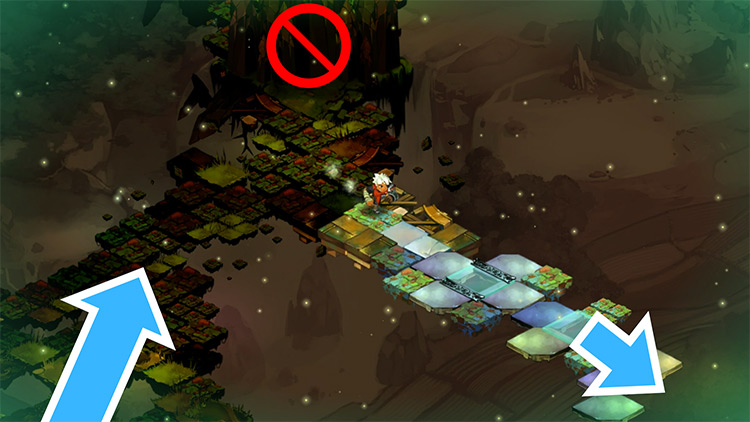
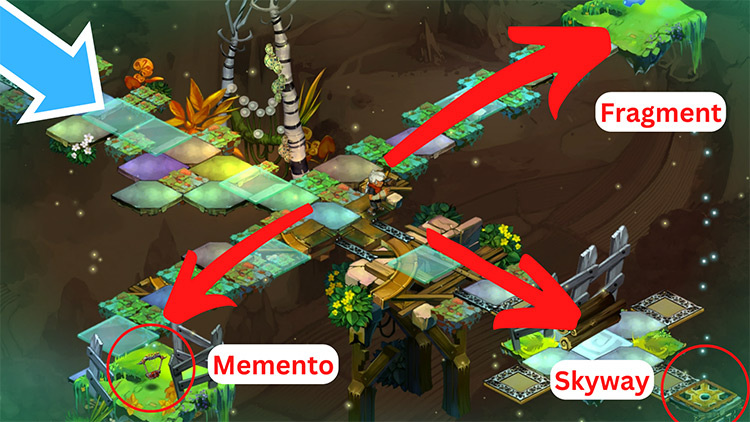
Step 2: You’ll reach a crossroads right before a Skyway.
The left path has Zia’s “Harp Guitar” memento, while the other one has a large fragment.
Grab both, then continue forwards to the Skyway. It’ll take you inside the Bastion.
Step 3: There are five Halbediers and one Gunner raiding the plaza. Your pets are doing their best to defend your home, but they need help.
In fact, they can permanently die during this sequence.
This doesn’t hurt your progress nor lock you out of achievements or Vigils, but it’s still a terrible outcome. Which is why you have to kill all the Ura as fast as you can to save them.
The Mechanical Pyth and the Anklegator can hold their own. They can keep the Halberdiers busy. You should help the Squirt and the Pecker first, as they’re your weakest pets. The latter often dies first because of its aggressive behavior.
The biggest threat to them is the lone Gunner, who’s providing fire support for her allies. Focus on her first, then mop up the rest.
After the last Ura falls, you’ll watch a cutscene.
Rucks will explain the reason for the attack and the Calamity.
Once he’s done, ask him about Zia. He thinks that the Ura took her back to their home.
As for your own home, all buildings are still functional.
But the debris has made some inaccessible. Insert the Quarry’s Shard into the Monument to repair the damage.
You’ll also get to enhance the last building to its true form. Do that, then go to the Memorial to claim a couple of Vigils. You should’ve completed at least two of them — “The Mercy” and “The Sanctuary”.
- The first Vigil is for defeating all enemy types in the game, of which the Ura Warriors were the last.
- The second is for unlocking all True Buildings.
Use the rewards to upgrade your weapons and buy Spirits and Secret Skills.
Then once you’re prepared, use the Skyway and go to the next story level — Urzendra Gate.
-
Bastion
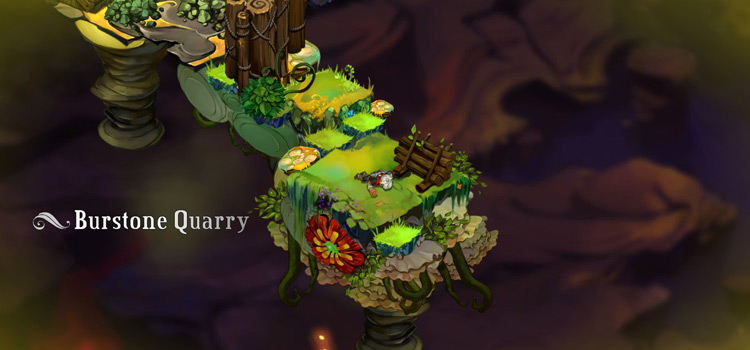
- Burstone Quarry: Bastion Walkthrough Part 14
Related Posts:
 Point Lemaign: Bastion Walkthrough Part 11
 Langston River and Prosper Bluff: Bastion Walkthrough Part 7
 Roathus Lagoon: Bastion Walkthrough Part 10
 Colford Cauldron: Bastion Walkthrough Part 12
 The Wild Outskirts: Bastion Walkthrough Part 8
 How To Upgrade Weapons in Bastion (Full List)
 Jawson Bog: Bastion Walkthrough Part 9
 Mount Zand: Bastion Walkthrough Part 13