The River is the border between Caelondia and the Wilds.
You’re riding a ferrybarge for most of this section, so navigation’s automated.
All you need to worry about is fighting off your enemies. You’ll also encounter your first type of Wild creature. They’re hostile to both you and your old foes from Caelondia. You’ll see a lot of them fighting each other as you sail down the River.
Section 1: Langston River
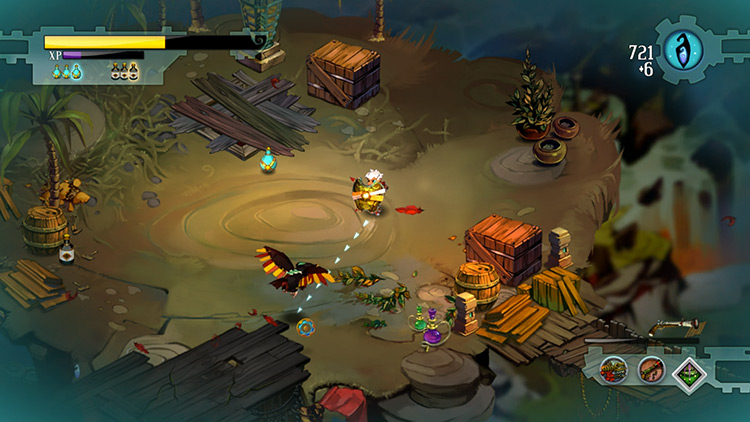
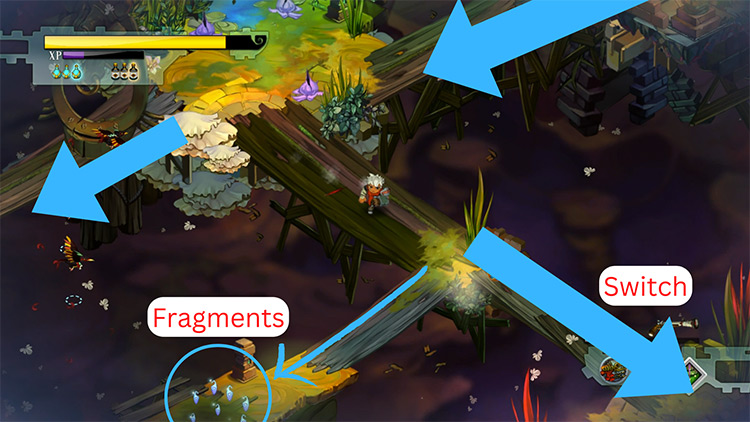
Step 1: You’ll land on a caravan site and spook a bird-like creature away.
There are also some fragments on the eastern deck. Get up, get those, then break the wagon and objects around the site to get a few more fragments.
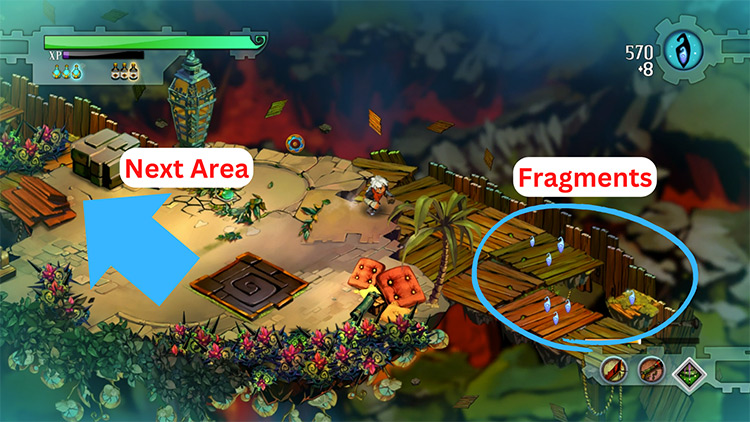
After collecting everything, head west on the wooden walkway. Smash the stabweeds and Gasfellas that try to block you.
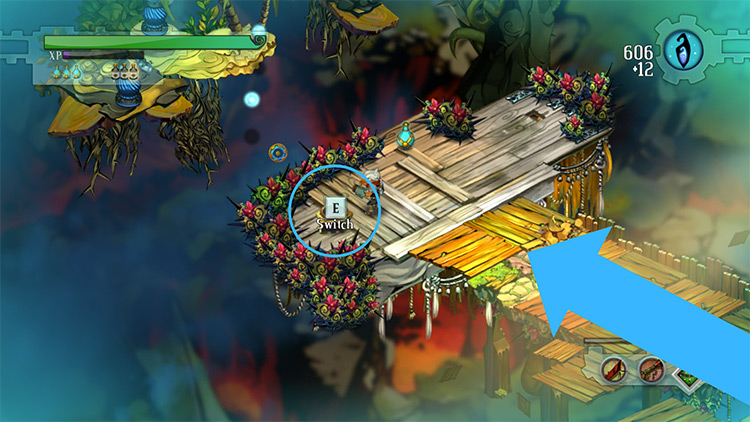
Step 2: At the end of the jetty, there’s a long-neglected ferrybarge with a switch and a health tonic on it. Save the tonic for later. You’ll need it on your journey.
There’s also two yellow Gasfellas floating nearby, and it’s engaging a trio of Turrets north of you. Shoot them all to settle their dispute.
Press the switch to activate the ferrybarge (which is called Weeping Nellie). It’ll sail forward, taking you along the “river”. It’s also impervious to damage, so you only have to worry about yourself.
Step 3: Turrets will be shooting you from afar. Small skiffs will also pull up alongside you; they carry various Turrets or Gasfellas. The skiffs will try to board you, or they’ll go after the Turrets if those are nearer to them.
Either way, dodge or counter any projectiles and kill those that approach you. Smash any skull crates that land on your ride.
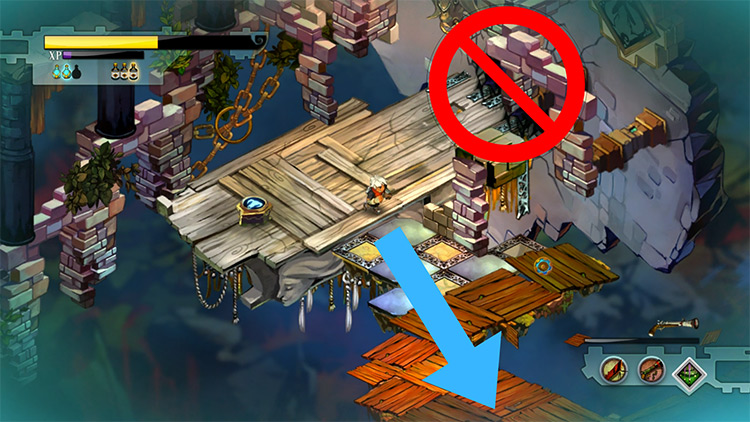
Step 4: Nellie will soon hit a wall, preventing further passage.
You’ll have to disembark via the planks on your right.
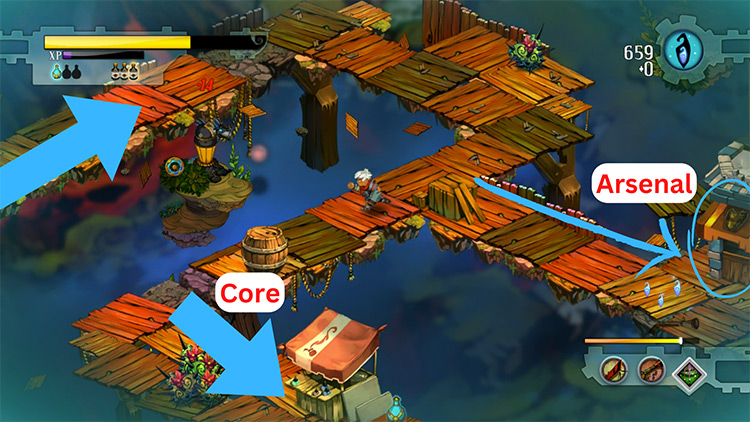
Follow this winding path and defeat the few enemies in your way. You’ll find the Core at the end.
There’s also an Arsenal on a pier right before it. If you don’t have the Repeater equipped, do so now. It’ll be useful for the next encounter.
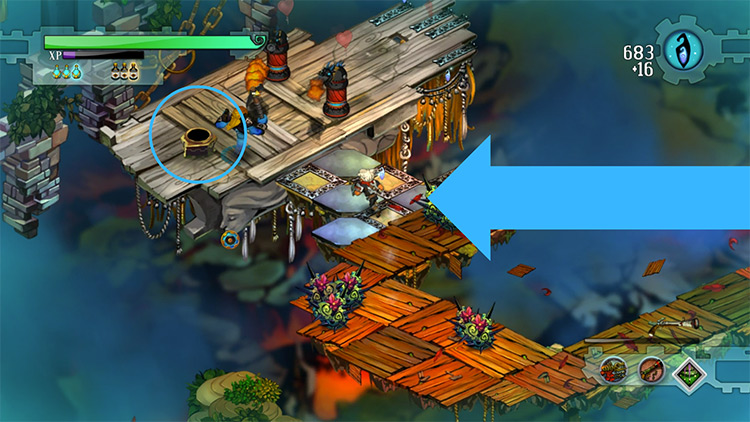
Step 5: Take the Core. As soon as you do, a moment of instability will shake the level.
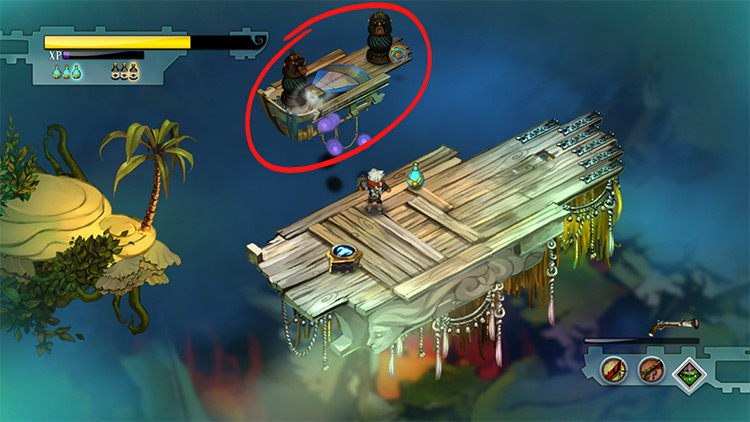
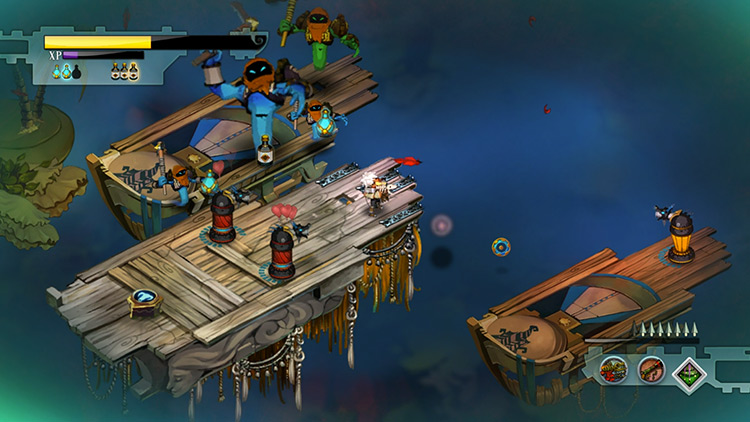
This agitates the birds that’ve been keeping their distance from you. They’ll turn hostile and attack. You’ll have to fight your way back to Weeping Nellie. She’s being strafed by Peckers and Gasfellas. But she’s also defending herself using her two flamer Turrets.

Enemy: Pecker
These birds of prey come in two sizes. The little ones move in squadrons and will harry you from all directions. They’re fast, so use quick-firing shooters like the Repeater or the Musket to keep them at bay.
The larger versions hunt alone. They’re much more clever than their smaller cousins. They’ll use their agility to track and relentlessly lunge at you. The trick is to stand your ground and counter-block their attacks. This leaves them stunned and vulnerable.
Once the enemies are dead, press her switch to resume your journey.
Step 6: A short distance later, more Peckers and Gasfellas will attack you.
Nellie’s flamers can form a frontline against them, but they won’t last long.
Kill the raiders fast to conserve your allies’ health.
Next, two skiffs will cruise alongside you. The first has a trio of homing Turrets; the second has Gasfellas — one of which is a big one. Defeat them as they come.
Step 7: After the skiff encounter, Nellie will speed up and zip past various enemies.
Her two flamers will also break apart. She’ll soon run aground, throwing you on an island. Here, two waves of Peckers will attack you. A couple of them are the big variants.
Remember to counter-block their attacks to stun them. Otherwise, you’ll have a hard time dealing with them.
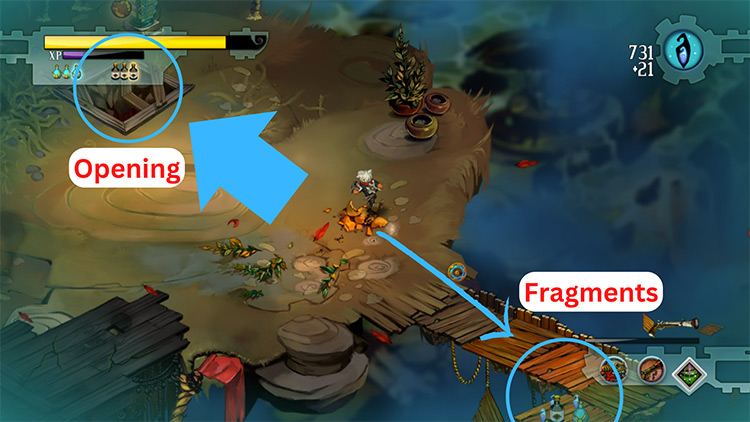
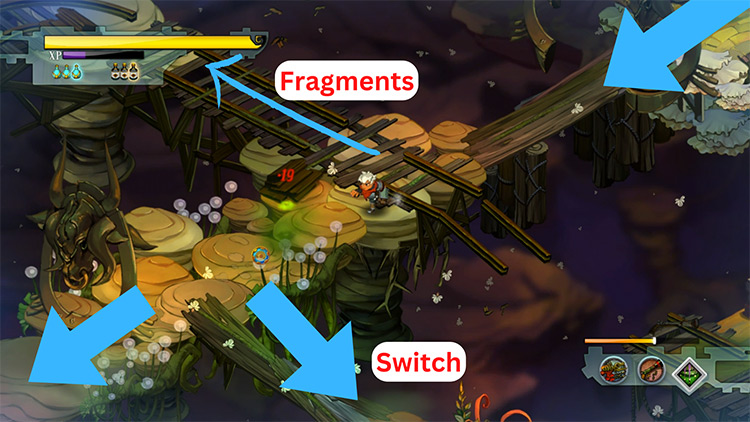
Step 8: When most of them are dead, a momentary firestorm will scare away the rest. It’ll also conveniently burn open the hatch at the island’s center.
You should first collect any loose fragments in the area, including those on the jetty to your right. Then you can jump down the opening.
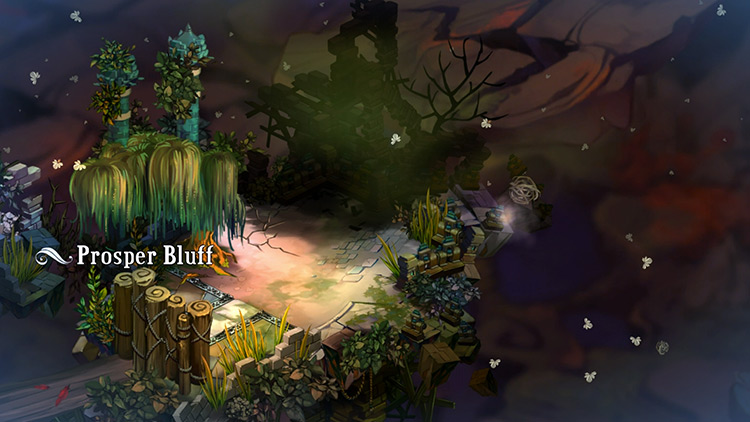
Section 2: Prosper Bluff
Unlike Caelondia’s paved aesthetics, the flora here can conceal items, roads, and dangers. At the same time, Peckers will harass you throughout the level.
You’ll want to be more attentive of your environment from now on.
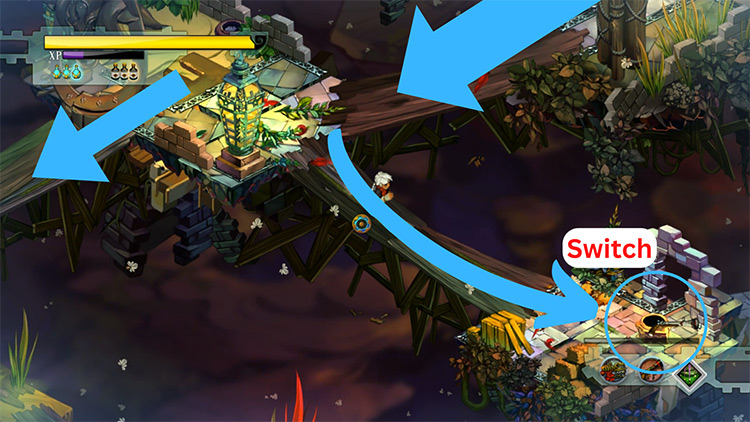
Step 1: Get up and break through the palisades blocking the western path.
Up ahead are a pair of Peckers picking on a Gasfella next to a locked gate. Dispose of them, then run across the east walkway.
The switch to unlock the gate is there. Press it then go through the gate.
Step 2: Don’t get too close to the lilac-colored bulbs on the next platform. Those are called swampweeds. If you step on them, they’ll burst and release a noxious cloud which lasts for 3–5 seconds.
The gas only spreads around their immediate vicinity, so blast them from afar to clear them.
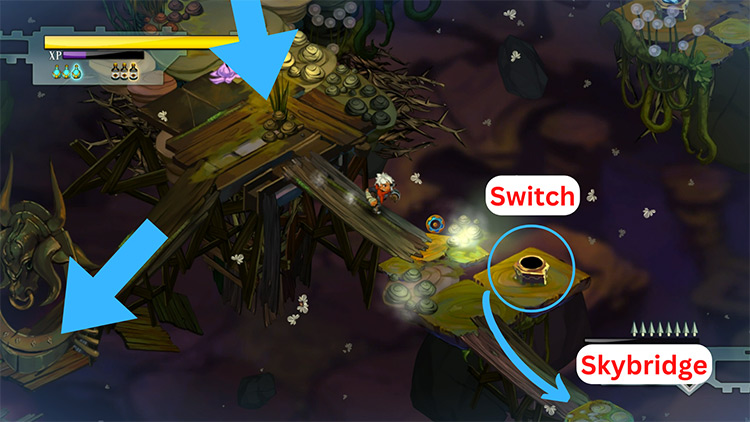
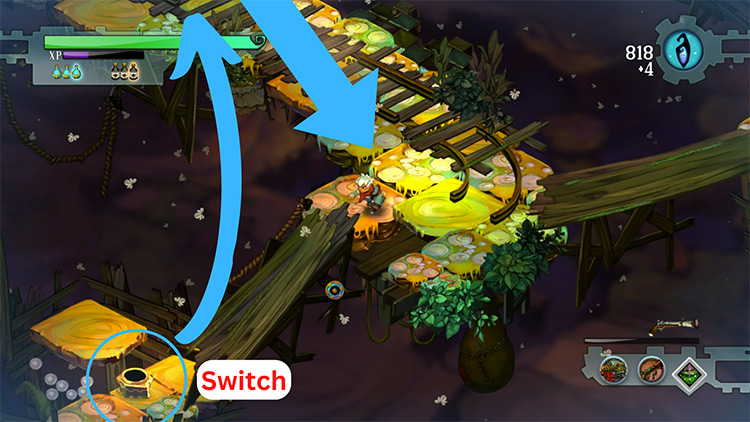
There’s another locked gate here. Its switch will be at the far end of the path to your right.
There are also some fragments on a side road along the way. When you get to the switch, there’ll be a Skybridge beside it that can take you back to the gate.
Press the switch, jump the Skybridge, then continue through the gate.
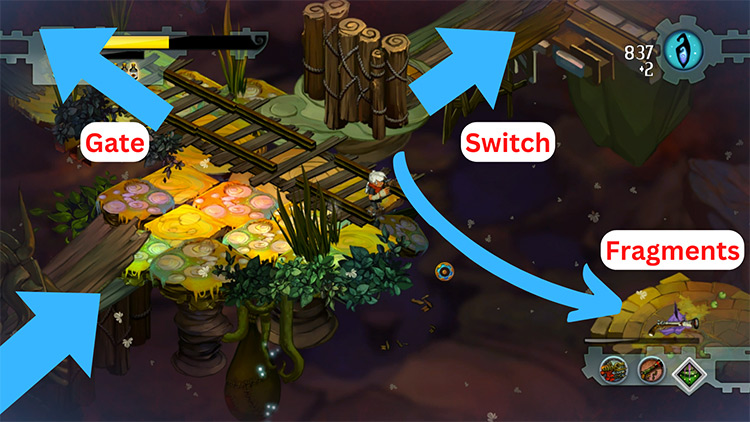
Step 3: A Gasfella is meandering in this next corridor. Kill him then take a detour up the rails first.
You’ll see there’s a minecart at the bend which contains a few fragments. Destroy it to collect its contents. As you do this, a big Pecker will pepper you with its sharp feathers. They stay stationary while attacking, which makes them easy to kill.
Head back to the corridor.
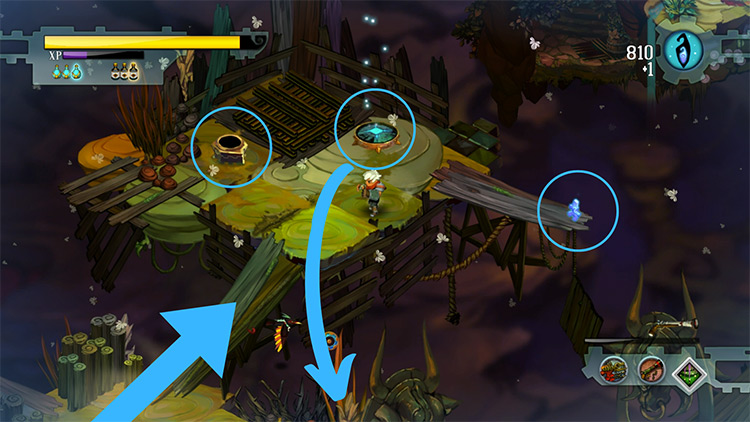
You’ll reach another switch, another Skybridge, another gate. You know the drill: press, jump, pass.
Step 4: More swampweeds litter the path ahead.
You can skirt around them, but it’s safer to pop ‘em. A few paces ahead is the same formula of gate and switch.
The Skybridge will appear after you’ve pressed the switch. So press the switch and go through the gate.
Step 5: Continue along the next path.
Break through any barricades and bulbs that bar your way.
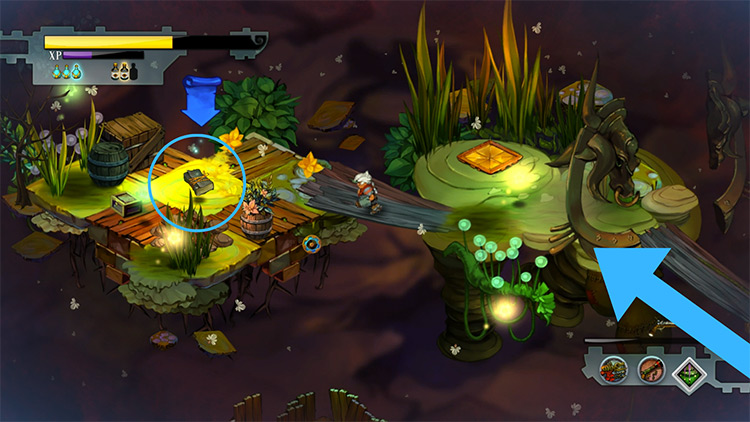
You’ll stumble into another locked gate. Its switch is on the platform above it, so head there.
This area has a big fragment on the plank protruding to the right. Grab that first then press the switch. Use the Skybridge to get back to the gate.
Step 6: This part’s gate puzzle has a different flavor than the previous ones.
For starters, there are two gates.
The first gate is right next to the gate from the previous step. Its switch is located down the road; follow the tracks to find it. After pressing that switch, use the Skybridge located next to it and it’ll take you back to the first gate.
Beyond it are some fragments, a tonic, and a Skybridge, which will throw you back on the tracks.
Step 7: Moving on, you’ll reach the second gate. Its switch is on the platform to your left.
To get to it, head right to where there’s a Skybridge. Use it to get to the switch.
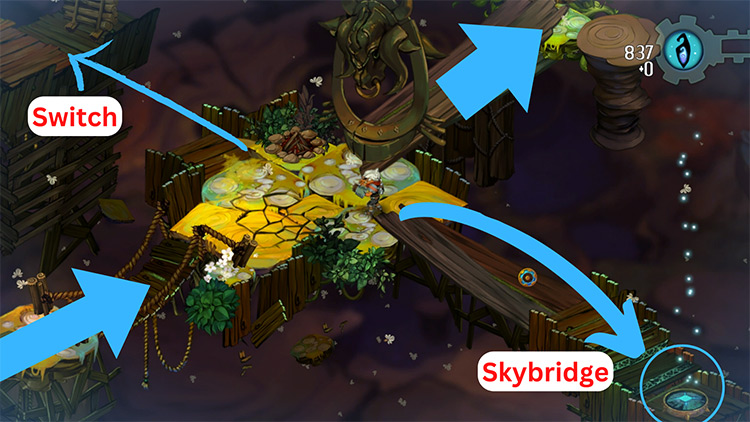
Once you’re there, planks will appear and connect this platform to the gate. Go ahead and press the switch then pass through the gate.
Step 8: You’ll be at an intersection. West leads to a locked gate, while east has an isolated island.
North through the palisades has the switch, so go there first.
After pressing the switch and using the Skybridge, there will now be a path to the eastern island. Head there to grab two large fragment pieces.
After that, go west through the final gate.
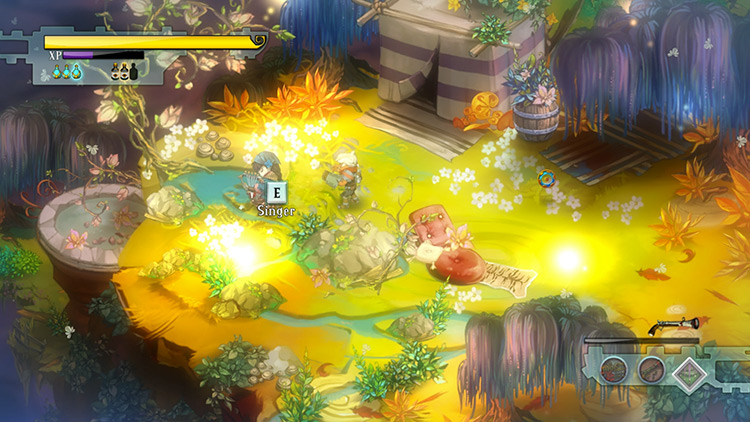
Step 9: Continue up the path, and pick up the “Hidebound Journal” memento along the way.
You’ll arrive at a scenic glade with a camp site. There’s a girl singing beside the pond at the far end. Talk to her to end the level.
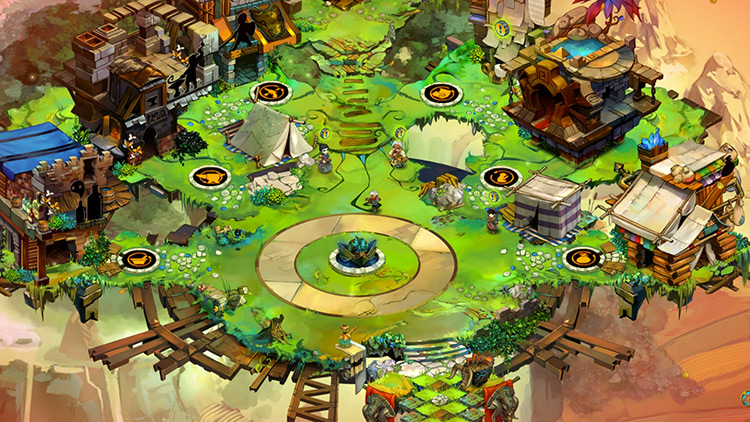
Home: The Bastion
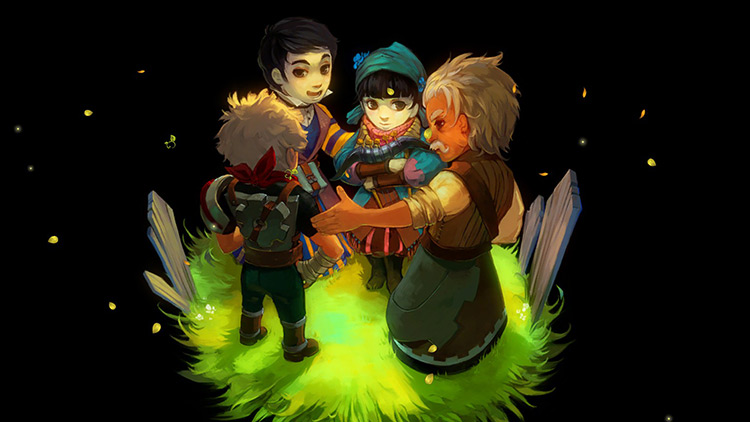
The Singer introduces herself as Zia. Go speak to her, and to Zulf and Rucks too.
You should also insert the Core into the Monument and put up your final building.
With all of them restored, you can prep more stuff for your campaign. When you’re all done, go to the Skyway to select the next story level — the Wild Outskirts.
-
Bastion
- Langston River and Prosper Bluff: Bastion Walkthrough Part 7
Related Posts:
 Burstone Quarry: Bastion Walkthrough Part 14
 The Sundown Path: Bastion Walkthrough Part 2
 How To Upgrade Weapons in Bastion (Full List)
 Cinderbrick Fort: Bastion Walkthrough Part 6
 The Melting Pot: Bastion Walkthrough Part 3
 Colford Cauldron: Bastion Walkthrough Part 12
 Point Lemaign: Bastion Walkthrough Part 11
 Roathus Lagoon: Bastion Walkthrough Part 10