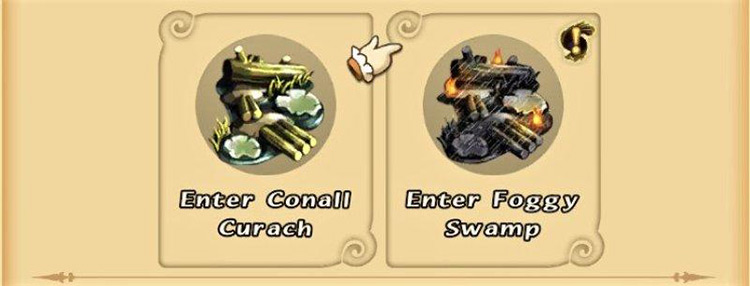
Foggy Swamp is the high-difficulty version of Conall Curach, unlocked after clearing FFCC Remastered’s main campaign.
It’s accessible from Conall Curach’s location in the Rebena Plains region or through the Setting Out Together online multiplayer option in the main menu.
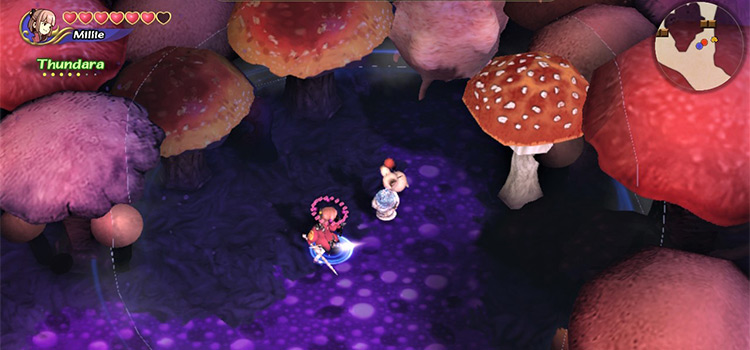
This is a cold-temperature dungeon, so make sure Mog has a full fur coat before coming.
Players can tackle this dungeon with a group only on:
- Tuesdays
- Weekends (Fri, Sat, Sun)
Note: Single-player dungeons are always available.
Let’s work through this dungeon in detail together, step by step.
TABLE OF CONTENTS
- Map
- Walkthrough
- Boss: Green Dragon
- Obtainable Items
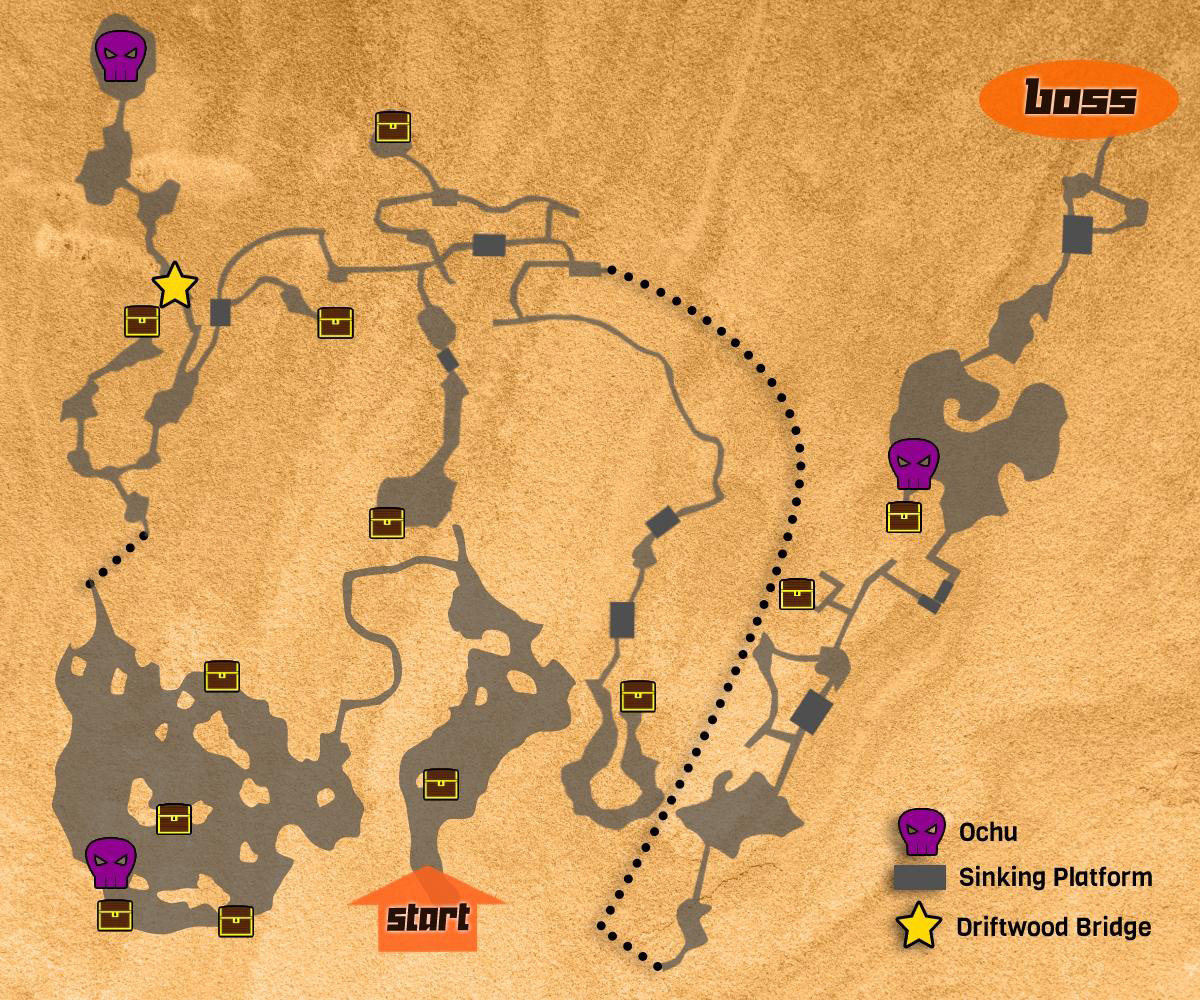
Map
Walkthrough
Step #1: Get Fire and Poison Resistance
Many enemies in the Foggy Swamp favor using Fire and Poison magic against you.
- Poison shaves off a bit of your health every few seconds.
- Catching fire halves your Defense, leaving you extra vulnerable to damage.
Fire is the bigger problem here. That loss in Defense means you might get downed in just one or two hits. It’s like an old arcade game at that point.
All of this makes procuring some Fire and Poison-resistant equipment a top priority.
Here are some suggestions:
| Item | Effect |
|---|---|
| Vanitas Set | Resist Fire +2 |
| Dragon Set | Resist Poison +2 |
| Flame Set | Resist Fire +1 |
| Blessed Set | Resist Poison +1 |
| Blue Misanga | Resist Poison +1 |
Tip: You need at least +2 Resistance to avoid the corresponding status effect.
Step #2: Use Thunder to Deal with Lizardmen
Walk north as you head into the dungeon and open the nearby chest to find Cure.
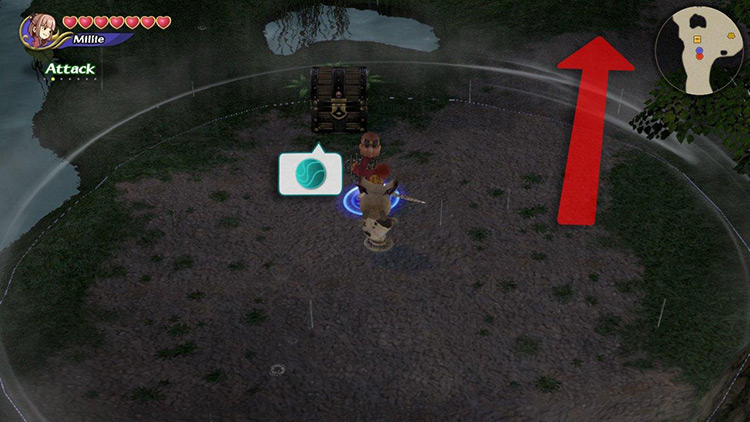
Keep heading north and watch out for three Dark Sahagin along the way.
Dark Sahagin rely on Fira, melee, and a mid-range breath attack to deal damage. They can be paralyzed with Thundara but not with Thunder.
You don’t have two Thunder magicites right now, so kill them with Focus Attacks and melee combos.
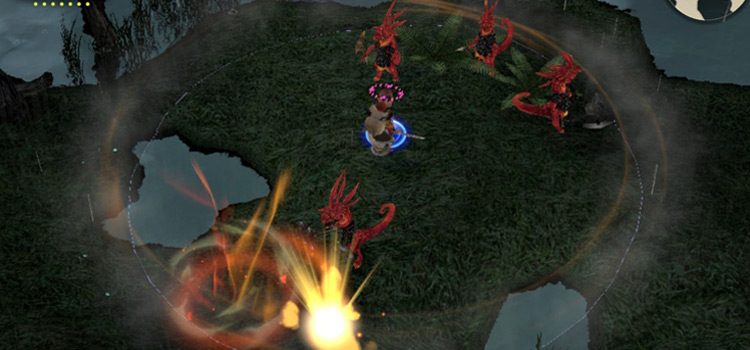
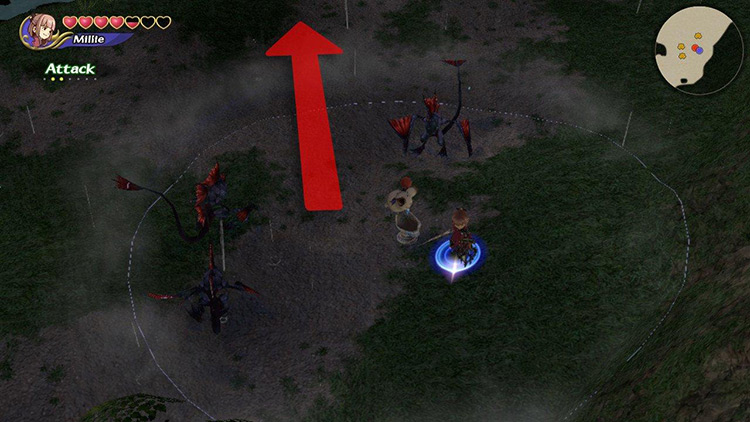
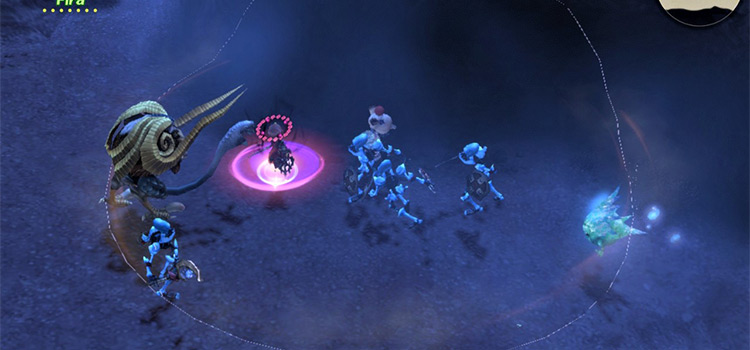
Next, you’ll find the most dangerous enemies in the Foggy Swamp: Red Lizardmen.
These enemies come in squads comprised of
- Two melee fighters.
- A javelin-thrower.
- A mage capable of casting Fira and Firaga quickly.
The sheer amount of enemies is a problem, but so is how easily they can stagger you. Even the javelin guy can interrupt your casting and leave you immobile momentarily.
Get hit by the javelin and a Fira, and you’re toast. This will happen a lot throughout your journey.
Tip: Don’t equip Phoenix Downs throughout the first area. You’ll waste them. It’s better to get a Game Over and hit Continue when prompted, as enemies won’t respawn.
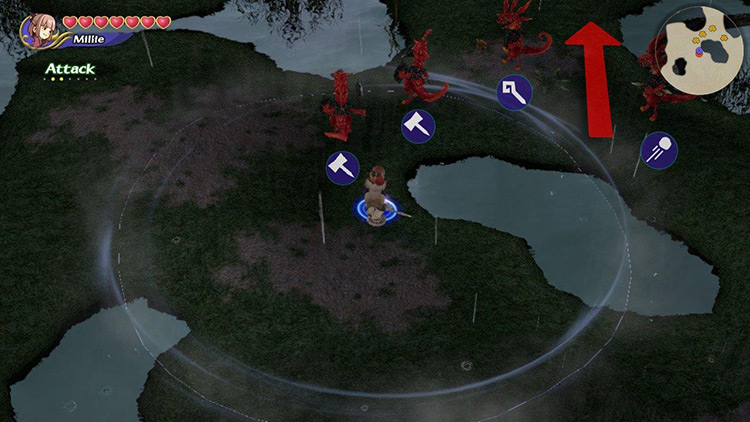
The best way to take care of them is with Thunder – and later, Thundara. They can be easily paralyzed, making them more manageable.
These enemies will drop you several magicites, including Raise, Cure, and a random elemental one.
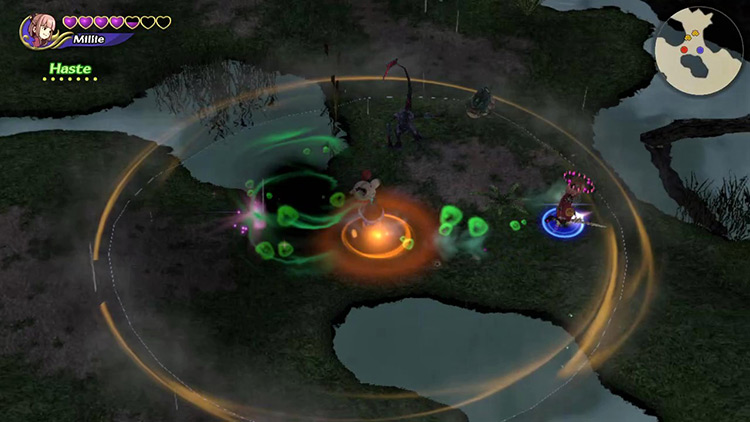
Step #3: Use Haste and Thundara as Your Main Tools
Let’s assume they dropped Thunder.
Now you can fuse it with your Thunder Ring to create Thundara.
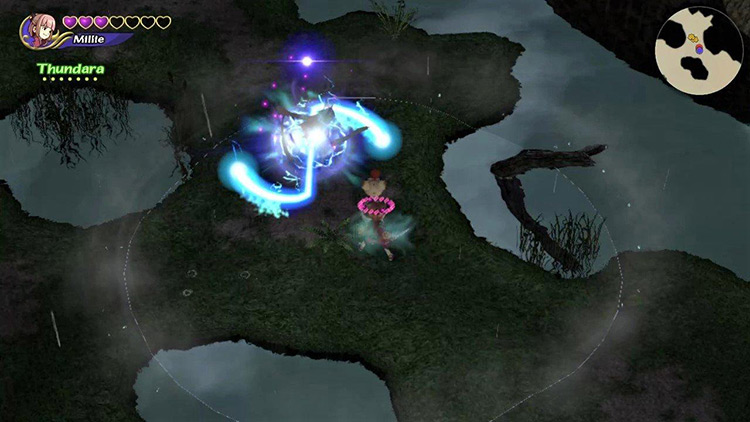
This spell has the strength to paralyze nearly every enemy in the Foggy Swamp. It’ll make your life much easier.
Note: If they didn’t drop Thundara, keep hunting down Lizardmen until you get it.
In addition, you should have enough magicite to create Haste.
Go on your Command List and fuse Raise + Cure + Cure in that order.
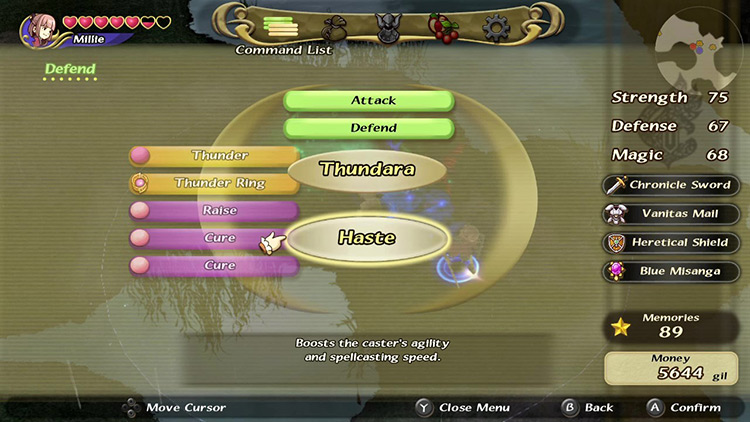
Haste will make you move and cast much faster. It lets you launch Thundara in just a moment and Thunder almost instantaneously.
Tip: Consider bringing a ton of food, so you don’t have to break up Haste every time you need to heal.
Try out your new strategy on the Dark Sahagin and Tiny Toads further north and watch them get stunned.
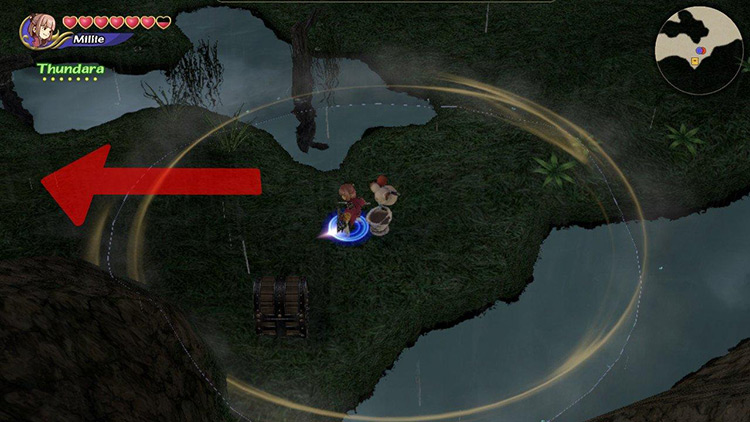
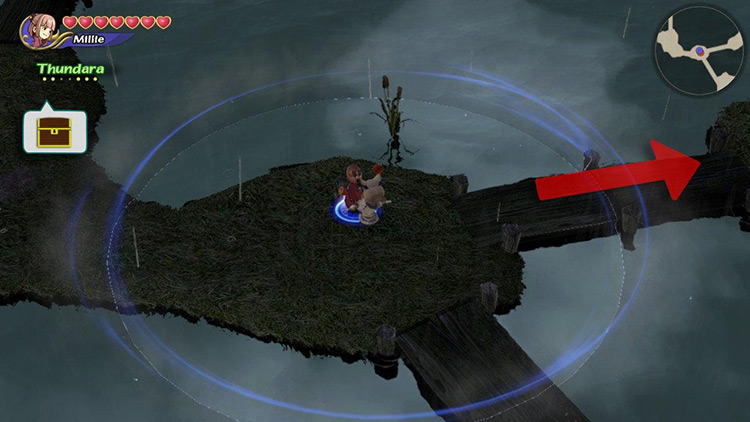
Step #4: Collect All Four Chests in the Swamp
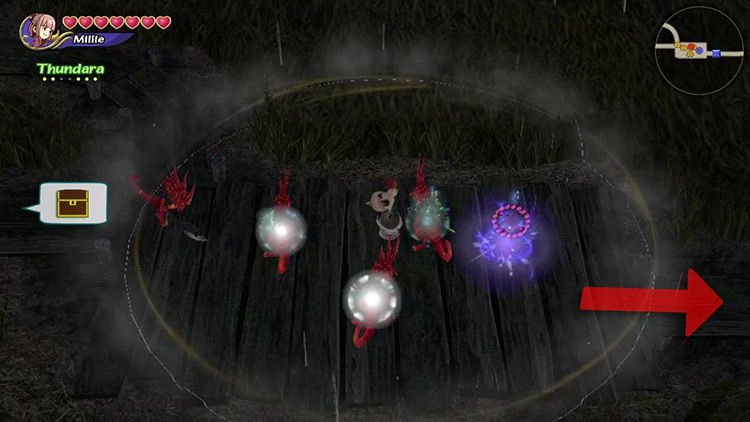
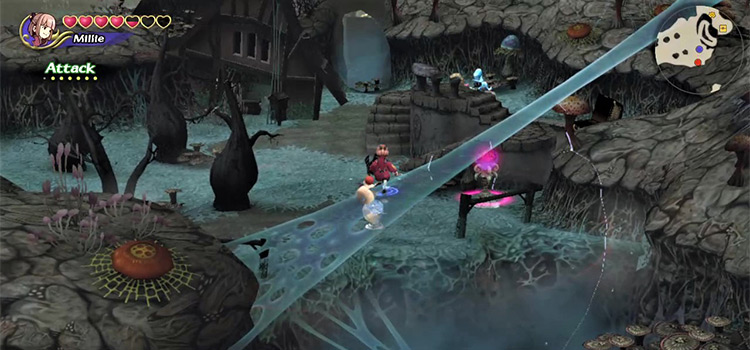
Turn left at the first opportunity, fighting through a Flame Bomb to enter a plank walkway.
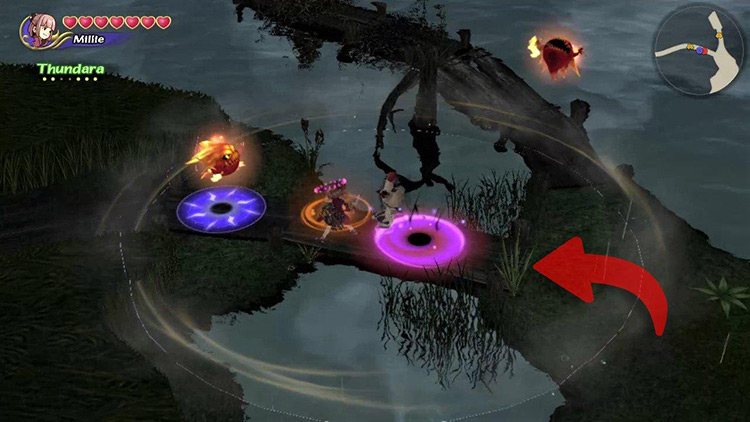
Follow this road through the reeds, defeating several Fire Bombs, until coming out to an open area.
You’ll be greeted by a Tiny Toad and a Fire Bomb. Use Thunder/Thundara to take care of them.
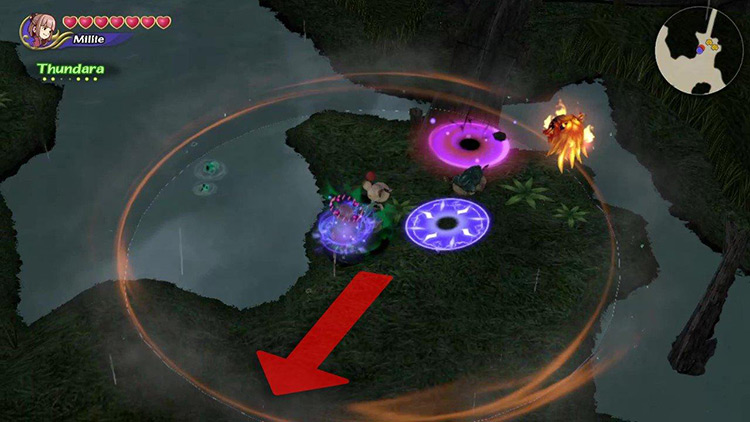
The chests in this area are distributed precisely as they were in Conall Curach. Let’s get to each of these chests from the bottom up:
Go southwest, staying close to the wall.
Eventually, you’ll come across a Red Lizardmen squad.
Go past them to reach the first chest in the swamp.
From the first chest’s location, walk straight westward, fighting through some enemies until finding a chest guarded by an Ochu.
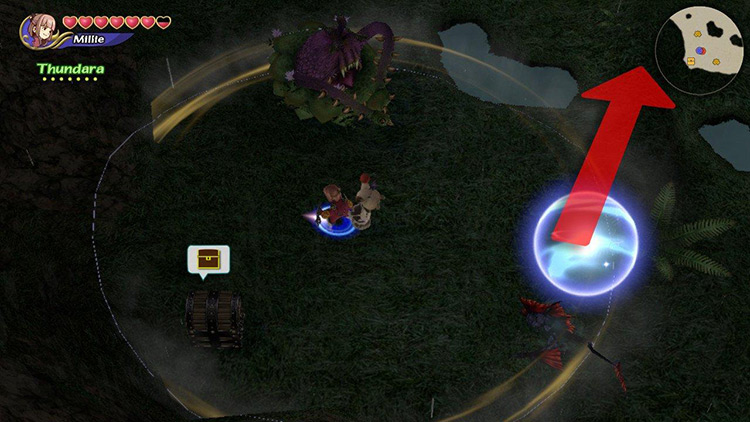
Ochu can Poison or Stop you, but what you need to avoid the most is its powerful melee moves.
Note: Ochu in Foggy Swamp carry valuable Recipes and Materials. Try to hunt down all three.
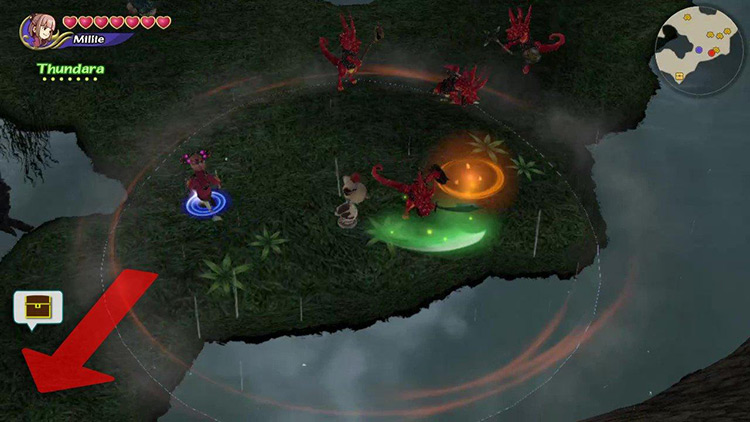
From here, head northeast toward the next chest. Another Red Lizardmen squad guards this one.
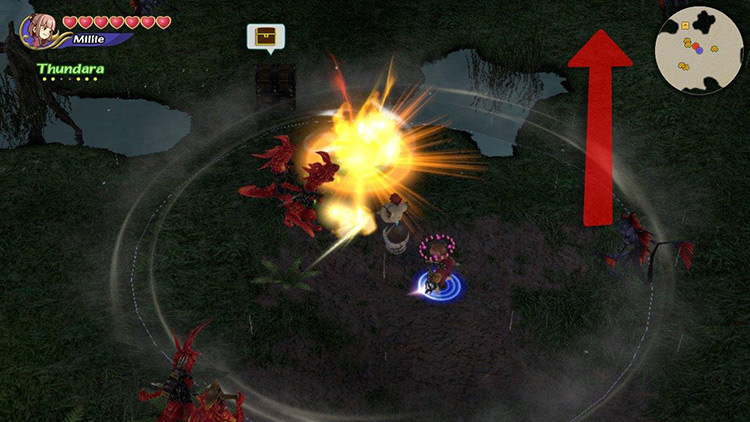
Once you’ve collected the Material inside, go north until you see some Red Lizardmen to the right.
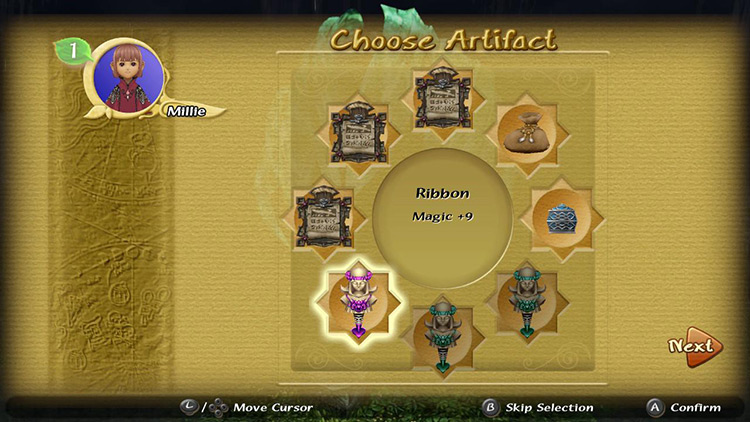
Defeat them and collect the nearby chest for an Artifact.
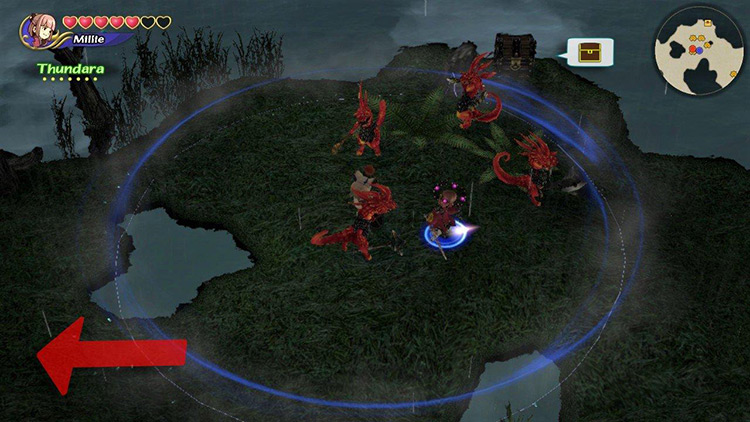
Finally, follow the edge of the map westward to find the passage into the next area.
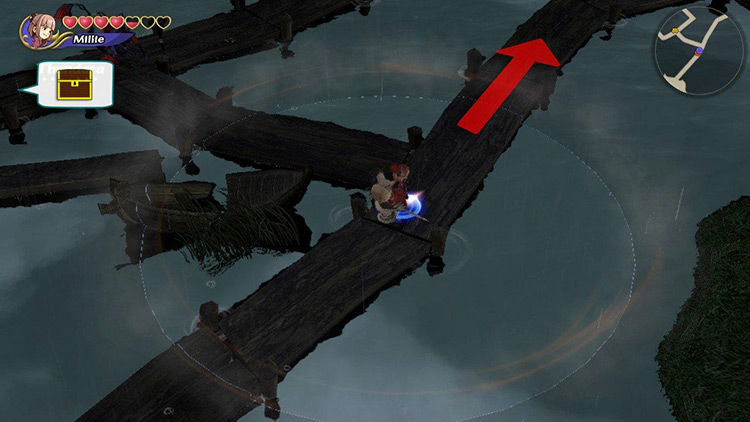
Step #5: Traverse Area #2
This area can feel like a maze due to the many road splits and similar-looking walkways.
Let’s go through it fork by fork.
Fork #1: Go Left for an Artifact
Some Dark Sahagins guard the way to a chest containing an Artifact to the left. It’s worth the detour.
Then go right to move on to the next fork.
Fork #2: Go Left to Hunt an Ochu
You’ll fight a Red Lizardman squad as you approach the second fork. Defeat them and keep going until you reach the next split in the road.
Heading left will take you through several enemies before reaching an Ochu.
Note: You must have blown up the bridge at Daemon’s Court twice for this to be crossable.
Once you’ve defeated the beast and collected any valuables, return to the fork and go right to continue on your way.
Fork #3: Go Right for Money
Some enemies guard the way to a chest containing some money on the right path.
Get if you want, then continue down the left path.
Fork #4: Go South for Money, North for Materials
Take a turn southward at the first opportunity.
You’ll fight through several enemies on the way to a Lizardmen squad and a Dark Sahagin guarding a chest.
Reminder: Haste + Thundara remains the best strategy throughout the entire dungeon.
Defeat them and get the money in the chest, then return to the main path.
Turn northward at the next available opportunity. It’s the upward road marked by a chest on the previous screenshot.
Follow the path, defeating enemies in the way, then go north again at the next chance.
This will lead you to a chest containing a Material protected by a Fire Bomb.
Collect the valuables and return to the last crossroads.
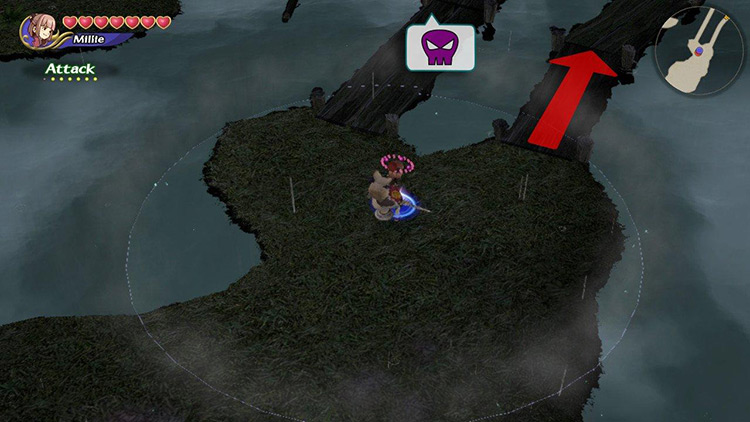
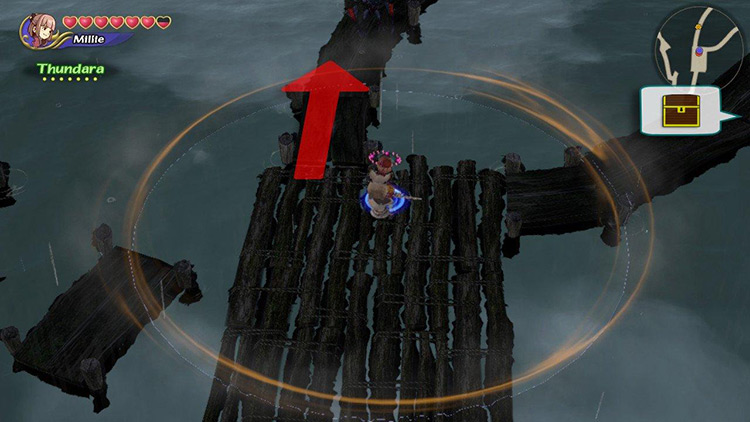
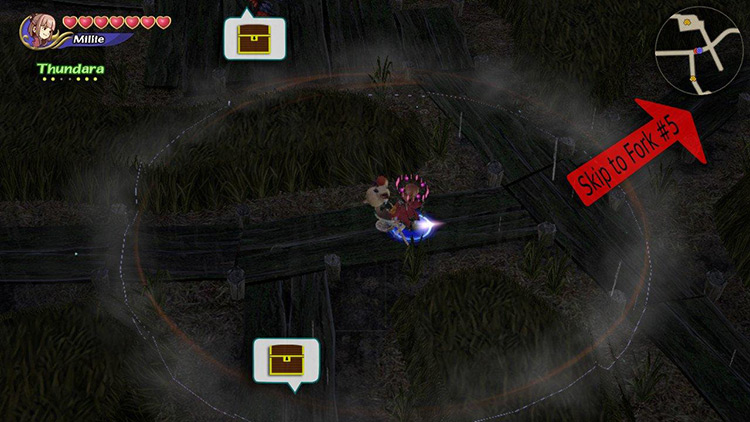
Fork #5: One Last Chest
Continue eastward until you reach the passage into Area #3. Some Red Lizardmen protect it.
Before crossing, consider exploring the road leading west of the platform.
Tip: Cross into Area #3 and come back so you respawn here if anything goes wrong.
Follow this long road defeating mostly Dark Sahagin on the way.
Eventually, you’ll reach a U-shaped area with a chest containing an Artifact at the opposite end. Watch out for Lizardmen and a Fire Bomb on the way to the chest.
Defeat them and collect your reward before returning to Area #3.
Step #6: Hug the Left Wall Through Area #3
The third area in Foggy Swamp is straightforward. As long as you stick to the left edge of the map, you’ll get everything.
You’ll fight through several enemies, including Lizardmen and Dark Sahagin, but they’re no match for the Haste + Thundara strategy.
Whether you go right or left at the first turn doesn’t matter, but you must go left at the second opportunity to grab a chest.
Eventually, you’ll make it to an open area.
Continue hugging the left edge of the map until you run into an Ochu.
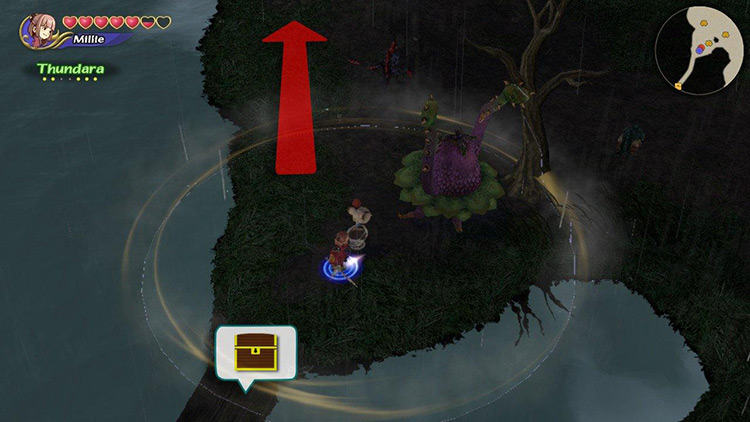
Defeat the Ochu and check the road below it for the final chest in Foggy Swamp. It contains an Artifact.
From here, go north and follow the path until reaching the boss.
Boss: Green Dragon
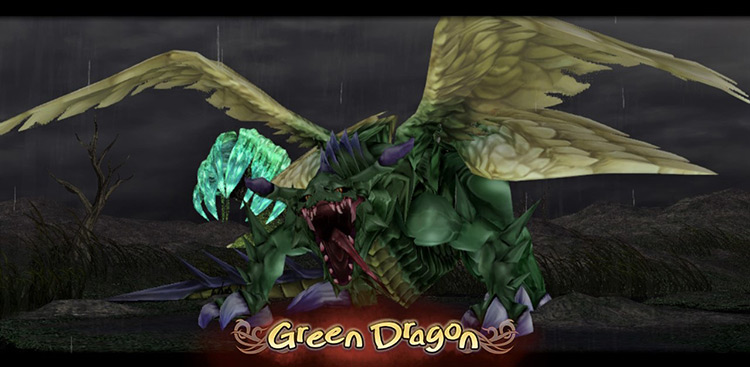
Unlike the Dragon Zombie, you won’t need to hit the Green Dragon with Holy to make it corporeal. It doesn’t have Sahagin minions, either.
That said, it’s still a post-game boss, so don’t let your guard down.
Follow these tips for an easier fight:
Tip #1: Buff Yourself with Haste
The boss spends half of the time away from the platforms you’re standing on, forcing you to cast magic if you want to damage it.
Its attacks come quickly. So Haste becomes necessary if you want enough time to cast anything worthwhile, such as Fira.
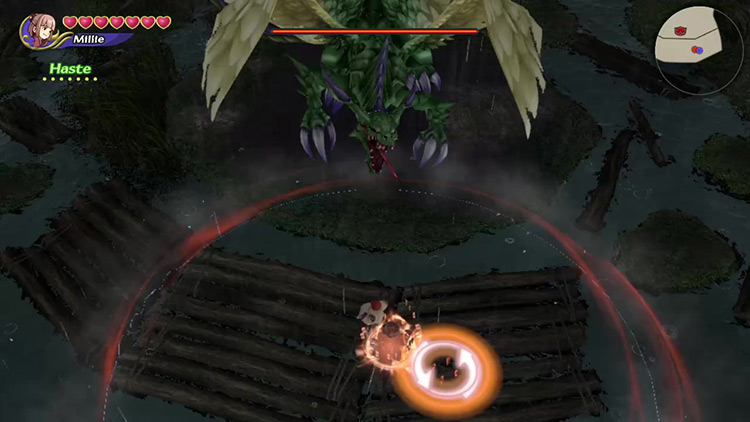
These spells will make the fight a lot less time-consuming and repetitive.
Tip #2: Kill It With Fira!
Although it can’t be paralyzed, frozen, or set aflame, the Green Dragon still has a weakness:
Fire.
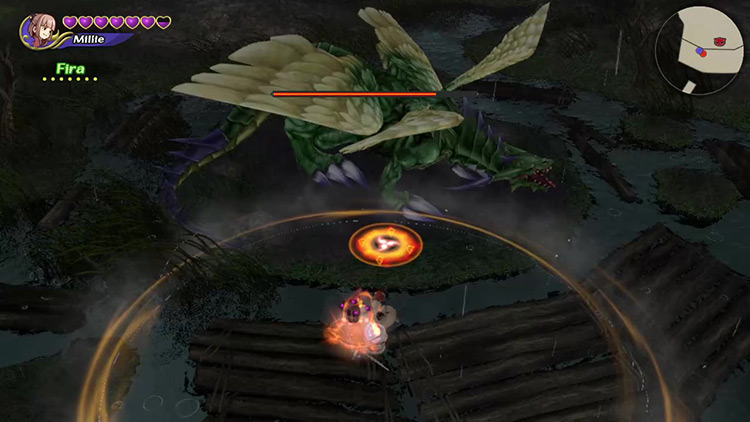
Fire, Fira, and Firaga deal more damage than their elemental counterparts. If you have the magicite, you’d be silly not to use this to your advantage.
I recommend Fira because it fits into your Command List next to Haste.
Tip #3: Keep Your Distance
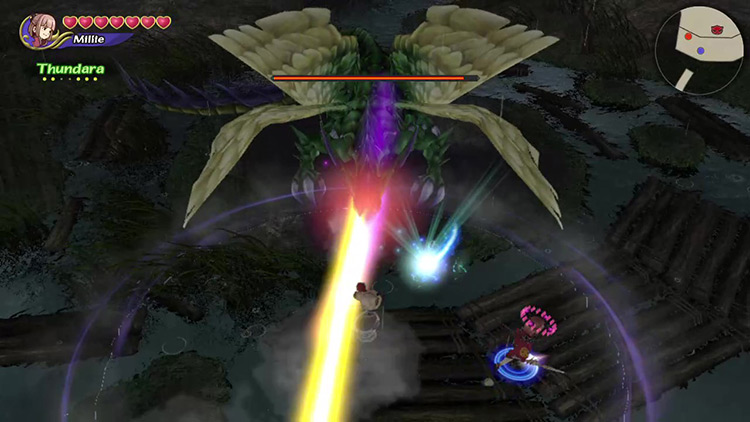
The Green Dragon has two positions during the battle: far & close.
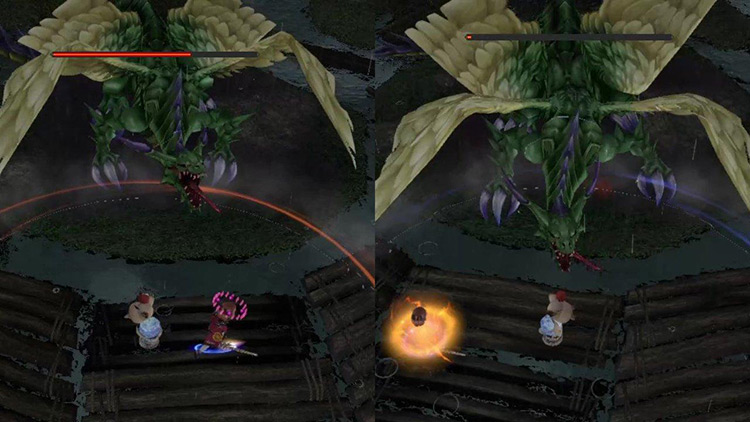
It will focus on ranged attacks when it’s far from the platforms you’re standing on. These include:
- A vicious green breath that deals massive damage over a wide area and inflicts Poison.
- A laser that inflicts Stone, petrifying your character.
- Blowing up a whirlwind with its wings for moderate damage.
These moves are powerful but relatively easy to dodge.
On the other hand, it’ll use short-range moves like biting and sweeping when it’s close to the platforms.
These are impossible to dodge at melee range, but you’re untouchable past the halfway point of the plank’s vertical length.
Step back and blast the boss with your strongest spells whenever it comes close.
Tip #4: Heal Often
Even when following every precaution, sometimes it’s impossible to avoid the poison breath move, among others.
You need to be ready to heal immediately, whether by casting Cure or eating food.

I recommend stocking up on your favorite foodstuffs before coming, so you don’t have to split up Haste in your Command List whenever you need to heal.
Tip #5: Get Stone Resistance +2
One of the Green Dragon’s most troublesome moves is the petrifying laser.
Getting petrified is extremely annoying. You can even damage your joystick trying to break out of it, so it’s better to come prepared.
A powerful item from the Heretical set will provide +2 Stone Resistance, making you immune to petrification.
You’ll find everything you need to craft it in the Afternoon Fort bonus dungeon.
Obtainable Items
You’ll find Artifacts, crafting Recipes, and Materials throughout the dungeon. You get to keep all Recipes and Materials, but you can only choose one Artifact to take with you.
Chest Items
The following items await in the chests at Foggy Swamp:
| Artifacts | Materials |
|---|---|
| Aegis Chicken Knife Dark Matter Donny’s Crystal (Mem. Crystal) Futsu-no-Mitama Giant’s Glove Gold Hairpin Loaded Dice Mjollnir Noah’s Lute Rat’s Tail Ribbon Ring of Blizzard Ring of Holy Ring of Raise Rune Bell Sage’s Staff Sasuke’s Blade Wonder Bangle Wonder Wand |
Adamantite Angel’s Tear Devil’s Claw Electrum Hope Shard Jade Remedy Ruby |
Monster Items
The Ochu in Foggy Swamp drop Rainbow Stones (Material) and a variety of Recipes. These include:
- Angel Kit
- Daemon Kit
- Soul of the Dragon
- Tome of Sorcery
- Zeal Kit
Boss Items
Unlike regular dungeons, the Foggy Swamp only has one set of Boss Items you can obtain regardless of your Bonus Points.
- Garden Weapon (Recipe)
- Paradise Weapon (Recipe)
- Lustrous Belt (Recipe)
- Rainbow Stone (Material)
These drops will help you obtain a variety of Selkie-exclusive items with magic-strengthening effects that’ll make future attempts at this and other dungeons much easier.

-
Final Fantasy Crystal Chronicles Remastered
- Foggy Swamp Dungeon Guide + Map (FFCC Remastered)
Related Posts:
 Toadstool Forest Dungeon Guide + Map (FFCC Remastered)
 Moonlit Desert Dungeon Guide + Map (FFCC Remastered)
 Conall Curach Dungeon Guide + Map (FFCC Remastered)
 Daemon’s Court Dungeon Guide + Map (FFCC Remastered)
 Selepation Cave Dungeon Guide + Map (FFCC Remastered)
 Oblivion Village Dungeon Guide + Map (FFCC Remastered)
 Lynari Desert Dungeon Guide + Map (FFCC Remastered)
 Veo Lu Sluice Dungeon Guide + Map (FFCC Remastered)