
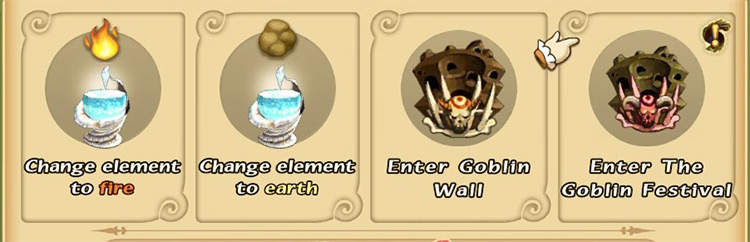
Goblin Festival is the high-difficulty version of the Goblin Wall. You’ll unlock the Goblin Festival after clearing FFCC Remastered’s main campaign.
This new dungeon is accessible from the Goblin Wall’s original location in Tipa Peninsula, or through the Setting Out Together online multiplayer option in the main menu.
You can also tackle this dungeon with other players online on only these days:
- Weekends (Fri, Sat, Sun)
Note: Single-player dungeons are always available.
But we’ll break down this whole dungeon and the Goblin Lord boss fight with more details below.
TABLE OF CONTENTS
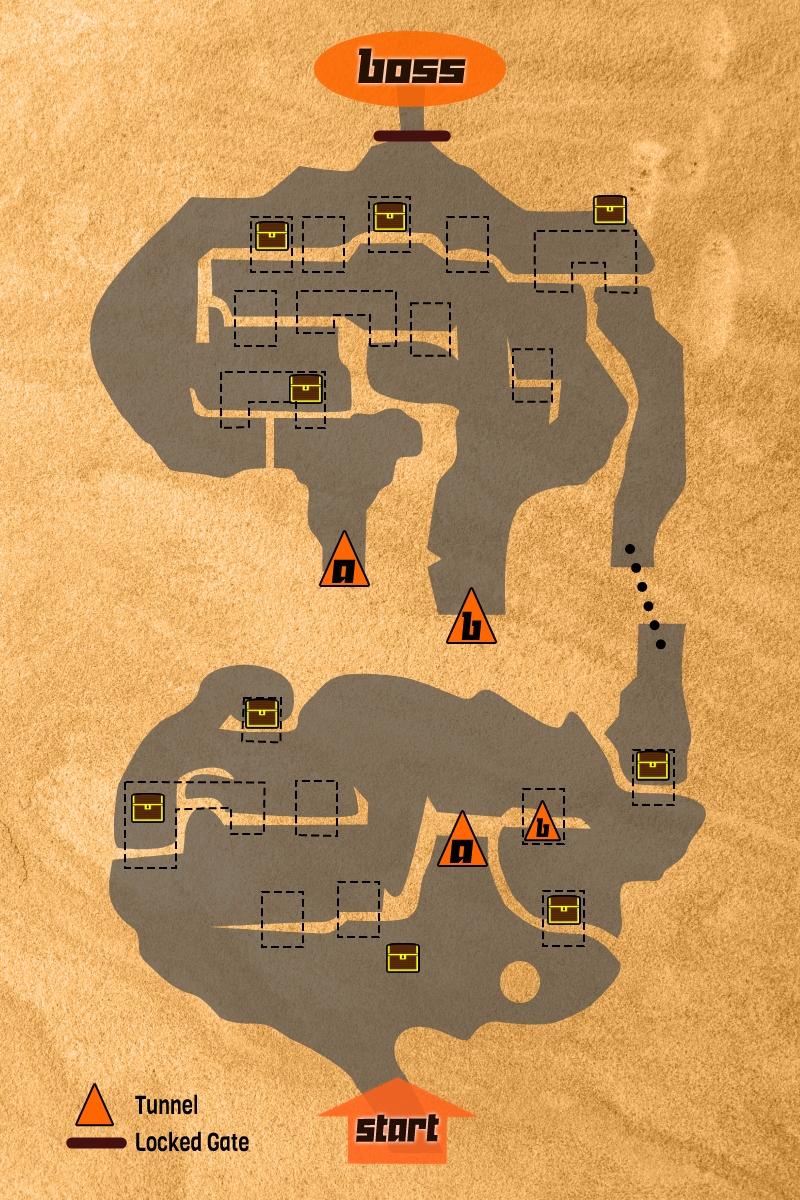
Map
Walkthrough
Step #1: Get Curse Resistance
Many enemies in the Goblin Festival will try to Curse you and cut your stats in half.
This makes it almost impossible to deal with the dungeon’s strong enemies. It’s especially crippling against high-HP enemies like Cerberus and the boss.
You should get equipment that provides +2 Curse Resistance. I recommend something from the Moogle set or the Pom-Pom Cloak.
Tip: The required Recipes and Materials can be farmed from the Dinner Party bonus dungeon.
This will make you immune to Curse, allowing you to ignore most enemy spellcasting.
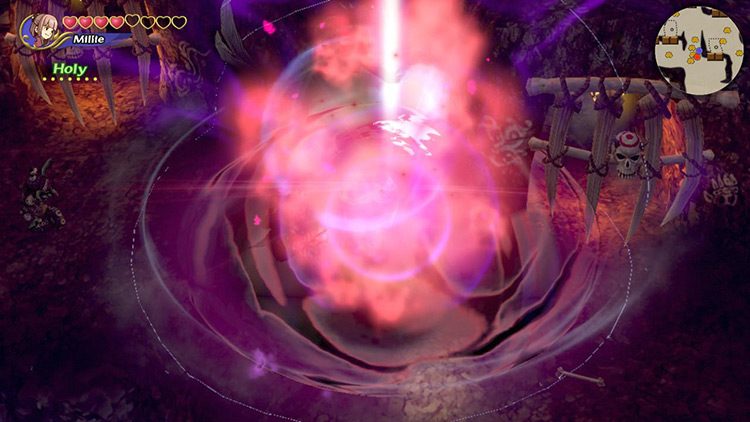
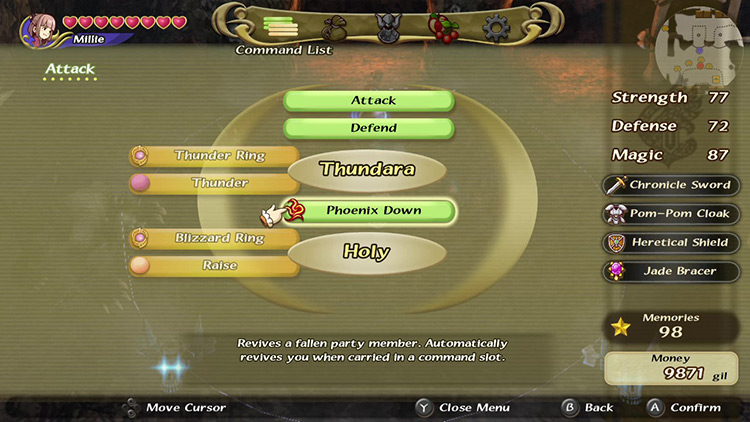
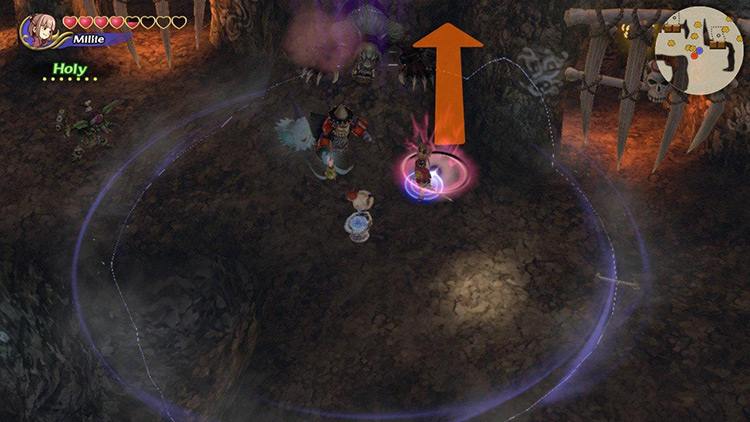
Step #2: Fuse Holy ASAP
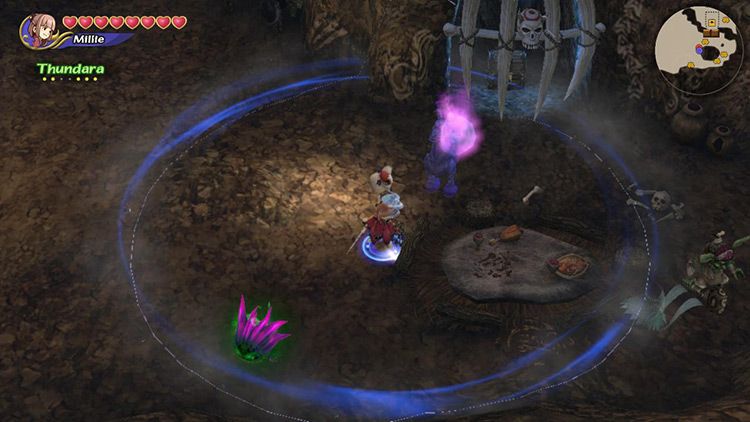
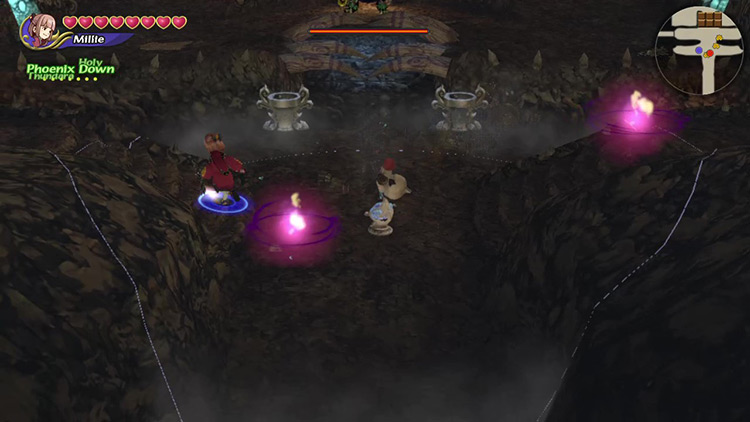
The Goblin Festival is full of spectral enemies.
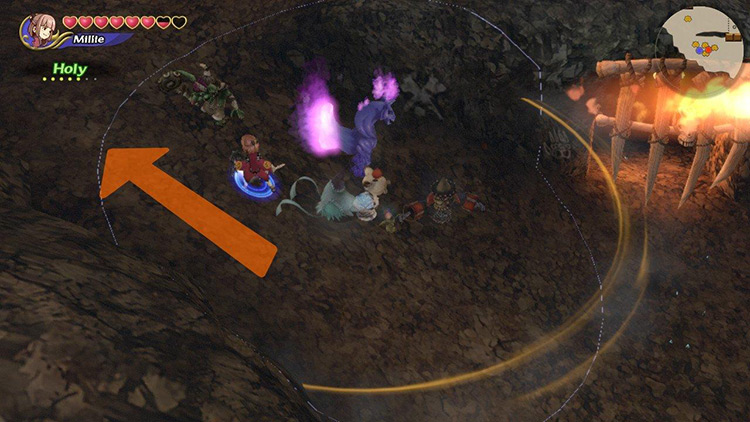
These creatures are see-through and can’t be damaged without casting Holy on them first.
Right when you start in this dungeon you’ll notice a spectral Dark Flan and a Cerberus as you enter, making Holy an urgent necessity.
Open the chest beside the Cerberus to find a Raise magicite. Then fuse an elemental ring + the newly-acquired Raise magicite to create Holy.
Defeat the Cerberus for a Phoenix Down and the Dark Flan for an elemental magicite.
Tip: Don’t get discouraged if it takes too long to defeat the Cerberus. Things will get easier when you get a Tier 2 spell like Fira, Blizzara, or Thundara.
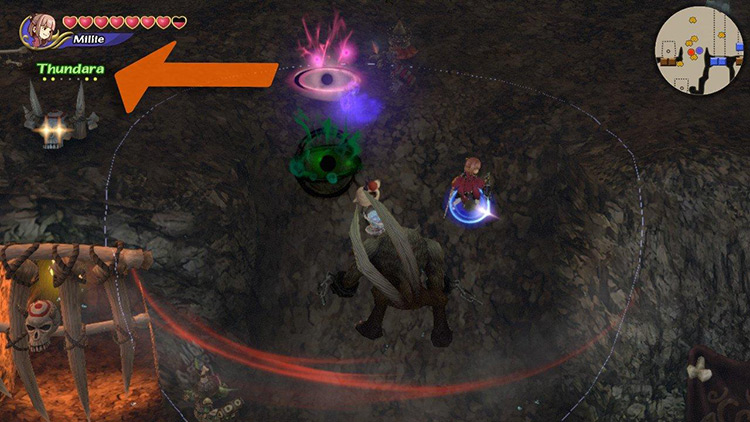
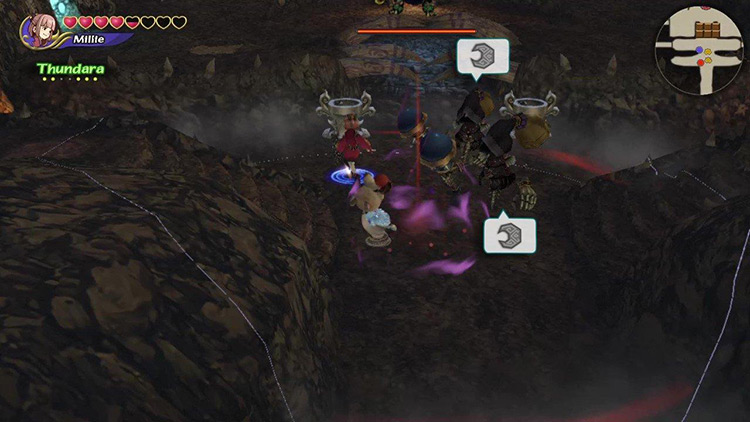
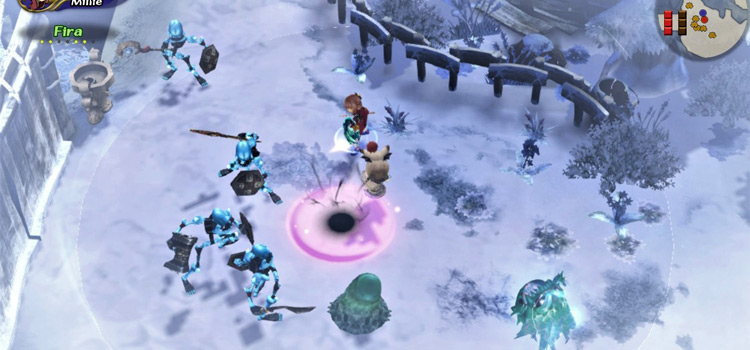
Step #3: Use Blizzara or Thundara to Stun Enemies
Hopefully the Dark Flan dropped a Thunder or Blizzard magicite for you.
These can be fused with an elemental ring to create Thundara or Blizzara, making the rest of the dungeon much easier.
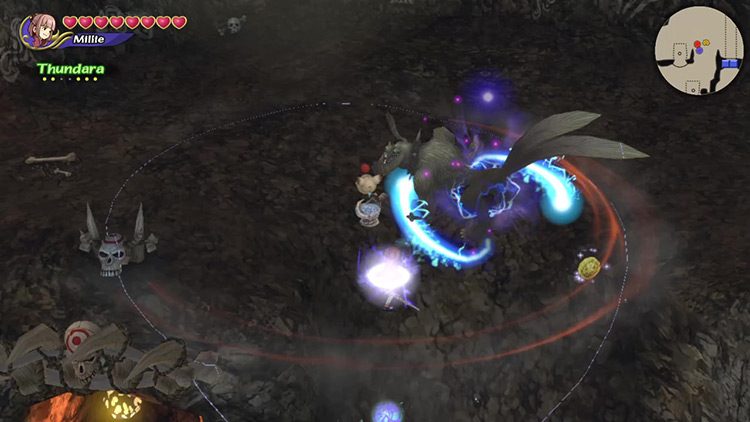
Every enemy in this dungeon except for the Dark Flan and the Toxic Bomb is vulnerable to Paralysis and Freezing. It’s a godsend with so many enemies around.
Tip: Fira is powerful too, but it won’t stop enemies in their tracks.
Both Holy and Blizzara/Thundara fit in your Command List without a problem. You may even have space left for a Cure or a Phoenix Down.
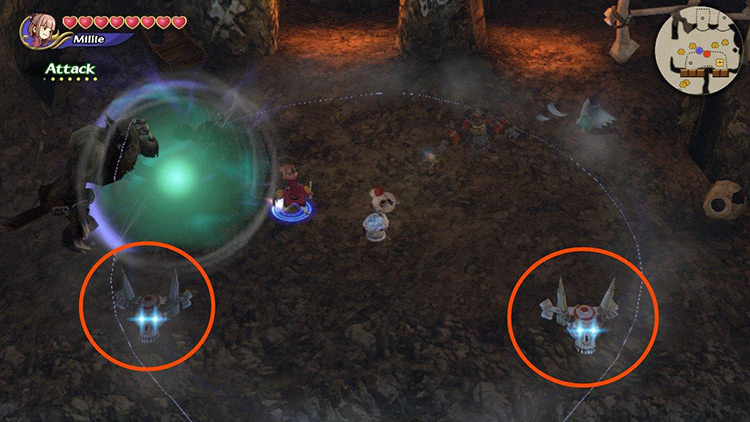
Try this out on the enemy group to the right, comprising a Nightmare, a Goblin mage, a Ghost, and a Toxic Bomb. Only the latter is immune to status ailments.
They’ll drop some useful magicites as well.
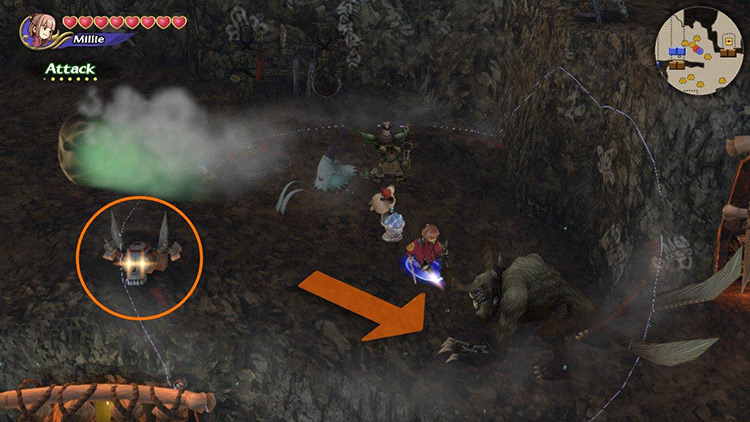
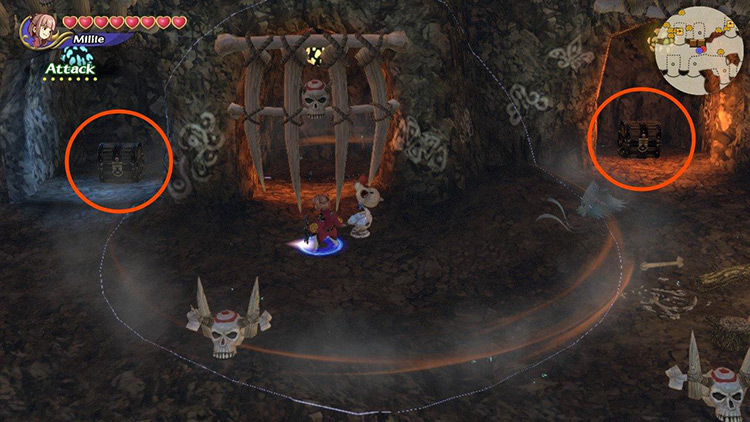
Step #4: Getting Chests (Hit Glowing Skulls to Open Bone Cells)
Now we want to collect all available chests in this area.
We’ll have to free them from their boney prisons by hitting glowing skulls on the upper floor. Here’s how:
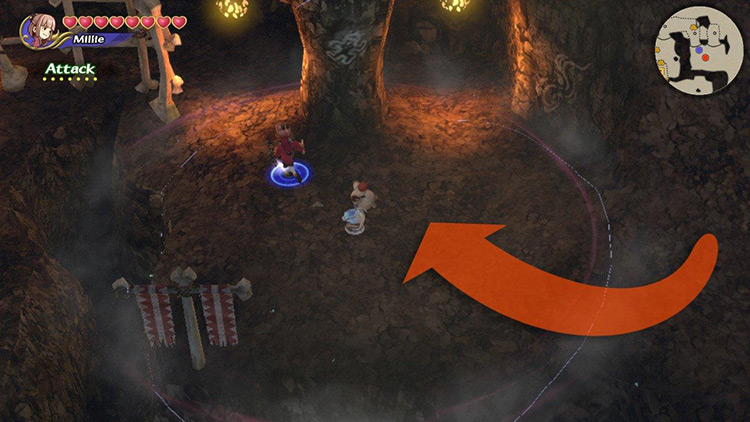
First, go all the way west and start climbing the hill.
Brace for combat against many enemies, including a Wraith, a Ghost, a Toxic Bomb, a Goblin, and a Dark Flan.
Tip: Don’t wait for Holy to wear off to re-cast it. I suggest regularly alternating between Holy and Thundara/Blizzara.
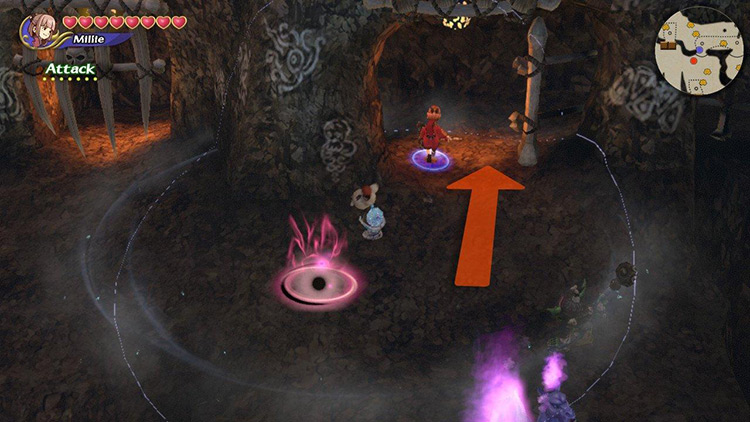
Go east on the 2nd Floor and prepare for another large battle as you make it to the 3rd Floor. Watch out for the Cerberus!
Tip: Lure individual enemies away from the crowd and try to take them out individually.
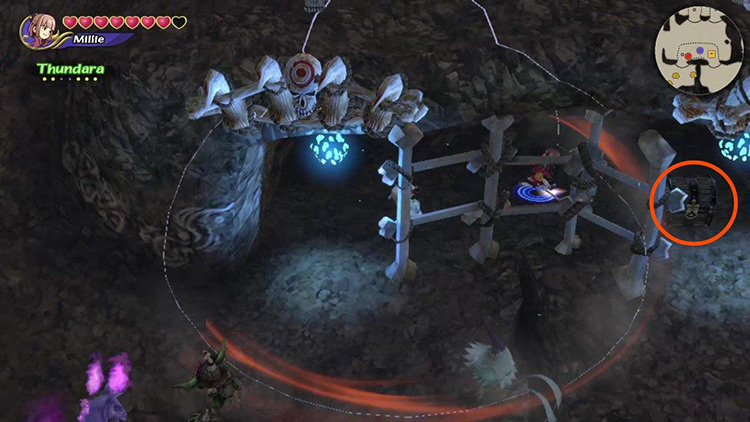
Go left after defeating the Cerberus and continue until the road splits north and south.
Both directions lead to glowing skulls you have to hit to free the chest directly below. More specifically, here’s where to go:
- Skull on the summit frees a chest with an Artifact.
- Southern skull frees a chest with a Material (where the Moogle House used to be).
Collect the chests and return to where we just fought the Cerberus.
Step #5: Enter Area #2 via Tunnel B
Go east from the area where you fought Cerberus and prepare to fight another enemy group with a Cerberus.
Defeat them before hitting the nearby glowing skull to open the way into Area #2 through Tunnel B (as depicted on our map above).
Keep following this path toward the Tunnel B entrance and either defeat the nearby enemies or run past them into Area #2.
Note: You’ll notice a glowing skull to the south. This opens the way to a chest on the floor below, but it just contains a Cure magicite. It’s not worth the effort.
Step #6: Collect the Remaining Chests
There are four more chests to collect in Area #2. We must also return to Area #1 through a hidden passage to get the last chest.
Here’s how to collect them all:
Go north as you enter Area #2.
Keep going until you run into an enemy group with a Cerberus near a fork in the road.
Defeat them and go up the northern ramp.
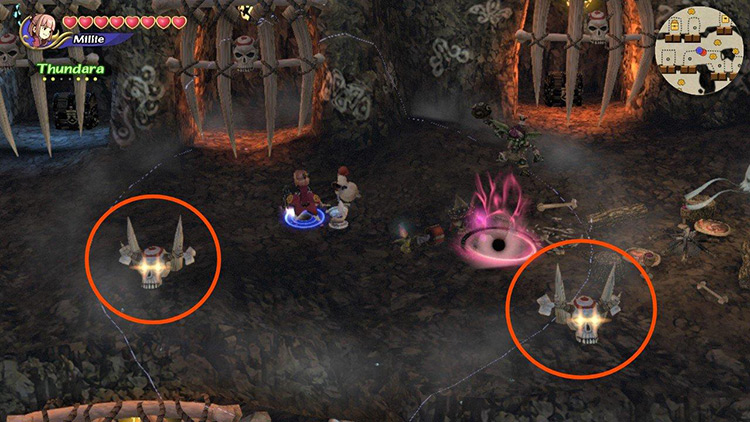
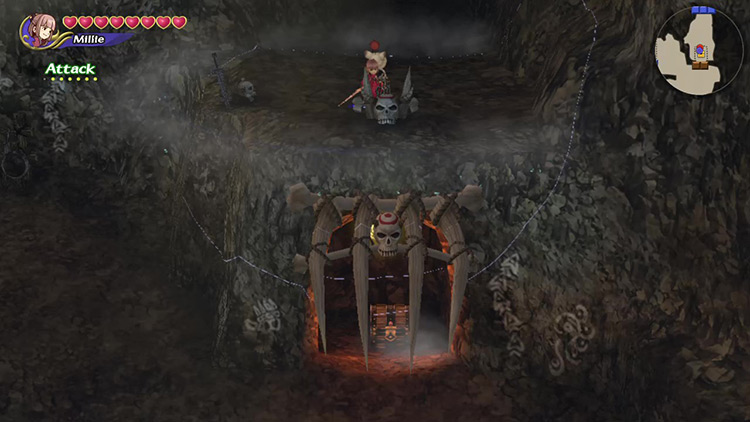
Explore the area to the west. There are four glowing skulls. Make sure to hit the two in the middle to open the way through the tunnel below.
Go back down the ramp and go through the tunnel we just opened up to the west.
Brace for combat as you exit the tunnel and hit the two nearby blue, glowing skulls.
Head west and go down south at the road split to collect the Artifact chest hidden inside the tunnel we just opened.
Then turn back to the last fork and go up north instead of south.
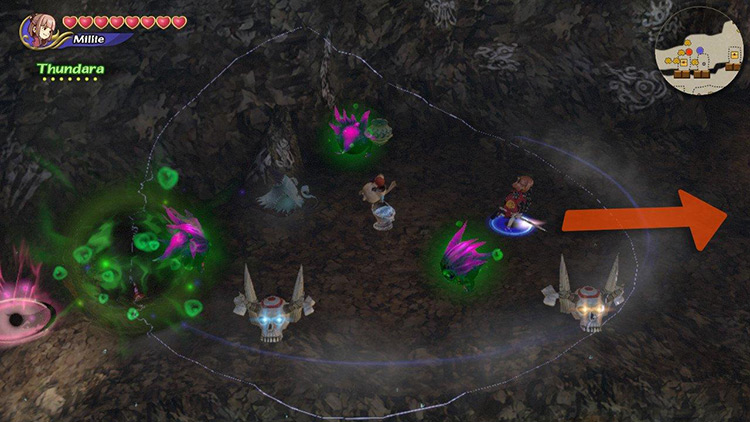
Watch out for hordes of enemies in this direction. Either defeat them now or run past them to fulfill these objectives:
- Hit the first and third glowing skulls.
- Hit the last two glowing skulls.
- Collect the chest at the end of the road.
Note: You’ll pass by the boss room entrance. Ignore it for now.
Once you’ve done that, run back to the beginning of Area #2 and climb the ramp where we fought the Cerberus again.
First, go left to collect the chests within the bone cells we just opened from above. They contain an Artifact and some Magicite.
Then go back and go to the right and enter the newly opened tunnel.
Defeat or run past the nearby enemies as you follow the road back into Area #1.
Here, you’ll find a lone glowing skull.
It opens the way to a chest down below.
Return to Area #2, then cross into Area #1 through Tunnel B to collect the chest we just freed. It contains an Artifact.
Step #7: Getting to the Boss Room
Return to the topmost floor of Area #2 to start heading towards the boss room.
Tip: Running through won’t help you now. We need to fight to enter the boss room, and that’s harder to do with a horde of small fries on your tail.
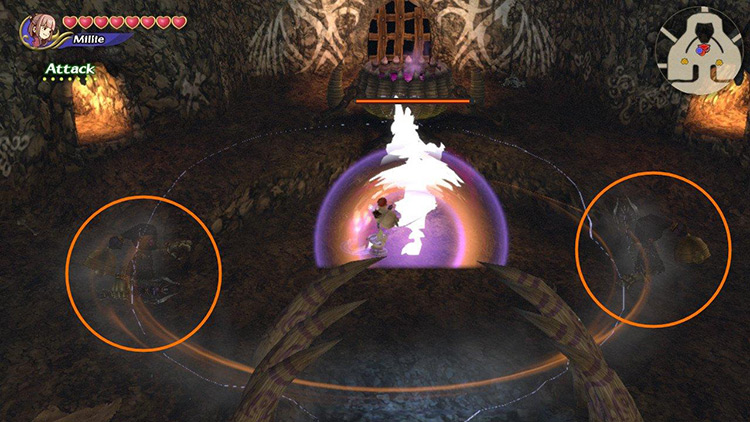
The Cerberus near the boss room entrance carries the key to open the ominous boney gate.

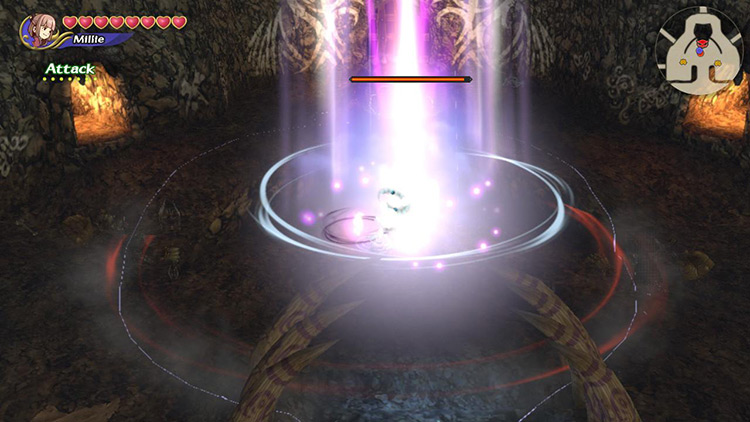
Defeat the beast and enter the boss room to face the Goblin Lord.
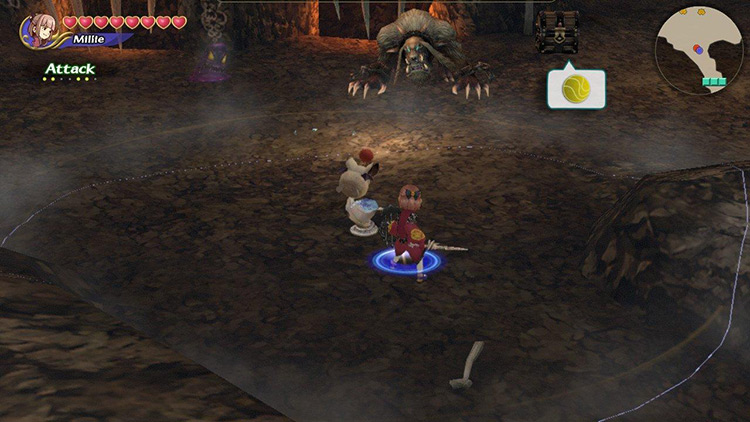
Boss: Goblin Lord
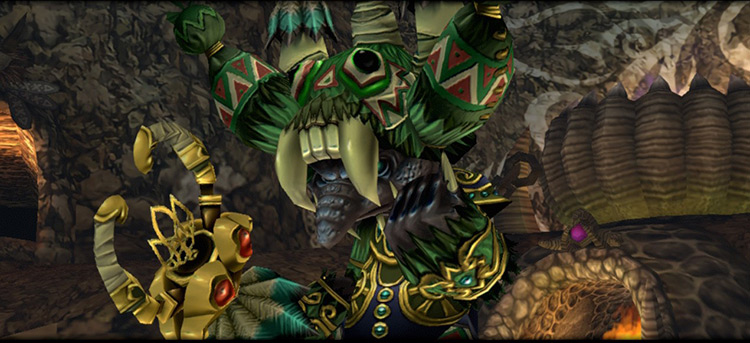
This bright green boss follows the same attack patterns as its predecessor, except faster. It also has more annoying minions.
Luckily, it can be defeated relatively easily with the right equipment.
Tip #1: Get Curse + Stone Resistance
Getting Curse and Stone resistance is the most important thing you can do to make this battle easier.
On the one hand, both the Shades and the boss itself will often cast Curse to cut your stats by half. This makes surviving damage (or dealing it) rather tough.
To solve it, you’ll need Curse Resistance +2. Your best bet is something from the Moogle Set or the Pom-Pom Cloak.
Note: Get everything you need to craft these Curse-resistant items from the Dinner Party dungeon.
On the other hand, Stone Resistance +2 will make you immune to all melee moves from the Goblin Lord. This makes dealing damage extremely easy and safe.
Your best bet is to craft something from the Heretical set.
Note: Recipes and Materials for Heretical equipment can be found in the Afternoon Fort.
Tip #2: Only Defeat the First Few Shades
A bone wall separates you from the boss when the battle begins.
To breach them, you need to defeat six Shades.
The first four are already there when you enter the room. Defeat them, and two more will spawn from the sides. They have the required keys on them.
When you reach the boss, you’ll notice two more Shades.
These enemies will limit themselves to cast Slow and Curse if you don’t get too close to them.
Slow and Curse deal no damage, and we have resistance to at least one of them, so there’s no need to waste time fighting these Shades.
Tip #3: Stay Very Close to the Boss
Stone resistance turns the boss’s melee moves completely ineffective.
That makes staying next to it the entire fight one of the safest strategies.
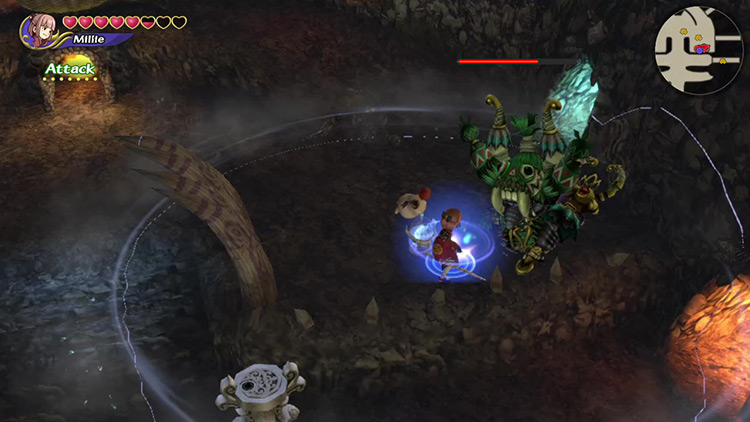
Usually, it’ll start trying to petrify you by hitting you with the staff repeatedly. It deals no damage, so keep casting or slashing away.
The Shades will continue trying to Slow, Curse, or Poison you. These are annoying, but there’s little risk of them killing you.
Note: Melee combos aren’t affected by Slow, so use them if you’ve got decent Strength stats.
Tip #4: Watch Out for Teleporting
The Goblin Lord’s sole mode of transportation is teleporting.
It turns into a purple ball of light and moves to the following location at supersonic speed.
By looking at the ball’s direction, you can predict where it’ll go.
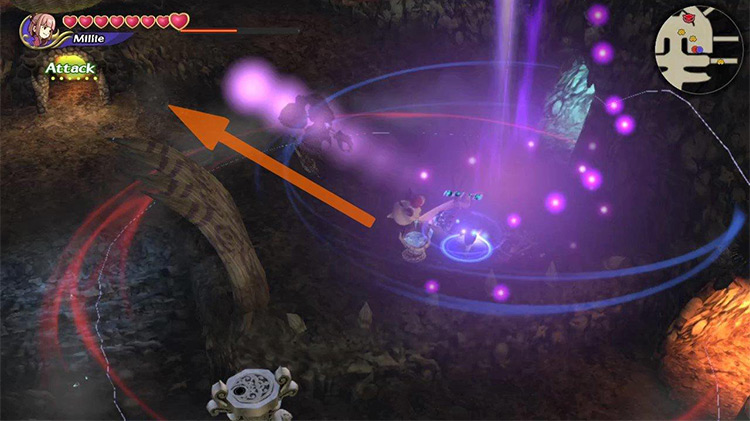
This becomes extremely important near the end of the fight when the Goblin Lord starts teleporting after just a couple of seconds.
You’ll deal more damage if you start running to it’s new location before it materializes.
Obtainable Items
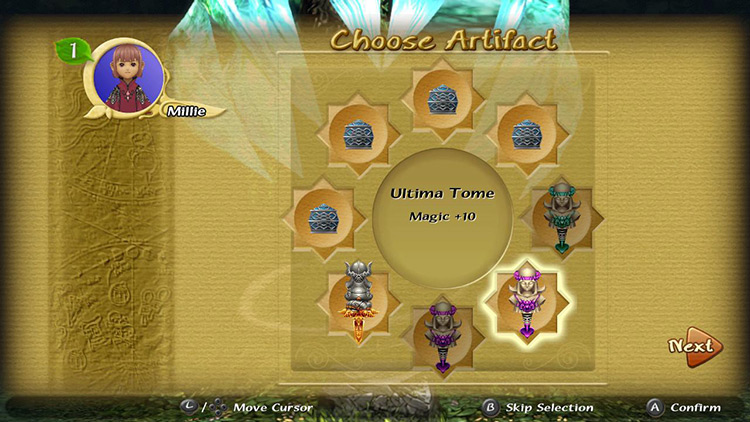
You’ll find Artifacts, crafting Recipes, and Materials throughout the dungeon. You get to keep all Recipes and Materials, but you can only choose one Artifact to take with you.
Chest Items
The following items await in the chests at the Goblin Festival:
| Artifacts | Materials |
|---|---|
| Aegis Buckler Candy Ring Dark Matter Drill Elven Mantle Heavy Armband Mage Masher Masquerade Murasame Onion Sword Rat’s Tail Shuriken Taotie Motif Tome of Ultima Winged Cap |
Adamantite Electrum |
Monster Items
Monsters at the Goblin Festival don’t drop anything noteworthy.
Boss Items
Instead of Artifacts, Recipes, or Materials, clearing the Goblin Festival rewards you with rare Memory Crystals you can use to mimic cool characters from FFCC.
These Memory Crystals are divided into two possible reward pools:
| Reward Pool A |
|
|---|---|
| Reward Pool B |
|
Higher scores make accessing Reward Pool B more likely.

Just talk to the Moogle at your nearest Moogle Nest to start mimicking. Remember, you can only mimic characters of your same race and gender.
-
Final Fantasy Crystal Chronicles Remastered
- Goblin Festival Dungeon Guide + Map (FFCC Remastered)
Related Posts:
 Goblin Wall Dungeon Guide + Map (FFCC Remastered)
 Rebena Te Ra Dungeon Guide + Map (FFCC Remastered)
 Moonlit Desert Dungeon Guide + Map (FFCC Remastered)
 Oblivion Village Dungeon Guide + Map (FFCC Remastered)
 Foggy Swamp Dungeon Guide + Map (FFCC Remastered)
 Conall Curach Dungeon Guide + Map (FFCC Remastered)
 Frozen Sluice Dungeon Guide + Map (FFCC Remastered)
 Mt. Kilanda Dungeon Guide + Map (FFCC Remastered)