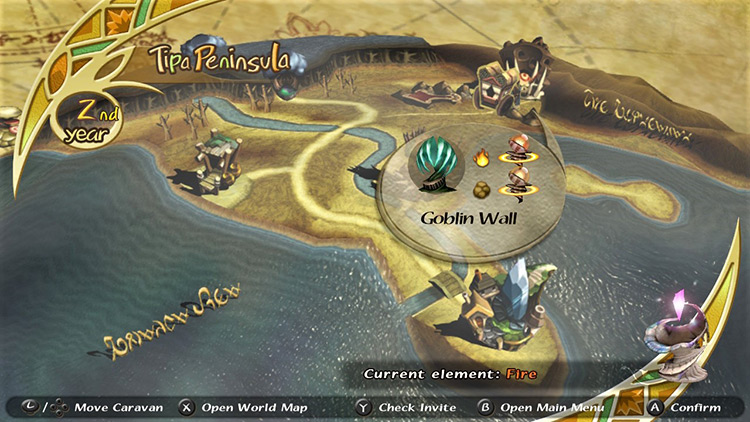
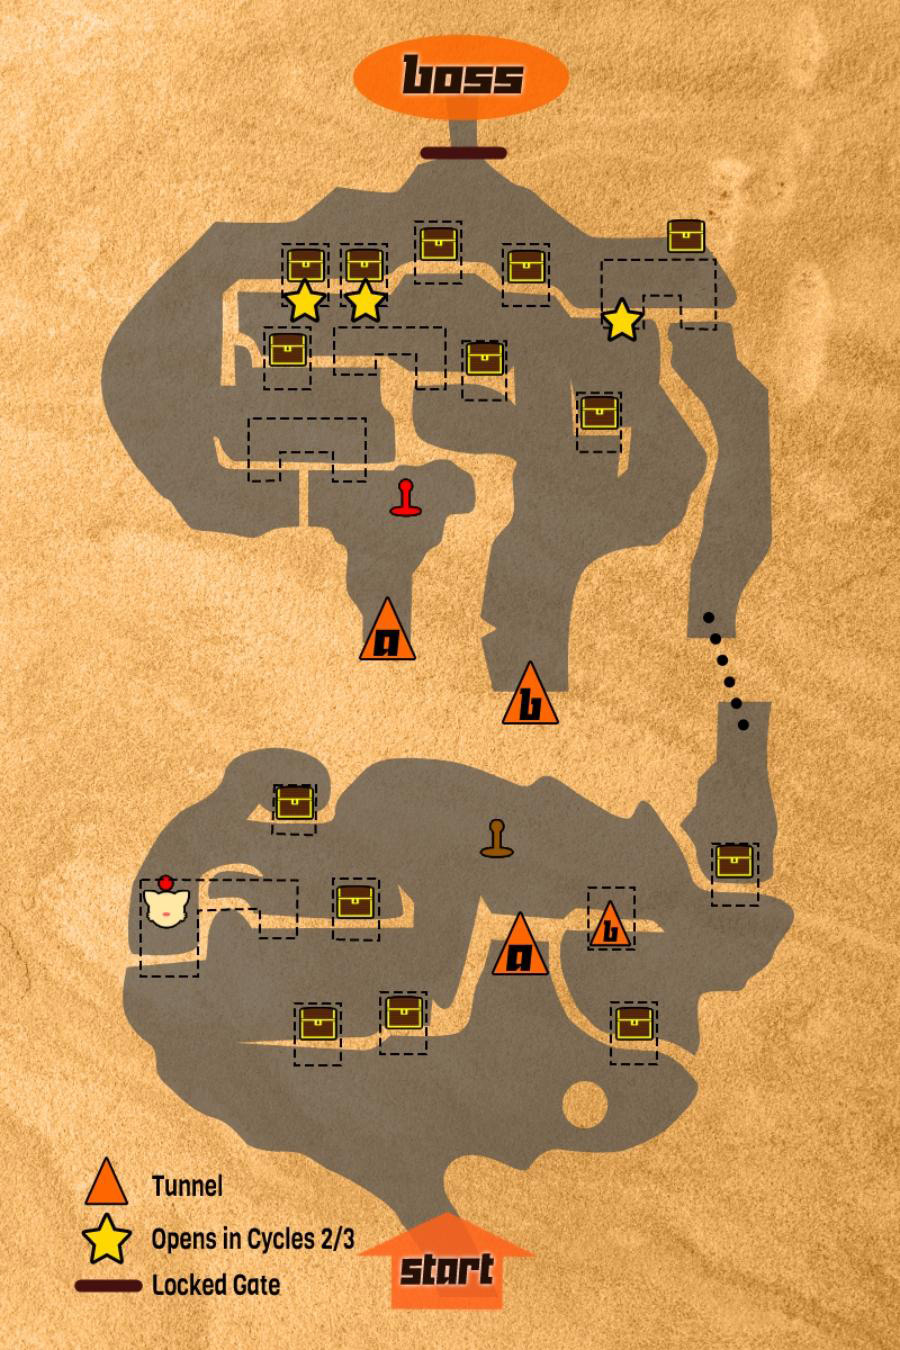
The Goblin Wall is the first dungeon players can visit in Year 2 of their Final Fantasy Crystal Chronicles playthrough and the fourth dungeon overall.
It’s located north of your Hometown and east of the Miasma Stream in Tipa Peninsula, and it contains both Earth and Fire elemental Hot Spots.
This dungeon shines for its abundance of valuables, such as crafting Recipes and Materials.
The steps toward conquering Goblin Wall look roughly like this:
- Climb the western hill.
- Hit glowing skulls to open bone cells.
- Claim your Moogle Stamp.
- Head east and enter the next area.
- Keep hitting skulls to open the way forward.
- Kill nearby enemies to open the gate at the summit.
- Defeat the Goblin King.
Let’s check it out step by step.
TABLE OF CONTENTS
Map
Walkthrough
Step #1: Clear the Ground Floor
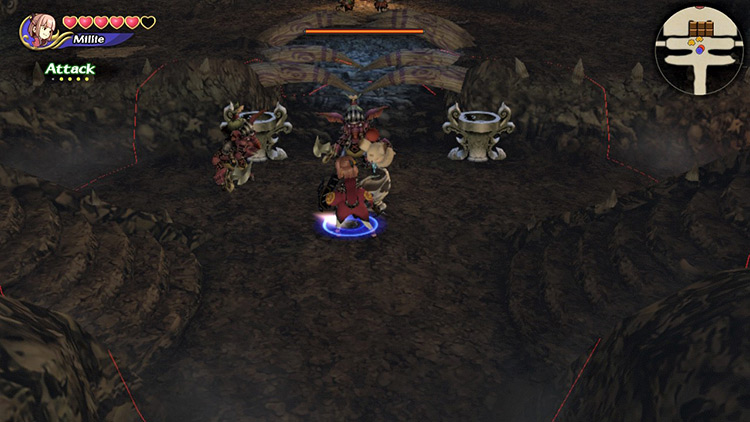
There are two small groups of enemies on the ground floor.
First is a Goblin and Flan combo standing right before you as you begin your exploration of Goblin Wall.
A second group comprised of a Goblin Mage and a Bat awaits a few steps to the right.
- Flans are slow-moving enemies whose attacks inflict the Slow ailment. They’re weak to Fire.
- Goblin Mages are semi-competent spellcasters who sometimes botch their hexes, leaving themselves wide open. They’re also weak to Fire.
- Bats are hard to hit and dodge due to their small size. They can also make you flinch, which is a major concern with other enemies nearby.
Once you’ve put them to the sword and collected their drops, head west to begin the climb.
Note: You’ll have noticed a path leading north between both enemy groups. We’ll come back to that later.
Step #2: Climb the Hill
Start climbing the western hill lined with bone-barred cells.
You’ll face three Goblins on your way through the 2nd floor, then a Flan the moment you approach the 3rd floor.
Tip: One of those Goblins will drop the Fire magicite. Almost all enemies in this map are weak to Fire, so make sure to put it on your Command List.
A Goblin and a Goblin Mage roam the area around an Earth-type Hot Spot on the 3rd floor. Kill them, then head west.

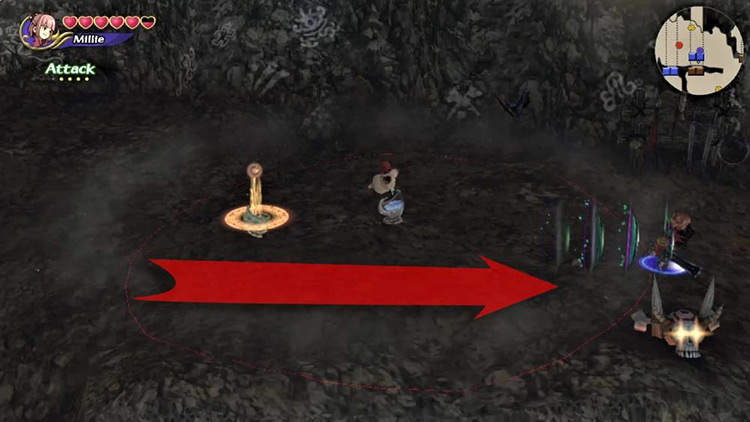
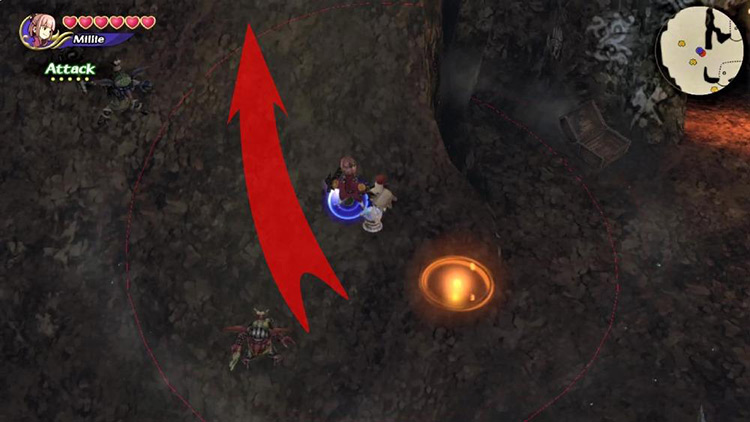
Brace yourself for battle against a Goblin Chieftain on the road, then a Flan and two Bats as you approach a crossroads leading up and down.
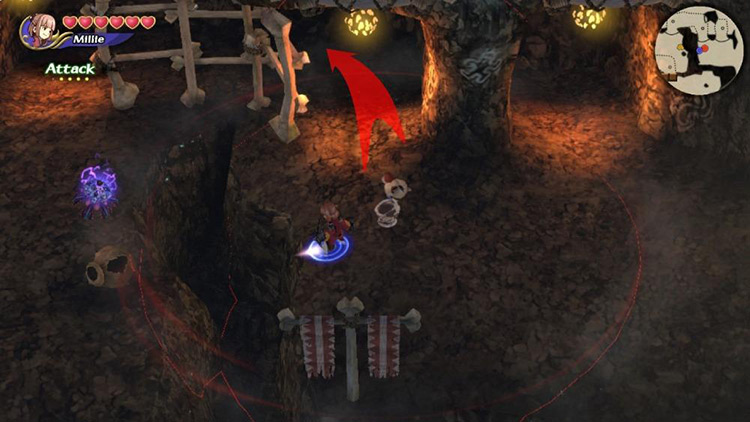
Go north at the crossroads and climb to the top.
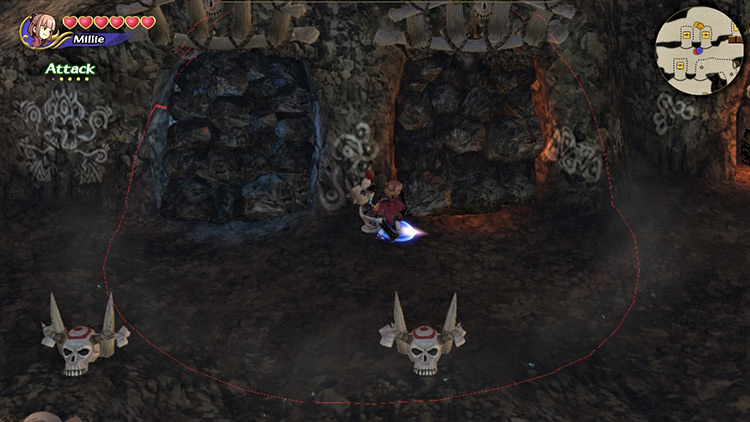
Step #3: Hit Skulls to Open Cells
You’ll undoubtedly have noticed the glowing skulls along the road.
Attacking them will open the bone cell right below, revealing chests and secret paths.
Now that we’ve cleared this side of the map, you can go down the hill opening cells and collecting the four chests that were previously off-limits.
When you’re done hitting skulls and opening chests, return to the 2nd floor.
Step #4: Claim Your Moogle Stamp
Two previously-locked bone cells on the westernmost side of the 2nd floor have opened to reveal a path connecting them.
While seemingly useless at first, this new passage hides a Moogle Nest on the western corner.

Examine the wall at this location to enter and collect your Moogle Stamp.
Step #5: Head East from Earth Hot Spot
Return to the Elemental Hot Spot on the 3rd floor and start heading east from there.
There are more glowing skull switches along the way. Make sure to hit them as you march forward.
A Bat will ambush you as you approach the first glowing skull, and a Goblin Chieftain + Bat combo awaits to the right.
Tip: There’s a chest in the bone cell north next to where you fought the Goblin Chieftain. This one will only become accessible in Cycles 2 and 3.
Keep moving southward to find another glowing skull. This one opens the cell containing a chest all the way to the right side of the 1st floor.
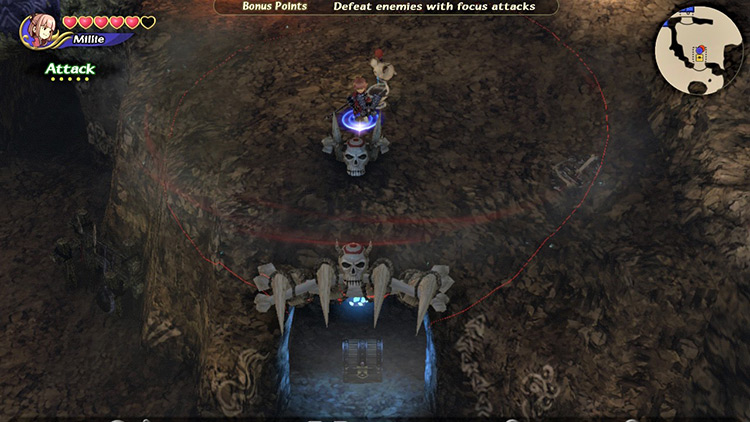
Backtrack to collect your treasure, then return topside and enter the passage right above the skull switch you just hit.
Step #6: Enter the Next Area
Keep heading north in this new area to fight a Goblin and a Flan standing near a locked bone cell.
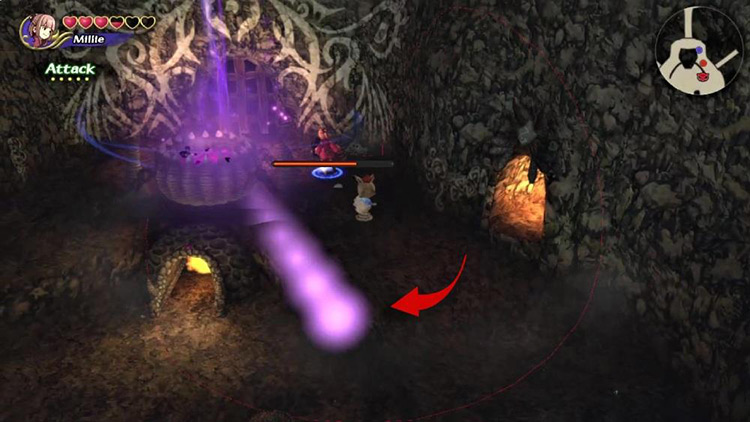
Use either the right or left paths to climb to the next floor, where you’ll immediately fight a Goblin and an Electric Jellyfish.
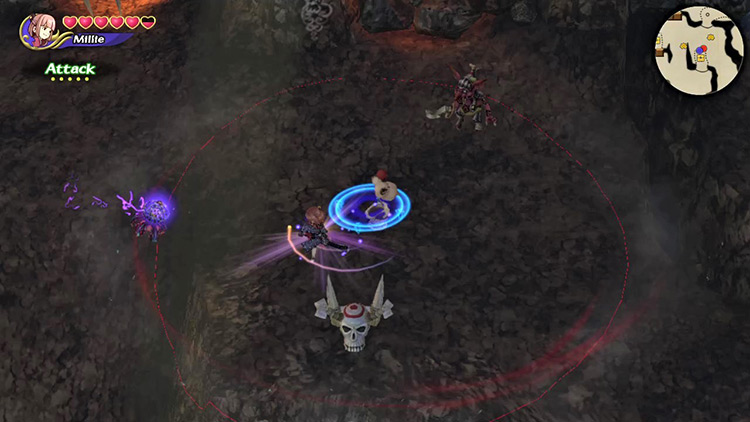
Electric Jellyfish should be engaged with caution, as hitting them with melee weapons can stun you for a moment. Thunder is ineffective, but Blizzard will bring them down in no time.
Don’t forget to open the nearby bone cell and collect its treasure before heading further.
A Goblin and Goblin Mage combo awaits further to the west, protecting some glowing skulls.
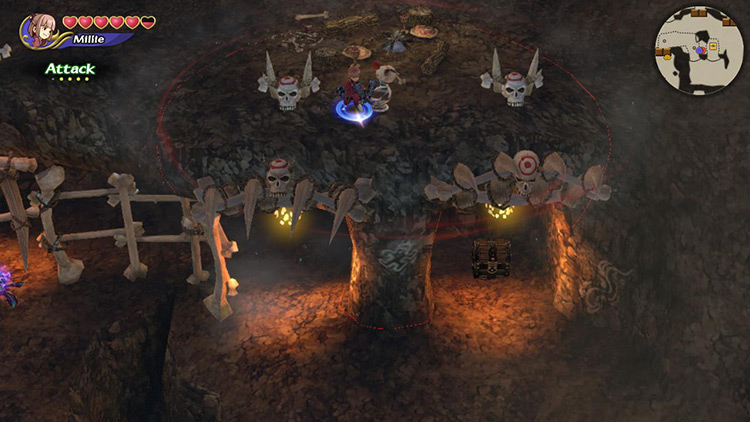
The ones on the far sides open the way to chests, while the inner two open up the path forward.
Tip: Some of the bone cells in this area lead to rock piles blocking the way forward. These cells can be accessed in Cycles 2 and 3 for three extra treasure chests.
Step #7: Cross the Gap
Head back down to the previous floor and cross the gap to the west side through the newly-opened passage.
Watch out for the Electric Jellyfish roaming the tunnel’s exit.
The glowing skulls right after the Electric Jellyfish open the way to a Fire Hot Spot and a shortcut back to the path we left unexplored at beginning of the dungeon.
Step #8: Keep Climbing
Keep heading west to find a crossroads leading up and down.
Try to defeat the Goblins roaming the crossroads without venturing too far down, or you’ll alert a Goblin Chieftain and fight all three at the same time.
There’s no real reason to head south right now, so go north once you’ve dealt with the enemies and brace for combat against a Flan and an Electric Jellyfish.
These enemies are guarding skulls that open the way to… paths blocked by debris. Ignore the switches and keep walking east to find the boss room entrance.
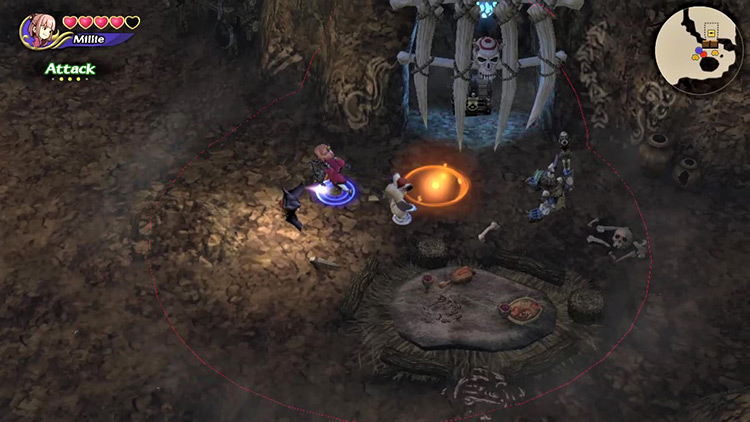
Step #9: Battle at the Summit
The entrance to the boss fight looks like a Sarlacc’s mouth.
It’s guarded by a Goblin Chieftain and its two Goblin underlings.
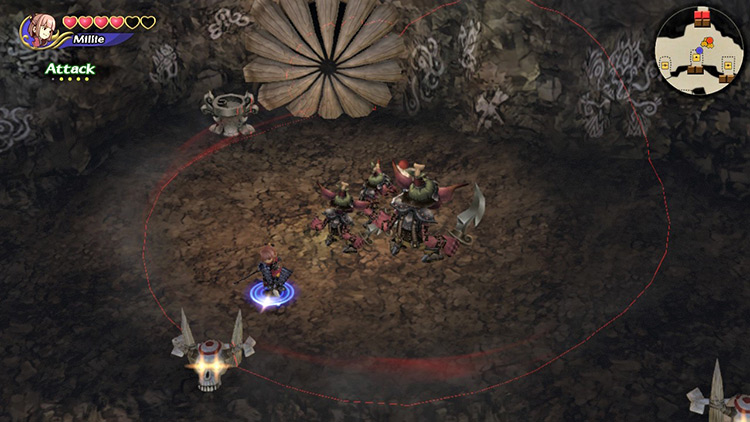
Be careful not to venture too far east during the battle, or you’ll alert a Goblin Mage and its Electric Jellyfish pet.
There’s real danger of getting overrun by so many enemies, but you’ll be fine.
Step #10: Open the Gate
Your epic battle will leave you with some drops including the half-moon token needed to open the ominous-looking door.

Open it, but don’t head through just yet.
First, continue eastward to collect a chest protected by two Goblins and an Electric Jellyfish.
Make sure you’ve collected all available chests before heading into the Sarlacc’s mouth.
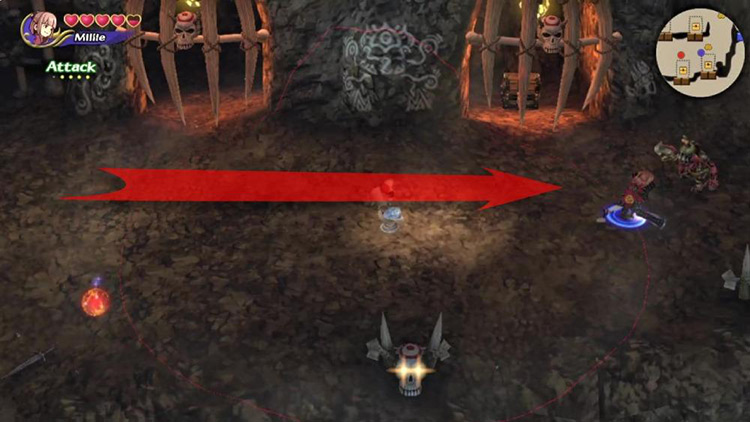
Boss: Goblin King
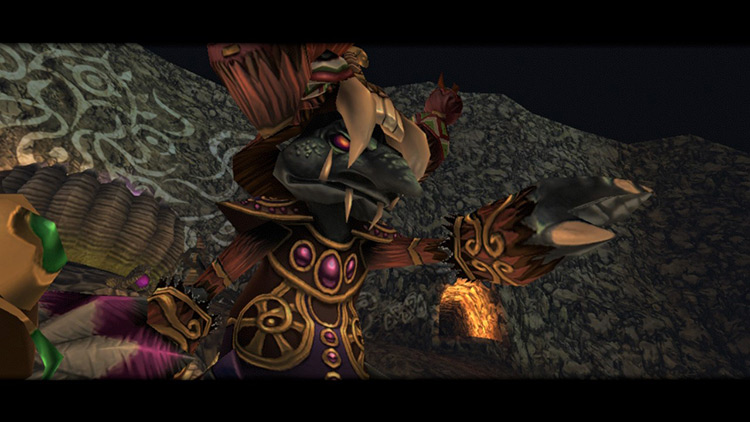
The Goblin King is a powerful but low-HP boss who prefers to keep you at a distance while casting Thundara and Bio (Poison) spells.
Follow these tips for an easier battle:
Tip #1: Small Goblins Come First
You’ll start the fight separated from the Goblin King by a gate requiring two different keys.
Waves of Goblins will come at you from the sides, harassing you while the Goblin King works its magic from a distance.
You should get the required keys after the first four Goblins have been defeated.
More Goblins will continue showing up every couple of minutes to distract you from killing the Goblin King. Moreover, their hits make you flinch, allowing the boss to zap or poison you.
Make them a priority or you’ll get overrun.
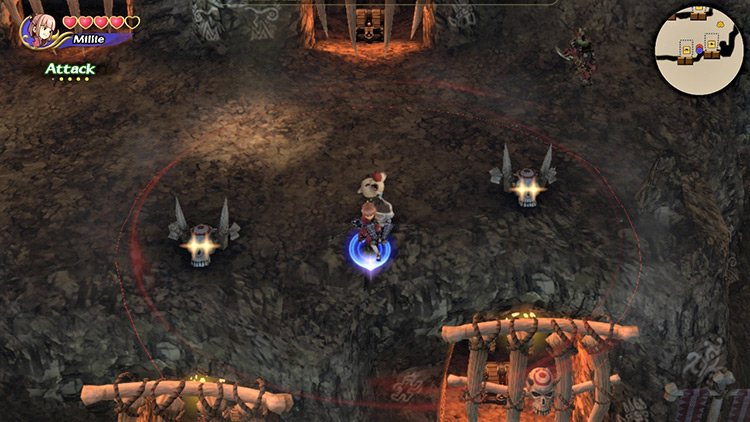
Tip #2: Don’t Get Stuck
Possibly the hardest part about this fight is how cramped the battle arena is, especially compared to the wide range of the Goblin King’s attacks.

The more Goblins, the easier it is to become stuck and open to damage from the boss.
Make sure you give everyone as wide a berth as possible, and don’t let the Goblins pile up.
Tip #3: Follow the Light
The Goblin King’s most confusing ability is teleporting.
It’s the boss’ primary means of locomotion, and it allows it to go from one side of the room to another in a matter of seconds.
Running toward it can make you lose precious DPS time, but it’s possible to predict where it’ll show up by following the orb of light that comes whenever it teleports.
This can help you get the jump on the Goblin King.
Changes with Dungeon Cycles
You’ll find new and stronger monsters next time you come collect myrrh.
- Ghosts must be hit with Holy before to make them vulnerable to other types of damage.
- Cerberus is a strong beast with a weakness to Blizzard.
Along with new enemies, there are also more riches.
The paths previously blocked-off by rocks are open in Cycles 2 and 3, allowing you to collect three more chests containing Recipes.
The Goblin King gets a slight power-up with the addition of Firaga, Thundaga, and Blizzaga to its magic arsenal. These have a large area of effect, so evading them is much harder.
Obtainable Items
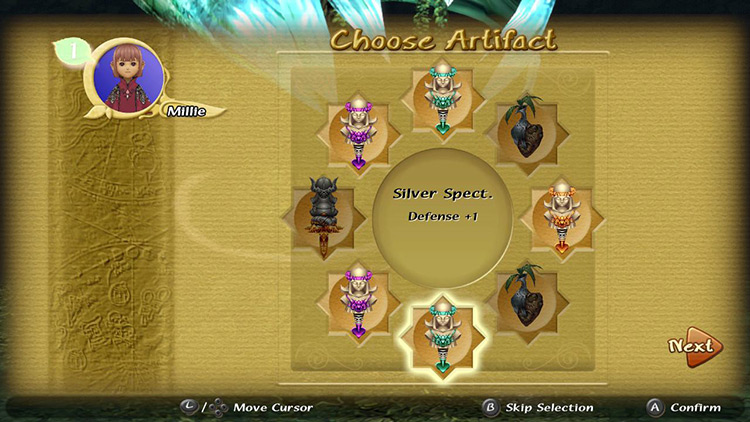
You’ll find Artifacts, crafting Recipes, and Materials throughout the dungeon. You get to keep all Recipes and Materials, but you can only choose one Artifact to take with you.
Chest Items
SCROLL
| Cycle | First | Second | Third |
|---|---|---|---|
| Recipes | Iron Armor Iron Belt Iron Gloves Iron Sallet Iron Shield Master’s Weapon Mythril Armor Mythril Belt Mythril Gloves Mythril Sallet Mythril Shield Tome of Wisdom Warrior’s Weapon |
Iron Armor Lightning Belt Lightning Gloves Lightning Sallet Lightning Shield Master’s Weapon Mighty Weapon Mythril Armor Mythril Belt Mythril Gloves Mythril Sallet Mythril Shield Time Armor Tome of Wisdom Victorious Weapon Warrior’s Weapon |
Flame Gloves Flame Shield Gold Gloves Holy Armor Holy Shield Lightning Gloves Lightning Sallet Lightning Shield Master’s Weapon Mighty Weapon Mythril Armor Mythril Gloves Mythril Shield Pure Armor Pure Belt Secrets of Wisdom Time Armor Tome of Wisdom Valiant Weapon Victorious Weapon |
| Artifacts | Buckler Cat’s Bell Double Axe Dragon’s Whisker Earth Pendant Green Beret Mage Masher Maneater Moogle Pocket Shuriken Silver Bracer Silver Spectacles |
Black Hood Cat’s Bell Double Axe Earth Pendant Flametongue Green Beret Ice Brand Kris Moogle Pocket Sage’s Staff Silver Bracer Silver Spectacles |
Black Hood Earth Pendant Flametongue Ice Brand Kris Loaded Dice Mage’s Staff Moogle Pocket Rune Bell Sage’s Staff Sasuke’s Blade Wonder Bangle |
| Materials | Bronze Iron |
Iron | None present |
Monster Items
SCROLL
| Cycle | First | Second | Third |
|---|---|---|---|
| Cerberus | Not present | Cerberus’s Fang Iron Mythril |
Cerberus’s Fang Mythril |
| Electric Jellyfish | Crystal Ball Thunderball |
Crystal Ball Jade Ruby Thunderball |
Jade Ruby Thunderball |
| Ghost | Not Present | Blue Silk Diamond Ore |
White Silk |
| Goblin Chieftain | Bronze Iron |
Alloy Iron |
Alloy Mythril |
Boss Items
Each boss has four drop pools per cycle.
Your Bonus Points determine which rewards you qualify to get. The higher your points, the more chances you have to get good rewards.
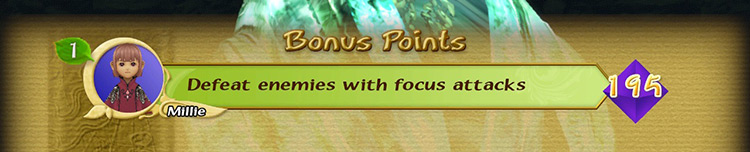
Higher ranks can randomly get any of the previous reward pools. There’s also a tiny chance that the contrary might happen, giving you higher-level rewards at low scores.
SCROLL
| Cycle | First | Second | Third |
|---|---|---|---|
| 0+ BP | Double Axe Earth Pendant Sparkling Bracer Winged Cap |
Ashura Faerie Ring Moogle Pocket Sparkling Bracer |
Ancient Potion Helm of Arai Mjollnir Red Slippers |
| 110+ BP | Earth Pendant Kaiser Knuckles Sparkling Bracer Wonder Wand |
Dark Matter Fang Charm Moogle Pocket Sparkling Bracer |
Engetsurin Helm of Arai Noah’s Lute Orichalcum |
| 138+ BP | Ashura Faerie Ring Moogle Pocket Sparkling Bracer |
Ancient Potion Helm of Arai Mjollnir Red Slippers |
Candy Ring Diamond Belt (R) Fang Charm Wonder Bangle |
| 172+ BP | Dark Matter Fang Charm Moogle Pocket Sparkling Bracer |
Engetsurin Helm of Arai Noah’s Lute Orichalcum |
Cursed Crook Galatyn Green Beret Sparkling Bracer |
-
Final Fantasy Crystal Chronicles Remastered
- Goblin Wall Dungeon Guide + Map (FFCC Remastered)