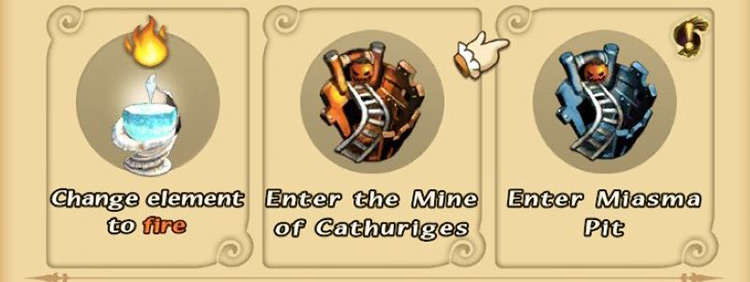
Miasma Pit is the high-difficulty version of the Mine of Cathuriges that you’ll unlock after clearing FFCC Remastered’s main campaign.
The dungeon is accessible from the Mine of Cathuriges’s location in the River Mine Downs region, or through the Setting Out Together online multiplayer option in the main menu.
You can tackle this dungeon with a group on any of these days:
- Thursdays
- Weekends (Fri, Sat, Sun)
Note: Single-player dungeons are always available.
Let me walk you through the Miasma Pit and the Orc Lord boss battle step-by-step.
TABLE OF CONTENTS
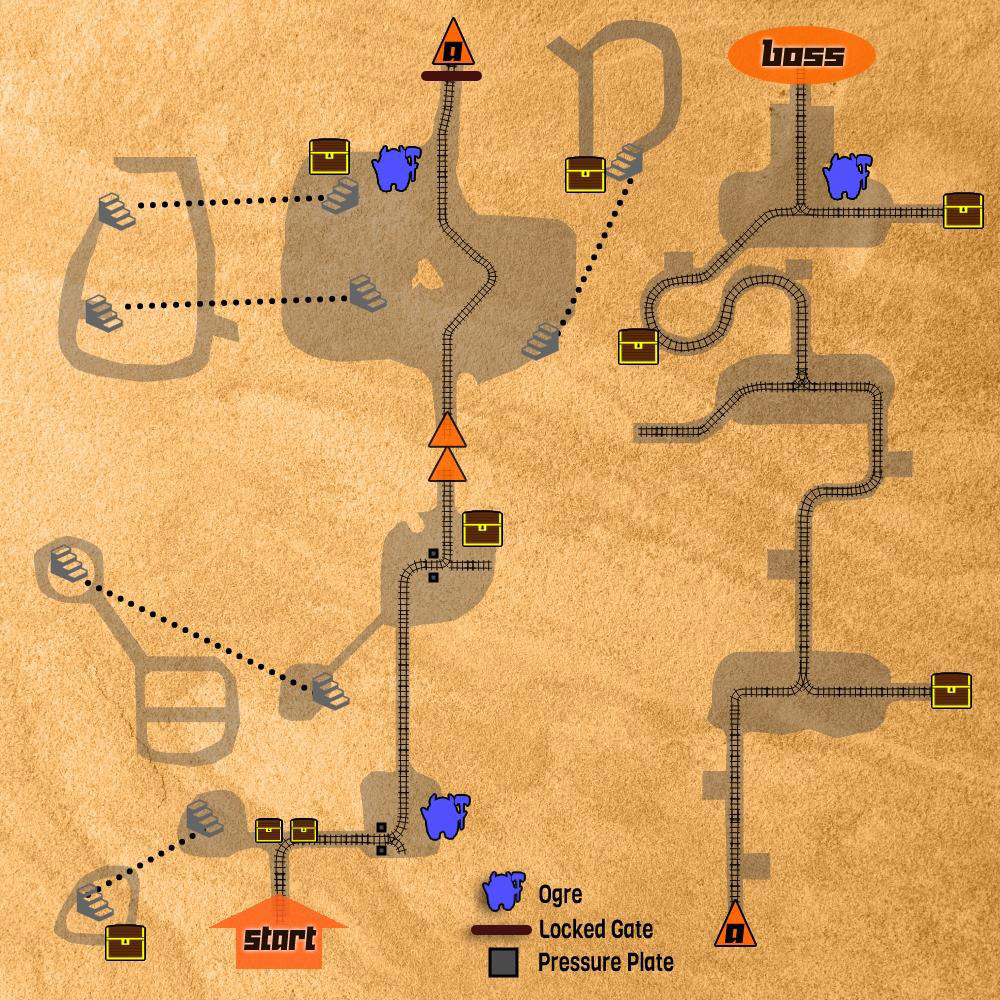
Map
Walkthrough
The Miasma Pit is one of the most densely-populated dungeons in the game, but you’ll get through it with the right equipment and strategy.
Step #1: Get Stone Resistance & Avoid Petrification
Dealing with so many enemies is tough. But it becomes nigh-impossible with Cockatrices petrifying you at every turn.
Getting petrified is a death sentence in the Miasma Pit.
This makes Stone-resistant equipment a must-have to clear the dungeon.
You need to reach +2 Stone resistance to avoid petrification.
Your best bet is to craft something in the Heretical set. You can get the recipe and required materials as a boss drop at the Afternoon Fort.
Optional: Get Poison Resistance as well if you can!
Many enemies in the Miasma Pit will constantly try to poison you. In all likelihood, you’ll spend the entire time poisoned.
Poison is not the most troublesome status ailment in FFCC, but you may want to avoid it.
Equipment from the Dragon set can provide +2 Poison resistance and make you immune.
Tip: You can get the required Recipe and Materials for Poison resistance from the boss at the Pale Cave.
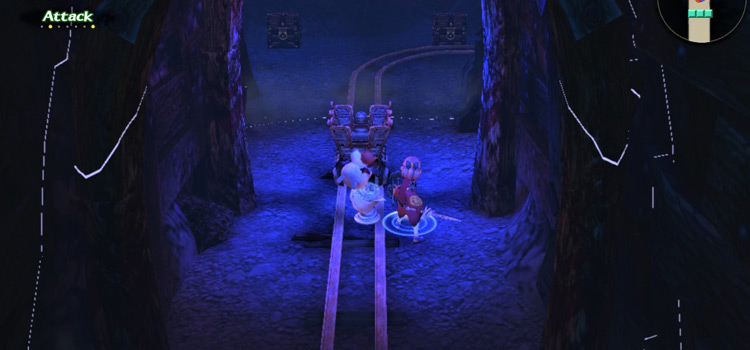
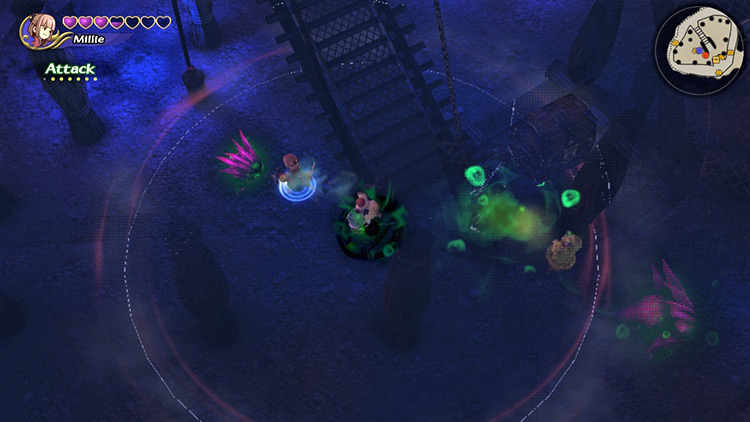
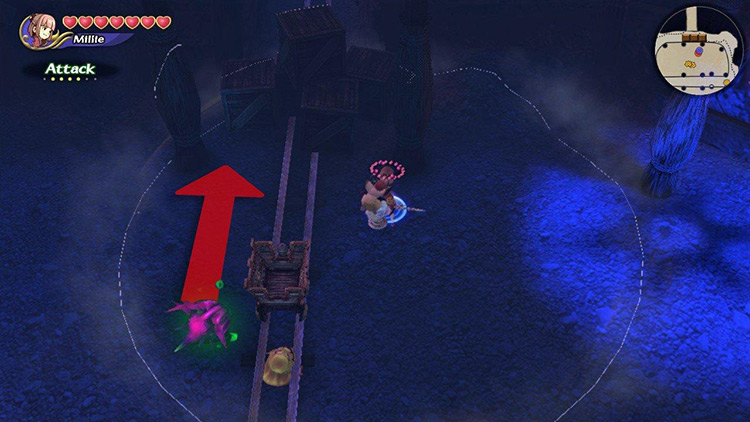
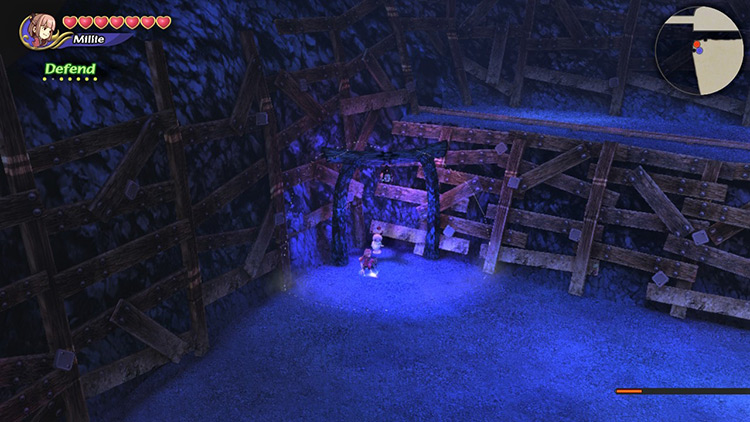
Step #2: Use the Minecart to Smash Debris
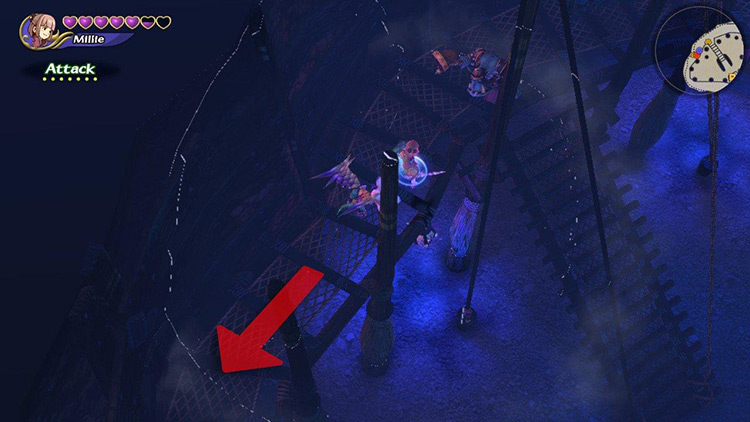
To get started, hit the minecart right in front of you upon entering the dungeon.
Then follow it down the tracks.
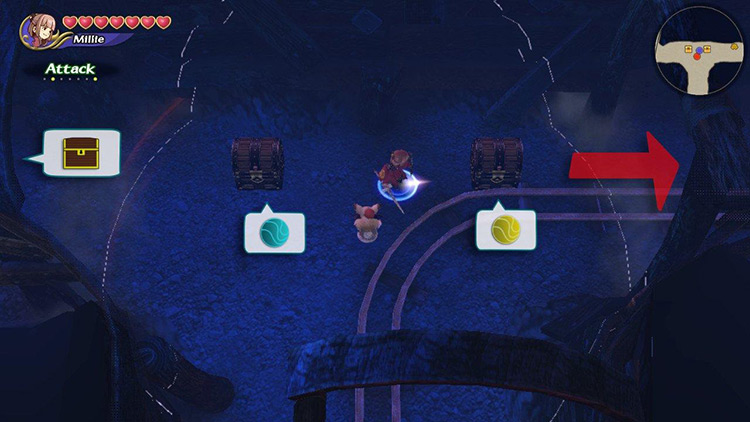
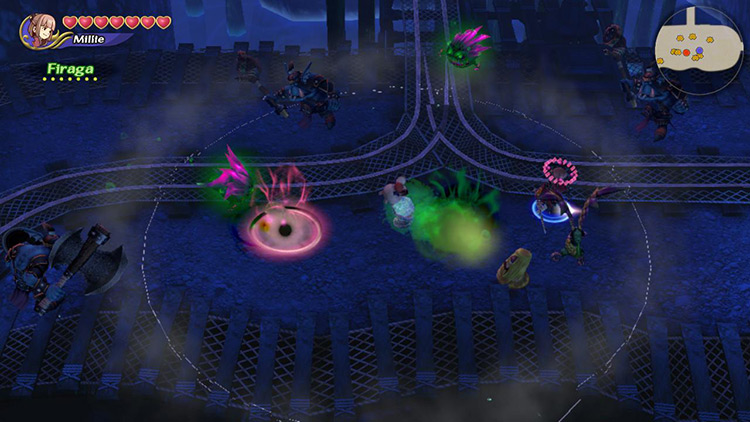
Collect the Cure and Raise magicites from the two nearby chests, then turn right and defeat the nearby Toxic Bomb.
Tip: Toxic Bombs will cast Poison and Meteor at the player, but their powerful melee attack is what you want to avoid. Attack them as they cast.
Hit the cart again and watch it destroy the nearby debris, opening the way forward.
Before continuing, go back to the beginning and explore the room to the left of the tracks for a chest containing an Artifact.
A Small Flan and a Toxic Bomb will attack you as you enter this area.
Tip: Small Flans are just like regular Flans but faster and harder to keep track of. They can also stagger you, so watch out.
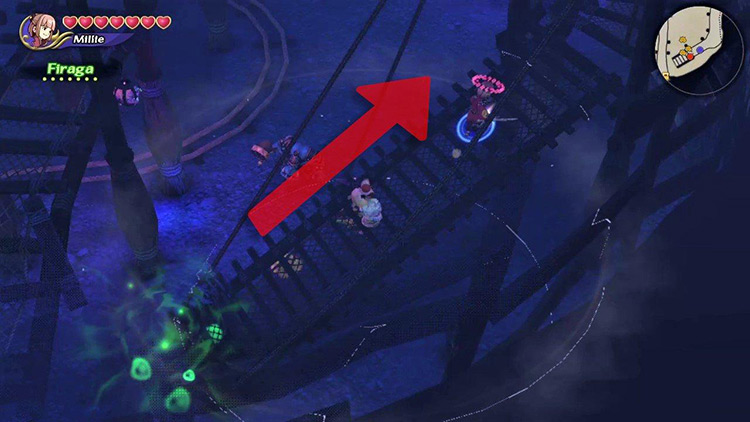
Defeat them before running up the nearby stairs.
Brace for combat against a Cockatrice and an Orc Mage. It shouldn’t be a problem if you have Stone resistance +2.
Then go around the catwalk to find a chest containing an Artifact. It’s protected by a Toxic Bomb.
Once you’ve defeated the Bomb and collected all valuables, return to the minecart.
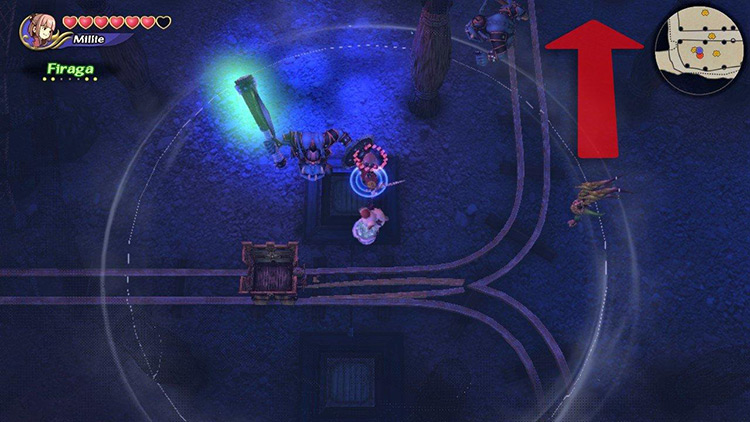
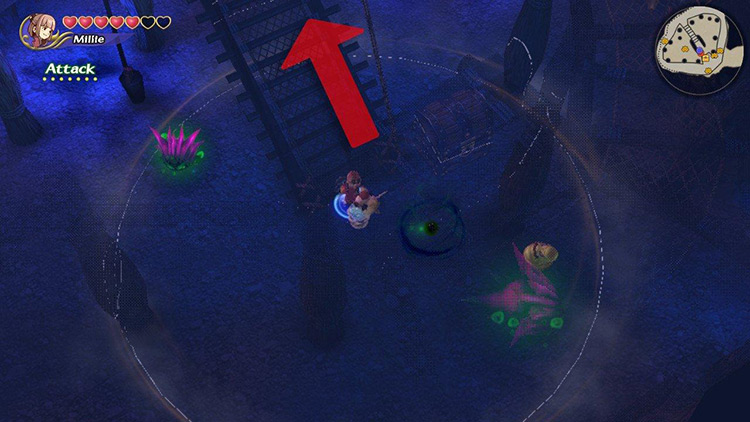
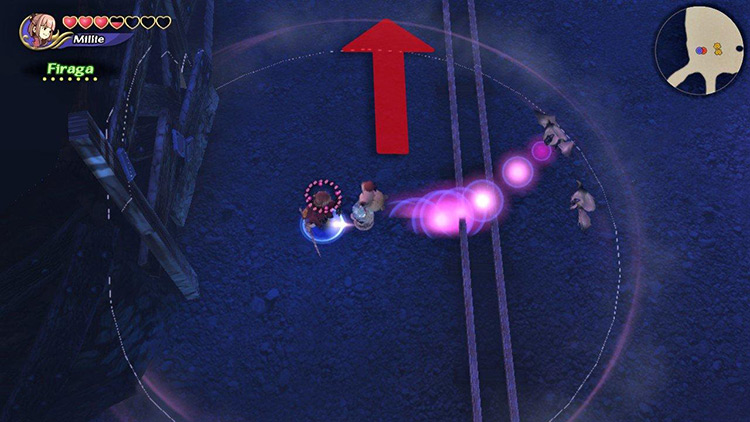
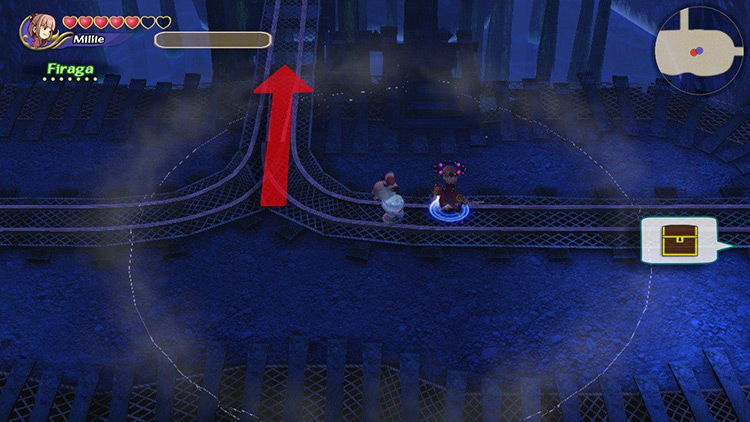
Notice the pressure plates on the sides of the railway. These control the direction of the minecart.
Stand on the topmost plate to redirect the rails northward, then hit the cart to move it further.
Tip: If you accidentally send it rolling in the other direction, it will return to the beginning.
By now, you should have enough magicite to fuse Haste. Cast this on yourself to increase your moving speed and significantly reduce casting times.
Make Haste by fusing Raise + Cure + Cure on your Command List.
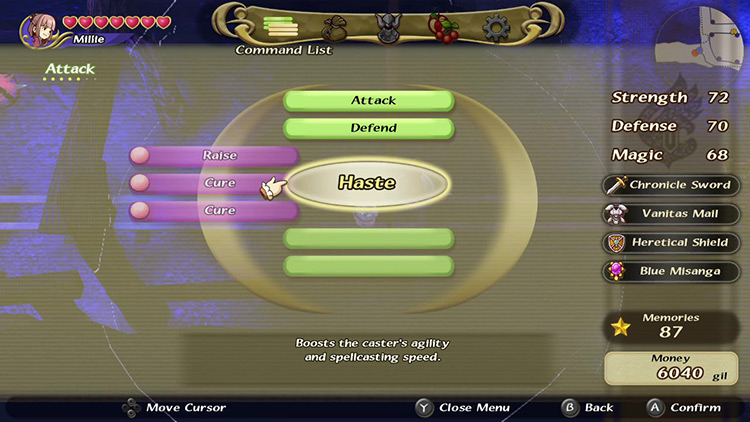
Once you’ve done that, split up Haste to make space for a Tier 3 spell like Firaga, Blizzaga, or Thundaga. It doesn’t matter which one you choose.
Haste will let you cast Tier 3 spells in what it usually takes to launch a Tier 2 spell. This makes it the most efficient way to deal with the hordes of enemies in Miasma Pit.
Step #3: Defeat Ogres for Artifacts & Materials
There’s an Ogre a few steps right of the pressure plates.
These enemies carry valuable Materials and Artifacts in the Miasma Pit. Make sure to hunt them down.
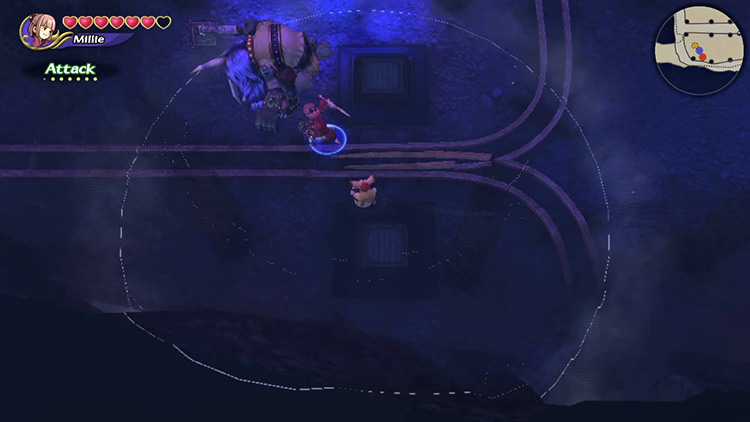
Ogres have a devastating and long-reaching AoE move where they hit the ground with their weapon and send out a shockwave in all directions.
This makes melee combat inefficient.
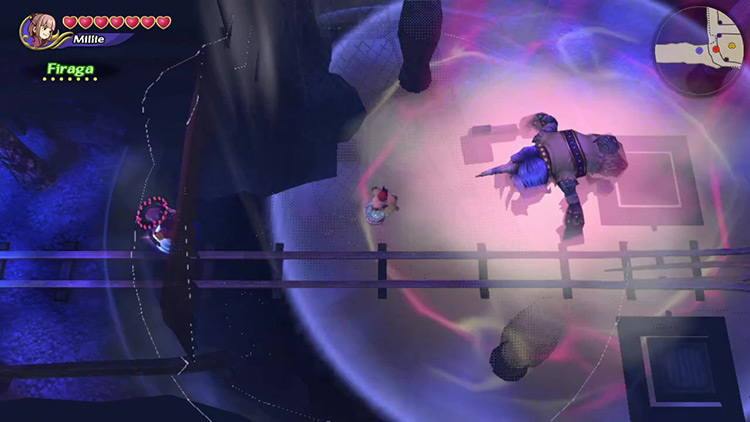
Sticking to Haste + Firaga/Blizzaga/Thundaga remains the best option.
Once you’ve defeated them and collected any valuables, head back to the cart. Hit it to destroy the debris blocking the way forward.
Follow the cart and keep moving it along the rails until you reach another open area.
Again, Haste + Firaga/Blizzaga/Thundaga is the easiest way to take care of the many nearby enemies.
Here, you’ll start running into White Bats.
They may look small, but these are the dungeon’s most damage-resistant and annoying enemies.
Tip: There’s little to gain from defeating these Bats, so try to ignore them as you go about your business.
Follow the tracks until you find another set of pressure plates. There’s also a chest to the northeast.
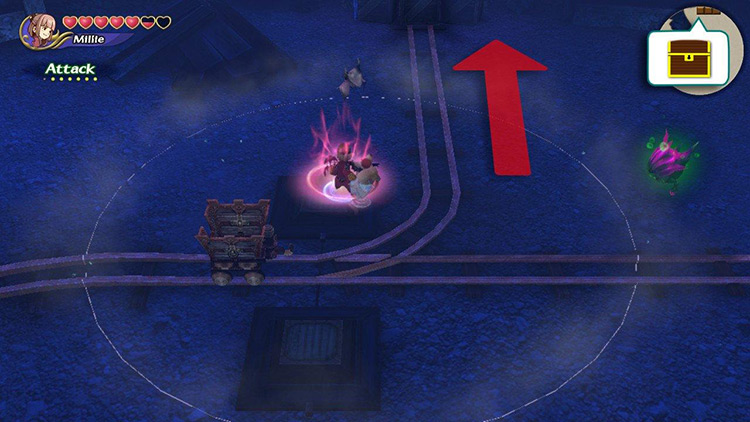
Stand on the northern plate to redirect the tracks, then move the cart to destroy the nearby debris.
After that, go through the newly opened passage into the next area.
Note: I left the southwestern path unexplored because there are no valuables, just enemies.
Step #4: Open the Gate into Area #3
As you head into Area #2, immediately turn right and climb the nearest stairs.
This room is full of enemies, including Toxic Bombs, Cockatrices, Orcs, and Small Flans.
Fighting them head-on would be really tough, but there’s another way to handle it:
When casting from the catwalk above, wide-range spells like Blizzaga, Firaga, and Thundaga can hit enemies on the ground floor. So this is an easy way to clear out the area.
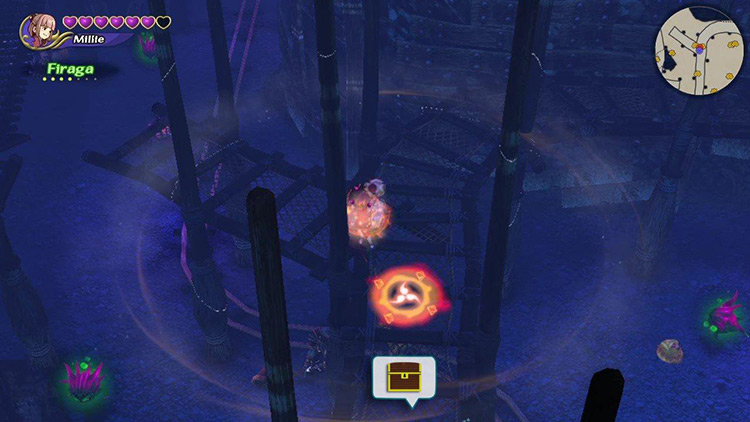
Enemies can cast Poison from below, but you don’t have to worry about anything else. You can comfortably clear the room’s east side from up here.
After that, continue advancing on the scaffolding until you hit a chest. Get the Artifact inside and return to the ground floor.
Tip: Remember to collect all items dropped by the enemies you’ve defeated so far. These drops eventually disappear, so do it ASAP.
From here, run straight to the west until you reach another staircase. Ignore any enemies around you and get up the stairs onto the second floor.
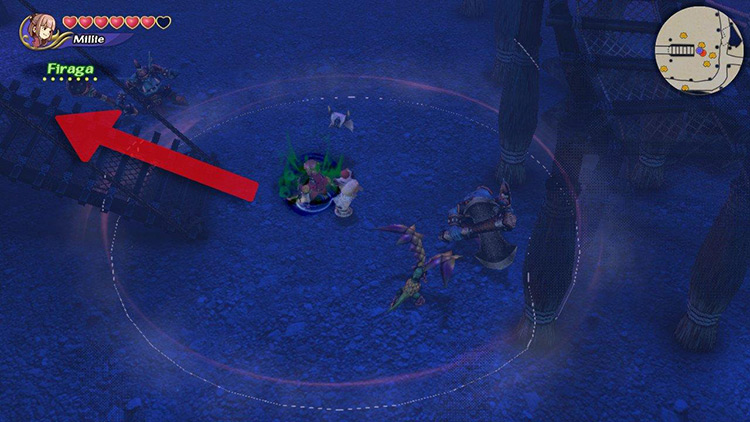
Once again, use Blizzaga, Thundaga, or Firaga to damage the enemies below without risk to your safety (other than Poison).
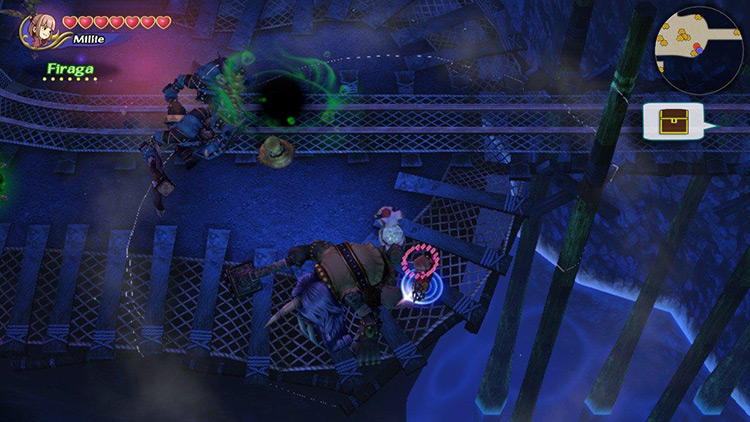
Following the road south after climbing the stairs will eventually put you above an Ogre and a Toxic Bomb carrying a key needed to open the gate into the next area.
Defeat them and come back down to collect their valuables.
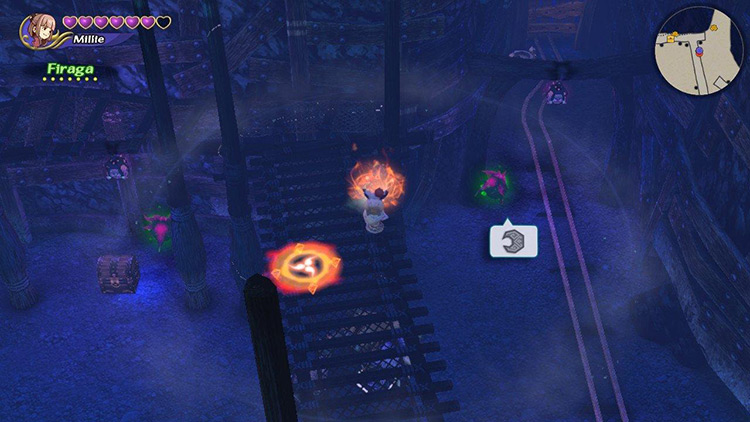
Then open the chest at the northwestern corner for a Material.
After that, pick up the crescent moon-shaped key and carry it north to the gate. Place it on the altar and enter Area #3.
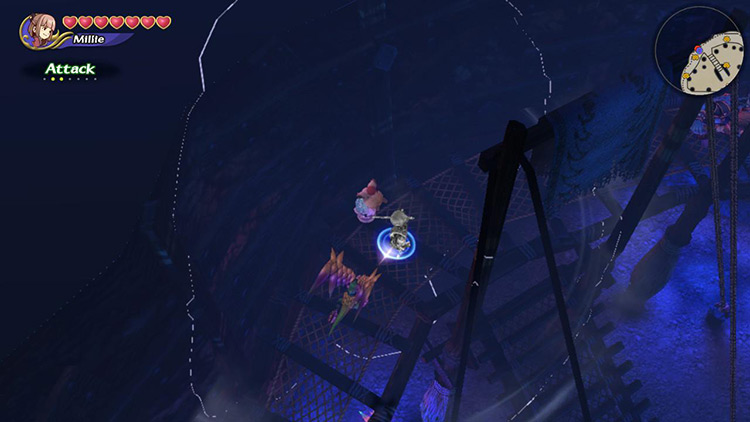
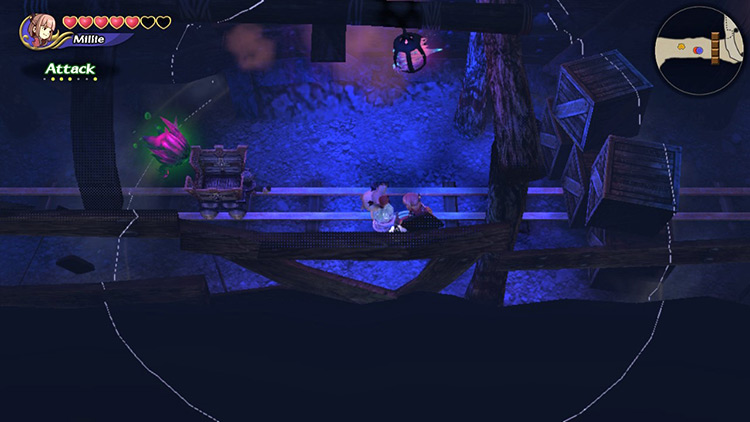
Step #5: Fight or Run through Area #3
The final section of the dungeon consists of a series of suspended walkways connecting three major platforms.
These platforms are full of monsters, including Orcs, Toxic Bombs, Small Flans, and Bats.
You’ve got two options:
- You run through, trying to avoid damage on your way to the boss.
- You fight, killing as many enemies as possible and collecting treasure.
If you choose to battle, cast Haste on yourself to give you a fighting chance. I find that casting Firaga, Thundaga, or Blizzaga while Haste’d is the best strategy.
Tip: Remember not to waste time trying to kill the oddly resistant Bats.
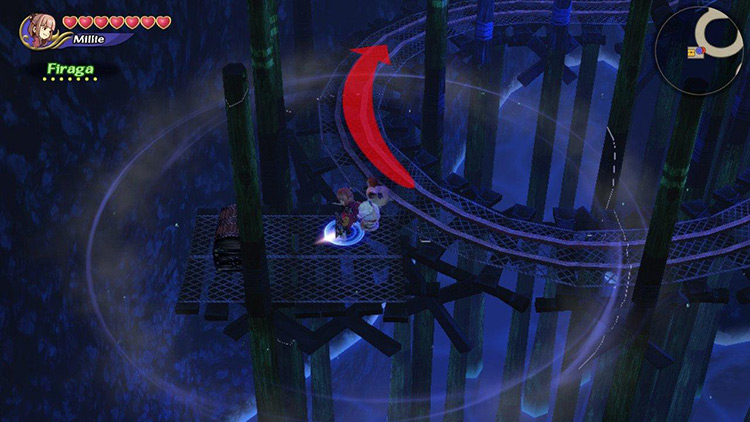
On the first platform, explore the walkway to the east for a chest before continuing northward.
You’ll find the next chest after the second platform, on the left side of the suspended walkway.
The last chest is to the east of the last platform, past an Ogre.
Once you’ve collected all Artifacts, Materials, and other valuables from enemies nearby, continue going north toward the entrance to the boss arena.
Boss: Orc Lord
The Orc Lord is a well-rounded boss based on the Orc King.
Like its predecessor, its strongest trait is short casting times and high movement speed.
Luckily, we have ways to deal with that.
Tip #1: Cast Haste on Yourself
Fuse Raise + Cure + Cure on your Command List to create Haste.
This spell will increase movement speed and significantly reduce casting times.
With it, you can cast Tier 3 spells like Blizzaga, Firaga, or Thundaga in less than half the time – and Focus Attacks are almost instantaneous.
Haste is almost non-negotiable when fighting the Orc Lord in single-player.
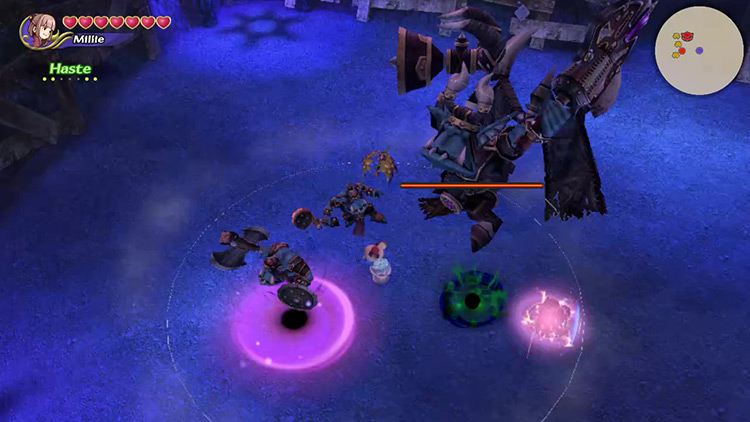
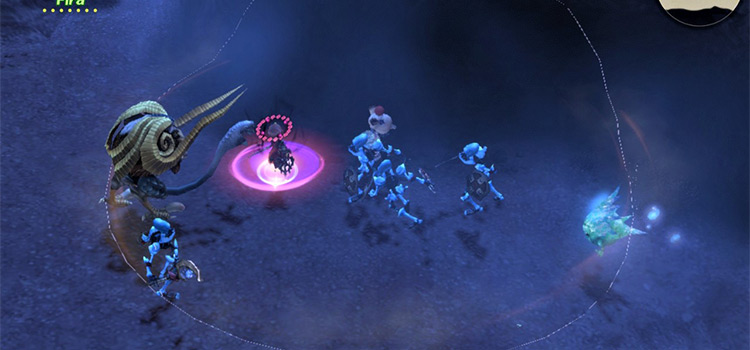
Tip #2: Use Firaga, Blizzaga, or Thundaga to Damage All Enemies
The easiest way to deal with the Orc Lord and its many minions (including Cockatrices and regular-sized Orcs) is to use wide-range Tier 3 spells.
Regrettably, these take way too long to cast.
That’s where Haste comes in.
Most of you won’t have enough Command List slots to have a Tier 3 spell and Haste fused simultaneously, so you’ll have to go into the pause menu to swap magicites often.
Note: You’ll also want a slot for a Phoenix Down.
It’s a bit time-consuming, but not nearly as time-consuming as losing against the Orc Lord because you’re not moving fast enough without Haste.
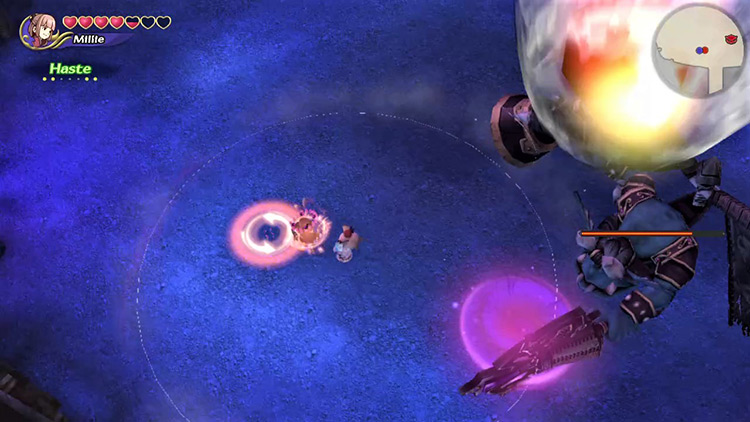
Tip #3: Keep Your Distance
The Orc has two rather fast melee moves:
- Vertical swing with its axe
- Spinning attack hitting the area around it
Due to their high speed, keeping your distance is the only real way to dodge them. That’s why we don’t recommend a melee damage strategy.
Staying relatively far from the boss will usually cause it to cast Meteor repeatedly. This is the perfect opportunity to launch your own spells or go in for a quick combo.
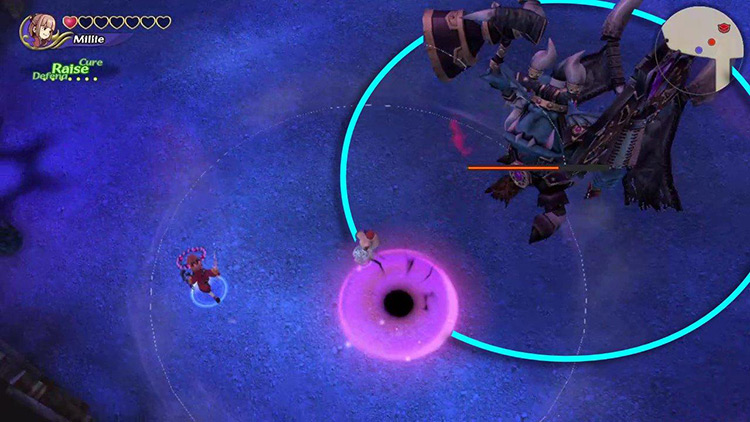
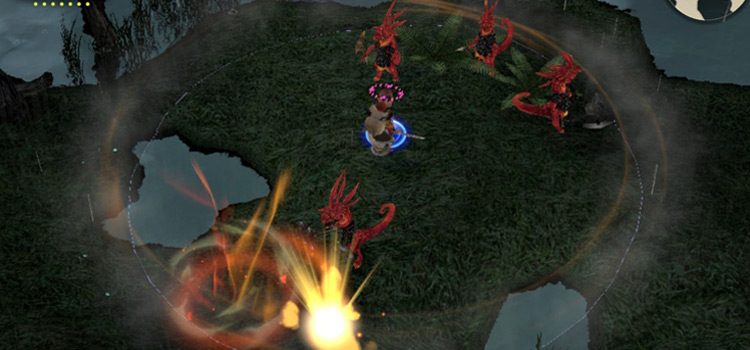
Tip #4: Run from the Self-Destructing Boss
The boss will start a self-destruction sequence when its health is around 15%-20%.
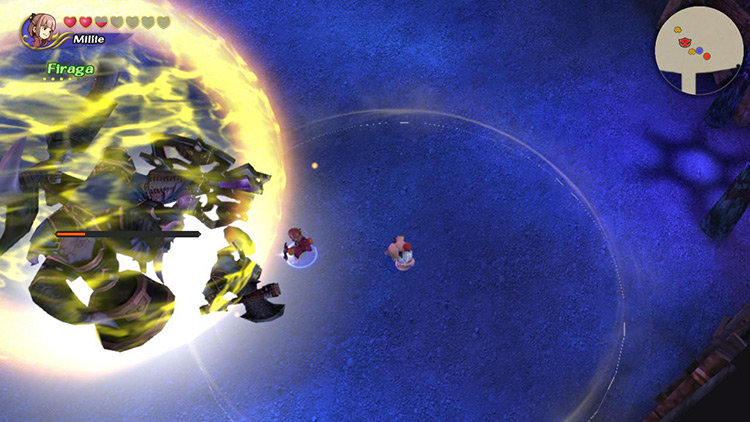
Once you see the Orc Lord become enveloped by a sphere of golden light, you want to run as far away as possible.
When you reach a safe distance, wait for the boss to blow up.
Then congratulate yourself on defeating the Orc Lord.
Obtainable Items
You’ll find Artifacts, crafting Recipes, and Materials throughout the dungeon. You get to keep all Recipes and Materials, but you can only choose one Artifact to take with you.

Chest Items
The following items await in the chests at the Miasma Pit:
| Artifacts | Materials |
|---|---|
| Black Hood Flametongue Galatyn Green Beret Kris Loaded Dice Mage’s Staff Murasame Ring of Cure Ring of Holy Rolf’s Crystal Sasuke’s Blade Silver Bracer Silver Spectacles Stardust Rod Ultimate Pocket Wonder Bangle |
Adamantite Electrum Golden Feather Hard Shell |
Monster Items
Ogres in the Miasma Pit drop:
- Adamantite
- Scarletite
Boss Items
Unlike regular dungeons, the Miasma Pit only has one set of Boss Items you can obtain regardless of your Bonus Points.
- Twilight Weapon (Recipe)
- Dawn Weapon (Recipe)
- Lustrous Bird (Recipe)
- Golden Feather (Material)
These drops will help you obtain powerful Clavat-exclusive equipment to take your Clavat characters to the next level.

-
Final Fantasy Crystal Chronicles Remastered
- Miasma Pit Dungeon Guide + Map (FFCC Remastered)
Related Posts:
 Mine of Cathuriges Dungeon Guide + Map (FFCC Remastered)
 Moonlit Desert Dungeon Guide + Map (FFCC Remastered)
 Foggy Swamp Dungeon Guide + Map (FFCC Remastered)
 Lynari Desert Dungeon Guide + Map (FFCC Remastered)
 Misty Mount Kilanda Dungeon Guide + Map (FFCC Remastered)
 Goblin Festival Dungeon Guide + Map (FFCC Remastered)
 Rainy Ruins Dungeon Guide + Map (FFCC Remastered)
 Frozen Sluice Dungeon Guide + Map (FFCC Remastered)