Misty Mount Kilanda is the high-difficulty version of Mount Kilanda that you’ll unlock after clearing FFCC Remastered’s main campaign.
You can access this bonus dungeon from both sides of the Jegon River and Port Tipa.
Ask the ferryman to take you to Mount Kilanda, and the option to enter Misty Mount Kilanda will appear. The round trip costs 400g.
You can also access this map from the Setting Out Together online multiplayer option in the Main Menu. You’ll be able to challenge this dungeon with friends on these days:
- Mondays
- Weekends (Fri, Sat, Sun)
Note: Single-player dungeons are always available.
It’s also a hot dungeon, so trim Mog’s hair at the Moogle House on the riverbank before sailing to the dungeon.
TABLE OF CONTENTS
- Map
- Walkthrough
- Step #1: Get Thunder Resistance
- Step #2: Cast Blizzard on Goblins to Freeze Them
- Step #3: Power Through with Haste & Blizzara
- Step #4: Collect Four Chests in Area #1
- Step #5: Hunt Down Three Sword-Carriers in Area #2
- Step #6: Defeat Behemoths and Find the Remaining Chests
- Step #7: Enter the Boss Room
- Boss: Red Giant
- Obtainable Items
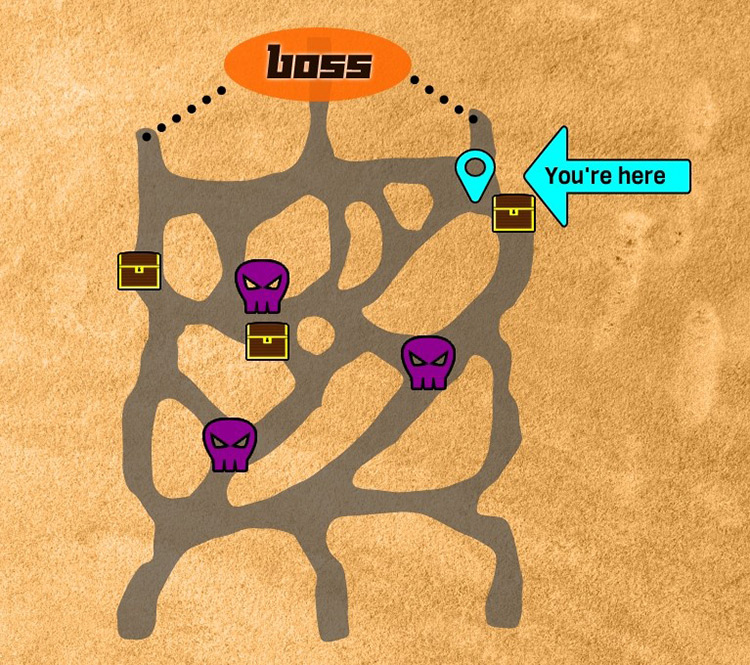
Map

Walkthrough
Step #1: Get Thunder Resistance
Many enemies in Misty Mount Kilanda, such as Goblin Mages and Thunder Bombs, use Thunder-type spells to paralyze the player.
Even the boss has a couple of electrifying moves!
Thunder-resistant equipment is an essential tool in this dungeon. You need to achieve at least +2 Thunder resistance to avoid paralysis.
You can combine a Storm Set (+1) item with the Thunder Badge (+1) or craft something from the Chronicle Set (+2).
Tip: Get the Recipe and all necessary Materials for Chronicle items at Falling Leaves Path.
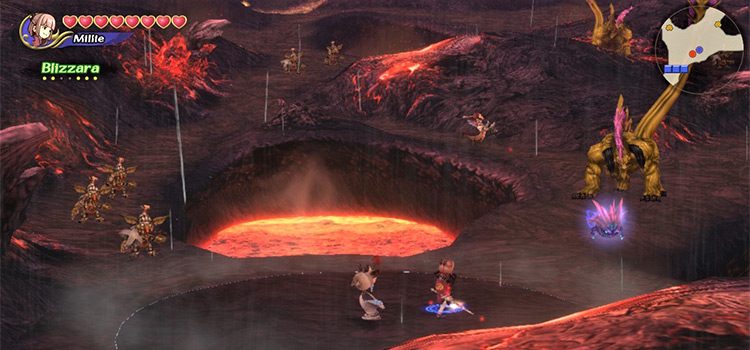
Step #2: Cast Blizzard on Goblins to Freeze Them
Now that you’ve equipped your Thunder-resistant items, it’s time to get going.
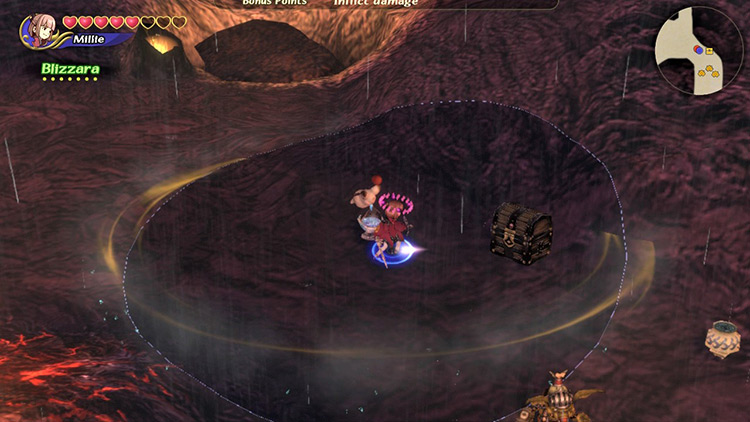
After getting off the ship, collect the two chests immediately north of your location. These chests contain Raise and Cure, respectively.
From there, head northwest up the past guarded by Yellow Goblins.
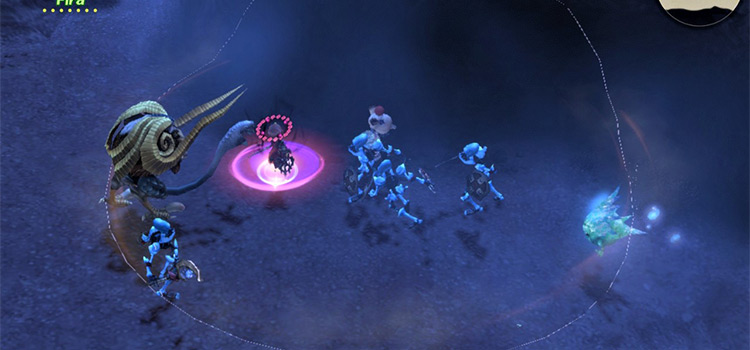
Goblin groups comprise melee bruisers, stone-throwers, and mages.
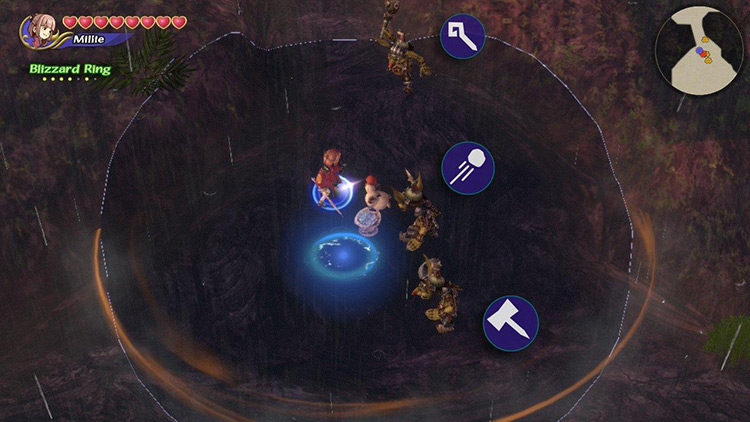
Goblin Mages are especially dangerous as they cast both Thundara and Thundaga.
Tip: Thundara can deal more damage despite being faster to cast than Thundaga.
Thunder resistance protects you from becoming paralyzed, but you’ll still take some damage. Watch out!
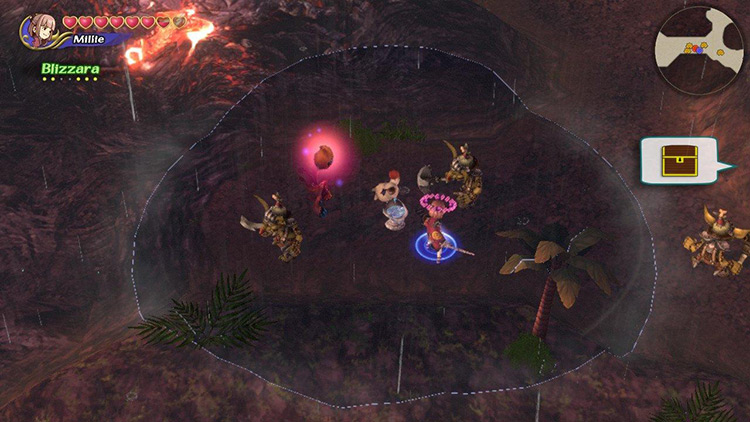
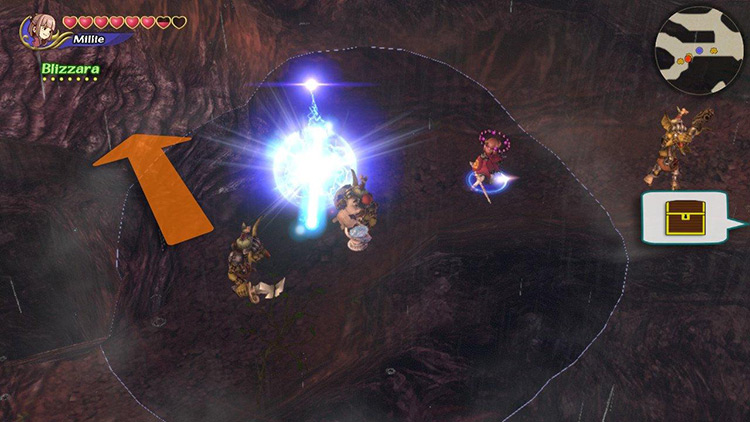
Use your Blizzard Ring (which you should have by now) and cast Blizzard on these Goblins to freeze them. This makes it much easier to deal with the crowd.
Step #3: Power Through with Haste & Blizzara
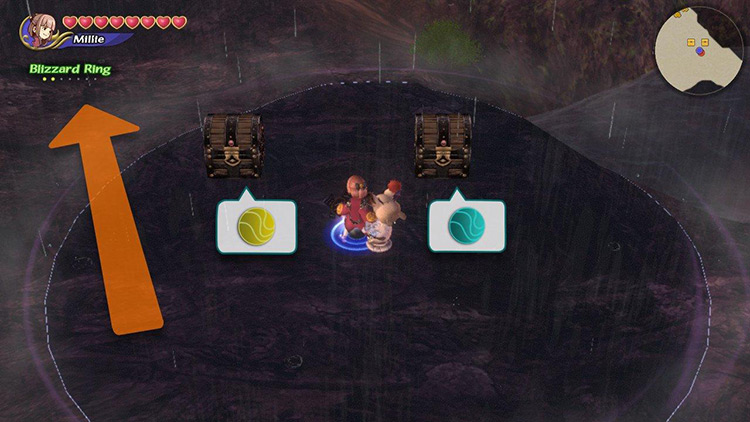
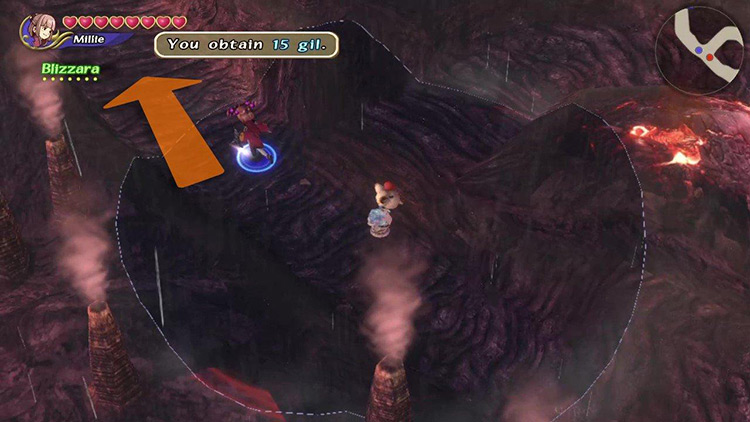
The first Goblin group will drop Blizzard, Raise, and Cure.
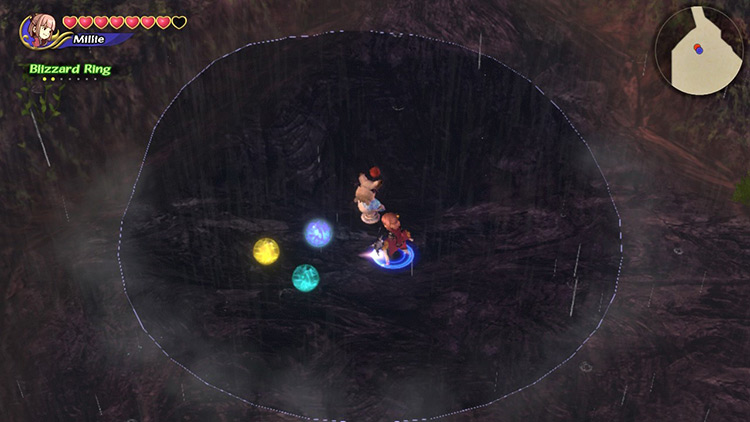
With this, you should be able to create both Haste and Blizzara in your Command List.
Tip: Create Haste by fusing Raise + Cure + Cure.
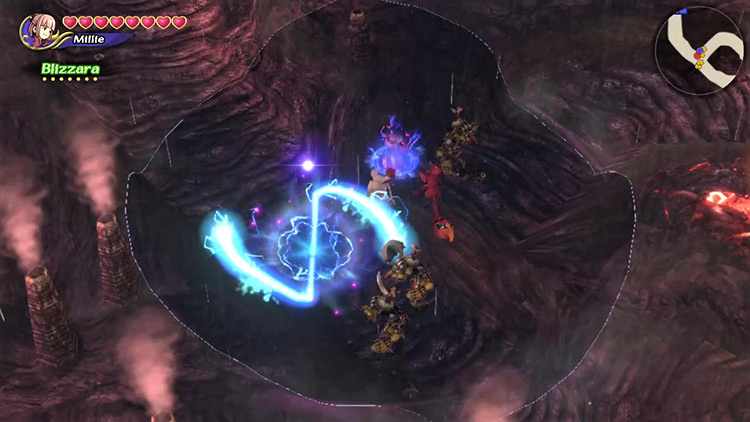
Blizzara is powerful enough to freeze even the strongest enemies in the dungeon: Behemoths.
Haste lets you cast it super fast.
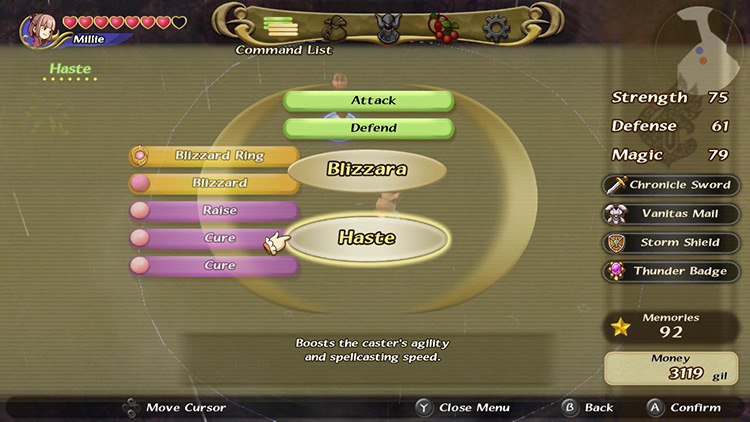
Together they might occupy most of your Command List, but it’s worth it.
Whenever you need to heal, just split up Haste in your Command List to gain access to Raise and Cure.
Tip: Alternatively, stock up on your favorite foodstuffs and heal from the Pause Menu.
Step #4: Collect Four Chests in Area #1
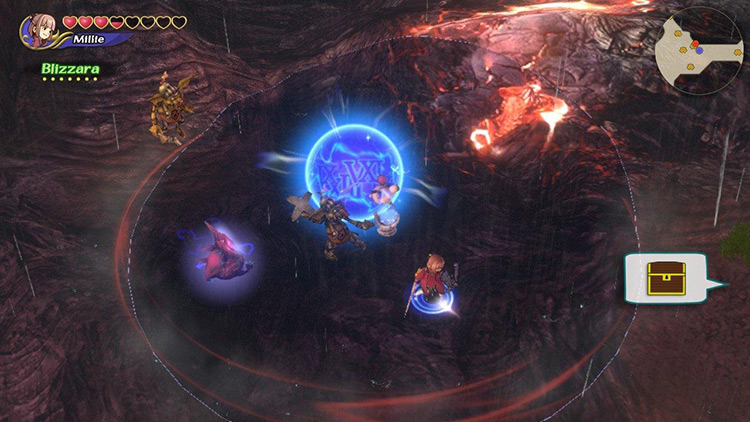
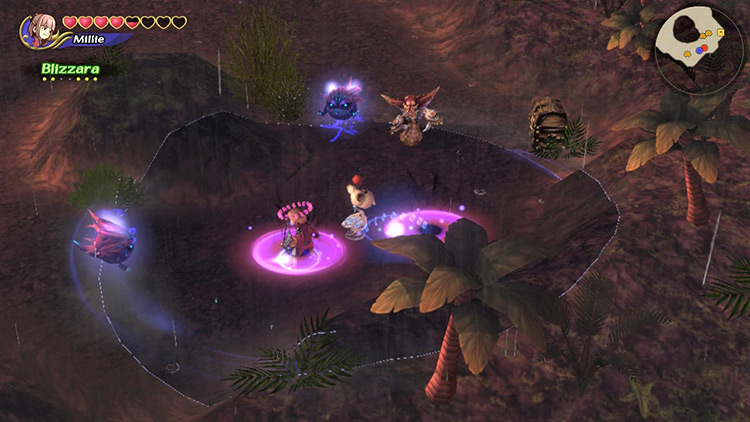
Use the Blizzara + Haste strategy to deal with the enemies further ahead.
Blizzara can’t freeze Lamias, but they won’t last more than two or three direct hits from this spell.
Tip: Casting Haste on yourself will erase the effects of the Lamia’s Slow spell and vice versa.
Go right at the first opportunity to get a chest. Watch out for nearby enemies.
Watch out for Goblins as you advance eastward.
A Lava Mu is also waiting to pop out of the ground. Freeze ‘em with Blizzara.
Tip: Lava Mu look awesome with that Flame Bomb face on their tail, but otherwise, they’re like any other Mu.
Keep going eastward to find a chest protected by a Lamia and two Thunder Bombs. It contains a valuable Material.
Then return to the last fork and go north.
Defeat the Thunder Bomb near the sign and turn left to collect a couple of chests.
A Lava Mu will cut you off from behind as you advance through the tight road. There’s also a Lamia further ahead. Defeat them before approaching the chests at the end of the road.
And watch out for a Lava Mu ambush right beside the chests.
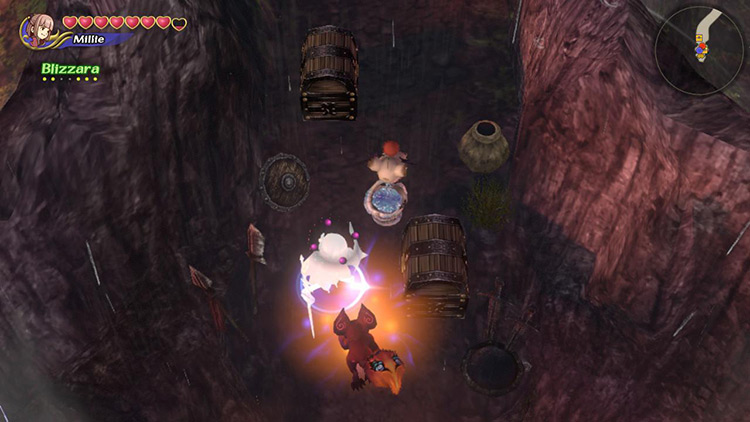
Open these chests to obtain a couple of Artifacts.
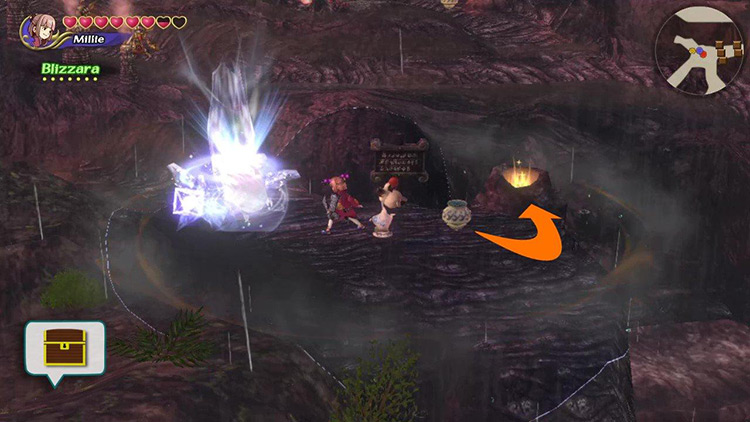
After that, return to the sign next to the shiny fire pit. You must throw the nearby water pot into this shiny pit to raise a bridge to the right.
Do it and cross the bridge.
A group of Goblins will attack you. Defeat them and keep going east toward another chest.
Another Lamia + 2 Thunder Bombs combo protects this chest. Defeat them and collect the Material inside.
After that, return to the crossroads where you fought the Goblins and then walk west, defeating some enemies on the way.
This will take you to the westernmost passage into Area #2.
There are three passages like this, but this one is ideal for easily carrying out the next step.
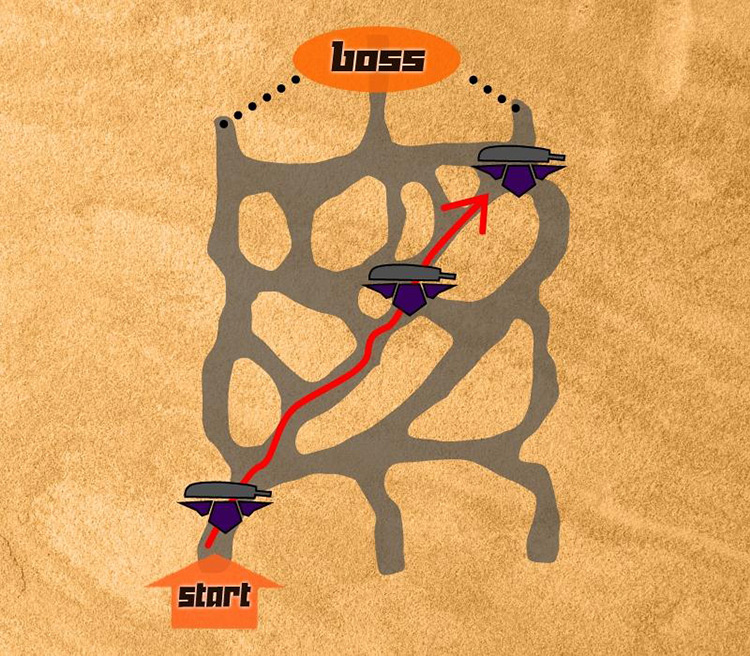
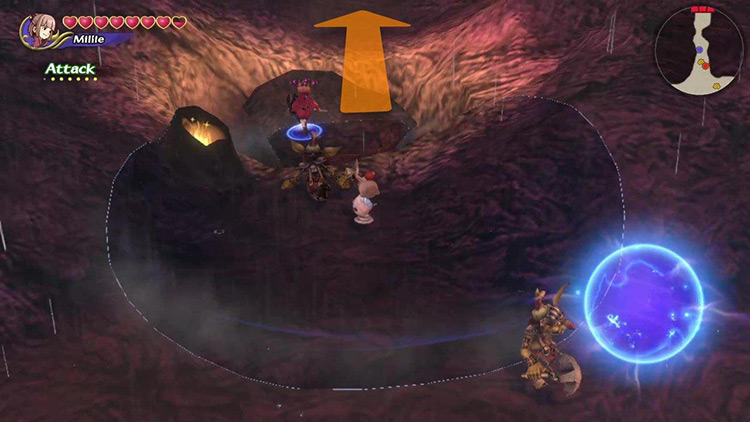
Step #5: Hunt Down Three Sword-Carriers in Area #2
Entering Area #2, you’ll immediately notice a Goblin carrying a giant sword up the mountain.
There are three of these Goblins, and we need to stop them from reaching the mountaintop to weaken the boss.
Here’s how:
Cast Haste on yourself, then give chase to this Goblin, ignoring all enemies around you. Just one hit is enough for the Goblin to drop the sword.
Keep running to the northeast until you intercept the second Goblin halfway up the mountain.
Follow the escaping Goblin as it runs to the northeast. This should lead you to the easternmost entrance to the boss room.
Then just wait for the last Goblin to make it there and make it drop the sword.
Congrats!
The boss battle will now be substantially easier thanks to your efforts.
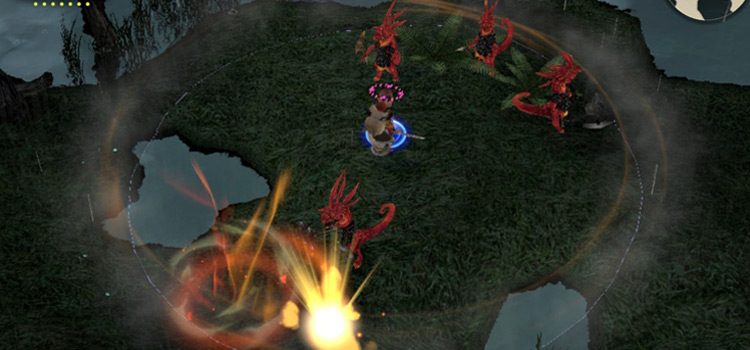
Step #6: Defeat Behemoths and Find the Remaining Chests
There’s a chest just slightly south of your location here. Open it!
Including the chest you just collected, there are:
- Three chests with money and Materials
- Three Behemoths who drop money and Materials
Use the map to orient yourself on your hunt:
Behemoths can be frozen with Blizzara, and their electrifying horn slash move won’t affect you, thanks to the Thunder resistance. It should be relatively easy to kill them.
Tip: Make sure to kill any Thunder Bombs in your way, as most of them drop Phoenix Downs.
Take it easy, taking on every enemy on your way individually, and you’ll be done in no time.
Step #7: Enter the Boss Room
Once you’ve collected everything, start walking north up the mountain.
Eventually you’ll reach one of the three boss room entrances. There are two boss rooms on each northern corner of the map, and another boss room in the middle.
You may need to throw a water pot in the nearby fire pit to raise a bridge, but most of the time, the bridges have risen by themselves.
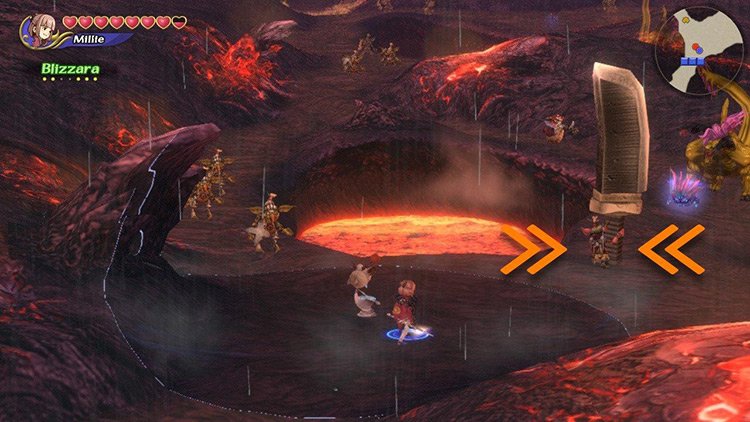
So cross into the boss room and prepare to battle the Red Giant.
Boss: Red Giant
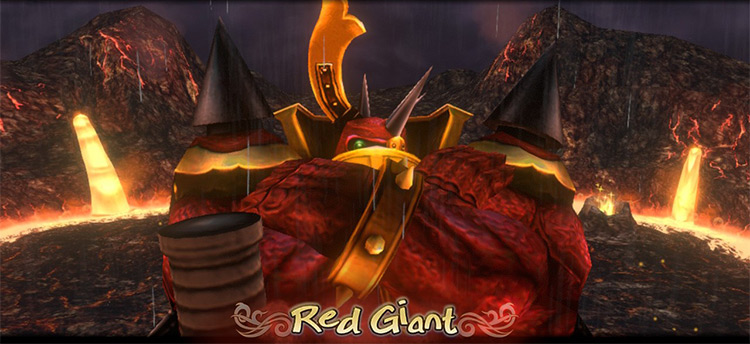
The Red Giant and its Behemoth minion look menacing, but they’re manageable with the right strategy.
Here are some tips to make it easier.
Tip #1: Boss and Minions are Weak to Blizzard
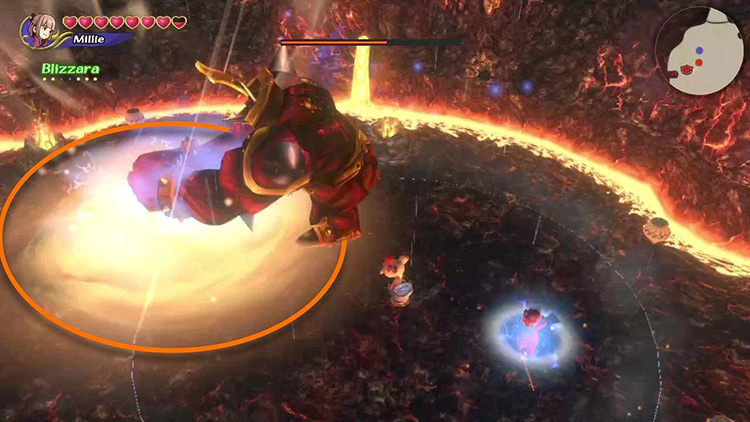
Both the Red Giant and the Behemoth minions are weak to Blizzard.
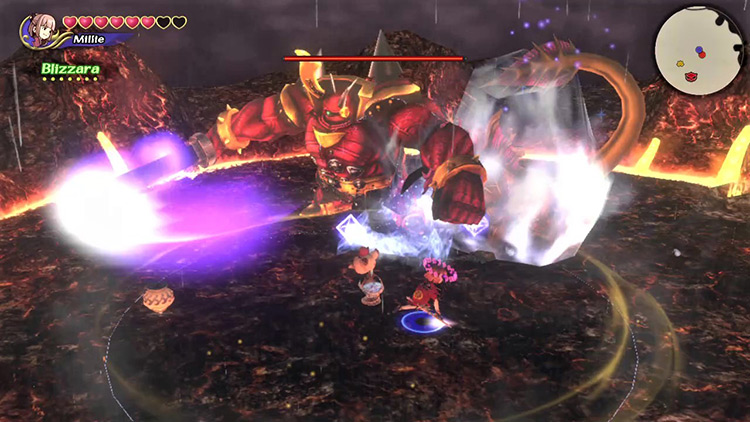
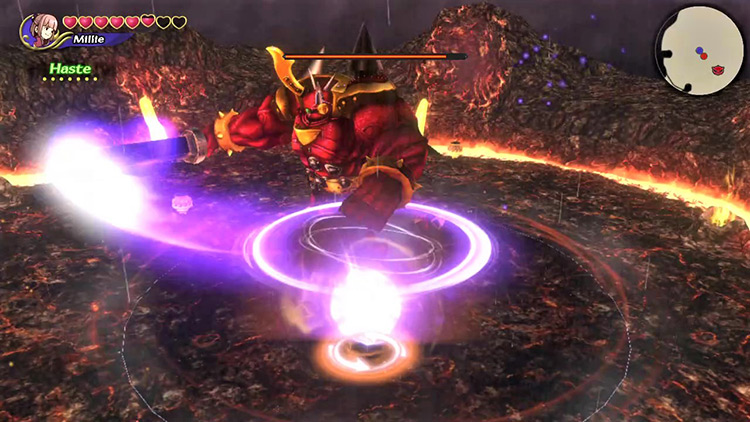
Use Blizzara’s wide area of effect to freeze the Behemoth and damage the boss at the same time. It remains the best option for damage after defeating the Behemoth.
Even if you’re playing a Lilty with log MAG, keep Blizzard in your Command List to freeze the Behemoth.
Don’t forget to cast Haste too. It’ll make launching these spells a lot faster.
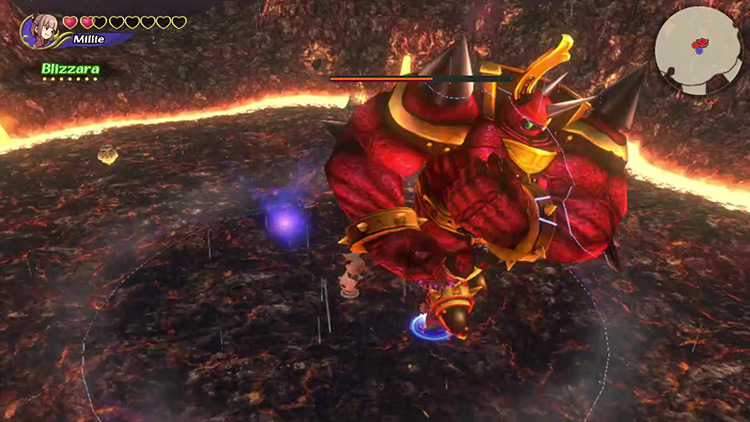
Tip #2: Stay Close to the Boss
The Red Giant is more dangerous at a distance than at a close range.
If you keep your distance, it’ll shoot fast whirlwinds from its sword. These are rather fast and hard to dodge. They also deal a lot of damage.
On the other hand, it favors slower moves at close range.
The vertical swing is especially easy to dodge. Just take a couple of steps to the side when you see it start raising its sword, and you’re golden.
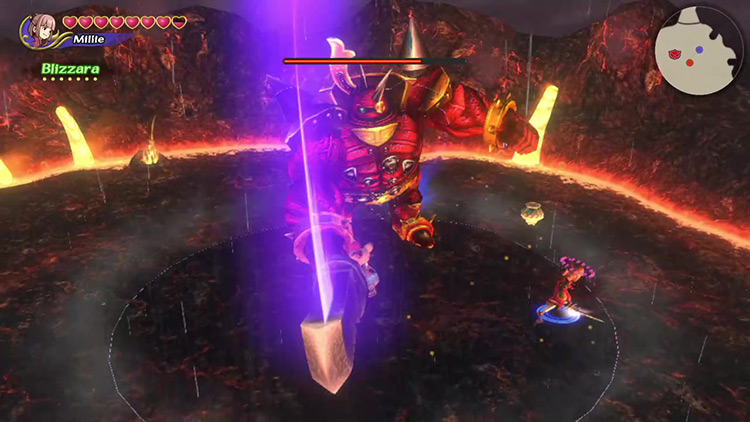
Take this chance to cast spells or go in for a melee combo.
The horizontal slash is harder to dodge, but it’s possible if you react quickly and run behind the boss.
Tip #3: Watch Out for any Lost Swords
After a while, the boss’s sword will break from overuse.
Depending on how many sword-hauling Goblins you managed to stop from reaching the mountaintop, it’ll be able to replace this sword one, two, or three times.
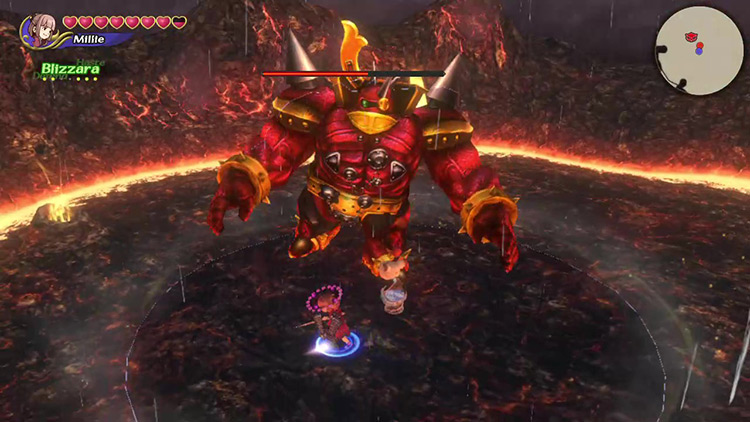
If you got all of the Goblins then the sword can’t be replaced.
But the new swords also change the Red Giant’s move pool too. Its new moves include:
- An electrifying ground pound with a wide area of effect. It can paralyze you without Thunder resistance.
- An almost instantaneous spell that sends four Thunder balls spinning around.
- A very slow, easy-to-avoid tackle.
The Red Giant will favor the ground pound if you stay close to it. It’s powerful but well-telegraphed, so dodging it is easy.
Just don’t underestimate its range.
The best direction to run away is usually around and behind the boss, but it depends on where you’re standing when the move begins.
Tip #4: Attack During Tackle Move
The Red Giant’s most harmless move is the tackle.
It will walk slowly away from the player toward the arena’s edge, then run straight at you. Just get out of the way to dodge it.
This slow and easily-dodged move gives you plenty of time to heal, deal with any Behemoths, or just cast a couple of spells on the Red Giant.
Tip #5: Ignore the Fire Pits
You’ll notice several shiny fire pits and water pots around the boss arena.
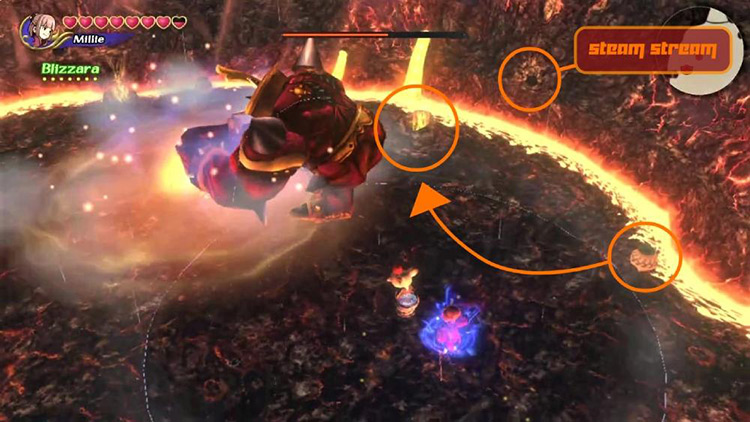
Throwing the water pot into the fire pit will cause a stream of damaging steam to come gushing out of the volcanic rock wall.
It looks pretty cool, but it’s not very powerful. The time spent luring the boss to your trap and activating it would be better spent healing or casting spells.
Keep it simple!
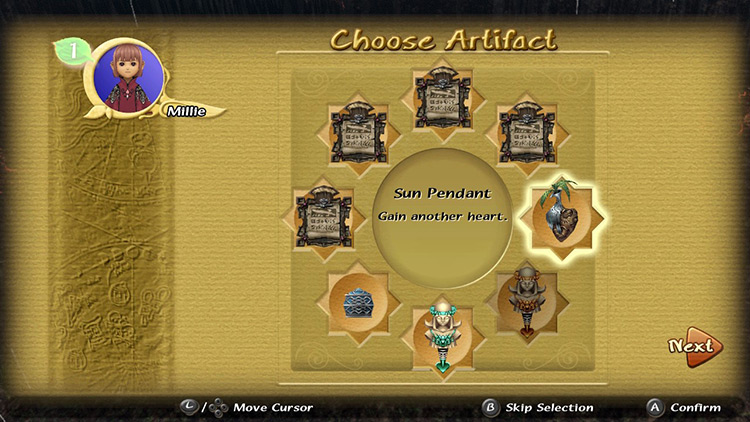
Obtainable Items
You’ll find Artifacts, crafting Recipes, and Materials throughout the dungeon. You get to keep all Recipes and Materials, but you can only choose one Artifact to take with you.
Chest Items
The following items await in the chests at Misty Mount Kilanda:
| Artifacts | Materials |
|---|---|
| Book of Light Buckler Chicken Knife Drill Flametongue Giant’s Glove Green Beret Heavy Armband Knoc’s Crystal (Mem. Crystal) Main Gauche Masamune Onion Sword Ring of Fire Ring of Gravity Royal Crown Sun Pendant Teddy Bear Twisted Headband Wonder Wand |
Abyss Eye Electrum |
Monster Items
Golden Behemoths in the Misty Mount Kilanda drop:
- Adamantite (Material)
- Regal Horn (Material)
Boss Items
Unlike regular dungeons, the Misty Mount Kilanda only has one set of Boss Items you can obtain regardless of your Bonus Points.
- Smoldering Weapon (Recipe)
- Gelid Weapon (Recipe)
- Storm Weapon (Recipe)
- Lustrous Sallet (Recipe)
These drops will help you obtain Yuke-specific equipment that’ll make future attempts at this and other dungeons much easier.

-
Final Fantasy Crystal Chronicles Remastered
- Misty Mount Kilanda Dungeon Guide + Map (FFCC Remastered)
Related Posts:
 Mt. Kilanda Dungeon Guide + Map (FFCC Remastered)
 Goblin Wall Dungeon Guide + Map (FFCC Remastered)
 Goblin Festival Dungeon Guide + Map (FFCC Remastered)
 Moonlit Desert Dungeon Guide + Map (FFCC Remastered)
 Foggy Swamp Dungeon Guide + Map (FFCC Remastered)
 Lynari Desert Dungeon Guide + Map (FFCC Remastered)
 Rebena Te Ra Dungeon Guide + Map (FFCC Remastered)
 Conall Curach Dungeon Guide + Map (FFCC Remastered)