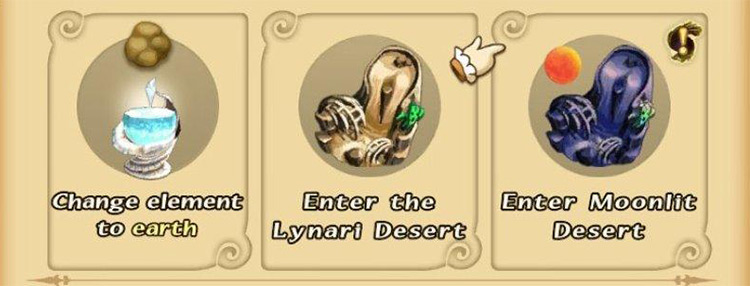
Moonlit Desert is the high-difficulty version of Lynari Desert. You can unlock it after clearing Final Fantasy Crystal Chronicles Remastered’s main campaign.
The Moonlit Desert is accessible from Lynari Desert’s location next to Leuda at the Lynari Isles. You can reach Leuda by boarding a ship at the Jegon River or Port Tipa.
You can also access this map through the Setting Out Together online multiplayer option in the Main Menu. You’ll be able to challenge this dungeon with friends on these days:
- Wednesdays
- Weekends (Fri, Sat, Sun)
Note: Single-player dungeons are always available.
Let’s check out each detail of this dungeon step-by-step.
TABLE OF CONTENTS
- Map
- Walkthrough
- Step #1: Get Blizzard Resistance
- Step #2: Obtain Essential Magicites (Raise, Cure, Fire)
- Step #3: Use Haste + Fira to Dominate Enemies
- Step #4: Hunt Down Chests & Cactuar for Treasure
- Step #5: Use Quicksand Pit D to Reach Area #2
- Step #6: Collect Chests Next to Breakable Cacti
- Step #7: Dig Up the Boss
- Boss: Antlion (High Difficulty)
- Obtainable Items
Map
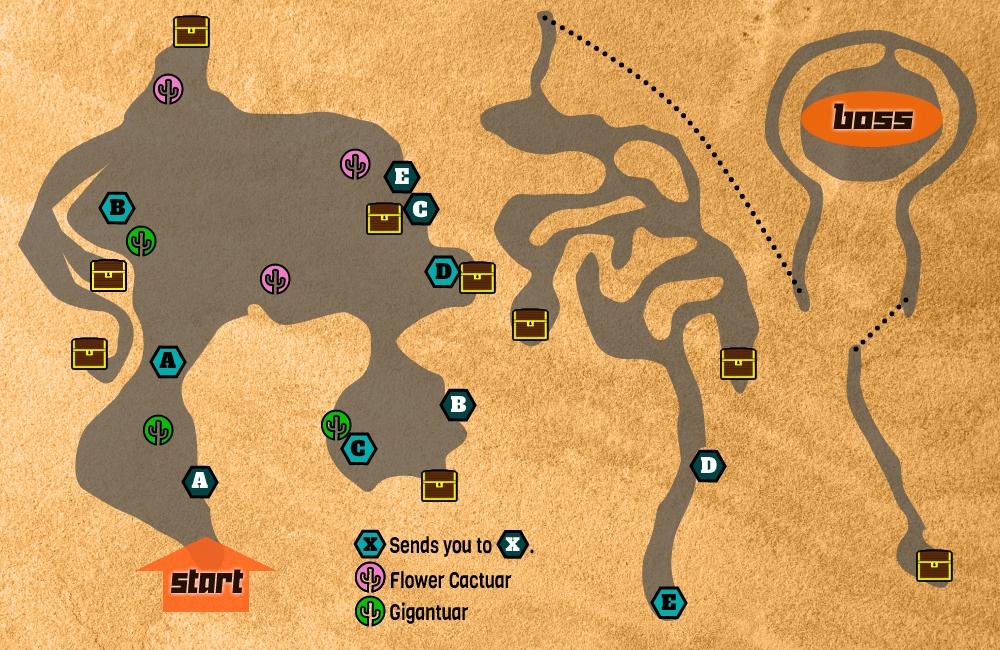
Walkthrough
Step #1: Get Blizzard Resistance
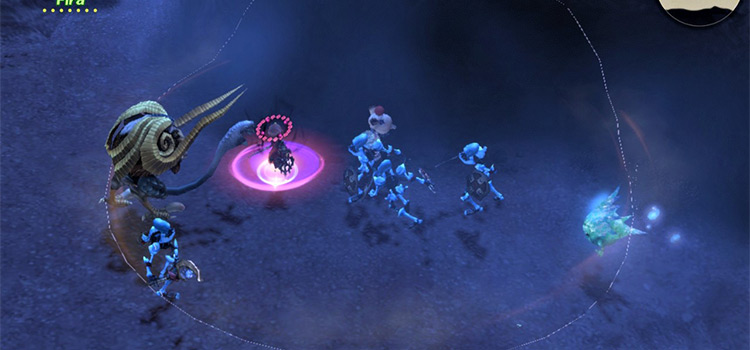
Many enemies in the Moonlit Desert rely on Blizzara and Blizzaga to freeze caravaners.
Getting frozen in a dungeon with so many strong enemies is a recipe for disaster, so bringing Blizzard-resistant equipment is necessary.
You need Blizzard resistance +2 to avoid freezing effects. This can be achieved by wearing two items from the Frost set (+1) or any one item from the Acies set (+2).
Tip: You can get the Recipes and required materials for Acies armor at Oblivion Village.
Step #2: Obtain Essential Magicites (Raise, Cure, Fire)
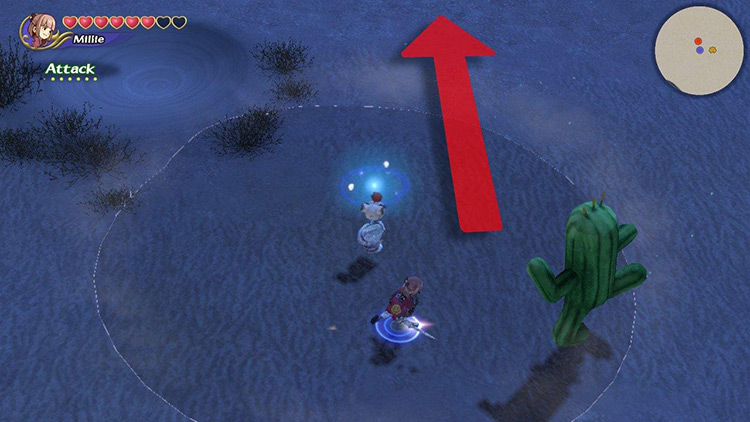
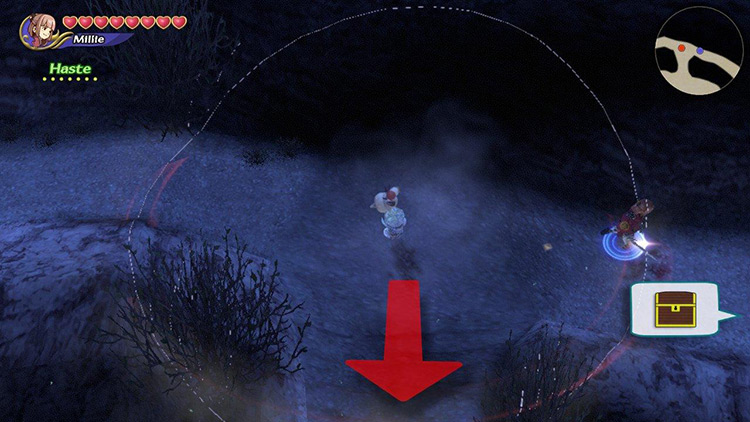
To get started, open the chest right in front of you as you enter the Moonlit Desert. It should contain a Cure magicite.
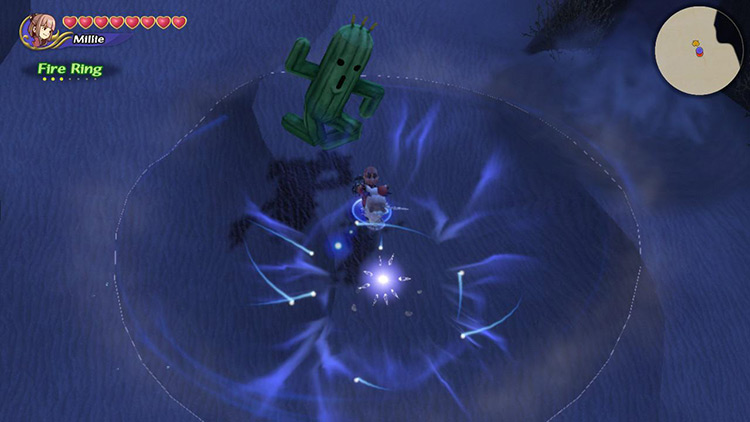
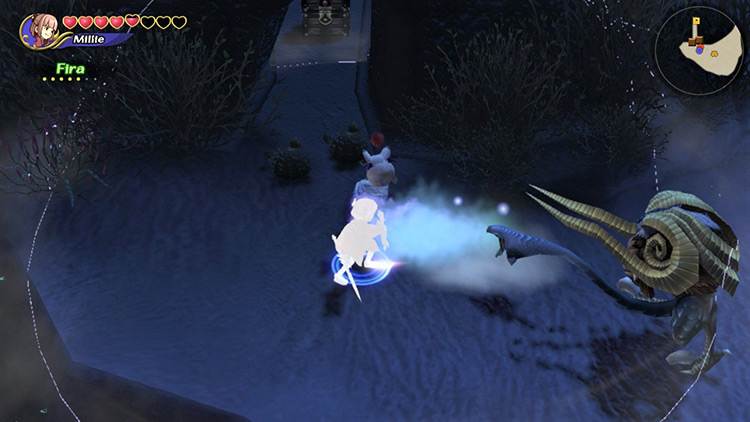
Then keep going northward and brace for combat against a Gigantuar.
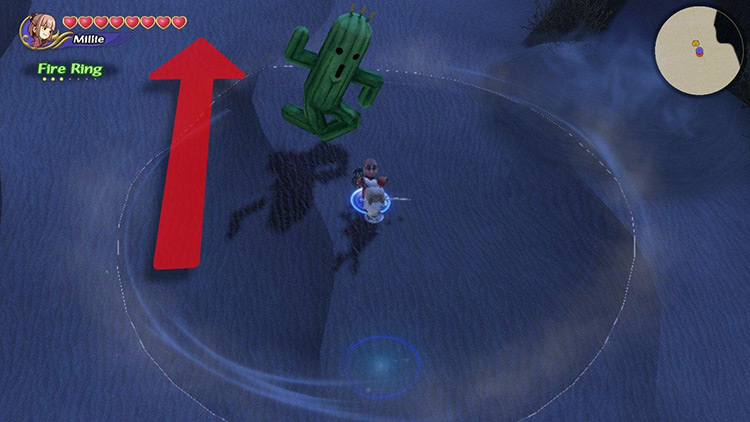
These enemies rely on casting Blizzaga to deal damage. Fire is the most efficient way to take care of them.
Tip: You’ll find several Gigantuars throughout the dungeon. Make sure to defeat them to get valuable Recipes and Materials.
Some Scorpions will pop out of the ground a little bit further ahead. Fire remains a good option, but melee works just as well.
These enemies can poison you, but they don’t deal that much direct damage.
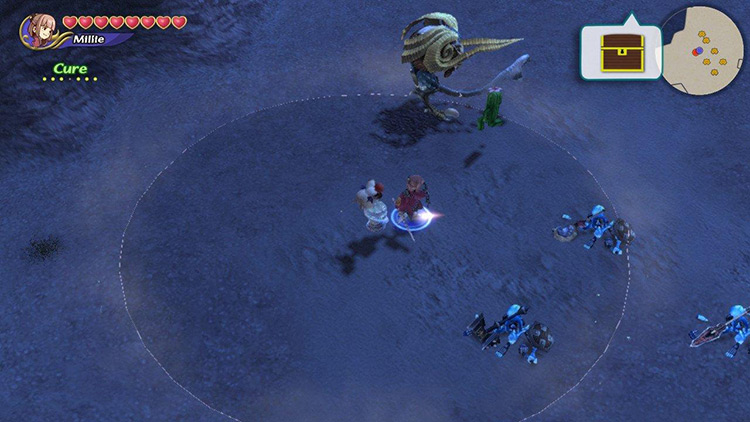
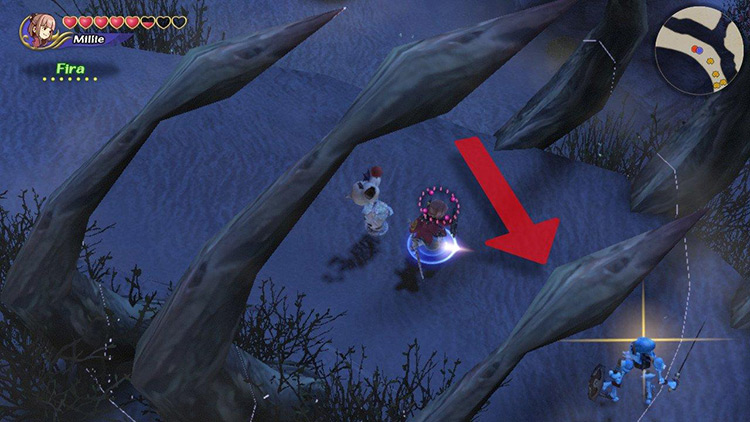
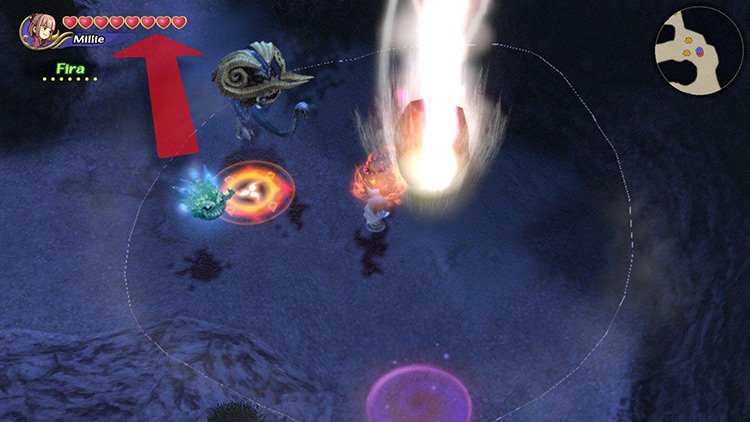
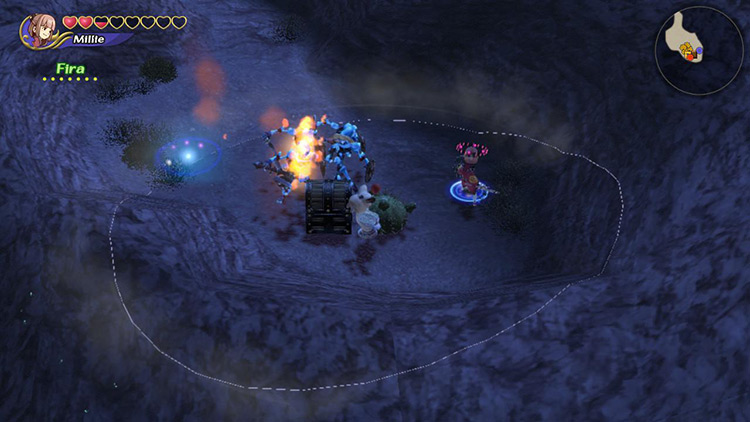
Continue moving northward until you find a Quicksand Pit surrounded by four Skeletons.
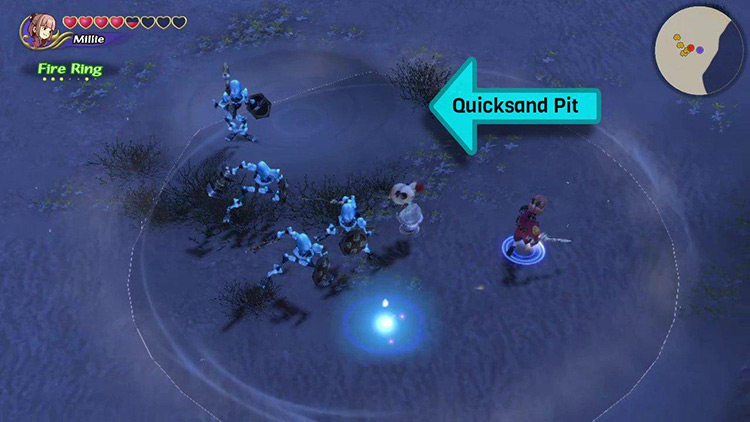
These enemies move fast and hit hard. They’re vulnerable to Fire, so use that to your advantage.
Tip: Lure the first two Skeletons to notice you far away from their friends before attacking them to buy yourself some time before reinforcements arrive.
These enemies will drop four magicites for you:
- Raise
- Cure
- Clear
- And an elemental spell
Step #3: Use Haste + Fira to Dominate Enemies
Hopefully one of those enemies dropped a Fire magicite for you.
If so, you should have all the necessary stones to fuse Haste and Fira in your Command List.
Tip: Create Haste by fusing Raise + Cure + Cure in that order.
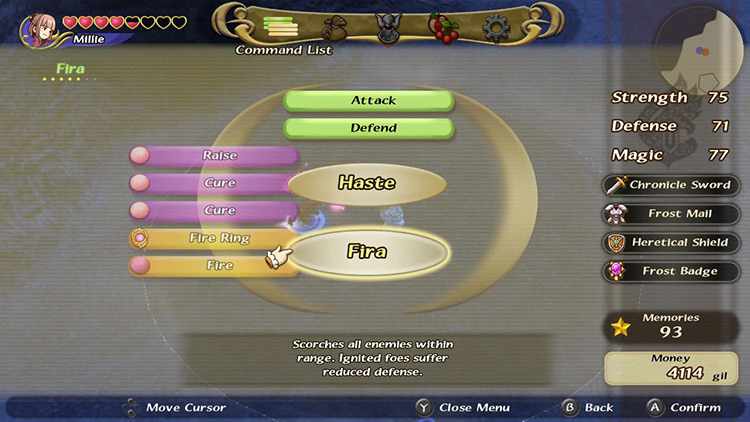
Fira is the most potent spell against local enemies, especially the Skeletons. It’s also the best spell to use against the boss.
On the other hand, Haste is necessary for a dungeon packed full of fast monsters like Cactuar and Skeletons. The boss is pretty quick as well.
If you didn’t get a Fire magicite, fuse Haste and keep going until another Skeleton crew drops it for you.
Step #4: Hunt Down Chests & Cactuar for Treasure
Now we’ll go around the desert collecting chests and hunting down strong monsters for their drops. Feel free to skip this step if you only care about clearing the level.
But for the chests, go northwest from the Quicksand Pit we just fought the Skeletons at.
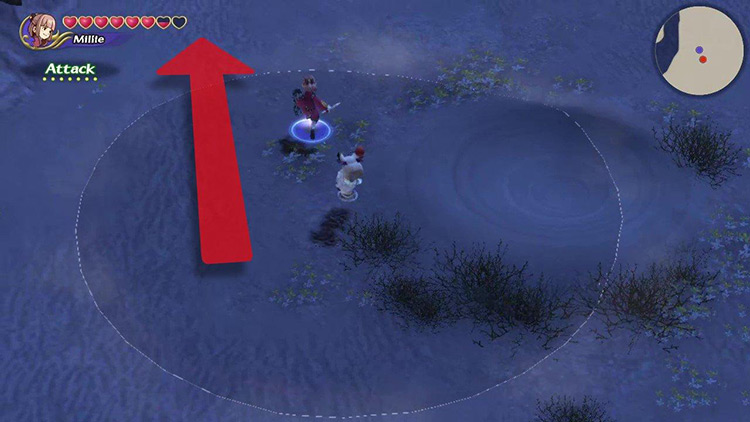
Follow the cliff’s edge until you run into a Gigantuar close to another Quicksand Pit.
Defeat it and continue moving northward.
Many enemies lie ahead, including a Chimera, a Skeleton squad, and a Flower Cactuar.
Tip: They won’t become aggressive at the same time. If one notices you before the rest, try to lure them away and fight one-on-one before coming back for the rest.
Flower Cactuar are swift. Their most dangerous moves include the needle shower and casting Blizzara nigh-instantaneously. This is where Haste becomes a necessity.
There are a couple more Chimera further north. Defeat them and keep going to find a chest containing a valuable Material.
From here, follow the western wall southward. You’ll fight through a Skeleton squad and a Chimera before reaching a second Skeleton crew.
Defeat them and any Scorpions that pop out of the ground, then start moving eastward.
Follow the wall until you find a chest containing a Material.
After that, go back to where we fought the last Skeleton crew and turn to go southward.
Some Scorpions and a Chimera will attack you before reaching a giant monster ribcage. Defeat them and keep going.
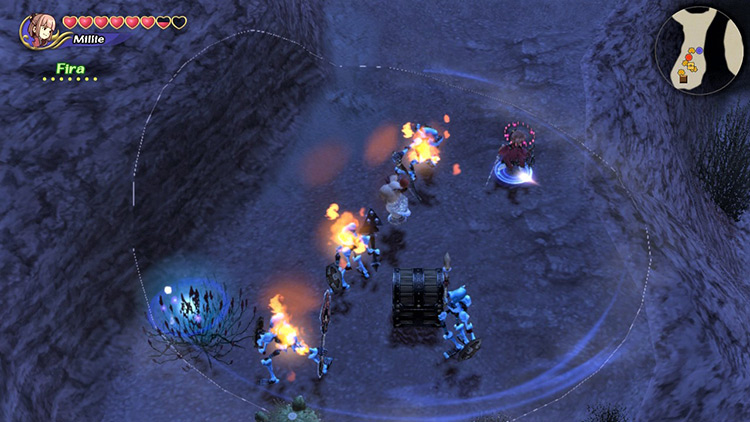
A bunch of Skeletons will then ambush you as you walk under the big ribcage.
Defeat the skeletons and keep going.
Finally, a Chimera guards a chest inside a small cave at the end of the road.
Defeat the Chimera, collect all valuables, then return to the last Quicksand Pit where we fought the Gigantuar.
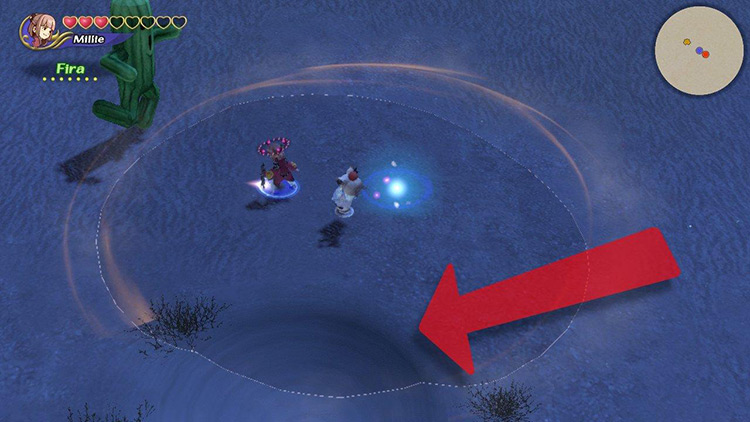
Once you get there, let yourself be swallowed by the sand.
You’ll turn up on the opposite corner of the desert (southeast). This tunnel is marked as B on our map.
Tip: Using these underground tunnels to move around counts as a checkpoint.
Head south as you come out of the sand and brace for combat against a Chimera.
Defeat it and keep going to find a chest protected by a Skeleton squad. Take care of the enemies and collect the Artifact in the chest.
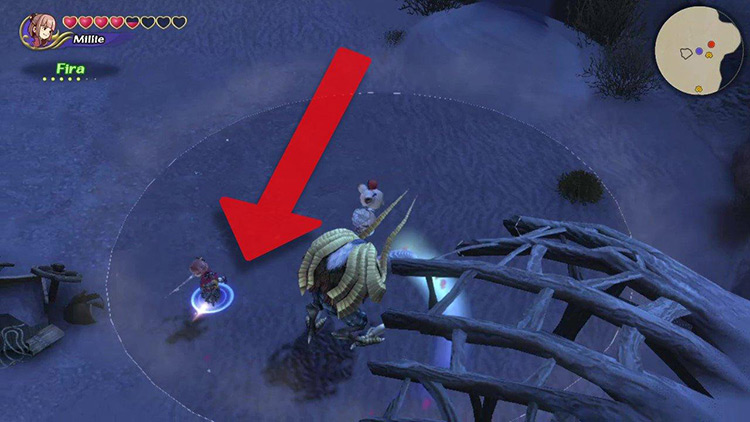
Go left from here. You’ll eventually reach Quicksand Pit C and a Gigantuar further ahead.
Defeat the Gigantuar and collect any valuables before jumping into the pit.
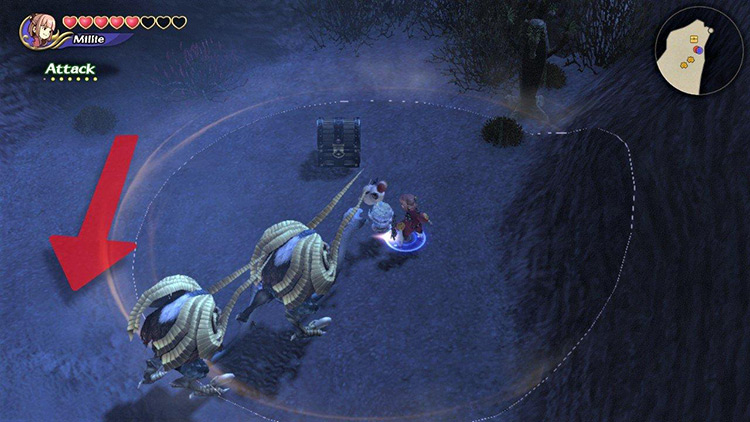
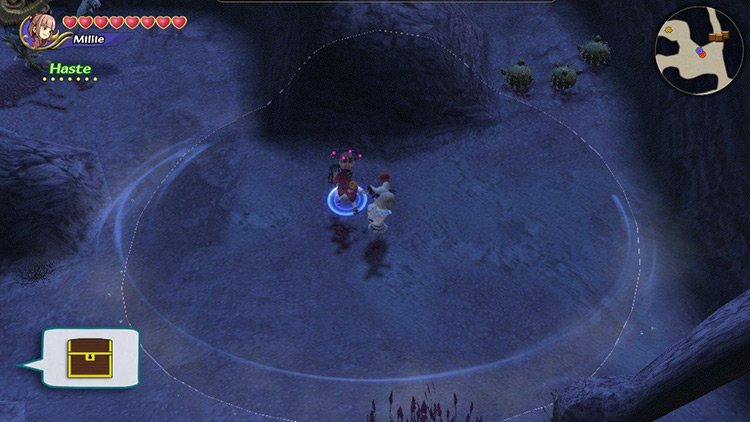
You’ll notice a chest protected by a Skeleton squad a few steps north of where you pop out.
There’s an Artifact in the chest, so get it.
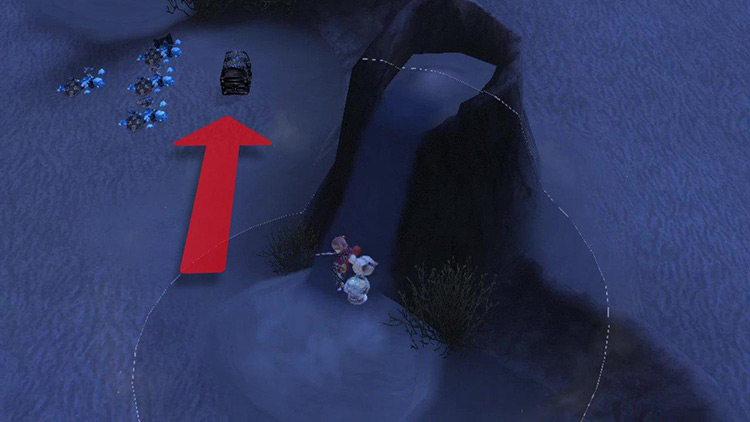
Tip: It’s possible to open the chest without alerting the Skeletons. Just approach from the south, hugging the right-side wall, as depicted in the image.
There are some Flower Cactuar and a Gigantuar still roaming around the desert. Use our map to orient yourself as you hunt them down.
Step #5: Use Quicksand Pit D to Reach Area #2
Quicksand Pit D lies just a few meters south of the last Sand Pillar you popped out of (C).
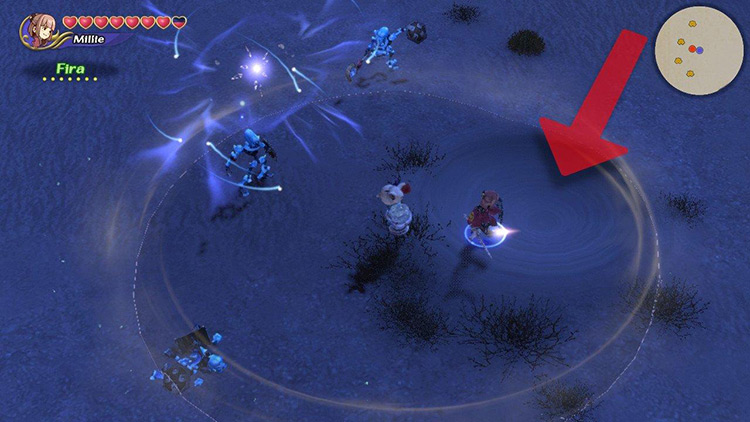
Some Skeletons guard it but feel free to ignore them and jump into the pit.
This will take you to a separate area. From here, you can run down to find the way back to the desert or move north to keep advancing into the dungeon.
Step #6: Collect Chests Next to Breakable Cacti
Remember the breakable cacti that could contain treasure in the Lynari Desert? Now there’s a chest next to each of these cacti.
We’ll be hunting those down before tackling the boss.
Start moving north from Tunnel D’s exit and brace for combat against a Chimera.
You’ll run into a Skeleton squad further ahead, just before the first fork in the road.

Defeat the Skeletons and go up the right-hand path, destroying any cacti in your way.
Then turn southward as you exit the narrow walkway. You’ll quickly run into a Skeleton squad protecting a chest.
Defeat them and claim the Material in the chest. Then start moving northward.
You’ll be attacked by a Frost Bomb and a Chimera.
Defeat them before going up the narrow path the Chimera came from. Watch out for a Skeleton crew.
Take a left at the earliest opportunity to get the last chest in this area.
Fight through a Chimera and break a cacti barrier before turning southward. Here, you’ll find the chest protected by a Skeleton squad.
Defeat them, collect all valuables (including the Artifact from the chest) and then return to the last fork in the road.
At that fork, break through the cacti barrier that’s blocking your way up the northeastern road.
Then keep heading up this road; you’ll find many enemies, including a Chimera, a Skeleton squad, and a Frost Bomb.
Fight them or run past them into Area #3.
Either way, follow the only path available until it splits. The southward path leads to the boss, but we’ll keep going eastward to find the last chest in the dungeon.
Keep going down this road, crossing into a new area.
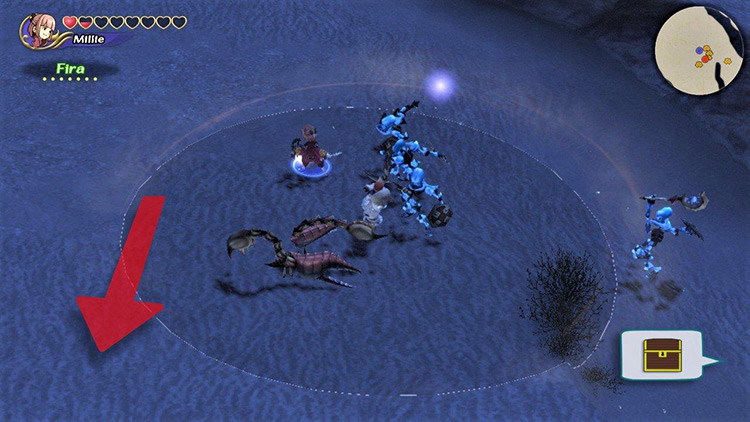
A Skeleton Squad and a Frost Bomb protect the chest at the end of it.
Defeat the enemies here, collect the Artifact from the chest, then return to the boss area entrance.
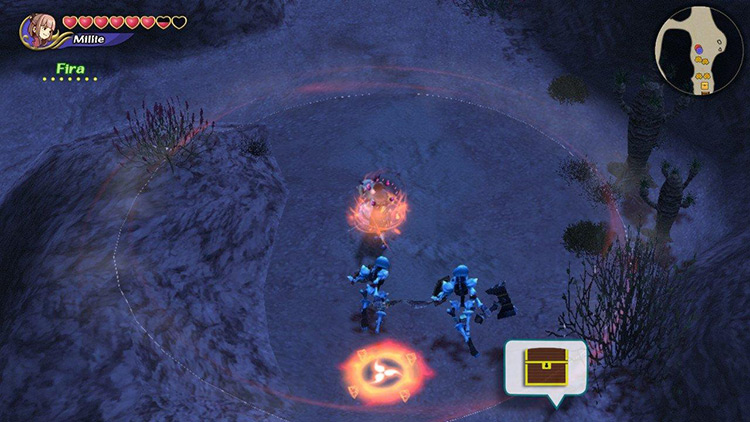
Step #7: Dig Up the Boss
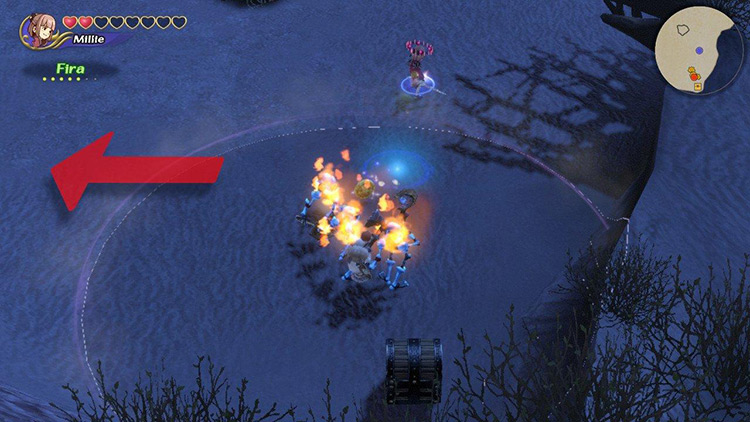
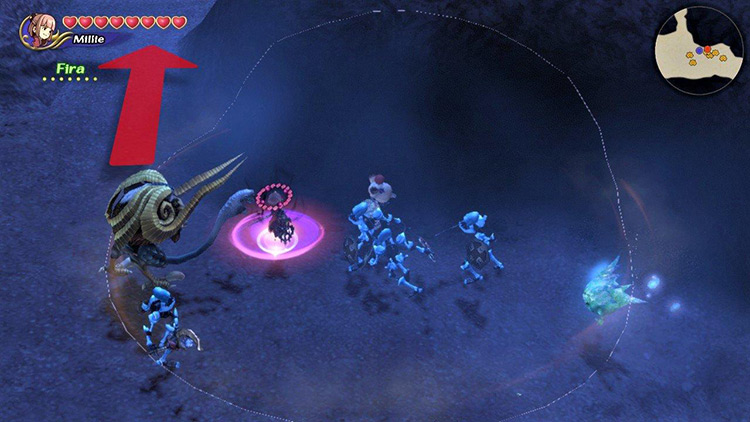
You’ll have to fight through three waves of increasingly large Cactuars to summon the boss.
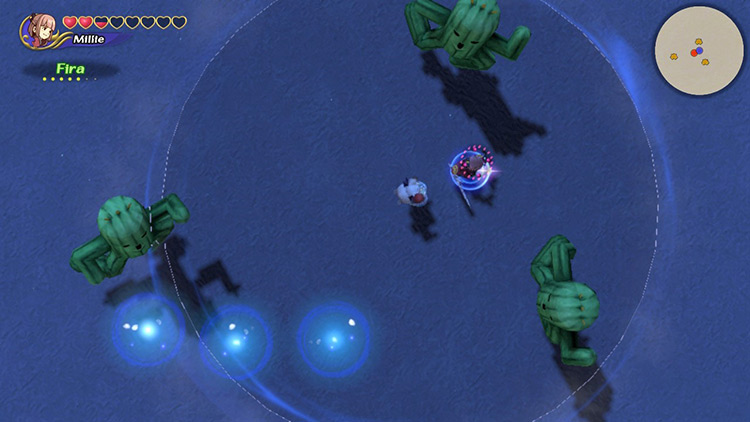
These waves are:
- Three Tiny Cactuars
- Three Cactuars
- Three Gigantuars
With each wave you beat, some sand drains from the arena. Fira or Firaga should make short work of them.
Tip: Remember to cast Haste on yourself! It’s a very uphill battle without a speed boost.
Boss: Antlion (High Difficulty)
The Antlion has more or less the same moves as its Lynari Desert counterpart, but now it moves faster and deals more damage.
These tips should make the fight a bit easier:
Tip #1: Defeat the Cactuar Assistant
The Antlion spawns with a Flower Cactuar to help it win the battle.
Both enemies are speedy, making it hard to deal with them simultaneously.
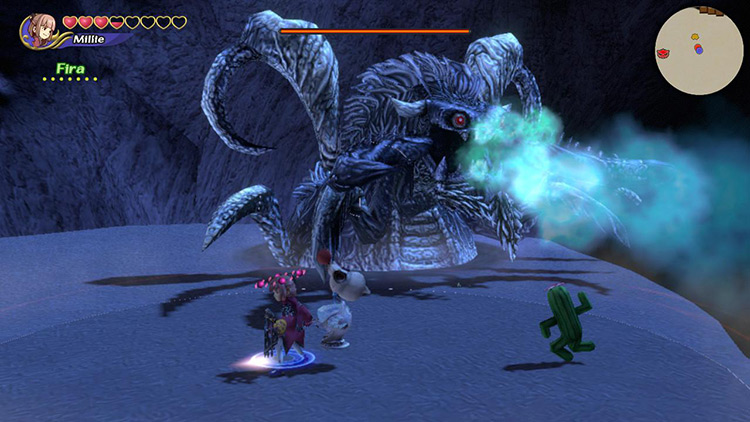
This makes defeating the Flower Cactuar a priority. Fira is the way to go.
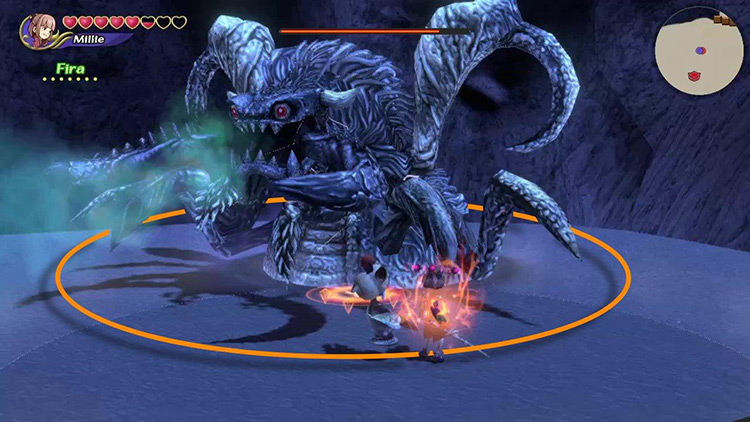
Tip #2: Use the Haste + Fira Strategy
Haste is a must-have when fighting the Antlion due to its high speed.
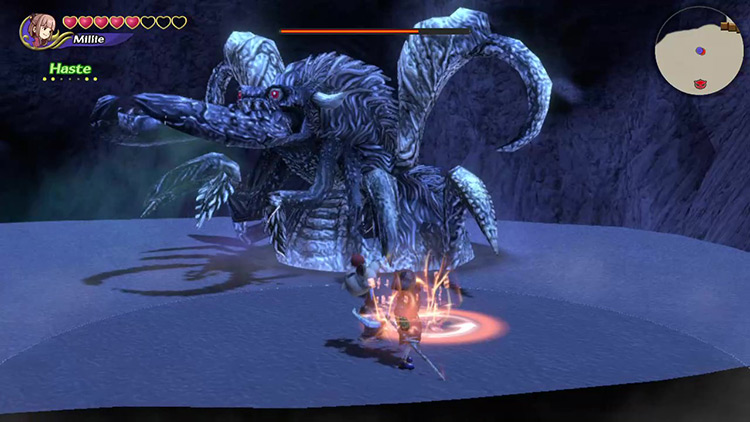
Using Haste allows you to cast offensive spells and heal in-between enemy attacks without getting hit and helps you run faster when getting out of the Antlion’s way.
Note: Remember to stock up on your favorite foodstuffs if you don’t want to split up Haste to cast Cure, which can be time-consuming and tedious.
When it comes to dealing damage, Fira is the only real option.
It has a wide range, and both the boss and its Flower Cactuar pet are vulnerable to Fire damage.
Tip #3: Stay at Mid-Range
The Antlion relies mainly on its icy breath and strong mandibles to deal damage.
Occasionally, it’ll also try to skewer you by driving its legs into the ground.
Dodging the mandibles at close range is tough, but you’ll have more luck avoiding the icy breath.
You want to remain at a medium distance from the boss to keep it breathing ice at you, giving you ample opportunity to cast spells or deal melee damage.
Note: Moving to the sides and behind it are the best ways to avoid damage.
Stay too close, and it’ll try to bite you. Stray too far, and it’ll quickly catch up to you.
Obtainable Items
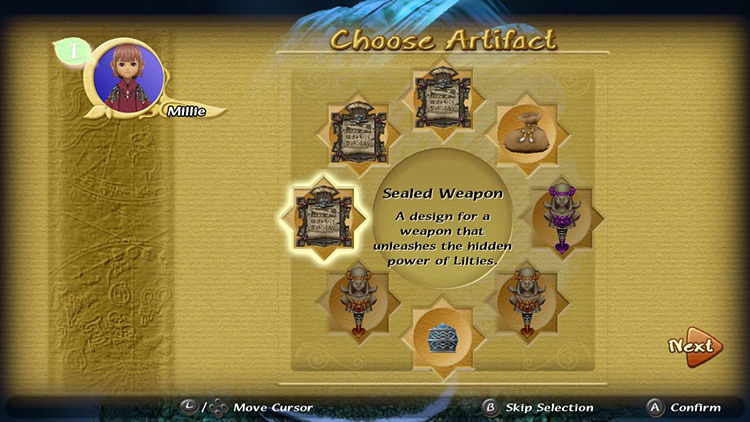
You’ll find Artifacts, crafting Recipes, and Materials throughout the dungeon. You get to keep all Recipes and Materials, but you can only choose one Artifact to take with you.
Chest Items
The following items await in the chests at the Moonlit Desert:
| Artifacts | Materials |
|---|---|
| Alan’s Crystal (Mem. Crystal) Dark Matter Elven Mantle Gekkabijin Giant’s Glove Gold Hairpin Ice Brand Kris Loaded Dice Masquerade Ring of Gravity Ring of Thunder Save the Queen Taotie Motif Tome of Ultima Wonder Bangle |
Dusk Sand Electrum Pressed Flower Remedy Tiny Crystal White Silk |
Monster Items
You’ll find the following Recipes & Materials on monsters at the Moonlit Desert.
| Gigantuar | Flower Cactuar |
|---|---|
| Designer Goggles Fashion Kit Healing Kit Secrets of Speed Secrets of Wisdom Zen Scroll |
Adamantite (M) Gold Needle (M) |
Materials marked with (M). Recipes unmarked.
Boss Items
Unlike regular dungeons, the Moonlit Desert only has one set of Boss Items you can obtain regardless of your Bonus Points.
- Sealed Weapon (Recipe)
- Aurora Weapon (Recipe)
- Lustrous Gloves (Recipe)
- Dusk Sand (Material)
These drops will help you obtain Lilty-specific equipment to power up your Lilty characters for future dungeon runs.

-
Final Fantasy Crystal Chronicles Remastered
- Moonlit Desert Dungeon Guide + Map (FFCC Remastered)
Related Posts:
 Lynari Desert Dungeon Guide + Map (FFCC Remastered)
 Oblivion Village Dungeon Guide + Map (FFCC Remastered)
 Rebena Te Ra Dungeon Guide + Map (FFCC Remastered)
 Tida Village Dungeon Guide + Map (FFCC Remastered)
 Conall Curach Dungeon Guide + Map (FFCC Remastered)
 Selepation Cave Dungeon Guide + Map (FFCC Remastered)
 Mt. Kilanda Dungeon Guide + Map (FFCC Remastered)
 Daemon’s Court Dungeon Guide + Map (FFCC Remastered)