
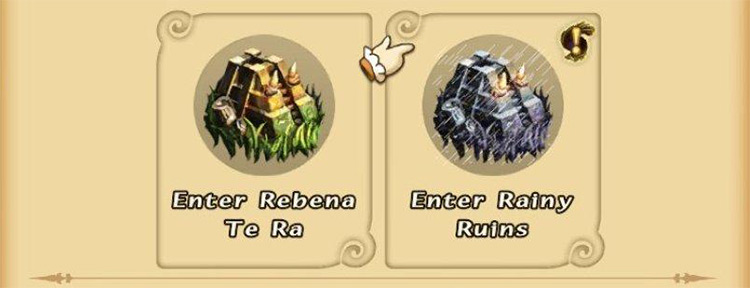
Rainy Ruins is the high-difficulty version of Rebena Te Ra. You’ll unlock this higher-difficulty dungeon after clearing FFCC Remastered’s main campaign.
You can access the Rainy Ruins bonus dungeon from Rebena Te Ra’s original location on the Rebena Plains, across the river from Conall Curach.
Or this dungeon is also available through the Setting Out Together online multiplayer option on just Friday & weekends (Fri, Sat, Sun).
Note: Single-player dungeons are always available.
Below we’ll cover an in-depth walkthrough of the entire dungeon, including all chest locations and combat tips for the Testament boss fight.
TABLE OF CONTENTS
- Map
- Walkthrough
- Step #1: Get Stop & Slow Resistances
- Step #2: Use Gravity to Ground Flying Enemies
- Step #3: Watch Out for Mimic Chests
- Step #4: Find Keys to Open Gates
- Step #5: Quick Puzzle (Enter Area #2 through the West Side)
- Step #6: Use Magic + Melee on Glowing Orbs to Advance
- Step #7: Take Magic Damage on Magic Plates to Advance
- Step #8: Retrieve the Key from Area #2 (East Side)
- Step #9: Exit Area #2 via Southeastern Road
- Step #10: Reach the Boss Room
- Boss: Testament
- Obtainable Items
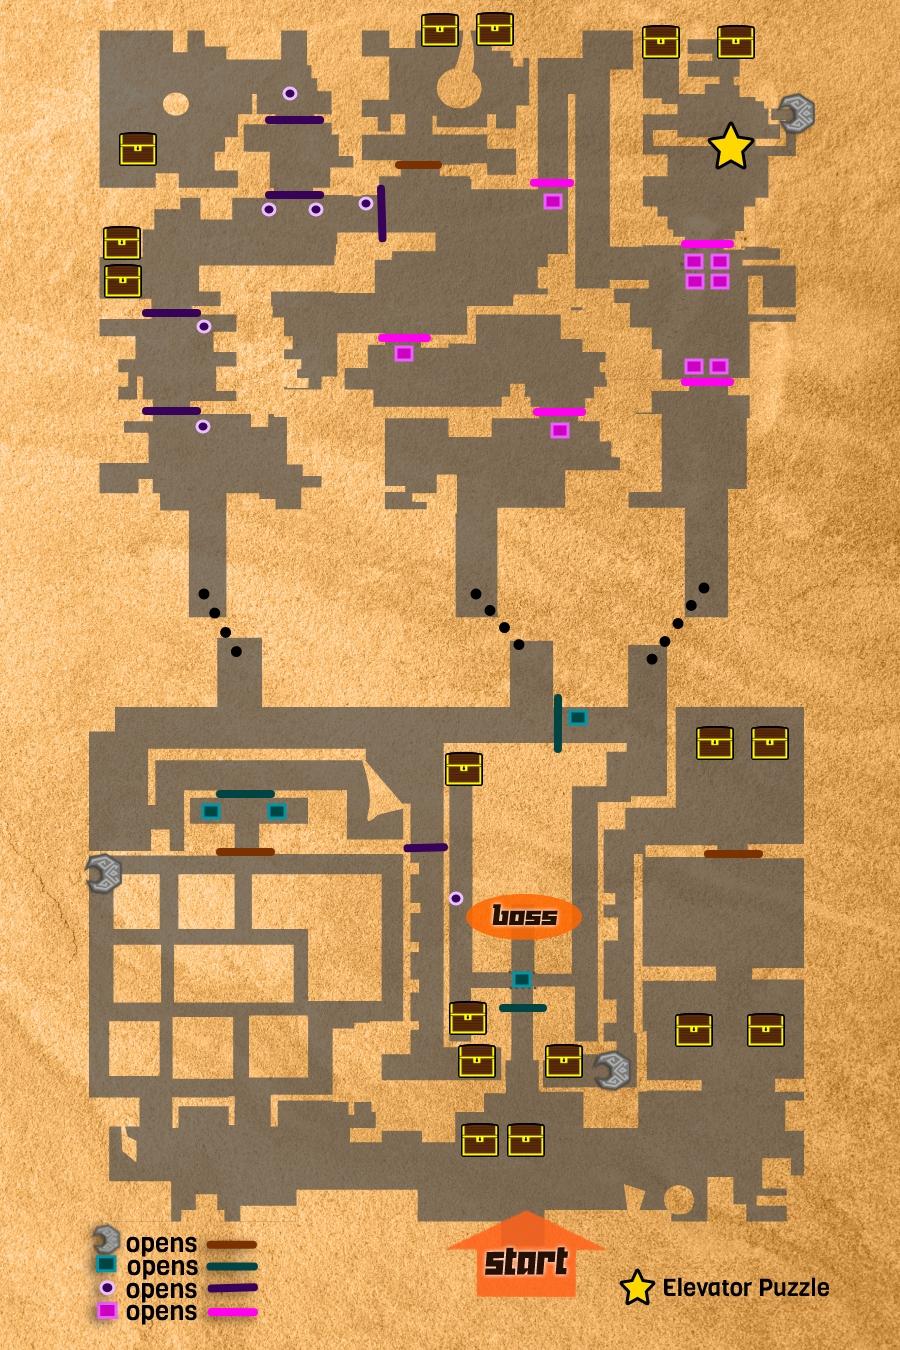
Map
Walkthrough
Step #1: Get Stop & Slow Resistances
The monsters in Rainy Ruins favor some of the most annoying spells possible: Stop and Slow.
Both are death sentences in a dungeon with so many fast and hard-hitting enemies, so you need to get the right equipment.
The minimum protection necessary is +2 Resistance for both status ailments.
You should look for a combination of an item with +2 Stop Res. and two items with +1 Slow Res.
Your ideal equipment tab will look like this:
| Item | Effect | Where to Find Recipe & Materials |
|---|---|---|
| Time Set Item | +1 Slow Resistance | Everything from Tida. |
| Valkyrie Set Item | +2 Stop Resistance | Everything from Frozen Sluice clear. |
| Accurate Watch | +1 Slow Resistance | Recipe from Shella. Materials from Tida. |
Tip: If you had to choose just one resistance item, Stop is the way to go.
Step #2: Use Gravity to Ground Flying Enemies
Rainy Ruins is populated by five types of flying enemies:
- White Bat
- Tiny Abbadon
- Mosquito
- Dark Ahriman
- Gargoyle
Gargoyles often appear by themselves or with other Gargoyles, while the other four work as a team. You attack one of them, and the other three will come after you. I’ll refer to these enemy teams as Flying Squads.
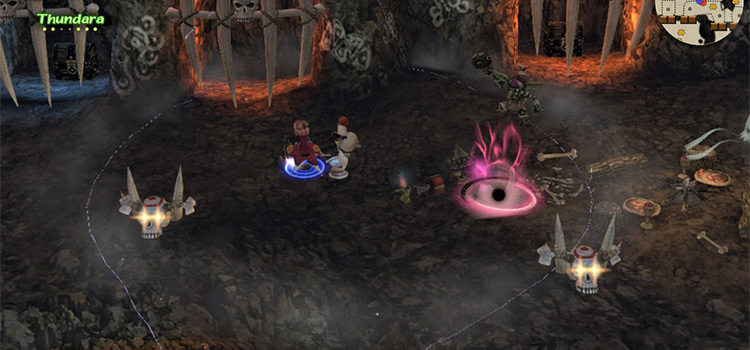
They all have one thing in common: they’re weak to Gravity.
One hit from this compound spell and these flying enemies will get incapacitated for over five seconds.
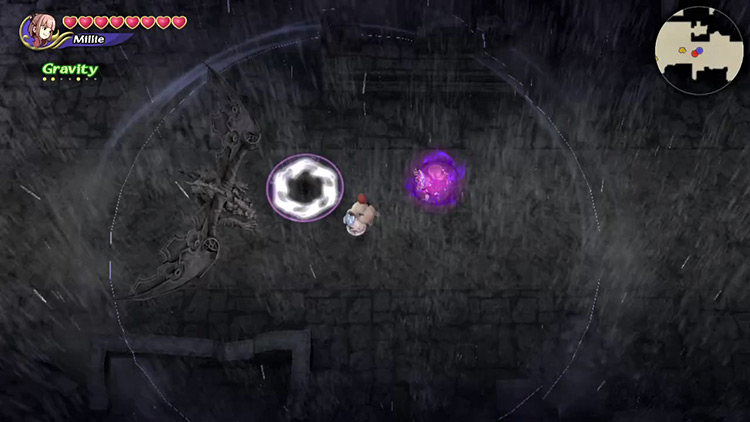
Create Gravity by fusing two elemental spell magicites in your Command List. (Two elemental rings work just as well.)
Take them on in the following order for an easier fight:
| Priority | Monster | Explanation |
|---|---|---|
| 1 | White Bat | All of its moves can interrupt your casting. |
| 2 | Mosquito | Won’t stagger you but deals massive damage. |
| 3 | Dark Ahriman | Occasionally staggers with melee move. Not too much HP. |
| 4 | Tiny Abbadon | High HP. Takes longer to kill. |
Step #3: Watch Out for Mimic Chests
Walk a little northwest from your spawning position to find a couple of chests.
One is a Mimic, while the other contains the Raise magicite.
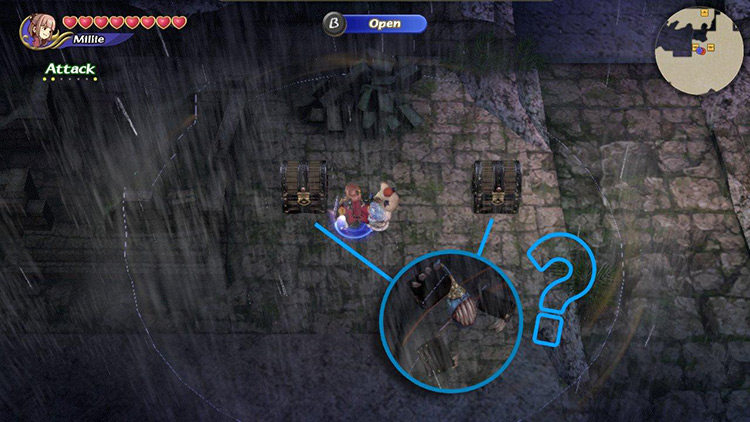
Mimics can cast all three basic elemental spells and Stop. It’s strong, but killing the Mimic will net you some good money.
The Mimic location also changes every time you visit the dungeon, so I can’t tell you which one is safe. You have to try your luck!
Most of the chests in this dungeon have a Mimic next to them, so keep an eye out.
Step #4: Find Keys to Open Gates
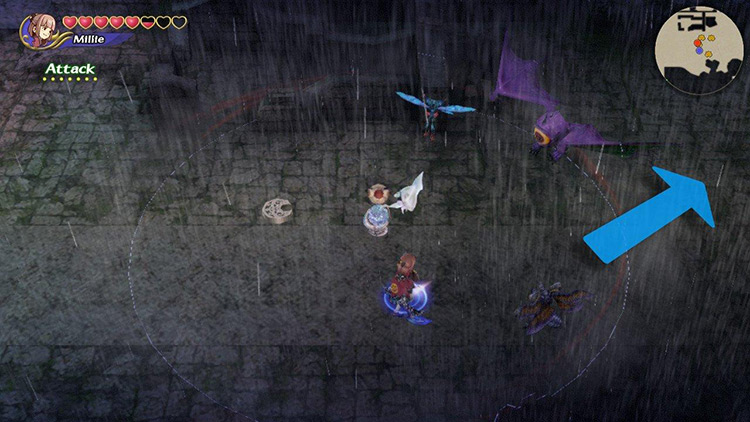
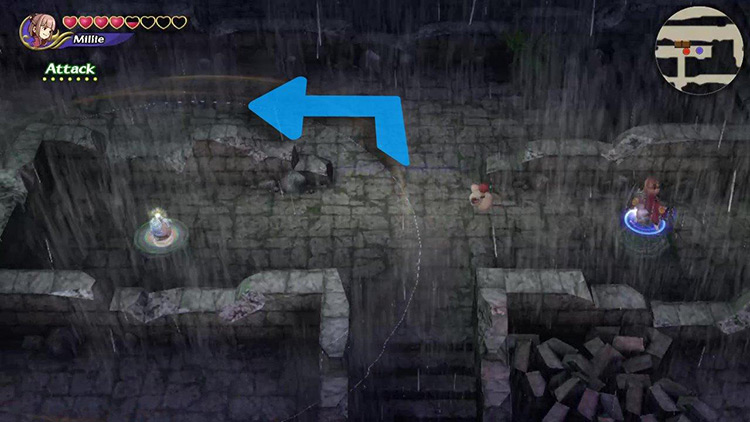
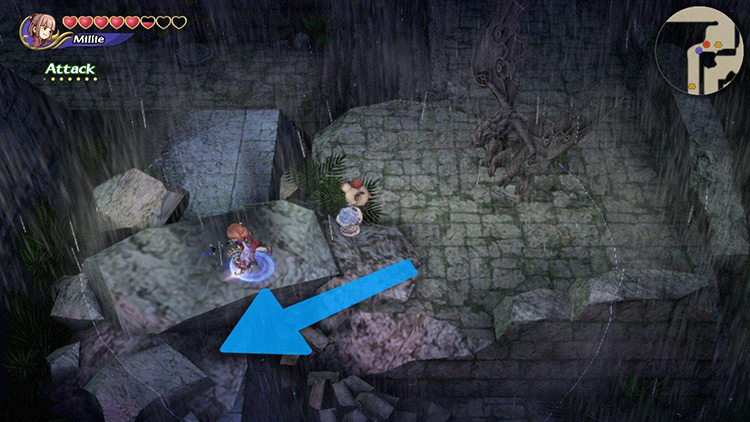
Now just start walking to the left.
You’ll want to brace for combat against a couple of Gargoyles and a Flying Squad (Bat + Mosquito + Ahriman + Abbadon) as you approach some stairs to the north.
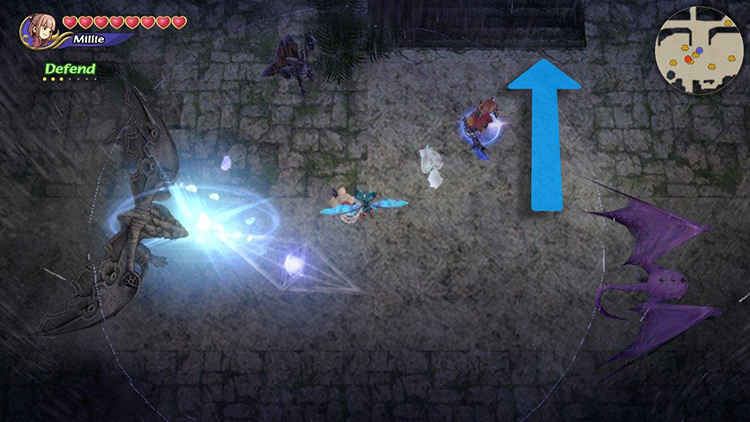
Then go down the stairs and take a left as you enter the dilapidated neighborhood.
Stick to the left-side wall and keep moving until you find a single White Bat at the northwestern corner of this area. Defeat this bat to obtain a crescent moon key.
From here, you have two options:
- Use the key to open the gate to your right and move further into the dungeon.
- Carry the key back to the opposite side of the map to get some chests.
I’ll explain the latter for this walkthrough.
So grab the key and retrace your steps back to the beginning of the dungeon. Now, go to the right side of the pyramid.
You’ll fight through a Flying Squad, then a Gargoyle, and another Flying Squad before finding a couple of chests.
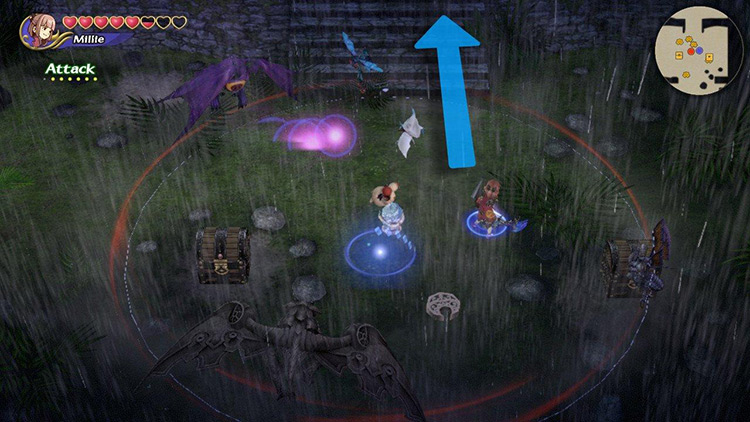
As you might have guessed, one of them is a Mimic.
Defeat the enemies and collect all valuables before continuing northward with the key.
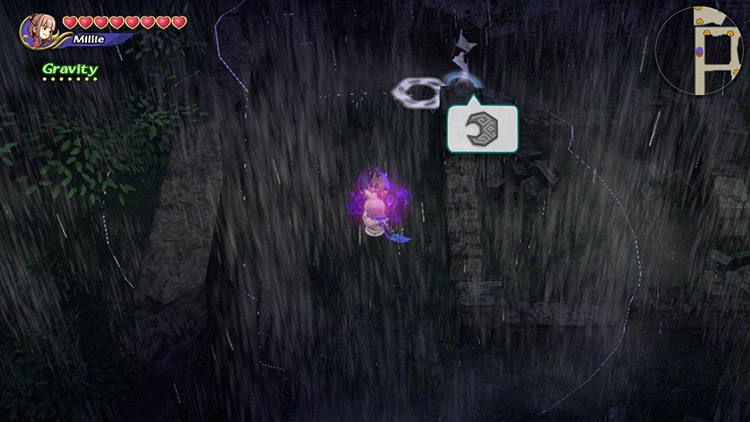
You’ll then find a gate with a crescent moon-shaped altar beside it. Use the key to open it and walk inside.
A Flying Squad will attack you the moment you walk through the gate. Defeat them and check out the chests further north. Again, one is a Mimic.
Once you’ve collected your treasure, head southwest onto a stone walkway.
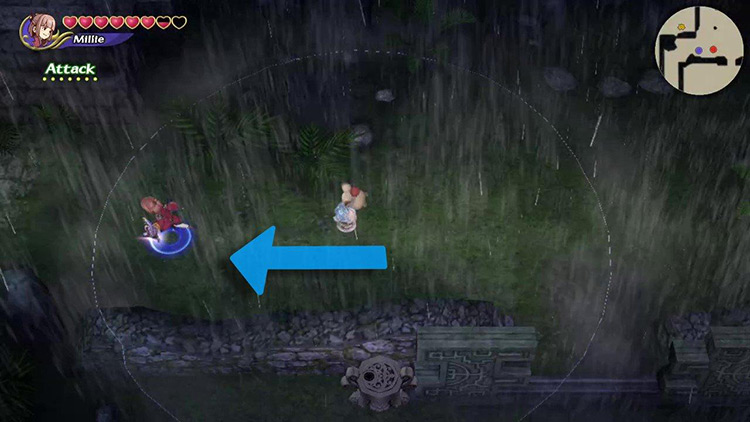
There’s a chest and a key at the end.
Collect the Artifact inside and carry the key back to the gate we saw on the left side of the map, past the ruined neighborhood.
Use the key to open the gate and step through.
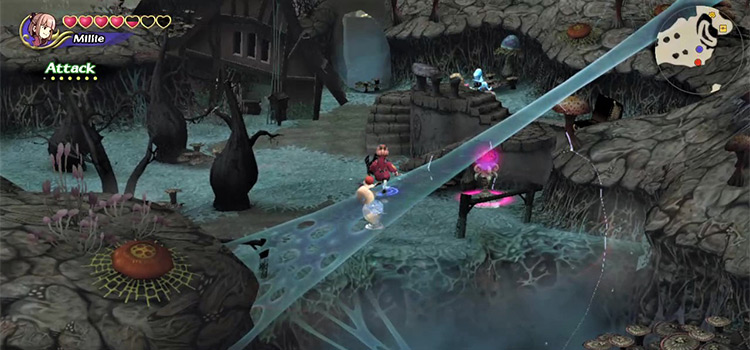
Step #5: Quick Puzzle (Enter Area #2 through the West Side)
Defeat all nearby enemies before engaging with the puzzle.
Place your Chalice on one of the pressure plates and stand on the other to deactivate the force field blocking your path.
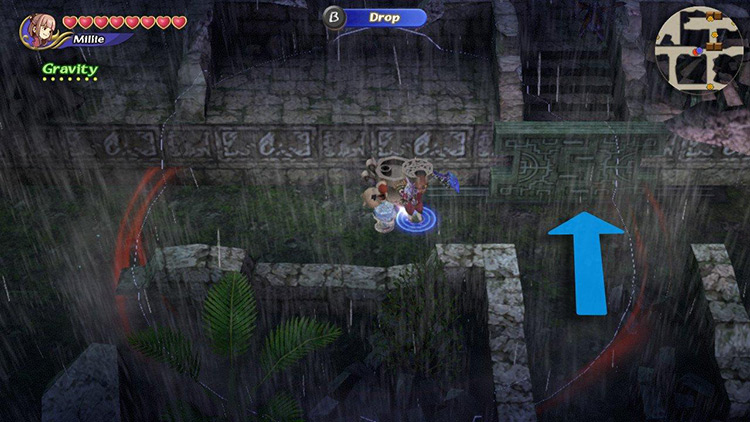
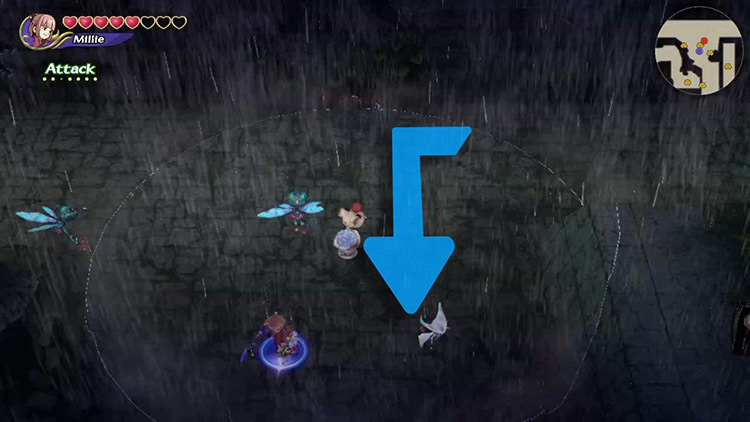
Cross over and turn left immediately.
Then follow the road past several enemies until you find a passage to the north.
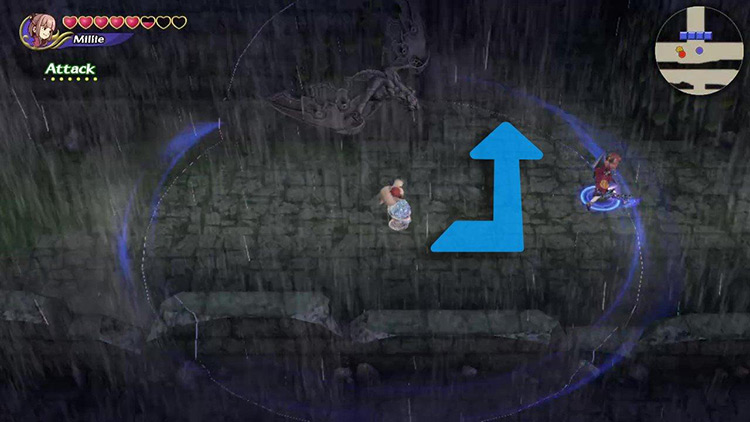
Use this path to enter Area #2.
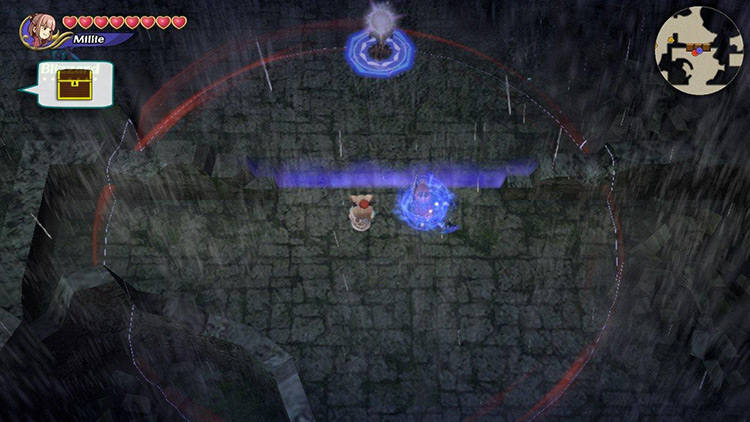
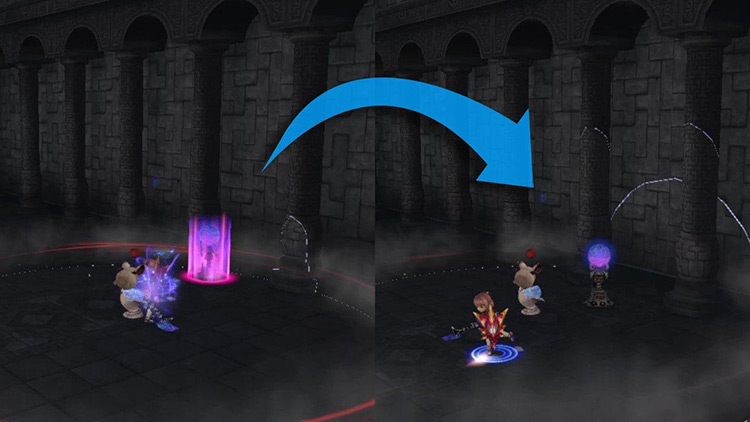
Step #6: Use Magic + Melee on Glowing Orbs to Advance
You’ll notice a gate next to a glowing orb as soon as you walk into Area #2.
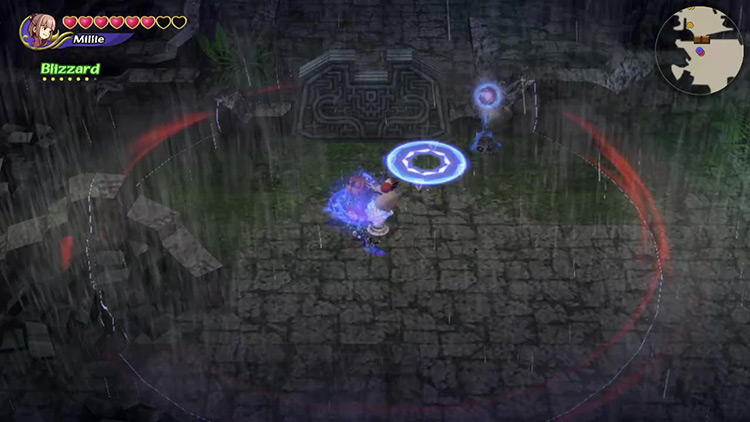
To open this gate, hit the glowing orb with the correct elemental spell, and finish the job with your melee weapon.
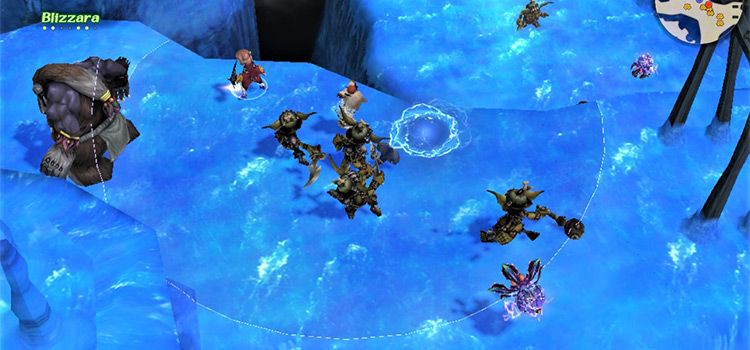
The color of the orb reflects what spell is required. This one needs Blizzard.
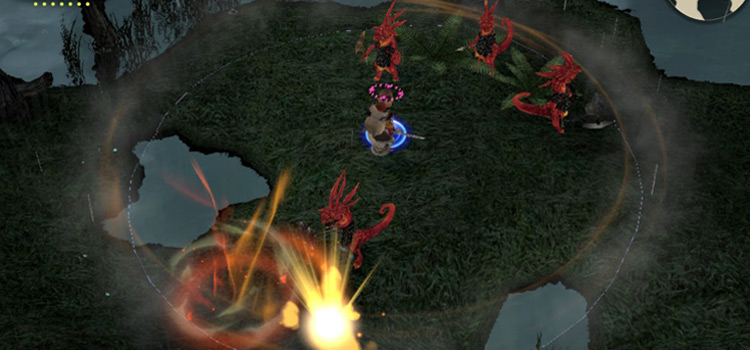
After that, continue toward the next gate and cast Fire on the orb to continue moving forward.
You’ll notice a couple of chests to your left. As usual, one is a Mimic.
Tip: This chest contains another Raise magicite, so maybe ignore it.
There are many enemies in this area, and you need to defeat them so we can focus on the following puzzle.
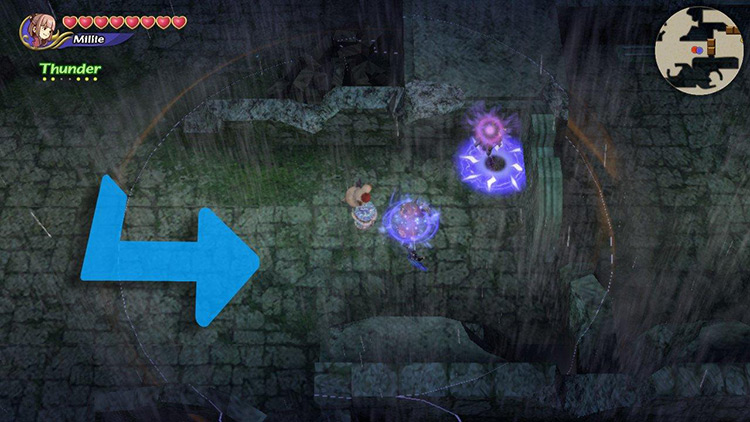
Once that’s done, bring your attention to the force field blocking the way north.
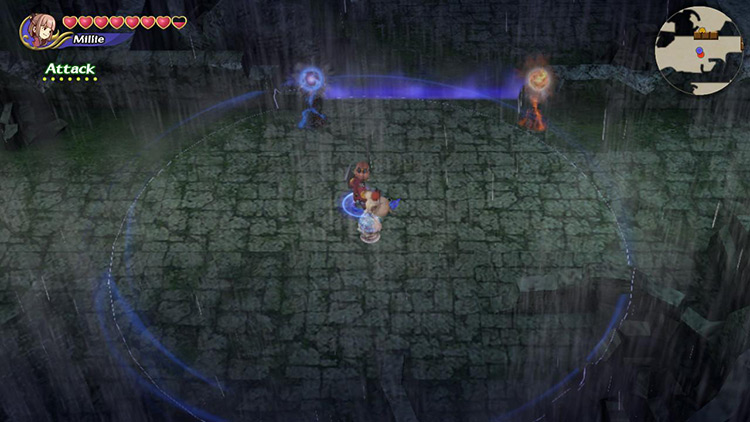
As you can see, there are two glowing orbs instead of one – and they must be hit almost simultaneously to deactivate the force field.
Follow these steps to disable the barrier:
- Fuse Firaga in your Command List
- Set any Blizzard next to it
- Stand in front of the blue orb and cast Firaga
- Immediately cast Blizzard on the orb in front of you
- Run to the opposite orb to hit it with your weapon, then go hit the Blizzard orb
You can replace Firaga with Blizzaga and Blizzard with Fire, depending on your magicites. The process remains the same, but you start on the opposite orb.
Once that’s done, push northward past a Gargoyle to find another force field.
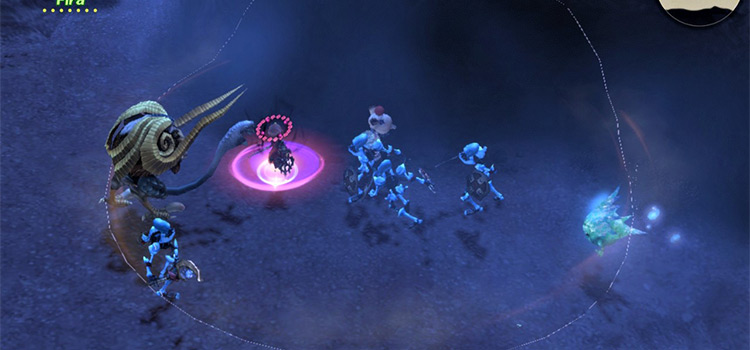
This time, you must cast any magic spell on the glowing orb on the other side of the force field to deactivate it.
Once that’s all set, follow the path to find a bunch of enemies protecting a chest.
Defeat them before collecting the Artifact in the chest, then go back to where we solved the double orb puzzle.
There’s one last gate locked by a glowing orb to your right. Cast Thunder on it and hit it with your weapon to open the way.
Step #7: Take Magic Damage on Magic Plates to Advance
Here you’ll notice a gate with a crescent moon-shaped altar to the north.
But we’ll continue exploring to get the key.

Head eastward from this place to find another gate with a Skeleton Mage and a mysterious panel in front of it.
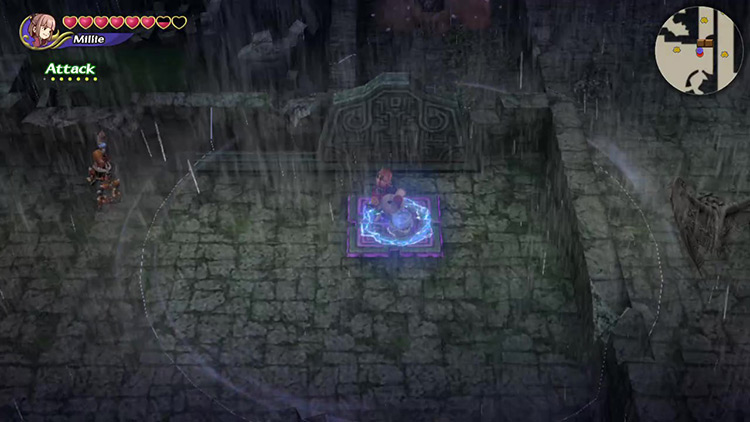
These panels are activated by taking the right elemental damage while standing on them.
This one requires Thunder, which the nearby Skeleton specializes in.
Open the gate and head through, keeping an eye out for Gargoyles as you press into the dungeon. You might even see one of them pop out of the ground on this road.
Step #8: Retrieve the Key from Area #2 (East Side)
You’ll reach another gate after climbing some steps. This one has four magic panels in front of it.
Tip: Skip to the next step if you are not interested in collecting treasure.
To open this gate, let the nearby Skeleton Mage set you on fire, then run over each of the four panels.
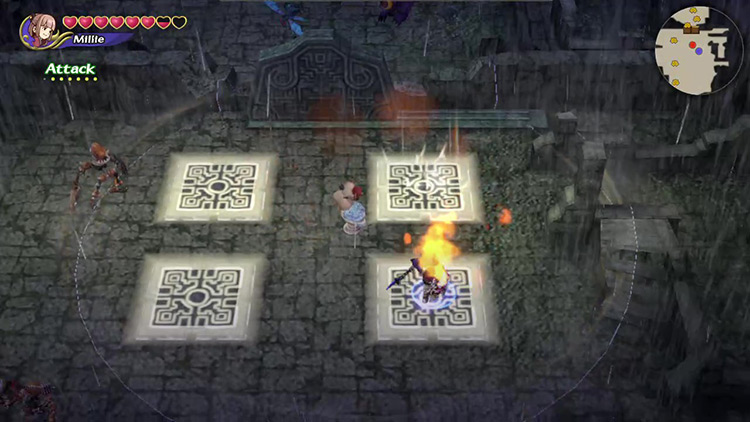
Go through and prepare to face one of this dungeon’s toughest puzzles.
And by “prepare” I mean defeat all nearby enemies.
Once that’s done, bring your attention to the stone blocks in your path.
Stone Wall Puzzle Solutions
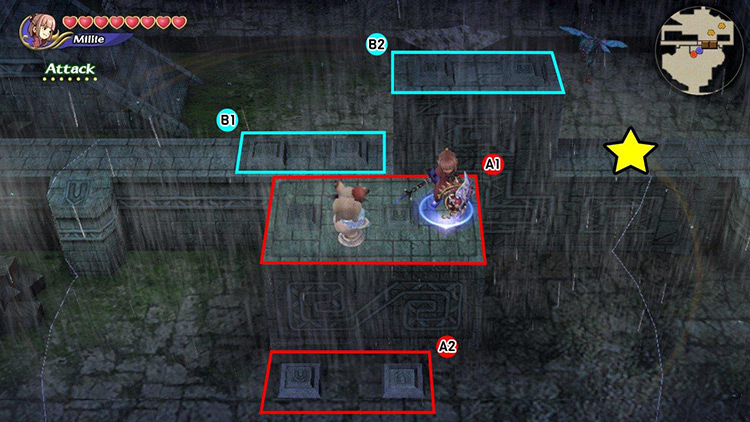
Two sets of buttons control two moving platforms.
Using this to cross to the other side of the wall is simple. Here’s how:
- Use the first block (red) as an elevator to reach the buttons that move the right-side wall (B1).
- Lower the wall (cyan).
- Return to the ground floor and cross over the area marked with a star above (★).
You’ll find a couple of chests on the other side here. One chest is a Mimic, and the other one contains an Artifact.
Once you’ve defeated all enemies and collected your treasure, return to the puzzle.
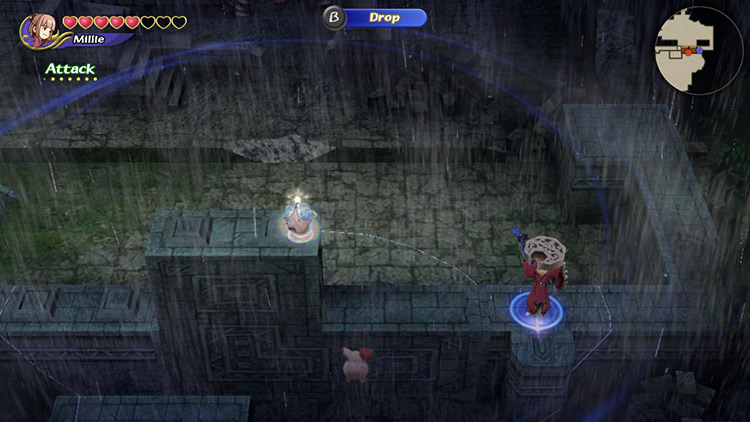
The crescent moon key we’re looking for is on the wall, far to the right.
We need to use the moving platform on the right (★) as an elevator to reach it.
This puzzle is tricky in single-player, so here’s a strategy you can try:
- Climb onto the highest level (B2).
- Place the Crystal Chalice on the Up (right) switch before quickly getting off so only the Chalice remains on the top level.
- Use the left-side buttons (B1) to lower the wall and run back to ground level through the left.
- Get in position (★) before the weight of the Crystal Chalice pushes the Up switch again.
- Step out of the Chalice’s protection to get the key. Miasma damage makes carrying it impossible, so try to push it back to safety.
Once you have the key, get off the wall by going to the right and use the elevator blocks to retrieve your Crystal Chalice.
Now carry the crescent moon key back to the gate in the center of Area #2.
Then use it to open the gate and go inside to find a couple of chests protected by a Flying Squad and a Gargoyle.
One of the chests contains a Material, while the other is a Mimic.
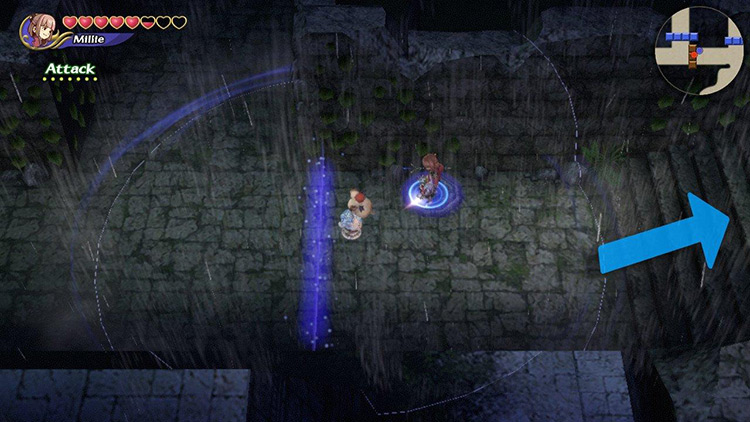
Step #9: Exit Area #2 via Southeastern Road
Now go back to the area with the four magic panels.

From here, walk south to find another gate with only two panels in front of it.
- Take Blizzard damage and get frozen on the left panel.
- Take Fire damage and catch aflame on the right panel.
The nearby Skeleton Mages will be happy to help with these tasks.
A couple of Gargoyles will also ambush you as you press on. You can fight or ignore them and run through the passage back into Area #1.
Step #10: Reach the Boss Room
From here, immediately go west, down the stairs, and open the force field by stepping on the nearby pressure plate.
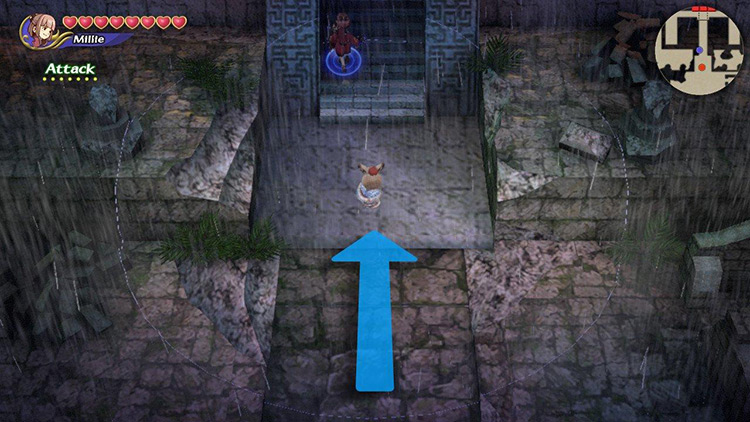
Then go back up the stairs and begin walking southward.
Make your way past some enemies and head up the stairs to the top of the pyramid.
There you’ll find another pressure plate. Step on it to open the door below, which leads to the boss room.

Note: Backtrack to the dungeon entrance and head north into the pyramid if you want to clear the dungeon ASAP.
But let’s get a couple more chests before heading into the boss fight.
Descend from the pyramid through the left staircase. There’s a chest to the south and another one to the north. One of them is a Mimic, while the other contains a Material.
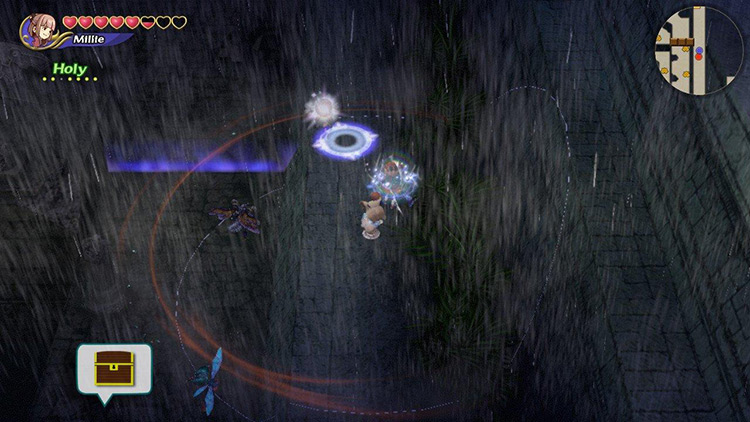
There’s something else to the north:
A glowing orb controlling a force field on the floor below. Cast Holy on the orb to deactivate the force field.
Backtrack around the pyramid to the passage we came from.
Then go down the west-side stairs and turn south at the first opportunity.
Fight or run past several enemies to reach a chest containing an Artifact. And that should be it for chests – congrats on getting the last chest in the Rainy Ruins!
From here, backtrack to the dungeon entrance.
Then at the entrance head north, up the stairs, and into the pyramid to face Testament.
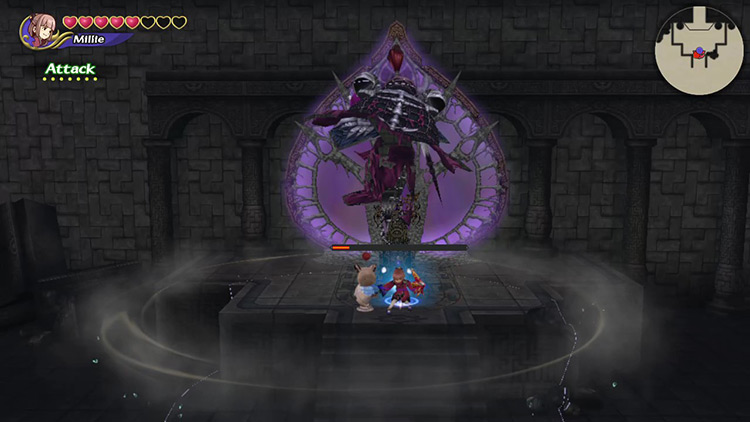
Boss: Testament
Testament is a strong boss with many layers of protection. Peeling them away is the key to victory.
Here are some simple tips to win the fight faster:
Tip #1: Change Your Equipment
There’s no need to keep the Stop and Slow resistance during your fight against Testament.
Instead, you can optimize for Strength, Defense, or Magic. Items like the Jade Bracer (Regeneration) or the Wisdom Talisman (Clavat Excl. Fast Casting) are great.

Alternatively, you can get +2 Resistance to Blizzard and/or Thunder to avoid becoming paralyzed or frozen by Testament’s Tier 3 spells (which are basically unavoidable).
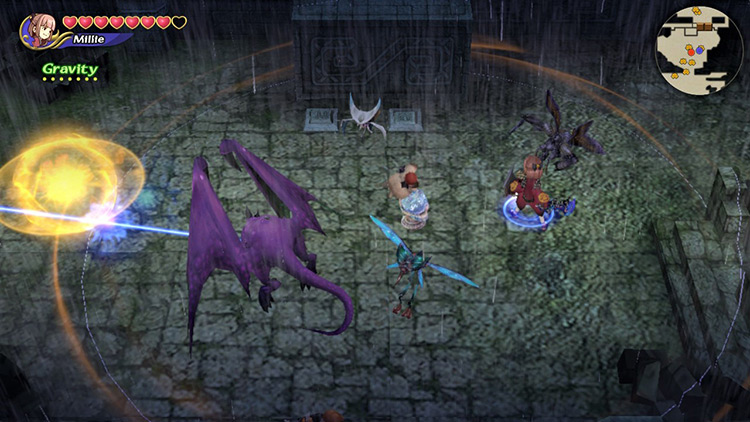
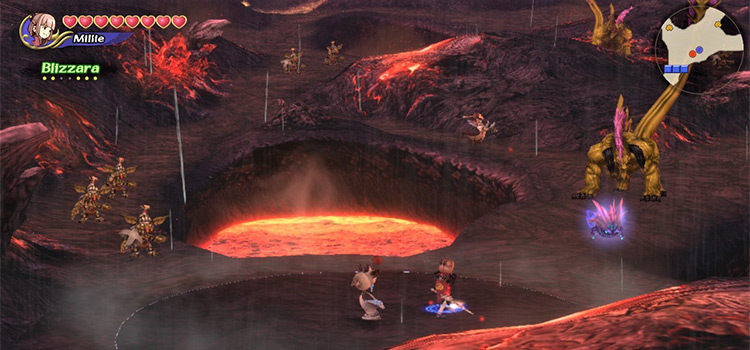
Tip #2: Defeat the Death Knight with Blizzara/Thundara
Testament spawns with a Death Knight protector.
These enemies are powerful but have one weakness: they’re vulnerable to freezing and paralysis.
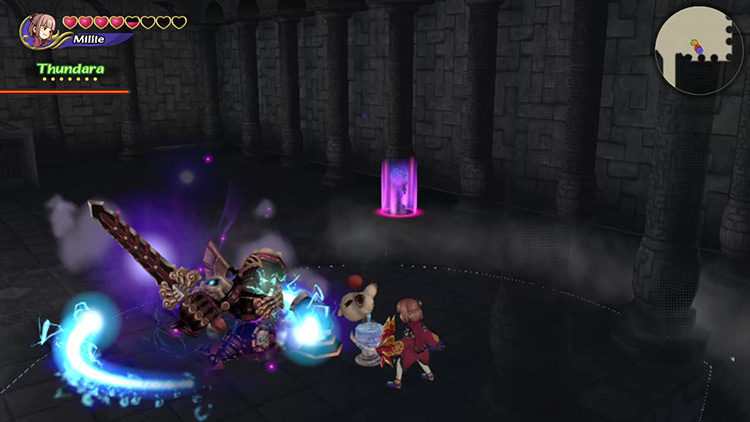
Thundara and Blizzara are enough to hinder the Death Knight for a few seconds while you charge up the next spell. This makes defeating it a lot easier.
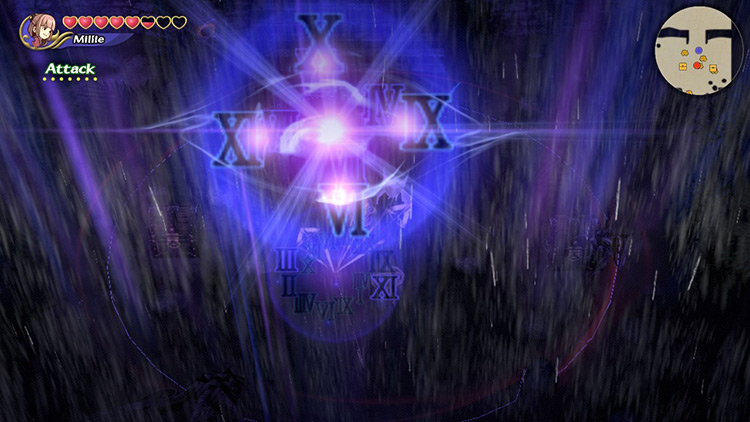
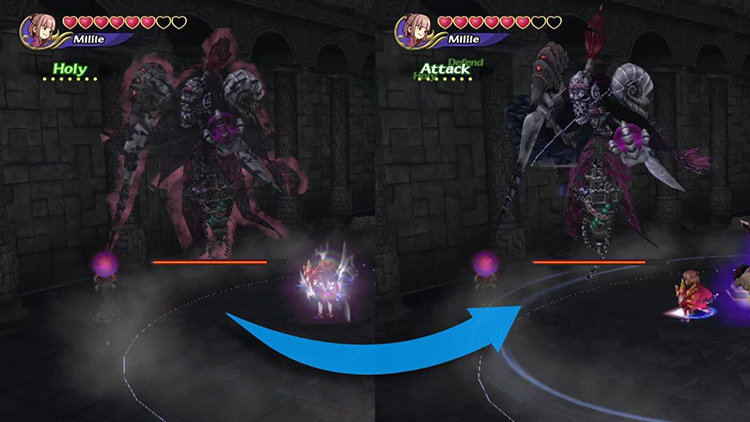
Tip #3: Bring Down the Force Field (& Cast Holy)
Testament starts the battle with a force field that prevents all damage.
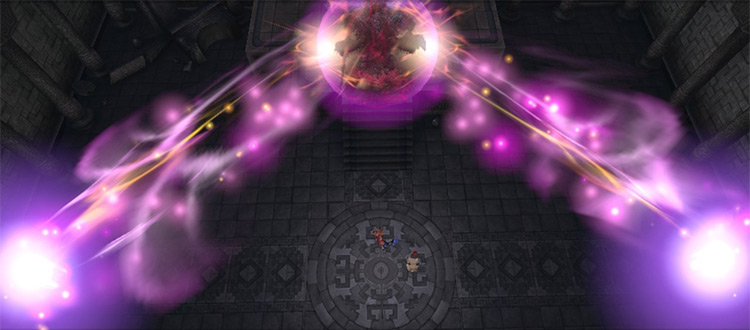
We need to deactivate two glowing orbs on the left and right sides of the arena to bring it down.
You only need to cast some magic on them for successful deactivation. You’ll know it’s done because the bright purple light will disappear.
The shield will return after a while. Just come back and deactivate the orbs again when that happens.
Tip #4: Cast Holy to Make the Boss Vulnerable
Testament is a spectral being. Like other ghostly enemies, you must hit it with Holy to make it corporeal and vulnerable to damage.
Holy is also a great way to damage the Lich if your character is Magic-focused.
Tip #5: Use Melee Combos for Massive Damage
The most efficient way to defeat Testament is with short-range melee combos.
Melee combos are great because they can’t get interrupted by Testament’s spells or the occasional earthquakes that shake the arena.
Just make sure to heal whenever your health falls below half. Play it safe – or keep a few Phoenix Downs in your Command List.
Obtainable Items
You’ll find Artifacts, crafting Recipes, and Materials throughout the dungeon. You get to keep all Recipes and Materials, but you can only choose one Artifact to take with you.
Chest Items
The following items await in the chests at the Rainy Ruins:
| Artifacts | Materials |
|---|---|
| Book of Light Faerie Ring Galatyn Giant’s Glove Gold Hairpin Helm of Arai Main Gauche Maneater Masamune Mjollnir Power Wristband Ribbon Rune Staff Save the Queen Sparkling Bracer Teddy Bear |
Adamantite Electrum |
Monster Items
Monsters at the Rainy Ruins don’t drop anything noteworthy.
Boss Items
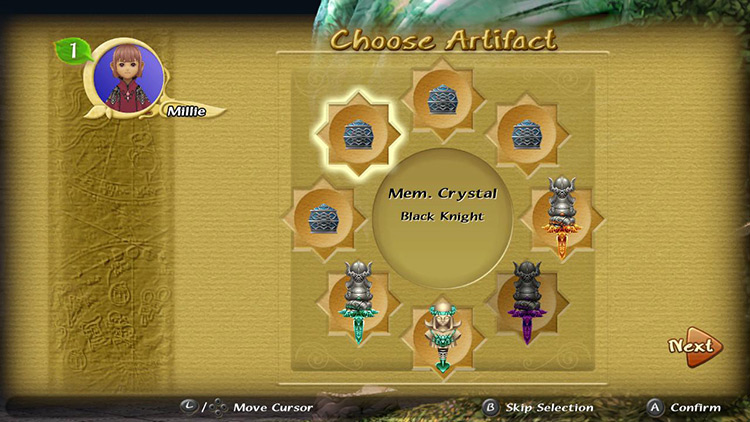
Instead of Artifacts, Recipes, or Materials, clearing the Rainy Ruins rewards you with rare Memory Crystals that you can use to mimic cool characters from FFCC.
These Memory Crystals are divided into four possible reward pools:
| Reward Pool A |
|
|---|---|
| Reward Pool B |
|
| Reward Pool C |
|
| Reward Pool D |
|
Higher Bonus Point scores make accessing Reward Pools B, C, and D more likely.

Tip: Talk to the Moogle at your nearest Moogle Nest to start mimicking. Just remember you can only mimic characters of your same race and gender.

-
Final Fantasy Crystal Chronicles Remastered
- Rainy Ruins Dungeon Guide + Map (FFCC Remastered)
Related Posts:
 Rebena Te Ra Dungeon Guide + Map (FFCC Remastered)
 Oblivion Village Dungeon Guide + Map (FFCC Remastered)
 Moonlit Desert Dungeon Guide + Map (FFCC Remastered)
 Foggy Swamp Dungeon Guide + Map (FFCC Remastered)
 Pale Cave Dungeon Guide + Map (FFCC Remastered)
 Conall Curach Dungeon Guide + Map (FFCC Remastered)
 Goblin Festival Dungeon Guide + Map (FFCC Remastered)
 Misty Mount Kilanda Dungeon Guide + Map (FFCC Remastered)