Tida Village is a dungeon accessible from Year 2 onwards.
It lies east of Alfitaria in the Vale of Alfitaria region and houses both Earth and Wind elemental Hot Spots.
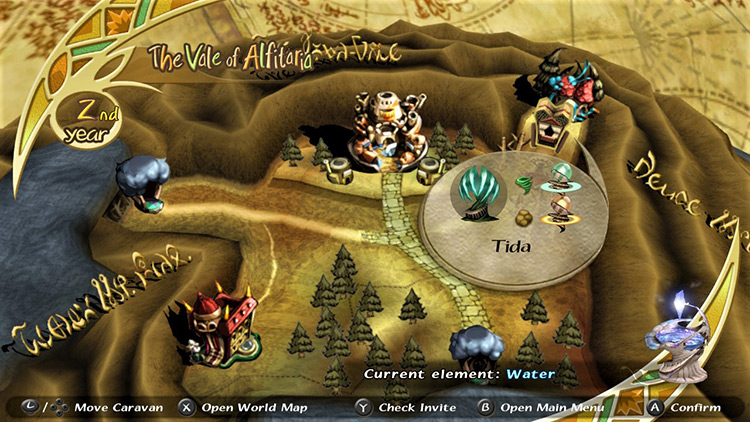
It can be the 5th or 6th dungeon you tackle in Final Fantasy Crystal Chronicles, depending on whether you visited Moschet Manor first.
This dungeon is packed full of monsters, so update your equipment at Alfitaria if you can.
The essential steps to clear Tida are as follows:
- Get Fire, Cure, and Clear.
- Find the Moogle Nest next to the Earth Hot Spot.
- Use Fire to remove vines on locked gate altars.
- Use Fire to clear roadblocks.
- Hug the wall after the 2nd Earth Hot Spot.
- Cross the Hell Plant field.
- Open the gate to the boss.
- Face Armstrong.
Let’s break it down in detail.
TABLE OF CONTENTS
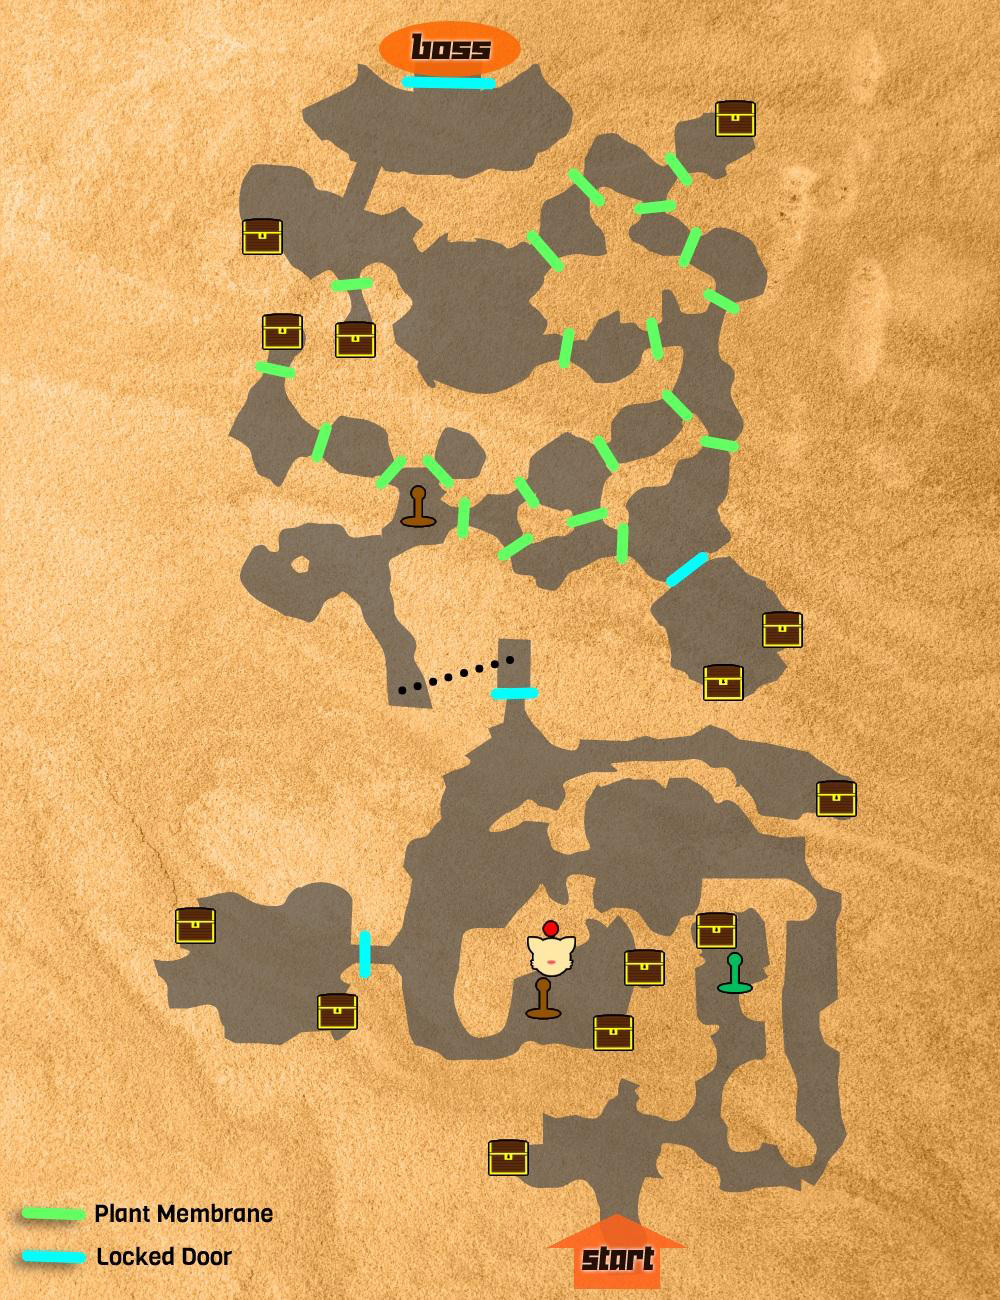
Map
Walkthrough
Head left as you enter the dungeon to collect a chest containing a Phoenix Down.
Keep it in your Command List for now. It’s a nice insurance policy against the many monsters coming your way.
Step #1: Get Fire, Cure, and Clear Magicites
Walk east from your starting point then make a left turn to reach an area with a Wind Hot Spot and a chest guarded by a Skeleton Mage.
All Skeletons are weak to Fire, but any melee weapon will do the job just fine.
The chest contains the magicite for Clear, which you’ll need to deal with Tida’s many poisonous enemies.
Claim the magicite and head back to the crossroads. This time, take a right turn.
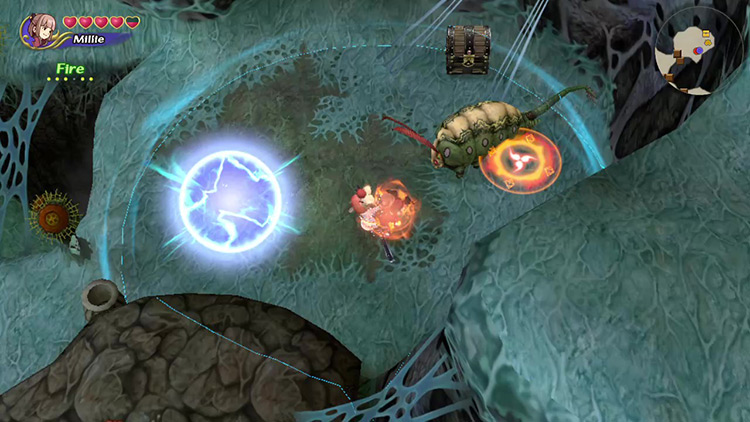
You’ll be attacked by a Gremlin and a Carrion Worm. These worms are bigger than the ones in Mushroom Forest, and they can easily inflict Poison.
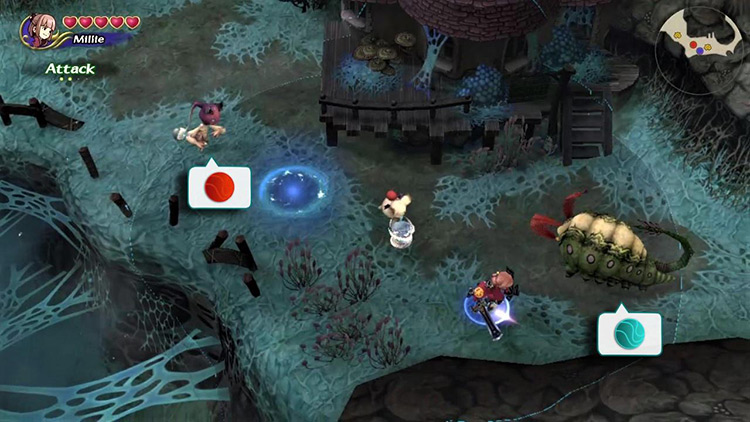
The Gremlin should drop a Fire magicite, and Cure will pop out of the Carrion Worm upon defeat.
- Tida features some mechanics requiring Fire, and most enemies are weak to it.
- Cure is an essential spell in a dungeon with so much combat.
You’re set to conquer Tida now that you have all three spells.
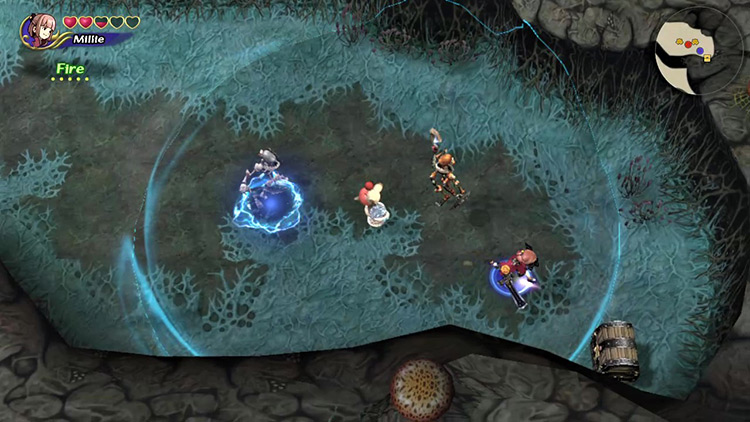
Step #2: Fight Through the Eastern Path
Continue walking down the same corridor and defeating the enemies in your path.
- First comes a Carrion Worm you can burn down with Fire.
- Then a Gremlin before a left turn.
- And finally, a Hell Plant, a Gremlin, and two Skeletons as you enter an open area.
Make sure to heal before crossing the little natural bridge to the left and running down the ramp.
A Hell Plant, Skeleton and Bomb combo awaits immediately after the ramp. A second Bomb and a Gremlin might join the fight if you tread too far south during combat.
Try to hit multiple enemies with your Focus Attacks, and keep Cure handy just in case.
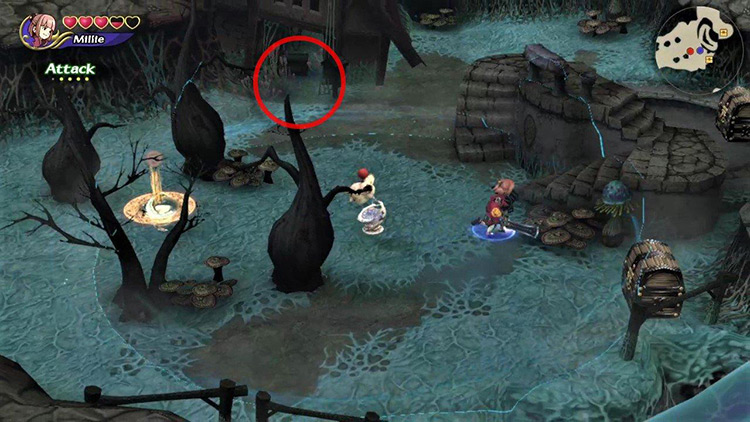
One of the bombs will drop the token needed to open a gate some steps to the southwest.
You’ll notice some vines growing all over the altar. Use Fire to burn them off before placing the half-moon token onto it to open the gate.
Inside, you’ll find three Skeletons guarding two chests containing an Artifact and a Recipe. Claim your treasure and head back through the gate to continue.
Step #3: Head South for a Moogle Stamp
Run to the southeast to find an area with an Earth Hot Spot.
Examine the dilapidated house nearby to find a Moogle Nest. Enter it and claim your Moogle Stamp.
Tip: Tida Village is a cold dungeon. Avoid trimming Mog’s hair to help him carry the chalice longer without getting tired.
Exit the Moogle Nest and collect the two surrounding chests before heading back to the unlocked gate.
Step #4: Open the Gate to the Next Area
From here, you want to head north toward another locked gate.
This one is protected by two Carrion Worms and a Bomb. Defeat them to get the key.
Tip: This Bomb should drop a second Fire magicite for you. Fusing the two to create Fira can make the rest of the dungeon easier.
Don’t go into the next area just yet.
First, explore the road to the right.
A pair of Hell Plants are waiting to ambush you up ahead, and a couple of Skeletons await further along. There’s a chest containing a powerful artifact behind them.
Collect it before heading back to the gate we just opened and crossing into the next area.
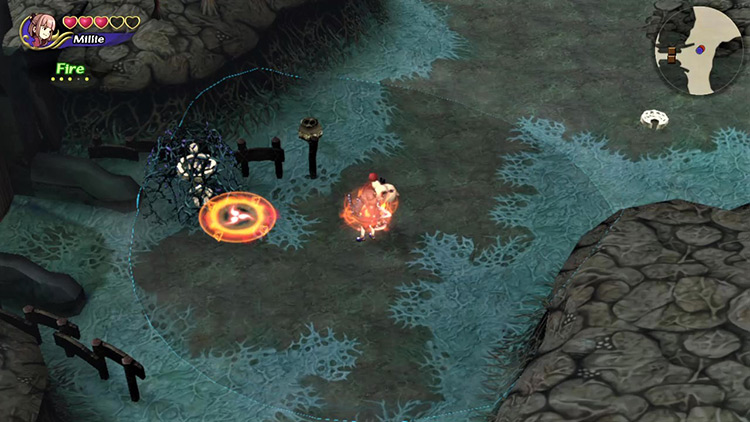
Step #5: Use Fire to Burn Roadblocks
Head north right as you enter the new area.
You’ll immediately come across an Earth Hot Spot surrounded by three blocked paths.
You must burn off these plant membranes with Fire before you can cross. They regenerate almost immediately, so get ready to cast the spell many times.
Tip: Mog might get locked in by a regenerating membrane, exposing you to Miasma unless you return and burn it.
You can safely ignore the middle path unless you want to hunt a Carrion Worm for materials.
Cross the left barrier and fight through two Skeleton Mages and a Carrion Worm to reach a chest containing a Recipe or some Gil.
Return to the Earth Hot Spot and go through the right-side barrier to begin a slightly confusing part of the level.
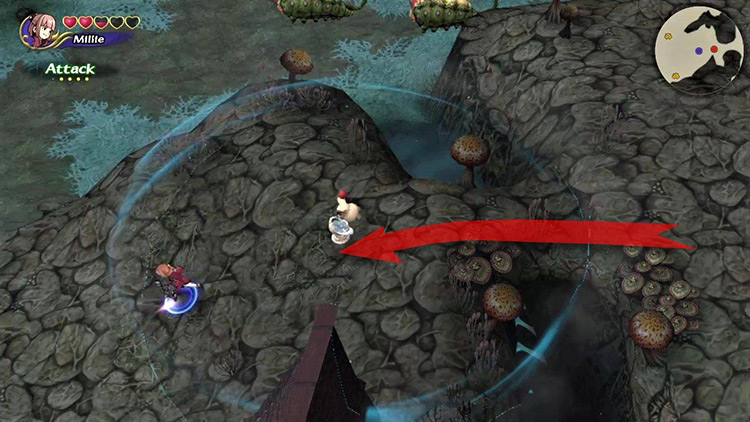
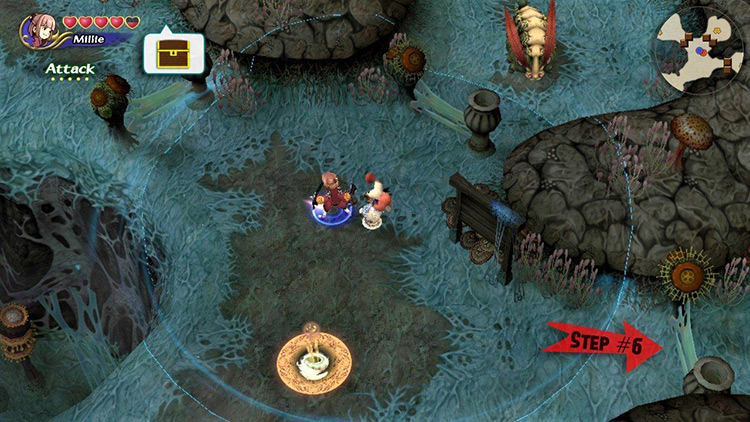
Step #6: Traverse the Corrupted Maze
There’s a fork in the road reading left or right. It’s the start of a rather maze-like area.

You can tackle this challenge in two main ways:
- Option #1: Hug the left wall to reach the next area quickly with few fights.
- Option #2: Hug the right wall to collect all the treasure despite more combat.
Since the left path is more straightforward, we’ll focus on the right side for this walkthrough.
So continue along the right wall, fighting through a Carrion Worm and a Skeleton to arrive at a locked gate guarded by two Bombs. One of them drops the key.
Inside are two chests with an Artifact and a Recipe guarded by two Carrion Worms.
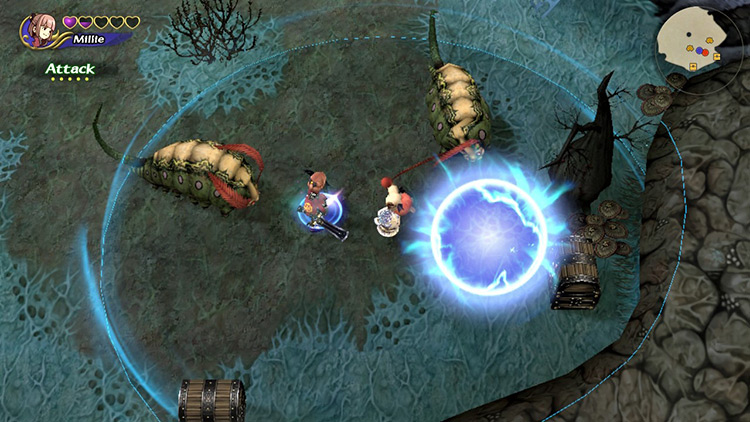
Burn them down, grab your treasure, and keep hugging the right edge of the map as you exit the room.
You’ll cross five more membranes and fight through some Carrion Worms and Skeleton Mages before reaching another chest containing a powerful Artifact.
Head back out and continue hugging the right edge until arriving at an open field.
Step #7: Cross the Field
Whether you hug the left or right walls, you’ll eventually come across a farm field full of ominous glowing pods and Hell Plants.
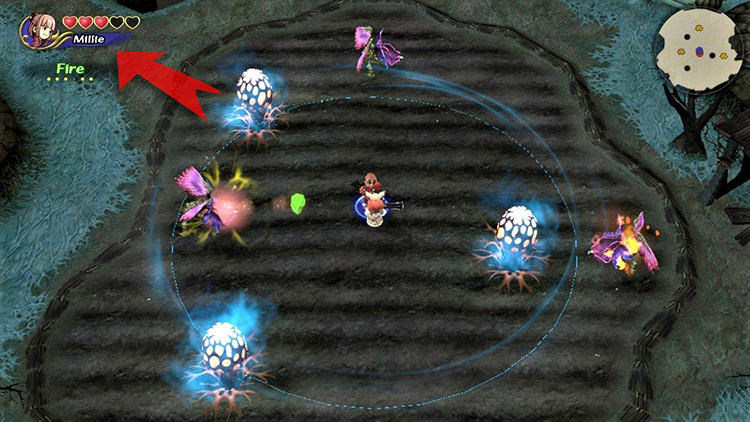
Fight your way to the northwest corner of the farm, and you’ll find two Skeleton Mages protecting a wooden bridge.
Kill them, but don’t cross just yet.
First, head south through the plant membrane to find a Recipe chest protected by a Carrion Worm.
Turn left as you exit this room to find the final Recipe chest.
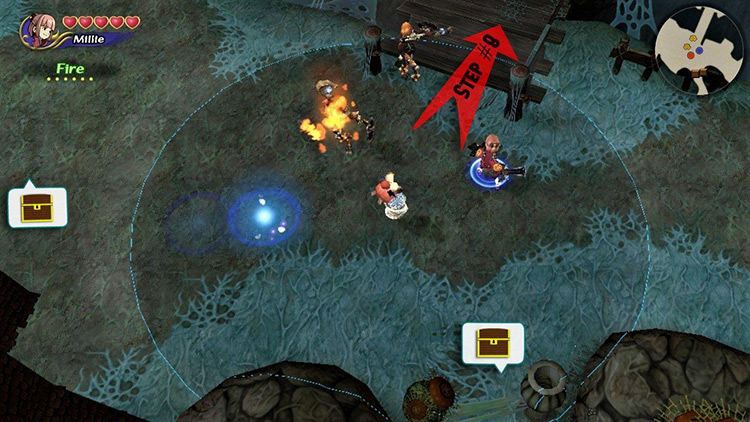
Step #8: Open the Gate to the Boss
Cross the wooden bridge and head right to find the entrance to the boss room.
One of the two Carrion Worms protecting the gate will drop the key needed to open it.
Remember to burn off the vines with Fire before placing the token on the altar.
Prepare your Command List and head in to fight Tida Village’s boss.
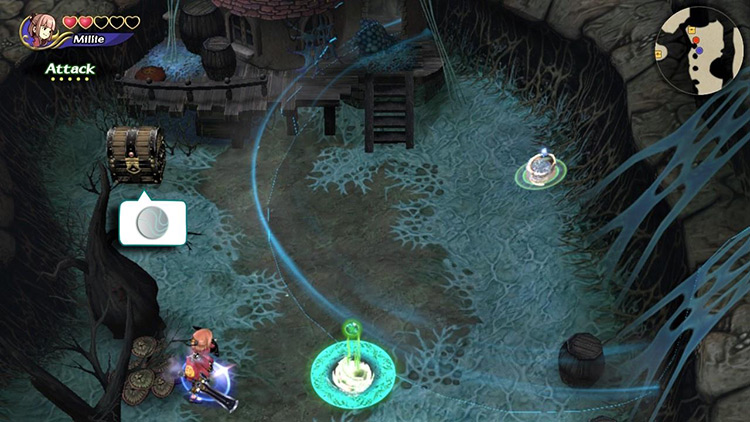
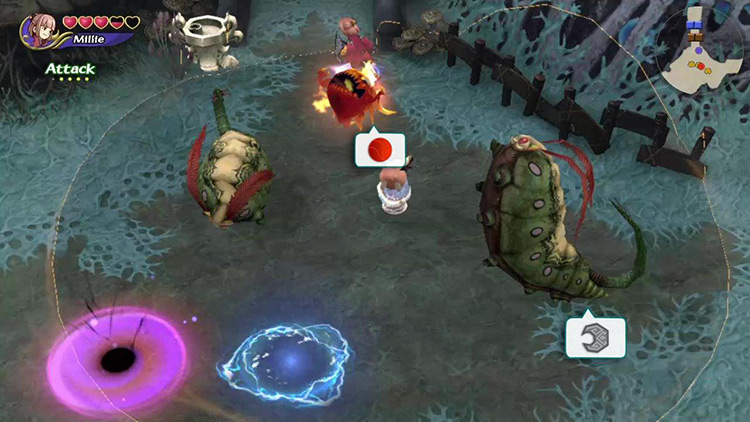
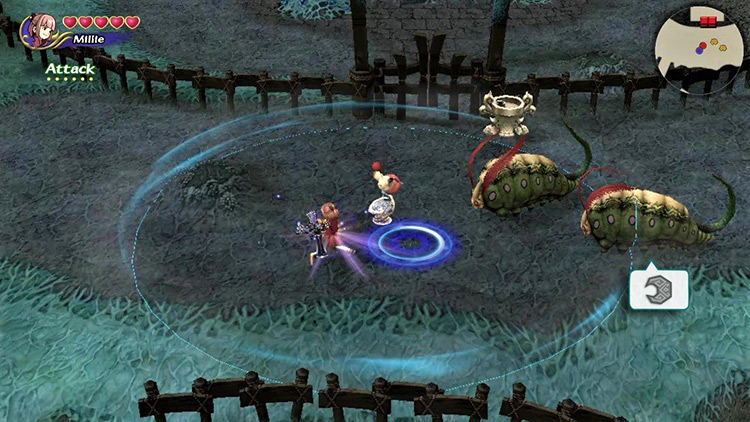
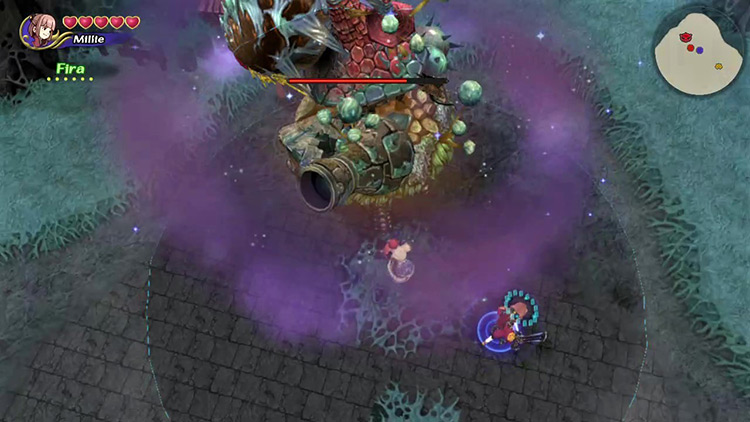
Boss: Armstrong
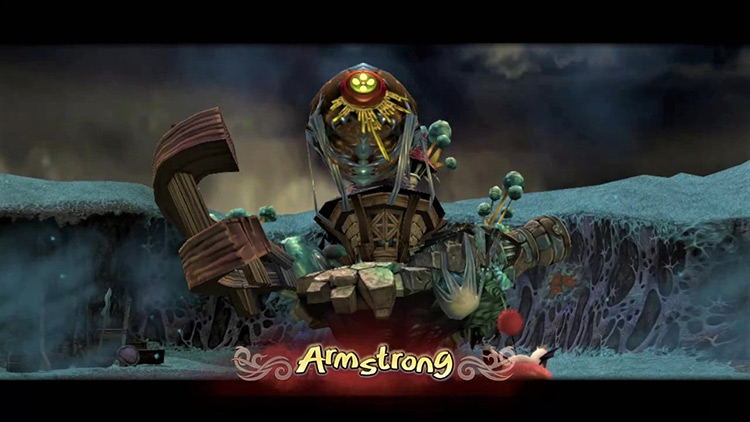
Armstrong is one of the most mobile bosses in the game, making the enormous arena feel rather cramped.
Despite its high speed, most of its attacks are well-telegraphed, allowing you to avoid them most of the time.
Here are some things to keep in mind to make the fight easier.
Tip #1: Focus on the Skeleton Mages
Armstrong begins the fight with two Skeleton Mages ready to gang up on you.
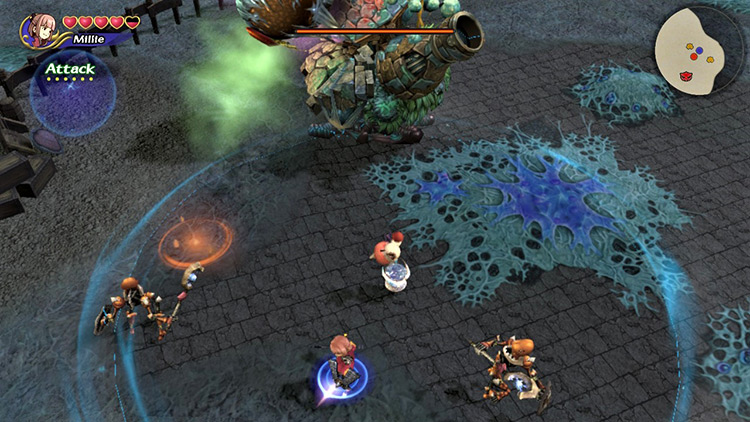
Here’s why that’s a problem:
- They can deal tons of damage if Armstrong inflicts Slow on you.
- You’ll get Paralyzed if they hit you with Thunder.
- They might get in Mog’s way and expose you to Miasma.
That’s why your first priority always needs to be defeating the Skeleton Mages.
Tip #2: Kill it With Fira
Armstrong and its Skeleton Mage underlings are weak to Fire, but the regular spell might fall short of what you need for this fight.
You want to fuse two Fire magicite into Fira in your Command List to increase its damage and radius.
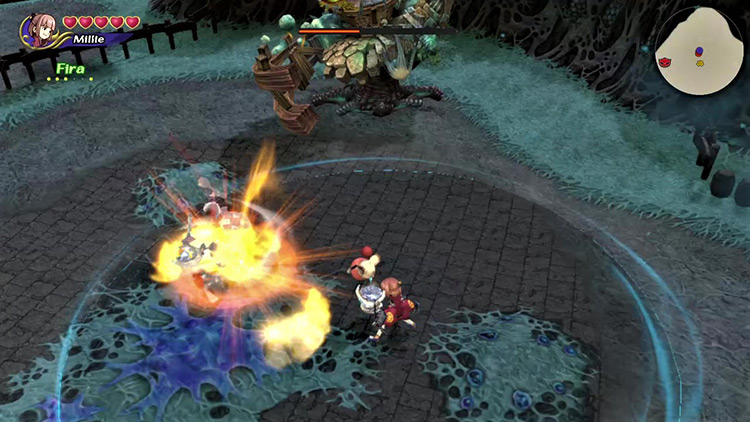
Fira might even one-shot the Skeleton Mages if your character has decent Magic stats, and it’ll lower Armstrong’s beefy health bar like nothing else.
If you can cast Firaga with a Multiplayer companion or with Mog, that’s even better.
Tip: Higher-level spells take longer to cast.
Tip #3: Keep Your Distance
Armstrong tends to use different attacks depending on how far you are from each other.
It’ll spin its fence arm around at short range for sizable physical damage. This move is fast and hard to dodge if you’re within range when it starts.
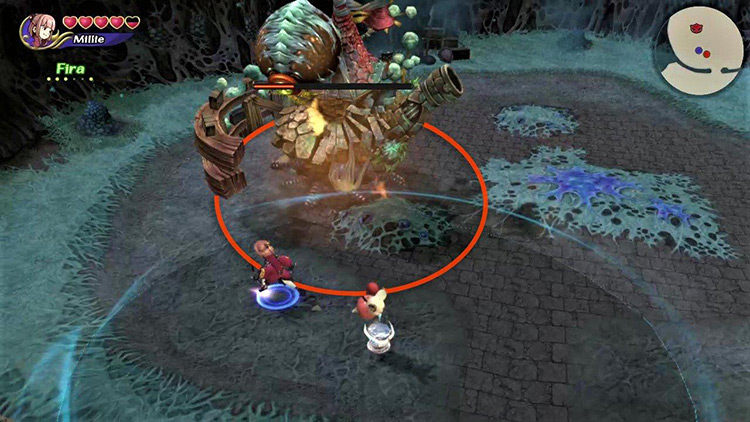
Your best bet is to keep a medium distance where it can’t hit you with the spinning attack. This will make it rely on ranged moves, which are easier to avoid.
Tip #4: Make Room for Cure & Clear
Along with heavily-damaging melee and ranged attacks, Armstrong will also try to afflict you with status ailments like Slow and Poison.
They’re not that hard to avoid, but little mistakes add up.
Ideally, you want to keep both Clear and Cure in your Command List. This almost guarantees victory – even if the fight drags on.
If Fira or Firaga don’t leave enough room on your Command List, then Cure alone will do.
Changes with Dungeon Cycles
Nothing changes in the dungeon’s layout the second or third time you return for Tida’s myrrh.
There’s better treasure, along with stronger monsters.
The main addition from Cycle 2 onward is the locust-like Abbadon enemy, which must be hit with Gravity before you can inflict damage.
Armstrong’s Cannon move gets different status effects with every cycle.
- Cycle 2: Stop
- Cycle 3: Curse
Just another reason to put Clear on your Command List before the fight.
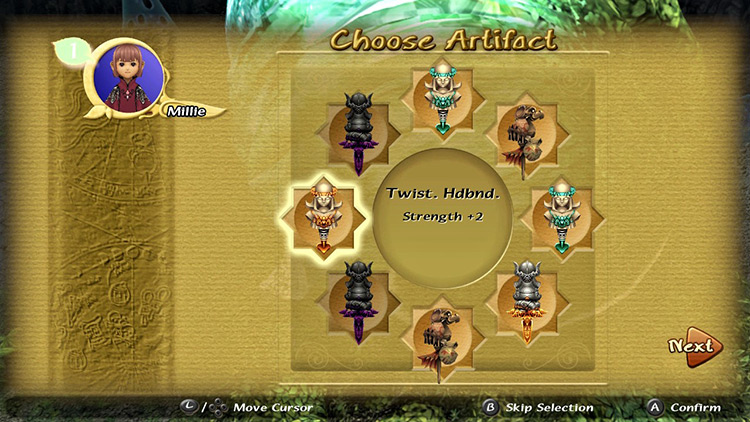
Obtainable Items
You’ll find Artifacts, crafting Recipes, and Materials throughout the dungeon. You get to keep all Recipes and Materials, but you can only choose one Artifact to take with you.
Chest Items
SCROLL
| Cycle | First | Second | Third |
|---|---|---|---|
| Recipes | Faerie Kit Iron Armor Iron Belt Iron Gloves Iron Sallet Iron Shield Master’s Weapon Mythril Armor Mythril Gloves Mythril Sallet Mythril Shield Warrior’s Weapon |
Faerie Kit Frost Belt Frost Gloves Frost Sallet Frost Shield Iron Armor Master’s Weapon Mythril Armor Mythril Belt Mythril Gloves Mythril Sallet Mythril Shield Time Armor Victorious Weapon Warrior’s Weapon |
Angel Kit Eternal Sallet Faerie Kit Frost Belt Frost Gloves Frost Sallet Frost Shield Gold Gloves Holy Armor Magic Shield Master’s Weapon Mighty Weapon Pure Armor Time Armor Valiant Weapon Victorious Weapon Wind Belt |
| Artifacts | Ashura Cat’s Bell Chocobo Pocket Dragon’s Whisker Helm of Arai Ice Brand Kaiser Knuckles Mage Masher Maneater Moogle Pocket Silver Bracer Sparkling Bracer |
Cat’s Bell Chocobo Pocket Elven Mantle Fang Charm Helm of Arai Ice Brand Kaiser Knuckles Kris Moogle Pocket Ogrekiller Sage’s Staff Silver Bracer |
Chocobo Pocket Elven Mantle Engetsurin Fang Charm Kris Mage’s Staff Mjollnir Moogle Pocket Ogrekiller Rune Bell Rune Staff Sage’s Staff Wonder Bangle |
Monster Items
SCROLL
| Cycle | First | Second | Third |
|---|---|---|---|
| Abaddon | None present | Jagged Scythe Mythril |
Jagged Scythe Mythril |
| Bomb | Bronze Bronze Shard Iron Iron Shard |
Flame Craft (R) Iron Iron Shard Magma Rock |
Flame Armor (R) Flame Craft (R) Magma Rock |
| Carrion Worm | Iron Worm Antenna |
Faerie Kit (R) Iron Worm Antenna |
Angel Kit (R) Faerie Kit (R) Worm Antenna |
| Gremlin | Crystal Ball | Blue Silk Iron Shard Ruby |
Blue Silk Jade Ruby Tiny Crystal |
| Skeleton | Gear | Gear | Gear |
| Skeleton Mage | Gear | Gear | Gear |
| Stone Plant | None present | Alloy Mythril |
Alloy Mythril Tiny Crystal |
Boss Items
Each boss has four possible drop pools per cycle.
Your Bonus Points determine which rewards you qualify to get. The higher your points, the more chances you have to get good rewards.

Higher ranks can randomly get any of the previous reward pools. There’s also a tiny chance that the contrary might happen, giving you higher-level rewards at low scores.
SCROLL
| Cycle | First | Second | Third |
|---|---|---|---|
| 0+ BP | Chocobo Pocket Dragon Whisker Silver Spectacles Twisted Headband |
Chocobo Pocket Elven Mantle Maneater Silver Bracer |
Ancient Potion Flametongue Giant’s Glove Wonder Bangle |
| 154+ BP | Kris Moogle Pocket Shuriken Sparkling Bracer |
Cat’s Bell Power Wristband Sasuke’s Blade Sparkling Bracer |
Gold Hairpin Orichalcum (M) Rune Bell Wonder Bangle |
| 193+ BP | Chocobo Pocket Elven Mantle Maneater Silver Bracer |
Ancient Potion Flametongue Giant’s Glove Wonder Bangle |
Chocobo Pocket Legendary Weapon Power Wristband Silver Bracer |
| 241+ BP | Cat’s Bell Power Wristband Sasuke’s Blade Sparkling Bracer |
Gold Hairpin Orichalcum (M) Rune Bell Wonder Bangle |
Brigandology Cat’s Bell Dweomer Spore (M) Green Beret |

-
Final Fantasy Crystal Chronicles Remastered
- Tida Village Dungeon Guide + Map (FFCC Remastered)
Related Posts:
 Mushroom Forest Dungeon Guide + Map (FFCC Remastered)
 River Belle Path Dungeon Guide + Map (FFCC Remastered)
 Goblin Wall Dungeon Guide + Map (FFCC Remastered)
 Mine of Cathuriges Dungeon Guide + Map (FFCC Remastered)
 Moschet Manor Dungeon Guide + Map (FFCC Remastered)
 Veo Lu Sluice Dungeon Guide + Map (FFCC Remastered)