To unlock the Level 50 trial Battle on the Big Bridge, also known as the Gilgamesh trial, you need to accept the Level 50 quest “The Three Collectors” from Hildibrand in Western Thanalan (X:13.1, Y:14.1).
“The Three Collectors” quest is part of the comedic Hildibrand Adventures questline from patch 2.2 of the ARR expansion.
TABLE OF CONTENTS
Step-by-Step Unlock Guide
- Finish the Level 50 Main Scenario Quest (MSQ) “The Ultimate Weapon” from Raubahn in Northern Thanalan (X:15.0, Y:16.0).
- Complete the quest “The Rise and Fall of Gentlemen” from Wymond in Ul’dah – Steps of Nald (X:9.8, Y:8.7) to begin the Hildibrand Adventures questline.
- Accept the Level 50 quest “The Three Collectors” from Hildibrand in Western Thanalan (X:13.1, Y:14.1).
- Follow along with the story and talk to the necessary NPCs, starting with the Sellsword Sergeant at the Observatorium in Coerthas Central Highlands (X:25.0, Y:28.4).
Detailed Unlocking Guide
The Level 50 quest “The Three Collectors” is part of the comedic Hildibrand Adventures questline.
To unlock Hildibrand’s questline, you need to finish the Level 50 Main Scenario Quest (MSQ) “The Ultimate Weapon” from Raubahn in Northern Thanalan (X:15.0, Y:16.0).
Once you’re done with the MSQs, head to Ul’dah – Steps of Nald (X:9.8, Y:8.7) and accept the Level 50 quest “The Rise and Fall of Gentlemen” from Wymond to begin the questline.

The Hildibrand Adventures questline is a comedic twist to the relatively serious Final Fantasy XIV Main Scenario Questline.
Hildibrand Manderville, heir to the Manderville empire, and his trusty assistant Nashu Mhakaracca embark on a journey to investigate and deliver justice for the common man in an incredibly unique way.
You’ll need to go through the fun and quirky story to unlock The Battle of the Big Bridge. If you need a break from the main story, you’ll definitely enjoy this change of pace.
Watch the cutscenes and go through the quests until you reach the Level 50 quest “The Three Collectors” from Hildibrand in Western Thanalan (X:13.1, Y:14.1).
By this point, you’ll know that the Hildibrand quests take longer than usual due to the dialogues and crazy cutscenes.
After accepting the quest, you’ll need to interact with the following NPCs:
- Sellsword Sergeant at the Observatorium in Coerthas Central Highlands (X:25.0, Y:28.4)
- Sellsword Watchman at the Observatorium in Coerthas Central Highlands (X:26.4, Y:28.4)
- Hildibrand in Coerthas Central Highlands (X:26.6, Y:27.9)
- A destination point in the wilderness east of the Observatorium in Coerthas Central Highlands (X:29.3, Y:29.0)
- Hildibrand once more at Griffin Crossing in Coerthas Central Highlands (X:31.2, Y:31.0)
Once you’re done, the Battle of the Big Bridge trial will be unlocked.
This trial requires at least a Level 50 Disciple of War or Magic job and an average item level of 50 to enter.
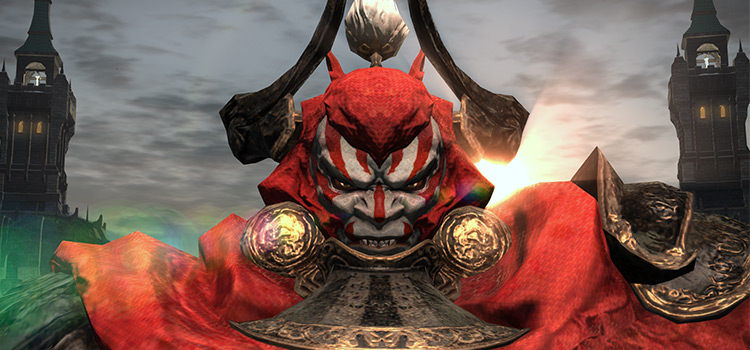
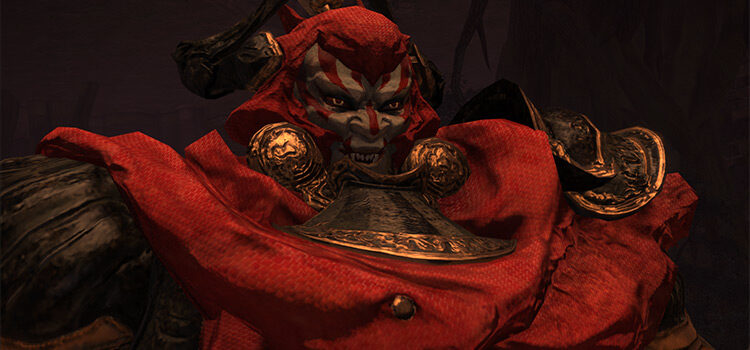
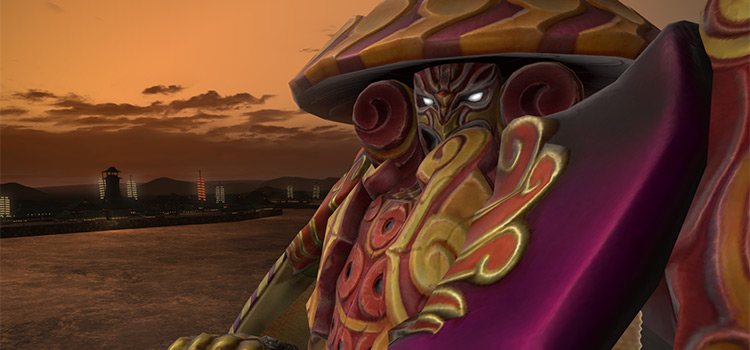
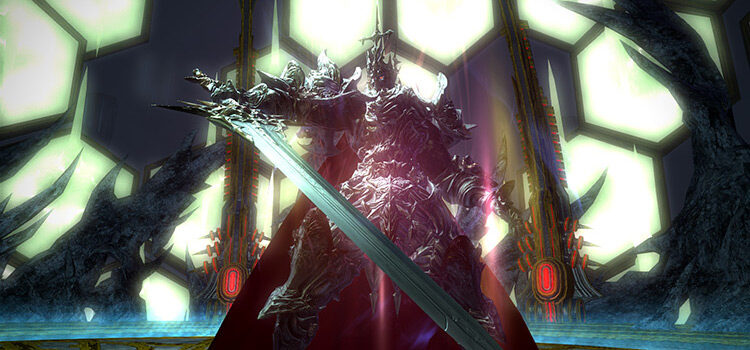
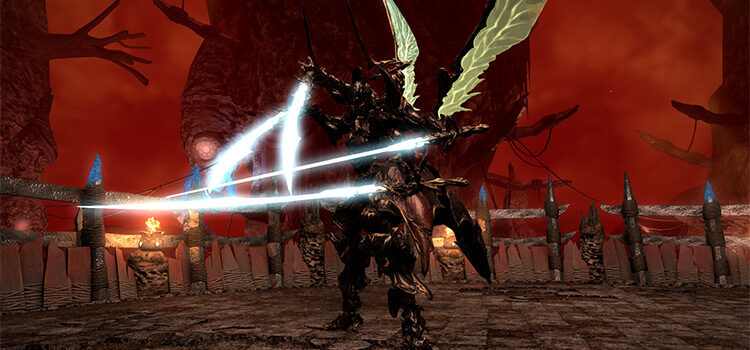
Trial Boss: Gilgamesh
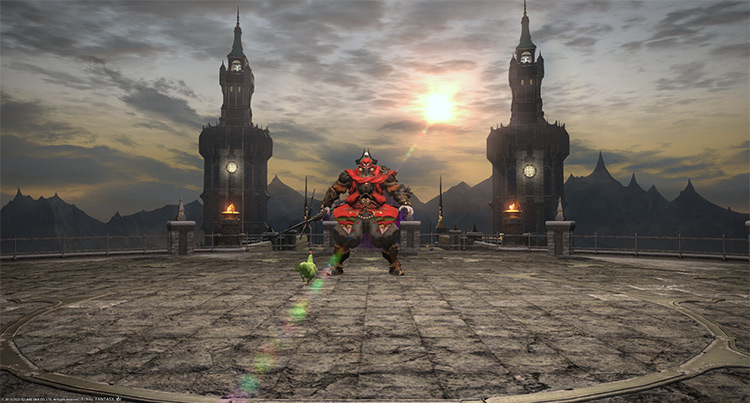
Being an old Level 50 trial, Battle on the Big Bridge can be easily soloed unsynced with a high-level character.
You can ignore any of the boss’ attacks due to the overwhelmingly high echo buff. However, if you encounter this in your Duty Roulette: Trials or you’re doing this trial with a Level 50 character, you’ll need to know the synced mechanics.
Phase 1: Frog Song and Tiny Song
At the start of the fight, you’ll notice one green chicken wandering around the arena. Move away from this chicken whenever you’re turned into a frog.
- Bitter End (tankbuster): A cleaving tankbuster attack on the primary target. Face the boss away from the party.
- Whirlwind Slash: A non-telegraphed, point-blank AoE attack. Stay away from the boss if you’re using a ranged job.
- Pradamante: The boss will target a random player with a non-telegraphed AoE. Spread out to avoid overlapping damage.
- Frog Song: One random player will be turned into a frog (“Toad” debuff) for 20 seconds. During this time, the chicken Enkidu will chase the affected player and deal high damage on hit. Run away from Enkidu until the debuff wears off.
- Bitter End (telegraphed): Later in the fight, the boss will also cast Bitter End as a telegraphed attack.
- Tiny Song + Bitter End (telegraphed): A random player will be debuffed with “Minimum,” increasing the damage they take, reducing the damage they deal, and slowing their movements. Then, the boss will chase the affected player around with a telegraphed “Bitter End” AoE multiple times. Sidestep the AoEs to avoid.
- Rocket Punch: A single-target attack that inflicts a “Confused” debuff for 30 seconds. This debuff forces players to attack their allies. Heal the affected player’s HP to 100% to dispel the debuff.
- Grovel: At around 50% HP, the boss will drop to his knees and go into a spiel while preparing a non-telegraphed AoE attack. Move away from the boss until the cast goes off. This skill also grants the boss “Haste,” “Physical Vulnerability Down,” and “Magic Vulnerability Down” buffs.
- Bomb: At around 40% HP, the boss will disappear and drop a bomb, signaling the end of Phase 1. Move away from the bomb and proceed to the next area.
Phase 2: Crossing Mobs
On the way to the second arena, you’ll face three Crossing Hippocerfs and three Crossing Bateleurs. Kill the mobs to force the boss out of hiding in the final arena.
- Peck (Crossing Bateleur): Normal attack.
- Wing Cutter (Crossing Bateleur): A frontal cone AoE attack.
- Beak Snap (Crossing Hippocerf): Normal attack.
- Shriek (Crossing Hippocerf): A point-blank AoE attack that inflicts a 3-second stun.
Phase 3: Whirlwind + Improved Mechanics
In Phase 3, there will be five chickens to run away from. Most of the boss’ attacks will be repeated and improved (except for Grovel and Bomb), along with some new ones:
- Pradamante and Whirlwind Slash (Phase 3): The boss will now use telegraphed and non-telegraphed versions of these AoEs.
- Frog Song (Phase 3): This debuff will now affect multiple players.
- Tiny Song + Bitter End (Phase 3): Handle this combo as you did in Phase 1.
- Rocket Punch (Phase 3): Multiple players will now be inflicted with “Confused.” Remember to top off the players’ HPs to dispel.
- Giga Jump: A random player will be marked. After a few seconds, the boss will jump onto the player, dealing AoE damage. Run away from the rest of your party to avoid overlapping damage.
- Whirlwind Circles: Pockets of air will appear around the arena, dealing damage to anyone that touches them.
Rewards
- Faded Copy of Battle on the Big Bridge Orchestrion Roll (not guaranteed)
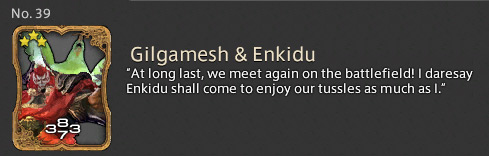
- Gilgamesh & Enkidu Triple Triad Card (not guaranteed)
-
Final Fantasy XIV
- FFXIV Battle on the Big Bridge: How To Unlock + Trial Guide
Related Posts:
 FFXIV Battle in the Big Keep: How To Unlock + Trial Guide
 FFXIV Kugane Ohashi (Yojimbo): Unlock + Trial Guide
 Zurvan EX Unlock & Trial Guide – FFXIV Containment Bay Z1T9 (Extreme)
 FFXIV The Minstrel’s Ballad: Shinryu’s Domain – Unlock + Trial Guide
 FFXIV Minstrel’s Ballad: Nidhogg’s Rage – Unlocking + Trial Guide
 Sophia EX Unlock & Trial Guide – FFXIV Containment Bay P1T6 (Extreme)
 FFXIV The Minstrel’s Ballad: Thordan’s Reign – Unlock + Trial Guide
 FFXIV Thok ast Thok (Extreme): How To Unlock + Trial Guide