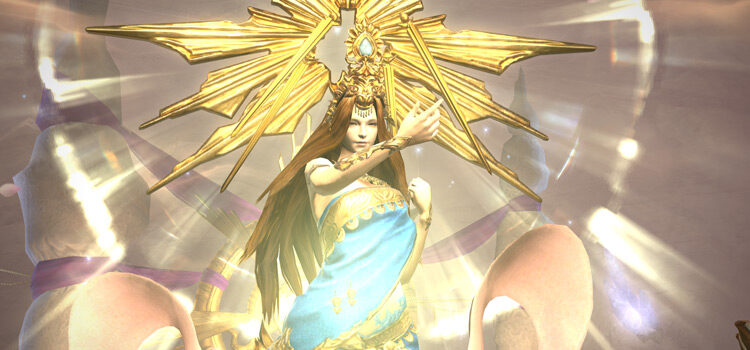
You can unlock the Level 70 trial The Minstrel’s Ballad: Shinryu’s Domain, also known as Shinryu EX, by selecting the option “Talk about Shinryu” while talking to The Wandering Minstrel in Kugane (X:11.5, Y:12.5).
This option only becomes available after clearing Shinryu’s normal mode in The Royal Menagerie trial, and after completing the Level 70 MSQ “Stormblood” from Pipin in The Lochs (X:32.6, Y:22.9).
Let’s go through the full unlock requirements + all the trial battle mechanics below.
TABLE OF CONTENTS
Step-by-Step Unlock Guide
- Accept the Level 70 MSQ “Stormblood” from Pipin in The Lochs (X:32.6, Y:22.9).
- Defeat Shinryu in the level 70 trial “The Royal Menagerie”.
- Talk to The Wandering Minstrel in Kugane (X:11.5, Y:12.5) and select the option “Talk about Shinryu”
Detailed Unlock Guide
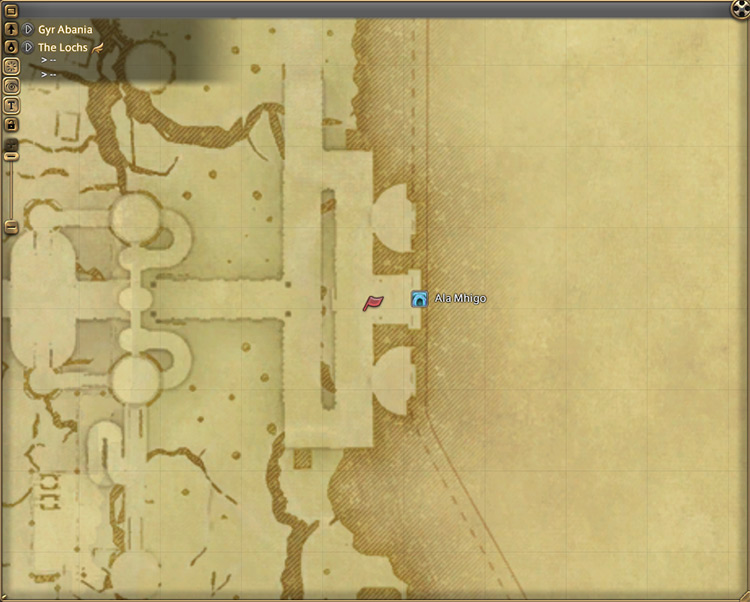
Start by accepting the Main Scenario Quest (MSQ) “Stormblood” from Pipin in The Lochs (X:32.6, Y:22.9).
“Stormblood” is the final quest for the Main Scenario Questline in patch 4.0 of the Stormblood expansion, so you’ll need to finish every MSQ leading up to this quest beforehand. This includes all of the MSQs in the previous expansions, A Realm Reborn and Heavensward.
In this quest, you’ll encounter Shinryu’s normal version in the Level 70 trial “The Royal Menagerie.”
The trial requires at least Level 70 Disciple of War or Magic job and an average item level of 280 to enter.
Defeat Shinryu in “The Royal Menagerie” and watch the succeeding cutscenes to finish the quest.
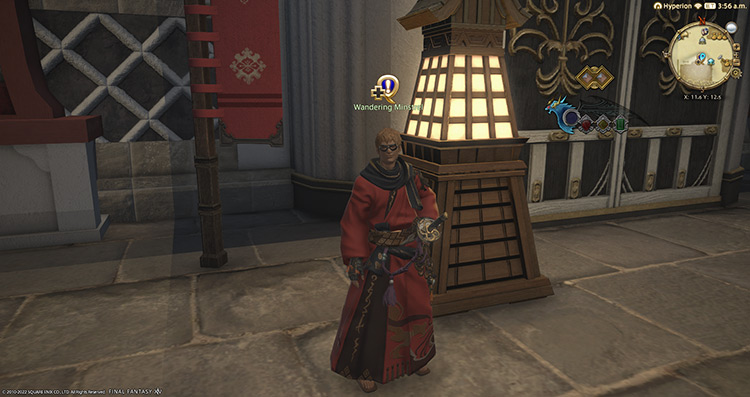
After completing “Stormblood,” you can now head to Kugane and talk to The Wandering Minstrel (X:11.5, Y:12.5).
Take the Kogane Dori Markets Aetheryte to get to him faster.
Once you arrive, select the option “Talk about Shinryu”.
A quick cutscene will begin, showing the minstrel praising you for your efforts in saving the Ala Mhigan people from the Garlean occupation.
Immediately after the cutscene, The Minstrel’s Ballad: Shinryu’s Domain will be unlocked, allowing you to fight Shinryu’s extreme version.
This trial also requires at least a Level 70 Disciple of War of Magic job to enter but has a higher average item level requirement of 320.
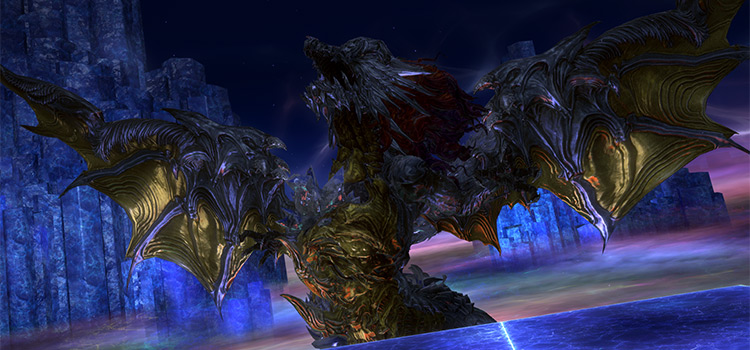
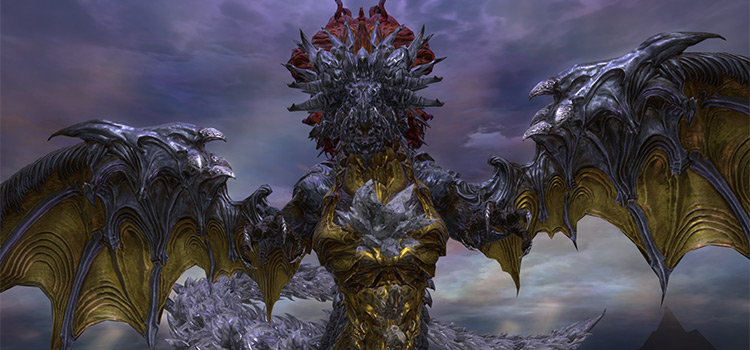
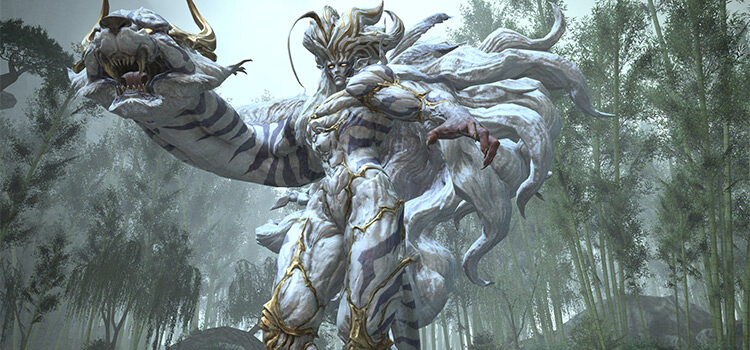
Shinryu EX is a complicated trial with a lot of mechanics to remember.
We’ll cover each mechanic and their corresponding rotations below.
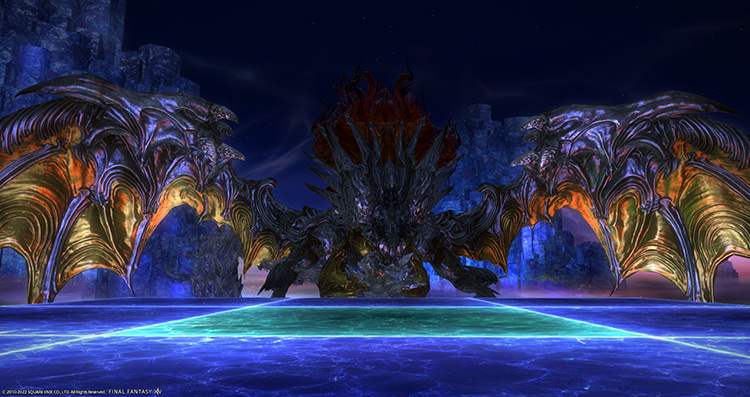
Trial Boss Guide: Shinryu (Extreme)
As of the Endwalker expansion, this trial can be soloed with a level 90 tank character with at least a 20% echo buff. Since you’ll need to wipe a few times to increase your echo buff, soloing the trial isn’t a recommended way of farming.
You can bring a friend along to smoothly clear this trial as a duo. Ideally, you want to bring another tank or healer to deal with the “Reiryu” dragon heads and provide more survivability. But if you can keep a DPS player alive with tank heals and mitigation, any job is viable to bring.
If you want to do the trial with seven of your friends while synced, use the explanations below to help your party clear it smoothly.
Pre-fight Preparation
To make pairing easier for upcoming mechanics, mark the DPS players 1 to 4 and the healers/tanks with related signs (shapes/chains/stop).
This fight has a lot of moving parts, so we’ll go through each phase step-by-step after the mechanics are explained.
Here are some important notes to look out for during the fight:
- Platforms: At the start of the fight, you’ll notice that the arena is divided into nine platforms, with the middle platform having a lighter shade of blue. Each platform can take two hits before it’s destroyed.
When a platform is hit once, it’ll show a huge crack in the middle. As you deal with “Tail Slap” during the fight, make sure the middle platform only takes one hit at most. If the middle platform is destroyed, the party will wipe. - The Worm’s Heart: The boss’ heart will be exposed multiple times throughout the fight. Its heart will have a constant “Regen” buff and get a stack of “Max HP Up” buff with every respawn. Destroying the heart deals huge damage to the boss, so focus it down as soon as possible.
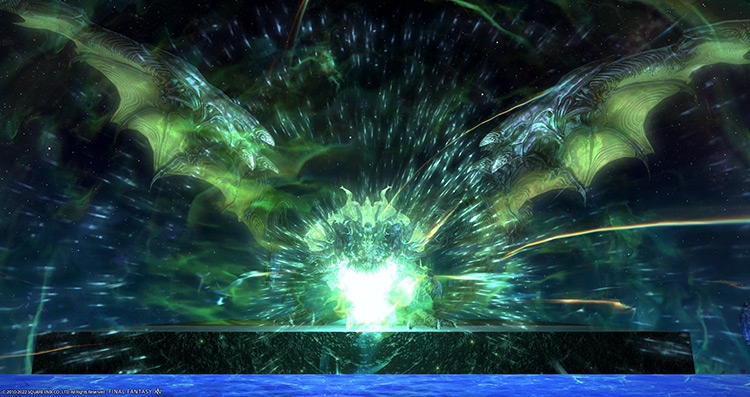
- Corrupted Aether Gauge: This gauge will continuously fill up throughout the fight. Once it reaches 100, the boss will use one of many ultimate attacks: Earthen Fury, Tidal Wave, Judgement Bolt, Hellfire, Diamond Dust, or Aerial Blast.
This gauge also serves as a timer for killing “The Worm’s Heart.” If the gauge reaches 100 and the heart is still alive, the incoming ultimate will deal increased damage and may wipe the party. - Water Puddles: Water puddles appear after ice or water-aspected ultimates (Tidal Wave and Diamond Dust). These puddles will grant players “Fire Resistance Up” buffs and “Lightning Resistance Down II” debuffs. Stand on these puddles to mitigate incoming “Hypernova” attacks. These puddles are removed after fire or lightning-aspected ultimates (Judgement Bolt and Hellfire).
Phase 1: The Worm’s Heart and Tail Slap
Rotation:
Earthen Fury > Burning Chains > Tidal Wave > Tail Marker (Healer) > Tail Slap #1 + Summon Icicle > Levinbolt or Hypernova > Dragonfist + Ice Storm > Akh Morn + Akh Rhal > Summon Icicle + Judgement Bolt or Hellfire > Tail Marker (DPS) > Levinbolt > Tail Slap #2 > Ice Storm.
- Earthen Fury: An ultimate attack that deals room-wide AoE damage. Mitigate and heal through the damage. This attack also destroys the middle-left and middle-right platforms and cracks three other platforms. Keep the cracked platforms in mind for upcoming mechanics.
- Burning Chains: Pairs of players with the same roles may be chained together throughout the encounter. The chains apply constant “Burns” DoTs and stacking “Suppuration” debuffs to affected players. “Suppuration” lowers maximum HP and increases damage taken. Each player must move away from their chained partner until the chains are broken.
- Tidal Wave: An ultimate attack that spawns a whirlpool on one side of the arena during its cast. Once the attack goes off, a tidal wave will wash over the arena from the direction of the whirlpool, knocking players back and dealing room-wide AoE damage. Run toward the whirlpool to give yourself enough room for the knockback, or use knockback-immunity skills.
- Tail Slap (Healer #1 and DPS #2): The boss will mark one player with a huge green crystal. Wherever the player is standing once the crystal disappears will indicate where the tail will slam. The slam will be two platforms long, destroying cracked platforms and cracking undamaged platforms.
Marked players must bait the tail to an undamaged platform. Immediately after the slam, the tail will be exposed and must be burned down to inflict massive damage to the boss. Keep all the platforms in front of the boss intact for the first two tail slaps. - Summon Icicle: Three icicles will spawn from the south. After some time, the icicles will rush through the arena, dealing non-telegraphed line attacks that knock players back and apply a “Slow+” debuff for 60 seconds. This debuff slows a player’s skill cast and recast time. Look behind you and move away from the icicles’ paths.
- Levinbolt: All players will be marked with non-telegraphed point-blank AoEs. These AoEs also inflict 8-second “Electrocution” DoTs. Standing in water puddles will amplify its damage and most likely kill you. Spread these AoEs out while avoiding the water puddles.
- Hypernova: A concentrated fire AoE on the player farthest from the group. This attack can instantly kill a player on their own. Have everyone stack inside a water puddle to share and mitigate the damage.
- Dragonfist: The boss will target the middle platform with a black and red AoE. Getting hit by this AoE will result in a 2-second stun and a stacking “Vulnerability Up” debuff. Move away from the middle platform. Note that this attack doesn’t damage the platform.
- Ice Storm: A moderate room-wide AoE attack. Mitigate and heal through the damage.
- Akh Morn: A multi-hit tankbuster that should be shared by both tanks. Stack together while mitigating the attack.
- Akh Rhal: During “Akh Morn,” a random DPS player will also be targeted with a small multi-hit AoE. This attack will stay on the DPS player’s initial location, so just move away as soon as it goes off.
- Judgement Bolt: A room-wide ultimate attack that applies “Paralysis” on four random players. Heal through the attack and dispel the debuffs.
- Hellfire: Another room-wide ultimate attack that needs to be mitigated by standing in water puddles. Remember to look toward the south for “Summon Icicles” while repositioning inside water puddles.
Here’s what you need to do for Phase 1:
- Mitigate and heal through “Earthen Fury” and keep track of the cracks on the platforms.
- Run away from your chained partner to break the “Burning Chains.”
- Run toward the whirlpool or use knockback-immunity skills for “Tidal Wave.”
- Drop the healer tail marker on an uncracked platform.
- Avoid the icicles and destroy the first tail.
- Move away from one another if it’s “Levinbolt,” or stack inside a water puddle if it’s “Hypernova.”
- Move away from the center while mitigating and healing through “Ice Storm.”
- Have the tanks stack and heal through “Akh Morn” while the affected DPS player moves away from “Akh Rhal.”
- Dodge incoming icicles again while healing through “Judgement Bolt” or “Hellfire.”
- If it’s “Judgement Bolt,” dispel the “Paralysis” debuffs.
- If it’s “Hellfire,” stack in a water puddle to mitigate the AoE damage.
- Drop the DPS tail marker on an uncracked platform.
- Spread out and heal through another “Levinbolt.
- Mitigate and heal through another “Ice Storm” while destroying the second tail.
Phase 2: Earth Breath, Reiryu, and Tail Slap #3
Rotation:
Burning Chains > Earth Breath > Akh Morn + Akh Rhal > Ice Storm > Diamond Dust + Burning Chains > Reiryu x4 > Tail Marker (Tank) > Tail Slap #3 > Summon Icicle + Akh Morn + Akh Rhal > Aerial Blast > Burning Chains > Earth Breath > Ice Storm > Gyre Charge > Hypernova > Akh Morn + Akh Rhal > Levinbolt > Tidal Wave > Dark Matter.
You can skip some mechanics on the latter half of Phase 2 if you bring the boss down to around 45% HP before the rotation ends.
- Earth Breath: One DPS and one healer will be marked with “Earth Breath,” a non-telegraphed frontal cone that applies a 15-second “Sludge” DoT. Spread each marker out to the northwest and southwest corners. If you handled the first two “Tail Slap” attacks correctly, both corners should still be intact.
- Diamond Dust + Burning Chains: “Diamond Dust” is a room-wide ultimate AoE attack that will make the floor slippery for a few seconds. During this time, both healers will be tethered with “Burning Chains.”
To handle this combo, have one healer stand in the middle platform while the other stands on a platform in front of the boss. Once the floor becomes slippery, have the healers slide away from each other to break the chains. - Reiryu: Four dragon heads will tether to DPS players and cast “Dragonflight.” Healers must quickly heal the dragon heads to full HP to stop the cast and avoid the incoming attack.
- Dragonflight (Reiryu): A room-wide AoE attack that applies a stacking “Damage Down” debuff to everyone. Heal the dragon heads to full HP.
- Aerial Blast: A room-wide ultimate attack that spawns a whirlwind on the middle platform. This whirlwind will knock players back four times, with the final knockback being much farther than the first three. Run toward the middle after each knockback, or use knockback-immunity skills.
- Gyre Charge: The boss will jump toward one of the intercardinal directions and prepare “Gyre Charge,” a very wide rushing attack. This attack knocks players back and inflicts a stacking “Vulnerability Up” debuff to anyone hit. Move to one of the adjacent corner platforms to avoid this attack.
- Tail Slap #3: This final “Tail Slap” will target the tank. Ideally, the marker should be dropped on the front platforms.
- Dark Matter: An Active Time Maneuver where you’ll need to spam-click or press random buttons on your keyboard/controller quickly to free yourself. You have five seconds to break out, or you will die.
Here’s what you need to do in Phase 2:
- Run away from your chained partner for “Burning Chains.”
- Spread out each “Earth Breath” marker on opposite corners of the front platforms.
- Have the tanks stack and heal through “Akh Morn” while the affected DPS player moves away from “Akh Rhal.”
- Mitigate and heal through another “Ice Storm.”
- Use the slippery floors from “Diamond Dust” to break the next set of “Burning Chains.”
- Top off the dragon heads’ HP bars to avoid the nasty “Dragonflight” AoEs.
- Drop the final tank tail marker on an uncracked platform and burn down the boss’ exposed tail right after.
- Dodge the incoming icicles while healing through “Akh Morn” and dodging “Akh Rhal.”
- Run toward the whirlwind after each knockback, or use knockback-immunity skills.
- Run away from your chained partner again while pre-positioning for “Earth Breath.”
- Mitigate and heal through another “Ice Storm” and dodge toward the corner platforms for “Gyre Charge.”
- Stack on a water puddle and heal through another “Hypernova.”
- Heal through another “Akh Morn” + “Akh Rhal” combo and spread out for “Levinbolt.”
- Run toward the whirlpool or use knockback-immunity skills for “Tidal Wave.”
Phase 3: Hakkinryu and Ginryu
Rotation:
Touchdown > Hakkinryu + Ginryu x4 > Hakkinryu x2 + Ginryu x 3 > Explosive Hatch > Ginryu x5 > Protostar.
You’ll see a gauge for the boss’ ultimate, “Protostar” on the duty list. The three sets of mobs must be killed before the gauge reaches 100, or the party will wipe.
- Touchdown: After “Dark Matter,” the entire party will be thrown off to a new platform. You’ll also notice a bigger platform in the distance while in the air. Then, the boss will use “Touchdown,” a proximity-based AoE with a strong knockback. Let yourself be knocked into the adjacent platform by standing near the edge of the first platform.
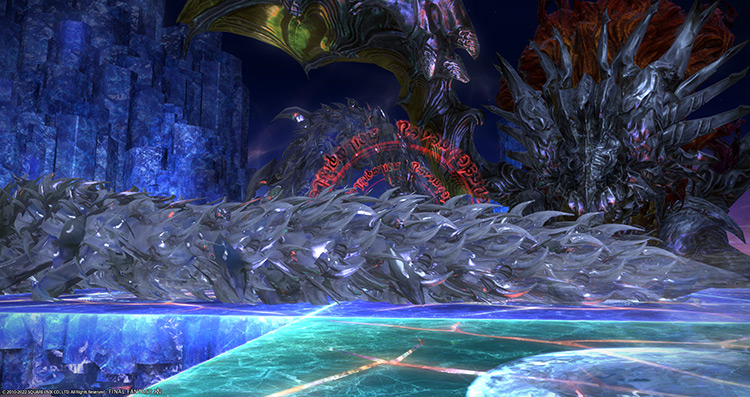
- Hakkinryu and Ginryu: The boss will spawn small “Ginryu” and large “Hakkinryu” dragon mobs throughout the phase. Each mob will spawn from the proximity-based markers on the ground. Move as far away as you can from the markers, then burn down the mobs that spawn.
- Death Sentence (Hakkinryu): A single-target tankbuster on the primary tank.
- Double Dive (Hakkinryu): A non-telegraphed knockback attack on the primary target.
- Fireball (Ginryu): Targeted circle AoEs on random players.
- Spiked Tail (Ginryu): A single-target frontal cleave that applies a 30-second poison DoT.
- Blazing Trail (Ginryu): A wide frontal attack that applies a “Suppuration” debuff.
- Explosive Hatch: Five players will be marked with “Explosive Hatch,” proximity-based AoEs that spawn the last set of “Ginryu” mobs. These markers must be spread out far away from each other. They’ll explode if placed too close together, resulting in room-wide AoE attacks and stacking “Vulnerability Up” debuffs.
Here’s what you need to do in Phase 3:
- Run to the edge adjacent to the next platform for “Touchdown.”
- Stay as far away as possible from the proximity-based markers for the first two sets of mobs.
- Kill the “Hakkinryu” and “Ginryu” mobs that spawn.
- Spread out the “Explosive Hatch” markers to the edges of the platform, then run back to the middle once the markers drop.
- Destroy the remaining “Ginryu” mobs before the gauge reaches 100.
- Mitigate and heal through “Protostar.”
Phase 4: Atomic Ray and Final Tidal Wave
Rotation:
Tail Spit > Aetherial Ray > Doom Puddle > Tera Slash > Burning Chains + Atomic Ray > Levinbolt or Hypernova + Ice Storm > Benighting Breath or Wormwail > Tera Slash > Reiryu x4 > Tera Slash > Burning Chains + Atomic Ray > Levinbolt or Hypernova + Ice Storm > Benighting Breath or Wormwail > Tidal Wave.
- Tail Spit: The boss will thrust its tail through the center of the arena with a blue knockback AoE. Position yourself to be pushed into the corners, or you’ll fall off. Knockback-immunity skills don’t work against this attack. Immediately after the tail lands, sprint up its length to move to the final platform of the encounter.
- Aetherial Ray: Players will be targeted with “Aetherial Ray” while running up the tail. These line attacks stun players for two seconds. Use “Sprint” to outrun them.
- Doom Puddle: Upon getting to the final platform, you’ll see a dark puddle underneath the boss. This puddle applies a 10-second “Doom” debuff to anyone standing in it, instantly killing the affected player when the timer runs out. You may need to stand inside this puddle to avoid an incoming attack later. Don’t linger inside for too long.
- Tera Slash: A heavy-hitting tankbuster on the primary target that also inflicts a “Physical Vulnerability Up” debuff for 25 seconds. Perform a tank swap to survive the normal attacks that follow soon after.
- Atomic Ray: DPS players will be targeted with stack-up markers that must be shared with at least one player. The stack-up markers will inflict 2-second “Magic Vulnerability Up” debuffs. These attacks will go off one at a time and must only be shared with a tank or a healer.
- Ice Storm (Phase 4): This improved version of “Ice Storm” will now apply a “Deep Freeze” debuff for 11 seconds. To avoid this, make sure you’re running around when the cast goes off.
- Levinbolt (Phase 4): “Levinbolt” can now be baited into a specific area after the cast goes off. Stay in one area until the cast goes off, then move out.
- Levinbolt + Ice Storm: For this combo, stack with your group in one area while running around in circles until “Levinbolt” goes off. Then, move out to avoid the non-telegraphed AoEs.
- Hypernova + Ice Storm: For this combo, stack with your party members in one area and let yourselves be frozen by “Ice Storm.” The debuff will be instantly canceled by the incoming “Hypernova” AoE.
- Benighting Breath: A large frontal cone that inflicts the “Infirmity” debuff for 60 seconds, lowering the HP healed by affected players.
- Wormwail: A room-wide donut AoE version of “Benighting Breath” that applies the same debuff. Run inside the “Doom Puddle” until the cast goes off, then move out before the “Doom” timer wears off.
- Tidal Wave (Phase 4): At around 22% HP, the boss will summon geysers around him, allowing everyone to jump on its back. Upon getting on top of the boss, you’ll notice its wings casting “Judgement Bolt” and “Hellfire.”
The wings must be destroyed before their cast goes off, or the party will wipe. Burn down the wing that started casting first. Once both wings are destroyed, burn the boss down. Kill it before “Tidal Wave” goes off, or you will wipe.
Here’s the recap for the final phase:
- Position yourself to be knocked into the corners for “Tail Spit”.
- Run up the boss’ tail while dodging “Aetherial Ray” until you get to the other side.
- Mitigate and heal through “Tera Slash.” Perform a tank swap after the attack.
- Have the DPS players spread out with a tank or healer while breaking the chains, then stack together for “Atomic Ray.”
- Stack together in one area to prepare for the next “Ice Storm” combo:
- If it’s “Levinbolt,” run around in circles until the cast goes off, then move out.
- If it’s “Hypernova,” let yourselves be frozen together.
- Dodge to the sides for “Benighting Breath” or move into the “Doom Puddle” for “Wormwail.”
- Heal through another “Tera Slash” and perform another tank swap immediately after.
- Top off the four “Reiryu” dragon heads to full HP.
- Mitigate, heal, and tank-swap for the final “Tera Slash.”
- Spread out and stack with your partners again for another “Burning Chains” and “Atomic Ray” combo.
- Handle another “Ice Storm” combo as you did in step 5.
- Dodge another “Benighting Breath” or “Wormwail” similar to step 6.
- Jump up the boss’ back to destroy its wings. Focus on the wing that started casting first.
- Burn down the boss before “Tidal Wave” goes off.
Rewards
- 20 Allagan Tomestones of Poetics
- Shinryu Triple Triad Card (not guaranteed)
- Shinryu Totem (1 per clear)
Shinryu Totems can be traded for weapons (10 fragments) or the Legendary Kamuy Fife (99 fragments) with Eschina in Rhalgr’s Reach (X:13.8 Y:11.8).
| Name | Type | Quality |
|---|---|---|
| Shinryu’s Grimoire | Book | Blue (Primal Gear) |
| Shinryu’s Codex | Book | Blue (Primal Gear) |
| Shinryu’s Greatbow | Bow | Blue (Primal Gear) |
| Shinryu’s Cane | Cane | Blue (Primal Gear) |
| Shinryu’s Daggers | Daggers | Blue (Primal Gear) |
| Shinryu’s Revolver | Firearms | Blue (Primal Gear) |
| Shinryu’s Claws | Fist Weapon | Blue (Primal Gear) |
| Shinryu’s War Axe | Greataxe | Blue (Primal Gear) |
| Shinryu’s Greatsword | Greatsword | Blue (Primal Gear) |
| Shinryu’s Gunblade | Gunblade | Blue (Primal Gear) |
| Shinryu’s Katana | Katana | Blue (Primal Gear) |
| Shinryu’s Paladin Arms (IL 335) | Other | Blue (Primal Gear) |
| Shinryu’s Lance | Polearm | Blue (Primal Gear) |
| Shinryu’s Rapier | Rapier | Blue (Primal Gear) |
| Shinryu’s Rod | Staff | Blue (Primal Gear) |
| Shinryu’s Ephemeris | Star Globe | Blue (Primal Gear) |
| Shinryu’s Chakrams | Throwing Weapons | Blue (Primal Gear) |
| Shinryu’s Scale | Crafting material | Basic |
| Faded Copy of The Worm’s Tail | Orchestrion Roll | Basic |
| Shinryu Weapon Coffer | Other | Basic |
| Legendary Kamuy Fife | Other | Basic |
-
Final Fantasy XIV
- FFXIV The Minstrel’s Ballad: Shinryu’s Domain – Unlock + Trial Guide
Related Posts:
 FFXIV The Royal Menagerie: How To Unlock + Trial Guide
 FFXIV The Minstrel’s Ballad: Thordan’s Reign – Unlock + Trial Guide
 FFXIV Minstrel’s Ballad: Nidhogg’s Rage – Unlocking + Trial Guide
 Zurvan EX Unlock & Trial Guide – FFXIV Containment Bay Z1T9 (Extreme)
 The Akh Afah Amphitheatre (Extreme): Unlock + Trial Guide (FFXIV)
 FFXIV Emanation (Extreme): How To Unlock + Trial Guide
 FFXIV Containment Bay S1T7 (Extreme): Unlock + Trial Guide
 FFXIV The Jade Stoa (Extreme): How To Unlock + Trial Guide