You can unlock the level 50 dungeon The Stone Vigil (Hard) by accepting the Level 50 quest “Blood for Stone” from Faillicie in Mor Dhona (X:21.9, Y:8.5). You will also need to be at least at level 50 in a Disciple of War or Magic job.
This unlocking quest has a couple of requirements you need to complete before it becomes available, including the Level 50 Main Scenario Quest “The Ultimate Weapon” from Raubahn in Northern Thanalan (X:15.0, Y:16.0).
Step-by-Step Unlock Guide

- Complete the Level 41 Main Scenario Quest (MSQ) “In Pursuit of the Past” from Alphinaud in Coerthas Central Highlands (X:12.5, Y:16.5).
- Finish the MSQ Level 50 “The Ultimate Weapon” from Raubahn in Northern Thanalan (X:15.0, Y:16.0).
- Accept the Level 50 quest “Blood for Stone” from Faillicie in Mor Dhona (X:21.9, Y:8.5).
- Speak with Drillemont in Coerthas Central Highlands (X:12.7, Y:17.4).
- Talk to Nathelain outside The Stone Vigil in Coerthas Central Highlands (X:8.0, Y:11.1).
Detailed Unlocking Guide
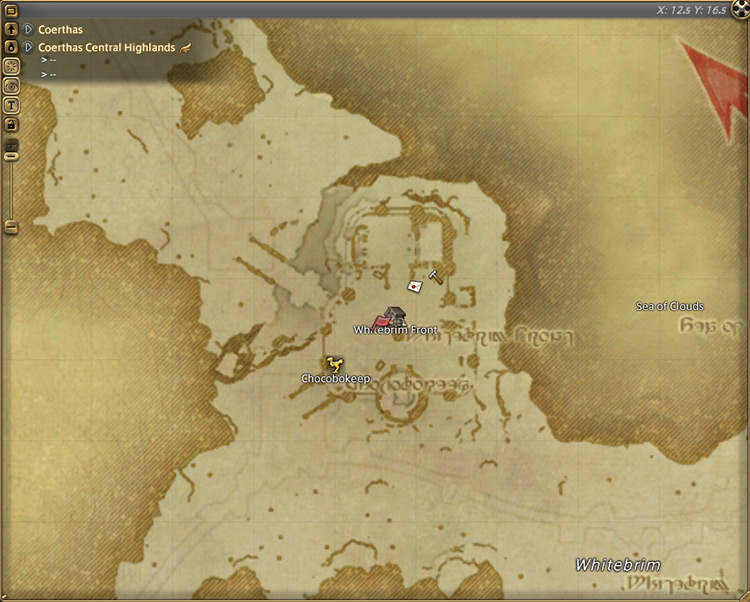
Before you can start unlocking The Stone Vigil (Hard), you must clear its normal version first. To do that, you must complete the Level 41 Main Scenario Quest “In Pursuit of the Past” from Alphinaud in Coerthas Central Highlands (X:12.5, Y:16.5).
This quest appears deep into the patch 2.0 Main Scenario Questline of A Realm Reborn. You need to complete every MSQ leading up to “In Pursuit of the Past” before it becomes available.
Clear The Stone Vigil’s normal mode to complete the quest.
Once you finish “In Pursuit of the Past,” continue working on your MSQs until you finish the Level 50 MSQ “The Ultimate Weapon” from Raubahn in Northern Thanalan (X:15.0, Y:16.0). Completing this quest allows you to unlock the expert-level dungeons in the A Realm Reborn expansions, including The Stone Vigil (Hard).
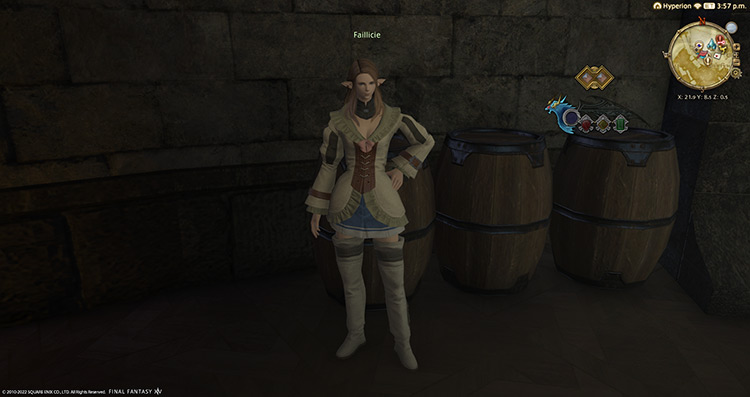
After completing the required MSQs, head to Faillicie in Mor Dhona (X:21.9, Y:8.5) and accept the quest “Blood for Stone” to continue.
In your first venture into the keep, Lord Drillemont asked you to retrieve the ship “Enterprise.”
This time, as you’ll learn from Faillicie, Drillemont wants to retake the entire keep from the Dravanian Horde.
Meet Drillemont in Coerthas Central Highlands (X:12.7, Y:17.4) to learn more about his plan.
Lord Drillemont will confirm what Faillicie said and inform you that the Ishgardians have already breached the Horde’s first line of defense.
He now wants to lead the second wave of attack with you by his side.
Speak with Nathelain outside the keep in Coerthas Central Highlands (X:8.0, Y:11.1) to continue.
After a quick chat with the Temple Knight, The Stone Vigil (Hard) will be unlocked.
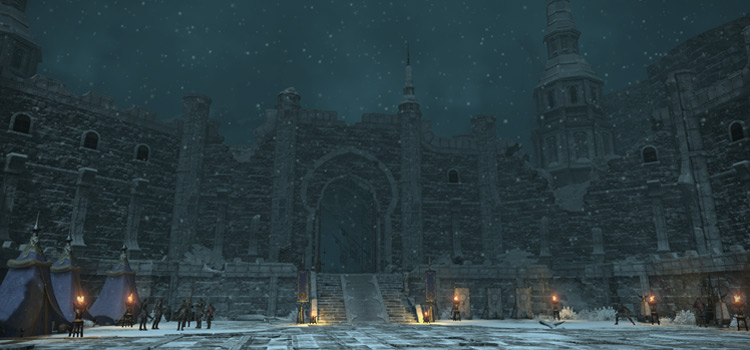
This dungeon requires a Level 50 Disciple of War or Magic job and at least an average item level of 70 to enter. The Stone Vigil (Hard) can be tedious to complete, even if you enter it unsynced with a high-level job.
Learn more about the boss’ mechanics below to help you speed things up:
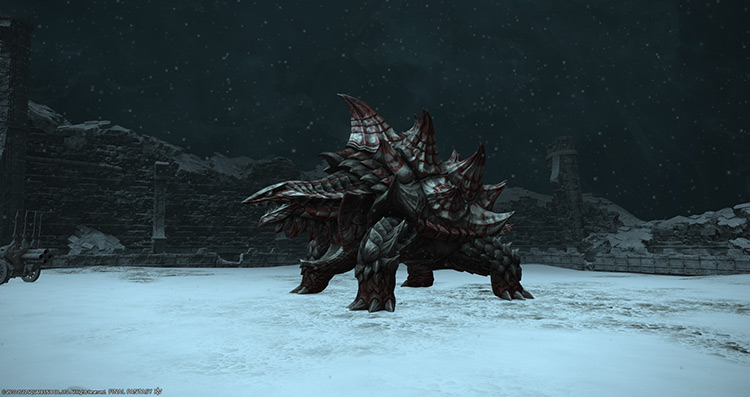
Boss #1: Gorynich
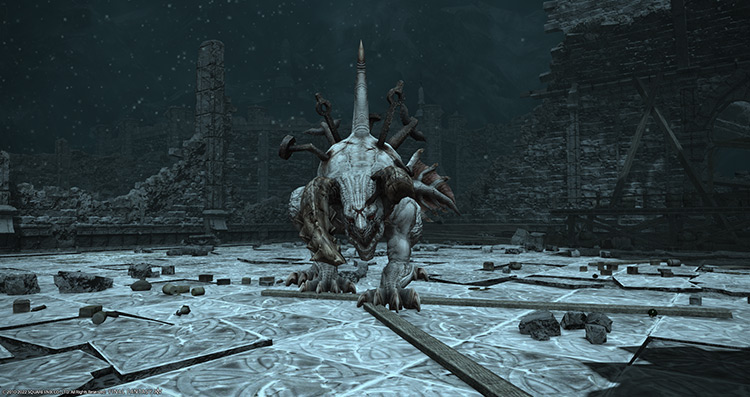
Mechanics:
- Swinge: A very strong, non-telegraphed frontal cleave. Later in the fight, the boss will move toward a corner before casting this attack. Move behind or inside the boss’ hitbox to avoid.
- Rake: A tankbuster attack on the primary target. Mitigate and heal through the attack.
- Lion’s Breath: Another non-telegraphed frontal cleave. Face the boss away from the party.
- Vigil Heir: The boss will summon up to three “Vigil Heir” mobs at a time. Burn them down as soon as possible to avoid nasty debuffs.
- Nip (Vigil Heir): The heir will target a random player with a single-target attack that applies a 30-second “Heavy” debuff and “Flesh Wound” DoT.
- Agony (Vigil Heir): A large point-blank AoE attack upon an heir’s death. If the boss gets hit by “Agony,” it’ll gain stacking “Haste+” and “Damage Up” buffs (up to three stacks). These buffs increase the boss’ attack and attack speed. Move the boss away from the heirs’ corpses.
Rewards
- 10 Allagan Tomestone of Poetics
| Name | Type | Rarity |
|---|---|---|
| Bracelet of Divine Death | Bracelets | Dungeon (Green) |
| Bracelet of Divine Wisdom | Bracelets | Dungeon (Green) |
| Bracelet of the Divine Harvest | Bracelets | Dungeon (Green) |
| Bracelet of the Divine Light | Bracelets | Dungeon (Green) |
| Bracelets of the Divine War | Bracelets | Dungeon (Green) |
| Boots of the Divine Hero | Feet | Dungeon (Green) |
| Boots of the Divine Light | Feet | Dungeon (Green) |
| Crakows of Divine Death | Feet | Dungeon (Green) |
| Crakows of the Divine Harvest | Feet | Dungeon (Green) |
| Sabatons of Divine Wisdom | Feet | Dungeon (Green) |
| Sabatons of the Divine War | Feet | Dungeon (Green) |
| Ring of Divine Death | Ring | Dungeon (Green) |
| Ring of Divine Wisdom | Ring | Dungeon (Green) |
| Ring of the Divine Harvest | Ring | Dungeon (Green) |
| Ring of the Divine Light | Ring | Dungeon (Green) |
| Ring of the Divine War | Ring | Dungeon (Green) |
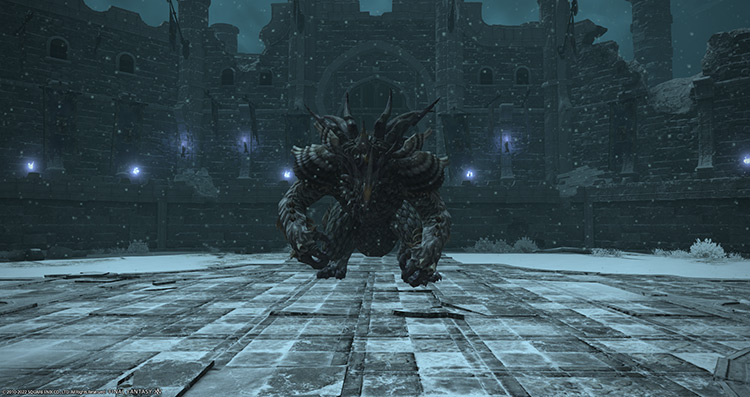
Boss #2: Cuca Fera
Mechanics:
This boss has very high defenses and must be damaged using the four cannons around the arena. Don’t bother tanking the boss, as it’ll stay in the middle for most of the fight. All players should be manning a cannon throughout the encounter.
- Falling Sky: A room-wide AoE attack that knocks all players back at the start of the fight.
- House Durendaire Knight: Knights will be assisting you during the fight. They must be kept alive, or the boss will hard-wipe your party.
- Bertha Cannons: These cannons will be your party’s main mode of damaging the boss. It has two skills you’ll need to learn.
- Iron Kiss (Bertha): A targetable AoE. This attack is your main damage-dealing skill. “Iron Kiss” has no cooldown, so spam it on the boss and the mobs it spawns.
- Spindly Finger (Bertha): A targetable AoE that can interrupt the boss. It has a 30-second cooldown and must only be used to interrupt “Hard Stomp.”
- Hard Stomp: A room-wide AoE attack that also damages the knights. “Hard Stomp” must be interrupted with “Spindly Finger.”
- Diamondback: The boss will buff itself with invincibility for six seconds and reflect any attack it receives. Stop attacking until the buff wears off.
- Sordes and Paleoaevis: The boss will summon mobs to attack the knights. Have at least one player focus on killing the mobs as they spawn to keep the knights in good shape.
- Tail Chase (Sordes): A point-blank AoE attack.
- Electric Ventilation (Paleoaevis): A targeted AoE attack on a player or knight.
- Whipstream: The boss will start spinning toward a random cannon, knocking off anyone within the vicinity of the cannon. Once the boss starts spinning, move away from your cannon. After the boss stops spinning, it’ll gain a “Vertigo” debuff. This debuff stuns the boss for six seconds, letting your party attack it freely.
Rewards
- 15 Allagan Tomestone of Poetics
| Name | Type | Rarity |
|---|---|---|
| Earrings of Divine Death | Earrings | Dungeon (Green) |
| Earrings of Divine Wisdom | Earrings | Dungeon (Green) |
| Earrings of the Divine Harvest | Earrings | Dungeon (Green) |
| Earrings of the Divine Light | Earrings | Dungeon (Green) |
| Earrings of the Divine War | Earrings | Dungeon (Green) |
| Cuffs of the Divine Hero | Hands | Dungeon (Green) |
| Cuffs of the Divine Light | Hands | Dungeon (Green) |
| Halfgloves of Divine Death | Hands | Dungeon (Green) |
| Halfgloves of the Divine Harvest | Hands | Dungeon (Green) |
| Vambraces of Divine Wisdom | Hands | Dungeon (Green) |
| Vambraces of the Divine War | Hands | Dungeon (Green) |
| Circlet of the Divine Harvest | Head | Dungeon (Green) |
| Eyepatch of the Divine Hero | Head | Dungeon (Green) |
| Hat of the Divine Light | Head | Dungeon (Green) |
| Helm of the Divine War | Head | Dungeon (Green) |
| Mask of Divine Wisdom | Head | Dungeon (Green) |
| Monocle of Divine Death | Head | Dungeon (Green) |
| Choker of Divine Death | Necklace | Dungeon (Green) |
| Choker of Divine Wisdom | Necklace | Dungeon (Green) |
| Choker of the Divine Harvest | Necklace | Dungeon (Green) |
| Choker of the Divine Light | Necklace | Dungeon (Green) |
| Choker of the Divine War | Necklace | Dungeon (Green) |
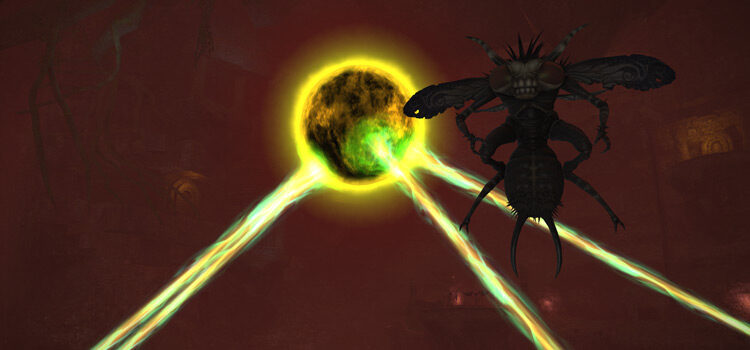
Boss #3: Giruveganaus
Mechanics:
This boss can’t be tanked and will move around the arena on its own. All of its mechanics are non-telegraphed and apply an 8-second “Infirmity” debuff. This debuff lowers HP a player receives through healing magics. Pay attention to the boss’ visual cues to avoid incoming attacks.
- Wild Charge: The boss will lower its shoulder and charge toward a random target. Spread out to avoid overlapping damage.
- Ripper Claw: The boss will raise its arm and slash anyone in front of it.
- Blood Boil: The boss will buff itself with “Damage Up.”
- Tail Smash: The boss will raise its tail to swipe at players behind it. Stay on the boss’ flanks as much as possible.
- Duplicate: A clone will appear at some point during the fight. This clone will have the exact skills as the original. Once the clone appears, the boss and its clone will gain additional fiery attacks. Burn down the original before focusing on the clone.
- Heat Breath: The boss will quickly turn toward a random player and breathe fire onto them. This attack is very hard to dodge, so just heal through the damage after.
- Fireball: The boss will arch its body back and shoot a fireball AoE toward a random player. Start running around once the boss charges its fireball to avoid it preemptively.
Rewards
- 25 Allagan Tomestone of Poetics
- Blue Dragon Triple Triad Card (not guaranteed)
| Name | Type | Rarity |
|---|---|---|
| Cuirass of Divine Wisdom | Body | Dungeon (Green) |
| Cuirass of the Divine War | Body | Dungeon (Green) |
| Robe of Divine Death | Body | Dungeon (Green) |
| Robe of the Divine Harvest | Body | Dungeon (Green) |
| Shirt of the Divine Hero | Body | Dungeon (Green) |
| Shirt of the Divine Light | Body | Dungeon (Green) |
| Breeches of Divine Wisdom | Legs | Dungeon (Green) |
| Breeches of the Divine War | Legs | Dungeon (Green) |
| Sarouel of the Divine Hero | Legs | Dungeon (Green) |
| Sarouel of the Divine Light | Legs | Dungeon (Green) |
| Tonban of Divine Death | Legs | Dungeon (Green) |
| Tonban of the Divine Harvest | Legs | Dungeon (Green) |
Extra Treasure Coffers
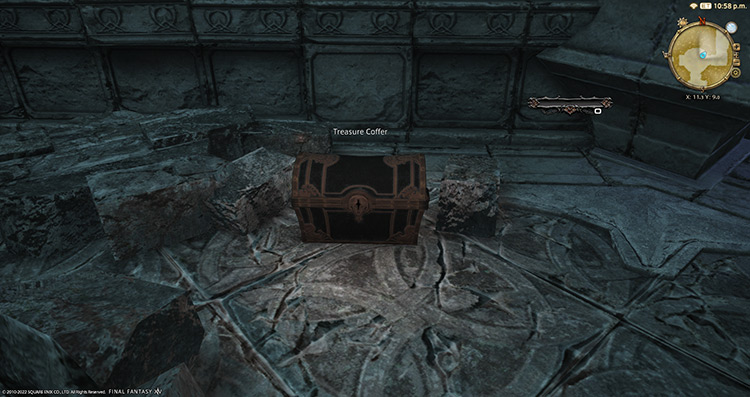
Apart from the boss rewards, there are four treasure coffers located throughout the dungeon that you can open for more gear or crafting material rewards:
- (X:11.4, Y:9.0)
- (X:11.0, Y:7.6)
- (X:10.7, Y:9.1)
- (X:10.7, Y:9.2)
-
Final Fantasy XIV
- FFXIV The Stone Vigil (Hard): How To Unlock + Boss Guides
Related Posts:
 FFXIV Hullbreaker Isle (Normal): How To Unlock + Boss Guide
 FFXIV The Tam-tara Deepcroft (Hard): Unlock + Boss Guide
 FFXIV The Dusk Vigil: Unlock + Dungeon Guide
 FFXIV The Stone Vigil (Normal): Unlock + Boss Guide
 FFXIV Pharos Sirius (Normal): How To Unlock + Dungeon Guide
 FFXIV Copperbell Mines (Hard): How To Unlock + Boss Guide
 FFXIV Xelphatol: How To Unlock + Dungeon Boss Guide
 FFXIV The Tower of Zot: Unlock + Boss Guide