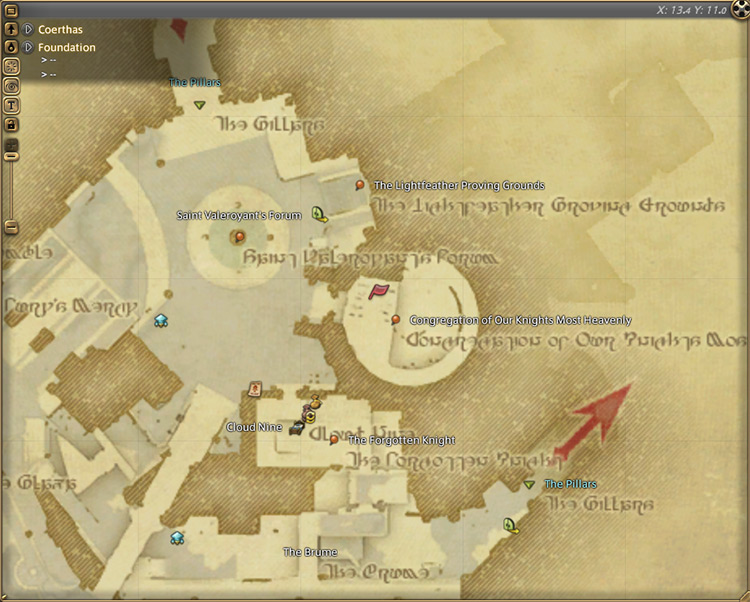
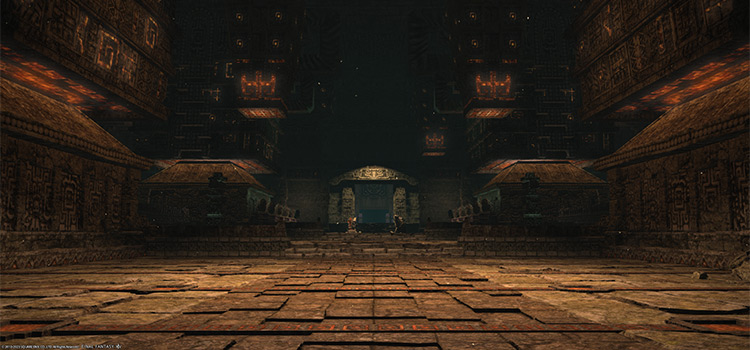
To unlock the Level 55 Normal-difficulty dungeon The Aery, you need to accept the Level 55 Main Scenario Quest (MSQ) “Into The Aery” from Estinien in Foundation (X:13.4, Y:11.0).
“Into the Aery” is an MSQ deep into the Heavensward expansion. So you’ll need to finish every MSQ leading up to it, including every MSQ from the previous expansion, A Realm Reborn.
Unlocking Quest: Into the Aery
Unlocking the Level 55 MSQ “Into the Aery” requires you to finish every MSQ from patch 2.0 to 2.55 of A Realm Reborn.
Doing so unlocks the patch 3.0 questline of Final Fantasy XIV: Heavensward, where you’ll eventually encounter “Into the Aery.”
Once you’ve unlocked the quest, talk to Estinien in Foundation (X:13.4, Y:11.0).
At this point in the main questline, you and fellow members of the Scions of the Seventh Dawn are preparing an assault toward Nidhogg’s domain to put an end to the mad dragon’s reign for good.
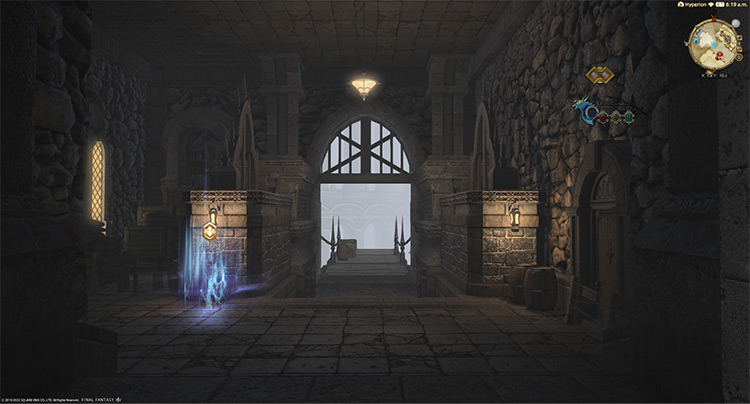
To get to Nidhogg’s domain, you need to acquire Manacutters from Cid, which you’ll use to travel to The Aery. Speak with Cid outside the Skysteel Manufactory in Foundation (X:7.5, Y:10.2) to continue.
Cid will be happy to inform you that the Manacutters are ready for use, and you’ll be able to travel to The Aery safely.
After talking to the trusty engineer, a brief cutscene will trigger and The Aery will be unlocked.
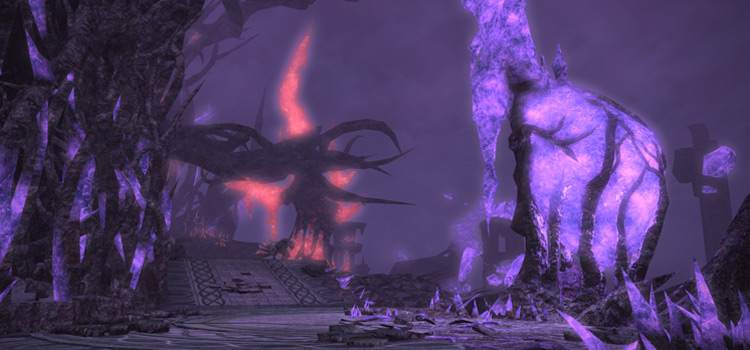
This dungeon requires at least a Level 55 Disciple of War or Magic job and an average item level of 110 to enter.
We’ve covered each boss and their mechanics below so you can clear this dungeon with your friends easily.
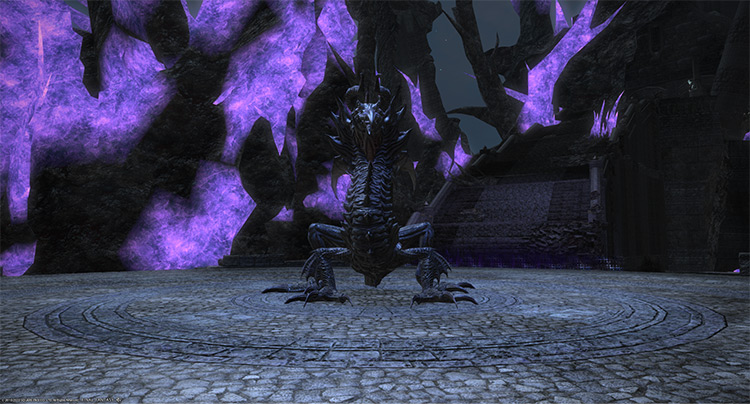
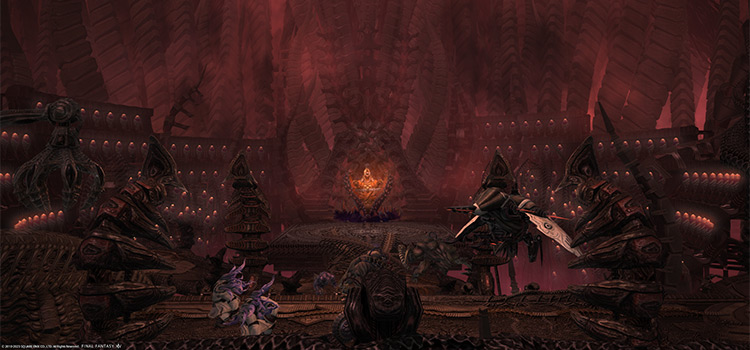
Boss #1: Rangda
Mechanics:
- Electric Predation: A cleaving tankbuster attack on the primary target. Use damage reduction skills and heal through the damage.
- Electric Cachexia: A room-wide donut AoE. Stand near the boss to avoid.
- Ionospheric Charge: The boss will spin around and target a random player with a lightning tether. After a few seconds, the tether will cause an explosion, dealing high single-target damage on the affected player and applying a 15-second “Paralysis” debuff. Drag the tether toward a pillar before it goes off to avoid getting paralyzed.
- Electrocution: A non-telegraphed knockback attack on a random player. This attack is usually followed by “Electric Cachexia.” Use knockback-immunity skills or run toward the boss as soon as possible.
- Leyak: A wyvern that uses “Reflux,” a single-target attack that applies a 20-second “Heavy” debuff. Kill this wyvern immediately.
Rewards
| Name | Type | Rarity |
|---|---|---|
| Orthodox Bracelet of Aiming | Bracelets | Dungeon (Green) |
| Orthodox Bracelet of Casting | Bracelets | Dungeon (Green) |
| Orthodox Bracelet of Fending | Bracelets | Dungeon (Green) |
| Orthodox Bracelet of Healing | Bracelets | Dungeon (Green) |
| Orthodox Bracelet of Slaying | Bracelets | Dungeon (Green) |
| Orthodox Greaves of Fending | Feet | Dungeon (Green) |
| Orthodox Greaves of Maiming | Feet | Dungeon (Green) |
| Orthodox Jackboots of Casting | Feet | Dungeon (Green) |
| Orthodox Jackboots of Healing | Feet | Dungeon (Green) |
| Orthodox Thighboots of Aiming | Feet | Dungeon (Green) |
| Orthodox Thighboots of Scouting | Feet | Dungeon (Green) |
| Orthodox Thighboots of Striking | Feet | Dungeon (Green) |
| Orthodox Ring of Aiming | Ring | Dungeon (Green) |
| Orthodox Ring of Casting | Ring | Dungeon (Green) |
| Orthodox Ring of Fending | Ring | Dungeon (Green) |
| Orthodox Ring of Healing | Ring | Dungeon (Green) |
| Orthodox Ring of Slaying | Ring | Dungeon (Green) |
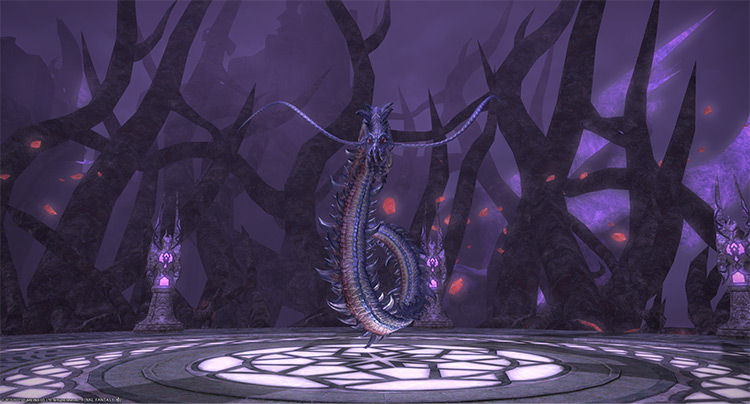
Boss #2: Gyascutus
A few seconds into the fight, the edge of the arena will turn into a swirling vortex. Touching the edge will result in a constant “Windburn” DoT.
Mechanics:
- Proximity Pyre: A large point-blank AoE that applies a stacking “Vulnerability Up” debuff for 60 seconds. Move away from the boss to avoid it.
- Deafening Bellow: A room-wide AoE attack. Mitigate and heal through the damage.
- Inflammable Fumes: Four circular fumes will start floating around the room. After a few seconds, the fumes will explode into circle AoEs. Keep moving away from the fumes until they explode.
- Ashen Ouroboros: A large donut AoE that’s usually paired with “Inflammable Fumes.” Move inside the boss’ hitbox while avoiding the fumes.
- Crippling Blow: A targeted tankbuster attack on the primary target. Use damage reduction skills and heal through the damage.
- Body Slam: The boss will move to the center of the arena and cast a room-wide knockback attack. Use knockback-immunity skills or run toward the boss.
Rewards
| Name | Type | Rarity |
|---|---|---|
| Orthodox Earrings of Aiming | Earrings | Dungeon (Green) |
| Orthodox Earrings of Casting | Earrings | Dungeon (Green) |
| Orthodox Earrings of Fending | Earrings | Dungeon (Green) |
| Orthodox Earrings of Healing | Earrings | Dungeon (Green) |
| Orthodox Earrings of Slaying | Earrings | Dungeon (Green) |
| Orthodox Armguards of Casting | Hands | Dungeon (Green) |
| Orthodox Armguards of Healing | Hands | Dungeon (Green) |
| Orthodox Gauntlets of Fending | Hands | Dungeon (Green) |
| Orthodox Gauntlets of Maiming | Hands | Dungeon (Green) |
| Orthodox Wristgloves of Aiming | Hands | Dungeon (Green) |
| Orthodox Wristgloves of Scouting | Hands | Dungeon (Green) |
| Orthodox Wristgloves of Striking | Hands | Dungeon (Green) |
| Orthodox Hairpin of Fending | Head | Dungeon (Green) |
| Orthodox Hairpin of Maiming | Head | Dungeon (Green) |
| Orthodox Hat of Casting | Head | Dungeon (Green) |
| Orthodox Hat of Healing | Head | Dungeon (Green) |
| Orthodox Tricorne of Aiming | Head | Dungeon (Green) |
| Orthodox Tricorne of Scouting | Head | Dungeon (Green) |
| Orthodox Tricorne of Striking | Head | Dungeon (Green) |
| Orthodox Choker of Aiming | Necklace | Dungeon (Green) |
| Orthodox Choker of Casting | Necklace | Dungeon (Green) |
| Orthodox Choker of Fending | Necklace | Dungeon (Green) |
| Orthodox Choker of Healing | Necklace | Dungeon (Green) |
| Orthodox Choker of Slaying | Necklace | Dungeon (Green) |
Boss #3: Nidhogg
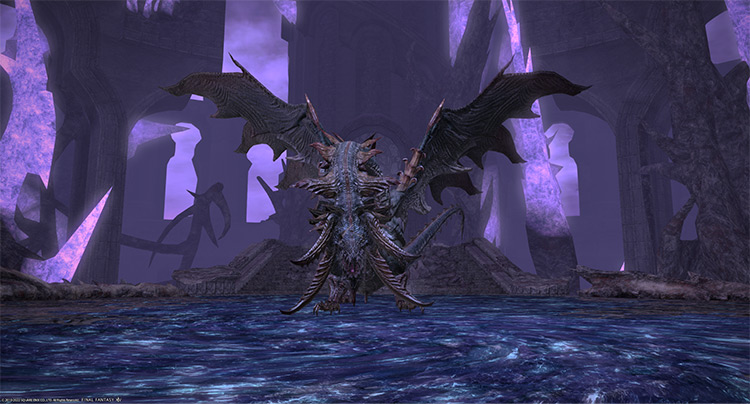
Mechanics:
- Deafening Bellow: A room-wide AoE attack. Mitigate and heal through the damage.
- Hot Wing: The boss’ wings will cover his sides with fire, dealing damage and applying stacking “Vulnerability Up” debuffs to anyone hit. Move in front, behind, or directly underneath him to dodge.
- Hot Tail: A line attack spanning the boss’ front and back that also applies stacking “Vulnerability Up” debuffs. Move toward the boss’ flanks to avoid getting hit.
- Cauterize: The boss will fly to one edge of the arena and cast a large line attack. Getting hit by this attack will result in more stacking “Vulnerability Up” debuffs. Check your surroundings whenever he disappears.
- Horrid Roar: Black circle AoEs will appear underneath players. This attack usually occurs when the boss flies out of the arena for “Cauterize.”
- The Sable Price + Sable Weave: A DPS or healer will be fettered, and a targetable gaol will appear. This gaol will slow-cast “Sable Weave,” an instakill attack. Destroy the gaol before the cast goes off to free the player.
- Touchdown: A room-wide AoE attack that comes after “Cauterize” or “Massacre.” Heal through the damage.
- The Scarlet Price: A marked tankbuster attack on the primary target. Use mitigation skills and heal through the damage.
- Massacre: The boss will fly out of the arena and charge “Massacre,” a room-wide ultimate AoE attack. A “Massacre” gauge will appear along with several mobs (one “Ahleh” and four “Liegedrake”) during this time. Kill the mobs before the gauge reaches 100, or you will wipe.
- Horrid Blaze: A stack-up marker on a random player after “Massacre.” Stand with the marked player to share incoming damage.
Rewards
- Nidhogg Triple Triad Card (not guaranteed)
| Name | Type | Rarity |
|---|---|---|
| Orthodox Coat of Fending | Body | Dungeon (Green) |
| Orthodox Coat of Maiming | Body | Dungeon (Green) |
| Orthodox Robe of Casting | Body | Dungeon (Green) |
| Orthodox Robe of Healing | Body | Dungeon (Green) |
| Orthodox Tunic of Aiming | Body | Dungeon (Green) |
| Orthodox Tunic of Scouting | Body | Dungeon (Green) |
| Orthodox Tunic of Striking | Body | Dungeon (Green) |
| Fagrskinna | Book | Dungeon (Green) |
| Morkinskinna | Book | Dungeon (Green) |
| Astrild | Bow | Dungeon (Green) |
| Mistilteinn | Cane | Dungeon (Green) |
| Hofuds | Daggers | Dungeon (Green) |
| Gjallarhorn | Firearms | Dungeon (Green) |
| Wargfangs | Fist Weapon | Dungeon (Green) |
| Skeggiold | Greataxe | Dungeon (Green) |
| Dainslaif | Greatsword | Dungeon (Green) |
| Katayama | Katana | Dungeon (Green) |
| Orthodox Longkilt of Casting | Legs | Dungeon (Green) |
| Orthodox Longkilt of Fending | Legs | Dungeon (Green) |
| Orthodox Longkilt of Healing | Legs | Dungeon (Green) |
| Orthodox Longkilt of Maiming | Legs | Dungeon (Green) |
| Orthodox Trousers of Aiming | Legs | Dungeon (Green) |
| Orthodox Trousers of Scouting | Legs | Dungeon (Green) |
| Orthodox Trousers of Striking | Legs | Dungeon (Green) |
| Paladin’s Tyrfing Arms (IL 136) | Other | Dungeon (Green) |
| Grasitha | Polearm | Dungeon (Green) |
| Verdun | Rapier | Dungeon (Green) |
| Gambanteinn | Staff | Dungeon (Green) |
| Muspell | Star Globe | Dungeon (Green) |
| Lesser Panda | Minion | Basic |
Extra Treasure Coffers
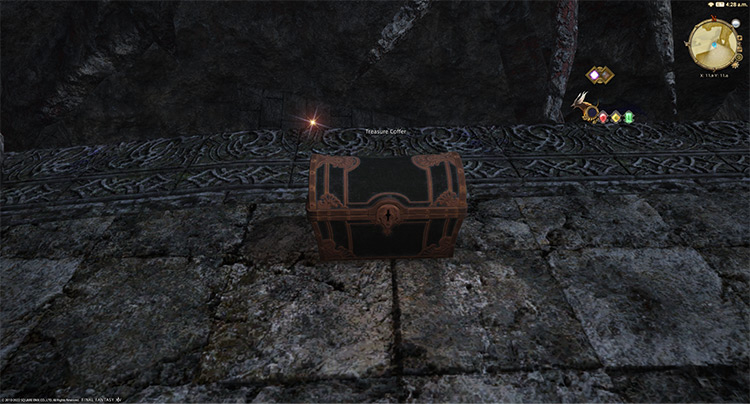
Apart from the boss rewards, there are four treasure coffers located throughout the dungeon that you can open for more gear, dye, or prism rewards. Here are their locations:
- (X:14.0, Y:10.7)
- (X:13.5, Y:12.5)
- (X:11.9, Y:11.7)
- (X:12.2, Y:10.1)
-
Final Fantasy XIV
- FFXIV The Aery: How To Unlock + Dungeon Guide
Related Posts:
 FFXIV Malikah’s Well: How To Unlock + Dungeon Guide
 FFXIV The Qitana Ravel: Unlock + Boss Guide
 FFXIV Dohn Mheg: How To Unlock + Boss Guide
 FFXIV Bardam’s Mettle: How To Unlock + Full Boss Guide
 FFXIV Lapis Manalis: Unlock + Dungeon Boss Guide
 FFXIV Holminster Switch: How To Unlock + Boss Guide
 FFXIV The Tower of Babil: Unlock + Dungeon Guide
 FFXIV The Fell Court of Troia: Unlock + Dungeon Guide