The Navel (Hard), also known as Titan HM, can be unlocked by accepting the Level 50 quest “In a Titan Spot” from Y’shtola in The Waking Sands (X:6.1, Y:5.1). But first you’ll need to clear two other hard mode trials: Ifrit (Bowl of Embers Hard) and Garuda (Howling Eye Hard).
And before any of these trials become available, you need to finish the Level 50 Main Scenario Quest (MSQ) “The Ultimate Weapon” from Raubahn in Northern Thanalan (X:15.0, Y:16.0).
We’ll cover the exact unlock details below, along with all of the mechanics for the Titan Hard Mode trial.
TABLE OF CONTENTS
Step-by-Step Unlock Guide
- Complete the Level 50 Main Scenario Quest “The Ultimate Weapon” from Raubahn in Northern Thanalan (X:15.0, Y:16.0).
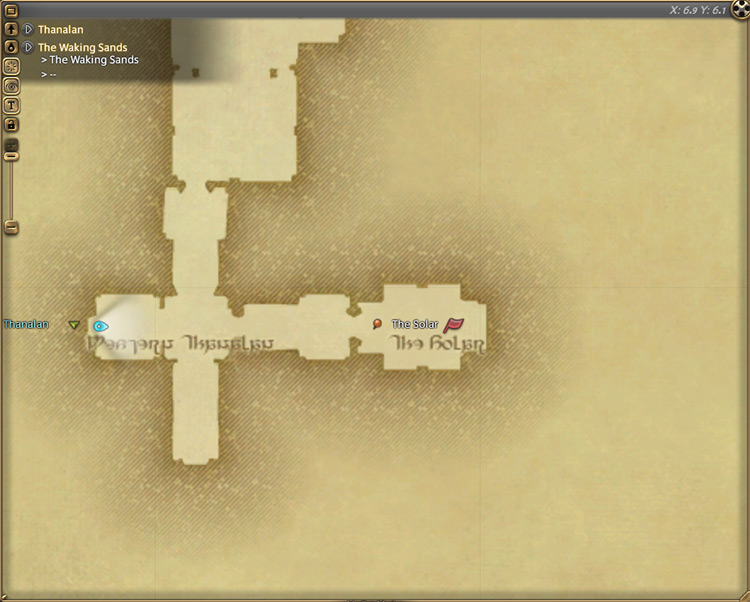
- Finish the Level 50 quest “A Recurring Problem” from Minfilia in The Solar (X:6.9, Y:6.1).
- Finish the Level 50 quest “Ifrit Bleeds, We Can Kill It” from Thancred in The Waking Sands (X:6.1, Y:5.1).
- Complete the Level 50 quest “In for Garuda Awakening” from Papalymo in The Waking Sands (X:6.1, Y:5.0).
- Accept the Level 50 quest “In a Titan Spot” from Y’shtola in The Waking Sands (X:6.1, Y:5.1).
- Talk to Storm Commander R’ashaht Rhiki at Limsa Lominsa Upper Decks (X:13.1, Y:12.8).
- Attune to the U’Ghamaro Mines Aetheryte in Outer La Noscea (X:24.3, Y:8.9).
Detailed Unlock Guide
Similar to other hard and extreme-mode trials in A Realm Reborn, you need to complete the Level 50 Main Scenario Quest (MSQ) “The Ultimate Weapon” from Raubahn in Northern Thanalan (X:15.0, Y:16.0) before you can unlock The Navel (Hard).
This quest wraps up the main story and lets you tackle end-game content for the base game.
Once you’re done with the main questline, head to The Solar (X:6.9, Y:6.1) in Western Thanalan to start Primal Questline. This questline allows you to fight the hard-mode versions of the three primals you’ve defeated in the main story, including Titan.
Here’s the list of quests you need to finish before you can unlock The Navel (Hard):
- “A Recurring Problem” from Minfilia in The Solar (X:6.9, Y:6.1).
- “Ifrit Bleeds, We Can Kill It” from Thancred in The Waking Sands (X:6.1, Y:5.1). This quest unlocks The Bowl of Embers (Hard), allowing you to fight Ifrit HM.
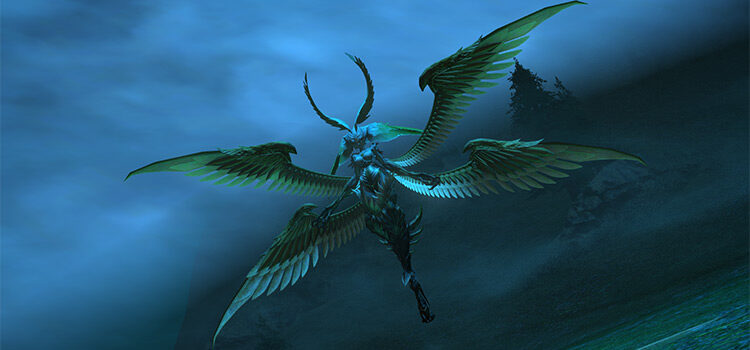
- “In for Garuda Awakening” from Papalymo in The Waking Sands (X:6.1, Y:5.0). This quest unlocks The Howling Eye (Hard), allowing you to fight Garuda HM.
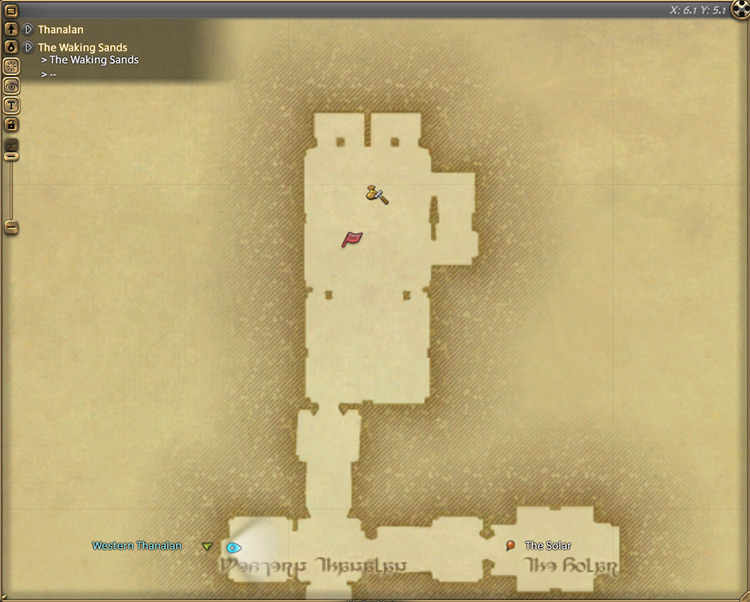
After completing all the prerequisites, you’ll finally be able to accept the Level 50 quest “In a Titan Spot” from Y’shtola in The Waking Sands (X:6.1, Y:5.1).
While you were busy defeating the Lady of the Vortex, the kobolds have stockpiled an enormous amount of crystals and summoned their deity once more.
Y’shtola notes that Titan’s strength exceeds Garuda’s, and the Maelstrom Command has already requested your help in dealing with the primal.
Talk to Storm Commander R’ashaht Rhiki in Limsa Lominsa Upper Decks (X:13.1, Y:12.8) to learn more about the summoning.
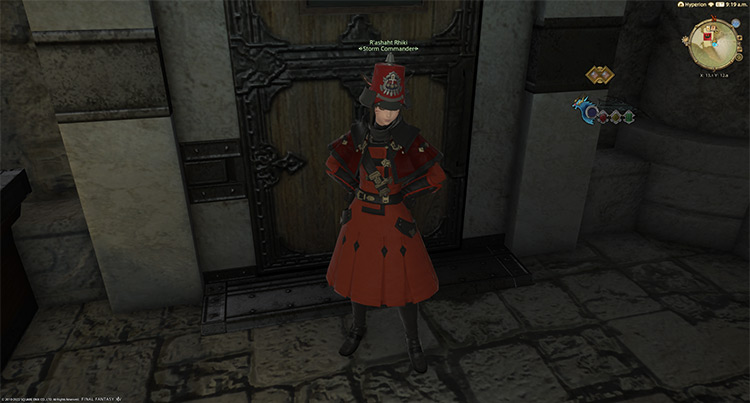
R’ashaht Rhiki will confirm Y’shtola’s report and fears that the Lord of the Crags may wreak havoc on Limsa Lominsa.
The aetheryte you used to defeat Titan in the main story is now unusable, making the situation even direr.
Fortunately, Maelstrom Command has learned of a new aetheryte you can use, albeit deep inside the U’Ghamaro Mines in Outer La Noscea.
After talking to the Storm Commander, attune yourself to the U’Ghamaro Mines Aetheryte in Outer La Noscea (X:24.3, Y:8.9) to unlock The Navel (Hard).
This trial requires at least a Level 50 Disciple of War or Magic job and an average item level of 57 to enter. Check out Titan’s new and improved mechanics below to help you clear the fight smoothly.
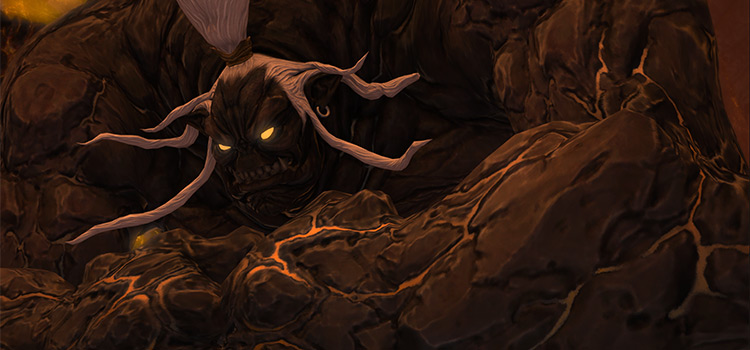
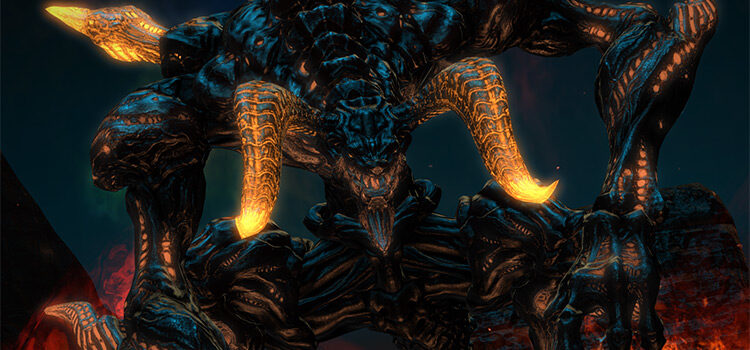
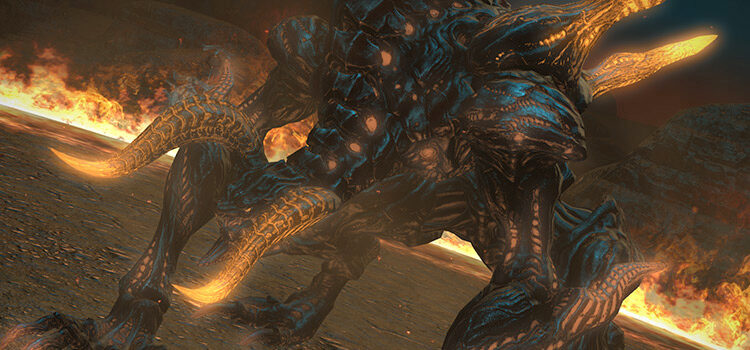
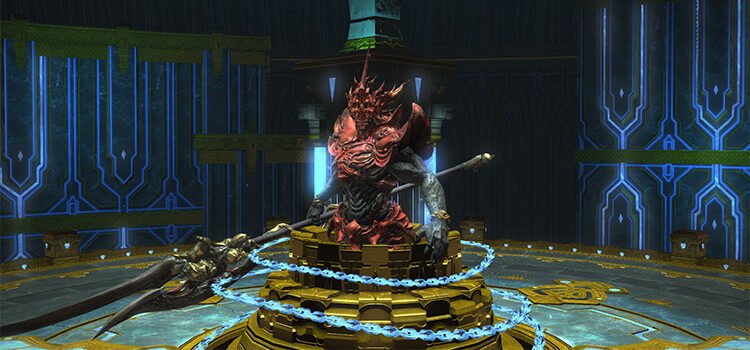
Trial Boss: Titan (Hard)
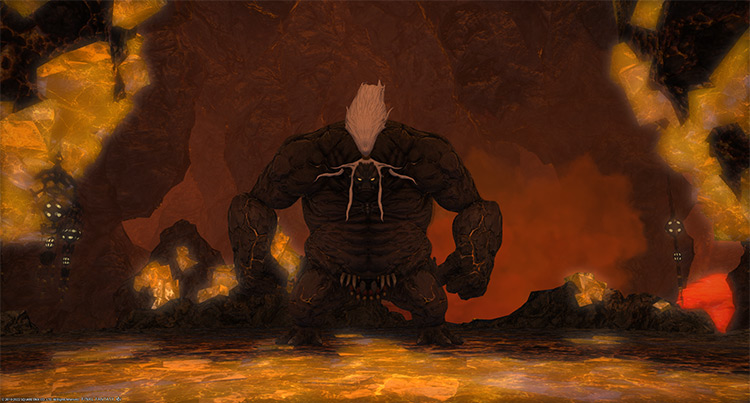
Due to the trial being released way back in patch 2.0, it’s very fast and easy to solo The Navel (Hard) when you enter the trial unsynced with a high-level character. You can easily ignore most of the mechanics and focus on DPSing the boss down.
However, if you are doing this for the first time or you’ve queued for Duty Roulette: Trials, you may need to do it while synced.
Phase 1: Landslide and Weight of the Land
Rotation:
Rock Buster > Landslide > Tumult > Repeat until 89% HP > Geocrush > Weight of the Land > Rock Buster > Landslide > Tumult > Repeat until 79% HP > Geocrush
- Landslide: A wide line attack that knocks players back. Sidestep to avoid or use knockback immunity skills.
- Tumult: A three-hit, room-wide AoE attack. Mitigate and heal through the damage.
- Geocrush: A room-wide AoE attack that deals damage based on your distance away from the center. This attack also trims the outer edges of the arena with an orange marker. Run away from the center while avoiding the marked outer edges.
- Weight of the Land: Brown AoE circles will appear under all players. Bait the puddles together in one area, then spread out to avoid overlapping damage.
Phase 2: Bomb Boulders + Rock Throw
Rotation:
Landslide > Weight of the Land > Bomb Boulders (8 outer 1 inner) > Landslide > Weight of the Land > Rock Throw > Rock Buster > Tumult > Weight of the Land > Bomb Boulders (4 outer 5 inner) > Landslide > Weight of the Land > Rock Throw > Rock Buster > Tumult > Repeat until 59% HP > Geocrush
- Bomb Boulders: Nine boulders will drop in two patterns throughout the phase. Each boulder will explode after some time, dealing point-blank AoE damage.
- 8 outer 1 inner: Eight boulders will drop one at a time on the outer edges of the arena. Then, a single boulder will drop in the center. Stay in the center until the first boulder explodes, then move into the safe space created.
- 4 outer 5 inner: Five boulders will drop near the center, followed by four boulders in the cardinal directions. Run away from the center toward the intercardinal directions to avoid both sets altogether.
- Burst (Bomb Boulders): Each boulder will explode into a non-telegraphed, point-blank AoE.
- Rock Throw: A random player will be marked. After a few seconds, they will be trapped in a “Granite Gaol” that applies a 60-second “Damage Down” debuff. Destroy the gaol before it explodes and dispel the debuff.
- Granite Sepulchre (Granite Gaol): The gaol will explode and likely kill the affected player if this trial is done while synced. Destroy the gaol as soon as possible.
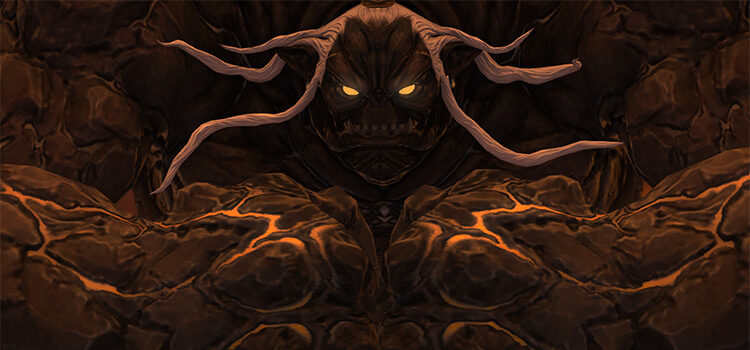
Phase 3: Titan’s Heart
Rotation:
Titan’s Heart > Rock Throw > Rock Buster > Landslide > Weight of the Land > Tumult > Rock Throw > Rock Buster Landslide > Weight of the Land > Tumult > Earthen Fury
- Titan’s Heart: The boss’ exposed heart must be destroyed before Phase 3’s rotation finishes, or the party will wipe.
- Earthen Fury: The boss will become invincible and cast a room-wide ultimate AoE attack. “Earthen Fury” will wipe the party if Titan’s Heart isn’t destroyed before it goes off. Destroy the heart and heal through the AoE damage.
Phase 4: Repeating Mechanics
Rotation:
Mountain Buster > Tumult > Weight of the Land > Bomb Boulders (one of three sets) > Landslide > Rock Buster > Mountain Buster > Weight of the Land > Rock Throw > Landslide > Rock Buster > Repeat until death
At this point, you’ve seen most of the boss’ mechanics. Phase 4 mechanics will repeat in a set rotation until the boss is defeated.
The only mechanic that will vary in the rotation listed above is the “Bomb Boulders” pattern that will be used. A new pattern is also introduced in Phase 4.
- Mountain Buster: A cleaving tankbuster attack on the primary target. Face the boss away from the party to avoid overlapping damage. Use mitigation skills and heal through the damage.
- Bomb Boulders (Phase 4): The “Bomb Boulders” in Phase 4 will introduce a new pattern to go along with the two previous patterns.
- 3 sets: Three sets of three boulders will drop one set at a time. Move to the set that dropped last to avoid the first two sets and dodge accordingly.
- Tumult (Phase 4): This attack becomes a four-hit AoE attack. Mitigate and heal through the damage.
Rewards
- Titan Triple Triad Card (not guaranteed)
- Titan’s Heart (not guaranteed)
| Name | Type | Quality |
|---|---|---|
| The Greater Key of Titan | Book | Blue (Primal Gear) |
| The Holy Key of Titan | Book | Blue (Primal Gear) |
| The Bow of Crags | Bow | Blue (Primal Gear) |
| The Cane of Crags | Cane | Blue (Primal Gear) |
| Cleavers of Crags | Daggers | Blue (Primal Gear) |
| Culverin of Crags | Firearms | Blue (Primal Gear) |
| Fists of Crags | Fist Weapon | Blue (Primal Gear) |
| The Axe of Crags | Greataxe | Blue (Primal Gear) |
| Guillotine of Crags | Greatsword | Blue (Primal Gear) |
| Katana of Crags | Katana | Blue (Primal Gear) |
| The Spear of Crags | Polearm | Blue (Primal Gear) |
| Foil of Crags | Rapier | Blue (Primal Gear) |
| The Wall of Crags | Shield | Blue (Primal Gear) |
| Staff of Crags | Staff | Blue (Primal Gear) |
| Star Globe of Crags | Star Globe | Blue (Primal Gear) |
| Crag Weapon Coffer (IL 80) | Other | Basic |
-
Final Fantasy XIV
- FFXIV The Navel (Hard): How To Unlock + Trial Guide
Related Posts:
 FFXIV The Navel (Extreme): How To Unlock + Trial Guide
 FFXIV The Howling Eye (Hard): How To Unlock + Trial Guide
 The Akh Afah Amphitheatre (Extreme): Unlock + Trial Guide (FFXIV)
 FFXIV The Bowl of Embers (Hard): Unlock + Trial Guide
 Sophia EX Unlock & Trial Guide – FFXIV Containment Bay P1T6 (Extreme)
 FFXIV The Bowl of Embers (Extreme): Unlock + Trial Guide
 Zurvan EX Unlock & Trial Guide – FFXIV Containment Bay Z1T9 (Extreme)
 FFXIV Emanation (Extreme): How To Unlock + Trial Guide