
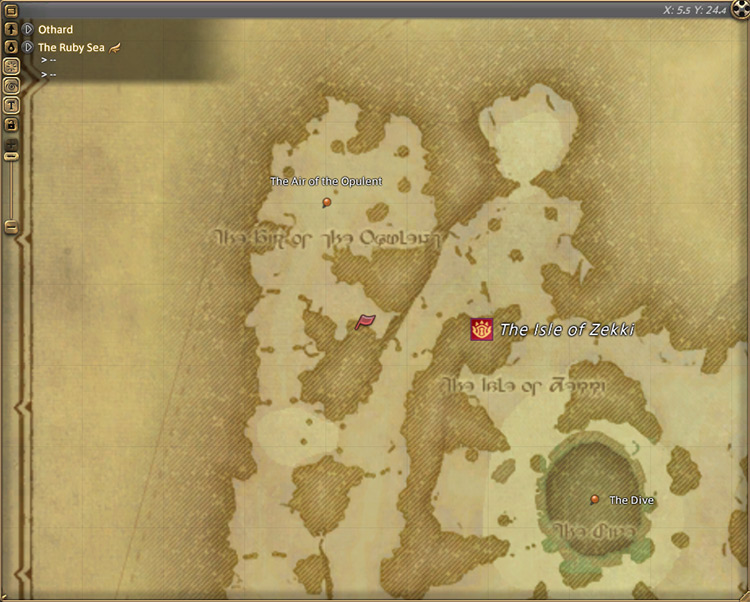
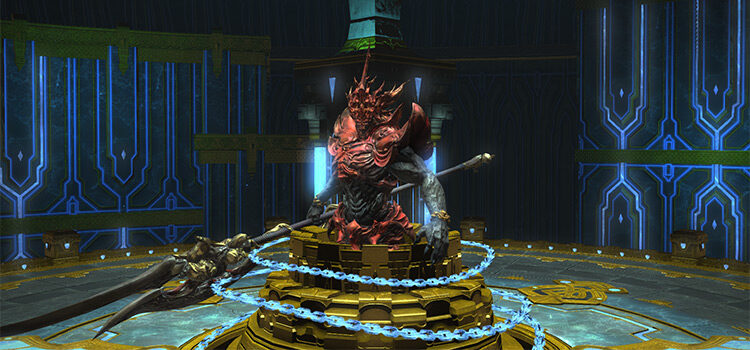
To unlock the Level 63 trial The Pool of Tribute, also known as Susano NM, you need to accept the Level 63 MSQ “The Lord of the Revel” from Alisaie in The Ruby Sea (X:5.5, Y:24.4). This quest is part of the main story for patch 4.0 of the Stormblood expansion.
Below we’ll cover this unlocking quest in detail, along with Susano’s battle mechanics in the trial.
TABLE OF CONTENTS
Unlocking Quest: The Lord of the Revel
“The Lord of the Revel” is a patch 4.0 MSQ for the Stormblood expansion. So before you can start it you’ll need to finish every MSQ leading up to it, including the MSQs from both A Realm Reborn and Heavensward.
Once that’s all set, talk to Alisaie in The Ruby Sea (X:5.5, Y:24.4) to begin the quest.
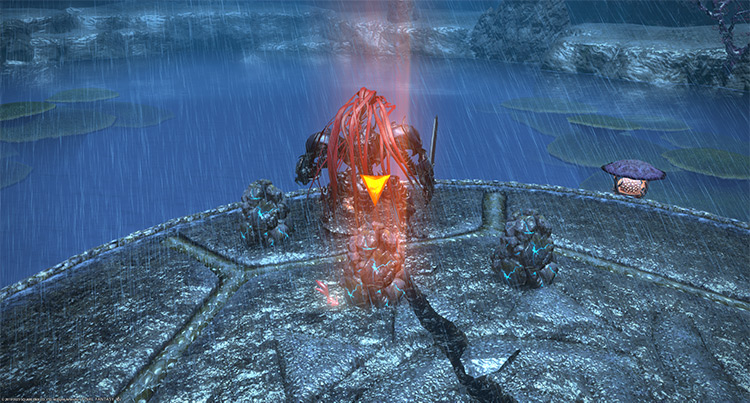
At this point in the story, the Red Kojin have successfully summoned the primal Susano.
Alisaie and Y’shtola have volunteered to draw the Red Kojin away from the vault door so you can sneak inside undetected to confront the primal.
Head to The Ruby Sea (X:4.7, Y:22.2) and interact with the vault door to unlock The Pool of Tribute.
This trial requires at least a Level 63 Disciple of War or Magic job to enter and has no item level requirement.
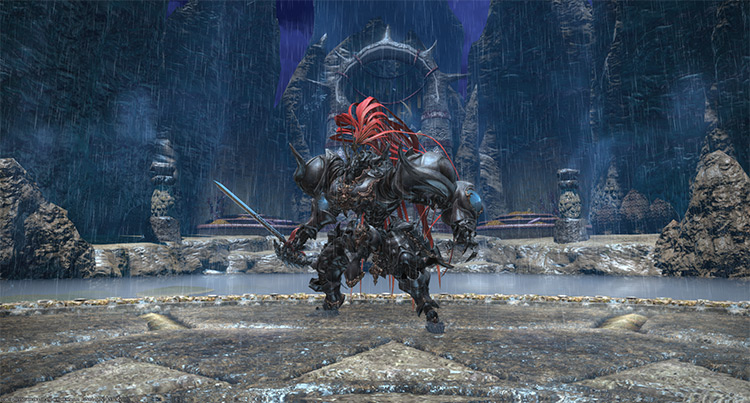
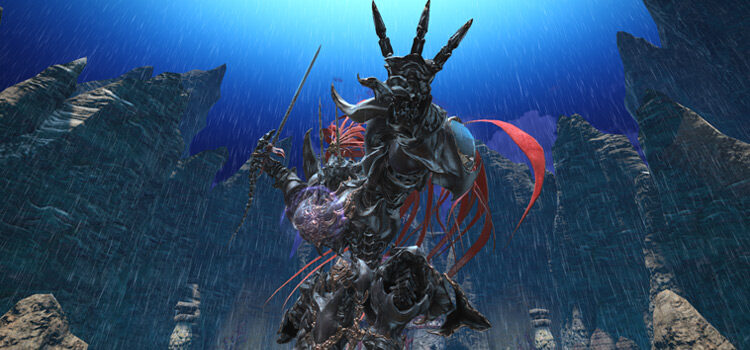
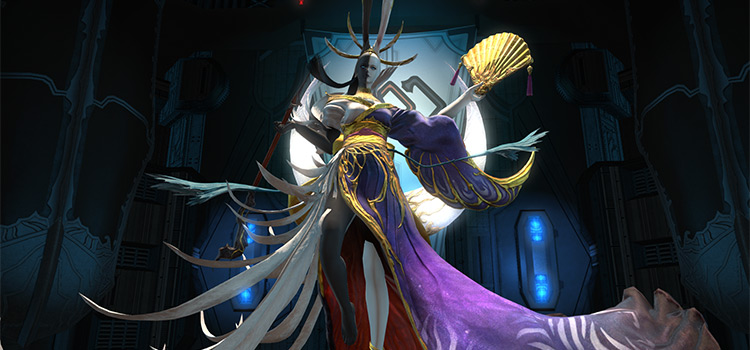
Trial Boss: Susano
Due to a mechanic in Phase 2, this trial can’t be soloed even with high-level characters. You’ll need at least two people to handle the “Blade’s Shadow” and avoid an instant wipe. Bring at least one extra person if you want to do it unsynced.
If you’re doing the trial through the Duty Finder while synced, check out the mechanics below to clear the trial quickly.
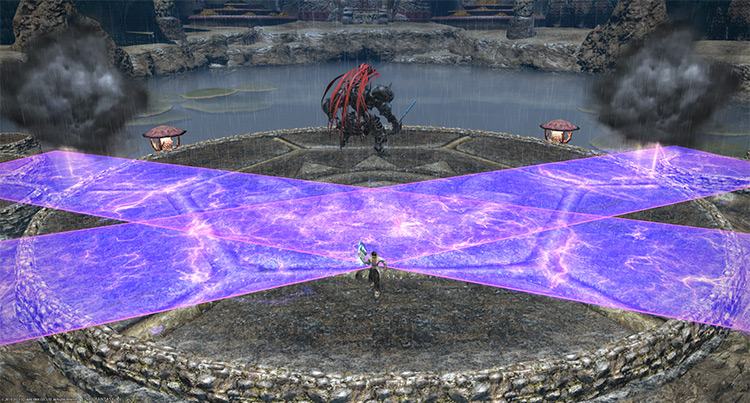
Phase 1: Yata-no-Kagami, Brightstorm, and Lightning Clouds
Rotation:
Assail > Rasen Kaikyo > Yata-no-Kagami > Assail > Lightning Clouds > Yata-no-Kagami > Rasen Kaikyo > Brightstorm > Assail > Rasen Kaikyo > Yata-no-Kagami + Brightstorm > Lightning Clouds x3 > Yata-no-Kagami + Brightstorm.
- Assail: A non-telegraphed cleave on the primary target that deals moderate damage. Always face the boss away from the party.
- Rasen Kaikyo: Several players will be targeted with ground AoEs that apply a stacking “Lightning Resistance Down” debuff for 20 seconds. Stand together behind the boss to bait the AoEs, then move out.

- Yata-no-Kagami: One player will get an orange marker for a knockback. Then, the arena will be covered with knock-up AoEs that apply “Lightning Resistance Down” for 20 seconds except for a narrow line headed toward the boss. Run back through the narrow line. Knockback-immunity skills do not work against this attack.
- Brightstorm: A stack marker usually placed on the player affected by “Yata-no-Kagami.” Run toward your party through the narrow line to share incoming damage.
- Lightning Clouds: Darkened clouds will appear outside the arena and target random players with wide column attacks that apply “Paralysis” for 20 seconds. These column attacks can happen up to three times in a row. Try to bait the AoEs on the opposite side of the arena if you’re targeted.
Phase 2: Blade’s Shadow and Ame-no-Murakumo
Rotation:
Blade’s Shadow x2 > Ame-no-Murakumo.
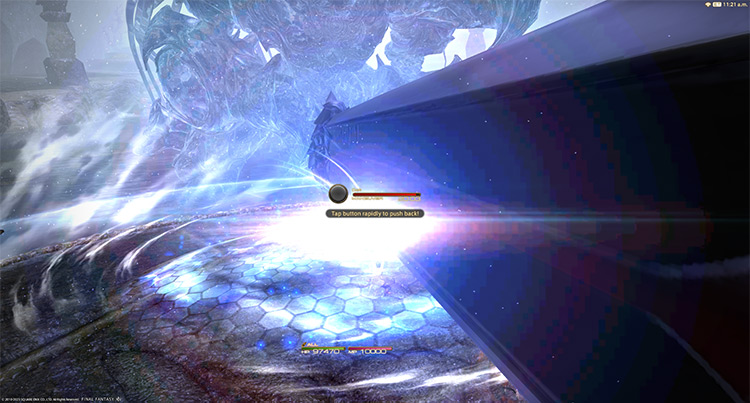
- Blade’s Shadow: Have the main tank interact with the “Blade’s Shadow” to trigger the Active Time Maneuver button spam and make the blade targetable. Burn down the blade to mitigate the ultimate attack. During this time, the main tank must also be topped off due to the “Flesh Wound” DoT.
- Shock Bubbles: While the blade is being burned down, have the off-tank pop the shock bubbles that will appear around the arena to avoid unnecessary damage to the rest of the party.
- Ame-no-Murakumo: A room-wide ultimate attack that will instantly wipe the party if a “Blade’s Shadow” isn’t killed in time. Avoid the crevice in the middle of the arena after the attack goes off.
Phase 3: The Hidden Gate, Ukehi, and Repeating Mechanics
Rotation:
Stormsplitter > The Hidden Gate > The Sealed Gate > Rasen Kaikyo > Ukehi > Stormsplitter > Yata-no-Kagami + Brightstorm > Rasen Kaikyo > Ukehi x2 > Lightning Clouds x3 > Stormsplitter > Rasen Kaikyo + Brightstorm > The Hidden Gate > The Sealed Gate > Ukehi x2 > Stormsplitter > Rasen Kaikyo > Yata-no-Kagami + Brightstorm > Lightning Clouds x3 > Rasen Kaikyo > Ukehi x2 > Repeat from 2nd Stormsplitter until death.
- Stormsplitter: A column tankbuster attack on the primary target that replaces “Assail” for Phase 3. Drag the boss toward the north and face him away from the party at all times.
- The Hidden Gate: A random party member will be trapped in one of three gates. After a few seconds, these gates will become targetable. Destroy the gate to free the affected player before “The Sealed Gate” goes off, or they will die. The gate at the bottom of the enmity list will always be the correct target.
- The Sealed Gate: A slow-casting instakill attack on the player trapped inside “The Hidden Gate.”
- Ukehi: A room-wide AoE attack that can be cast up to two times in a row. Mitigate and heal through the damage.
Rewards
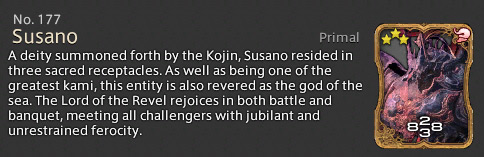
- Susano Triple Triad Card (not guaranteed)
-
Final Fantasy XIV
- FFXIV The Pool of Tribute (Normal): Unlock + Trial Guide
Related Posts:
 FFXIV Pool of Tribute (Extreme): How To Unlock + Trial Guide
 FFXIV Minstrel’s Ballad: Nidhogg’s Rage – Unlocking + Trial Guide
 Zurvan EX Unlock & Trial Guide – FFXIV Containment Bay Z1T9 (Extreme)
 FFXIV The Minstrel’s Ballad: Tsukuyomi’s Pain (Unlock + Trial Guide)
 FFXIV The Limitless Blue (Extreme): Unlock + Trial Guide
 FFXIV The Minstrel’s Ballad: Thordan’s Reign – Unlock + Trial Guide
 FFXIV Thok ast Thok (Extreme): How To Unlock + Trial Guide
 FFXIV The Jade Stoa (Extreme): How To Unlock + Trial Guide