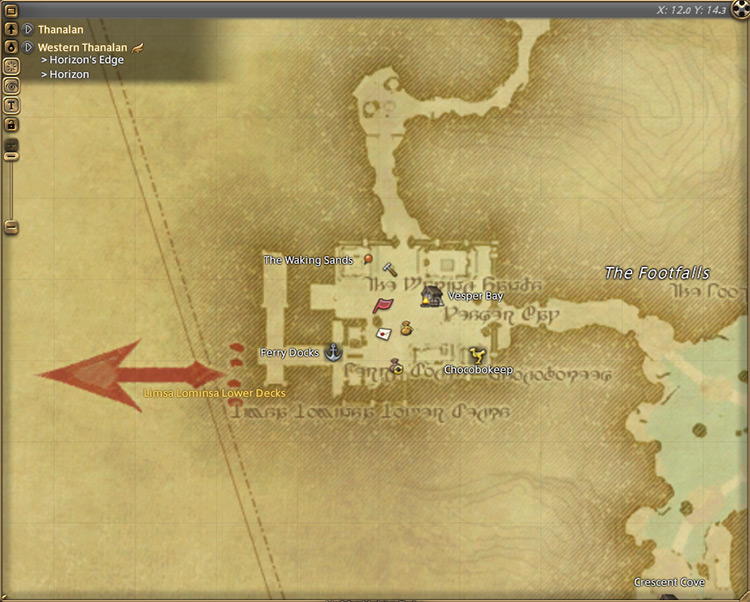
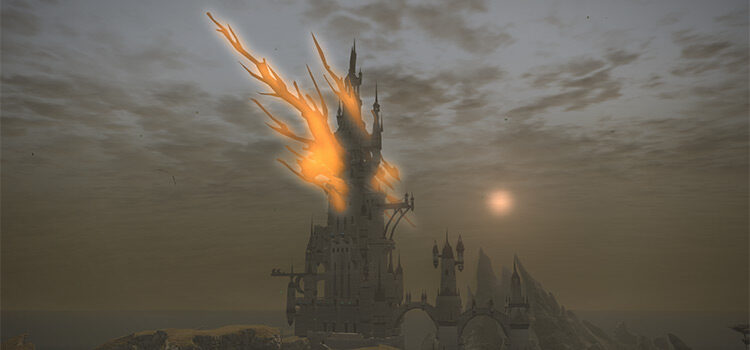
To unlock the Level 35 normal-difficulty dungeon The Sunken Temple of Qarn, you need to accept the Level 35 quest “Braving New Depths” from Nedrick Ironheart in Western Thanalan (X:12.0, Y:14.3).
We’ll cover the unlock quest details, along with all of the bosses and their mechanics in this guide.
Unlocking Quest: Braving New Depths
To be able to accept “Braving New Depths” from Nedrick Ironheart, you only need to reach Level 35.
Just remember to do your Main Scenario Quests (MSQs), FATEs, and dungeons to get experience quickly.
Once you reach the required level, talk to Nedrick in Western Thanalan (X:12.0, Y:14.3) to begin the quest.
Nedrick will gladly tell you about the ruins that emerged after the Calamity: The Sunken Temple of Qarn.
Due to the temple’s increasing popularity, the Immortal Flames began keeping watch of the temple. Fortunately, Nedrick knows a lalafell named Bibimu who may be able to grant you a safe passage.
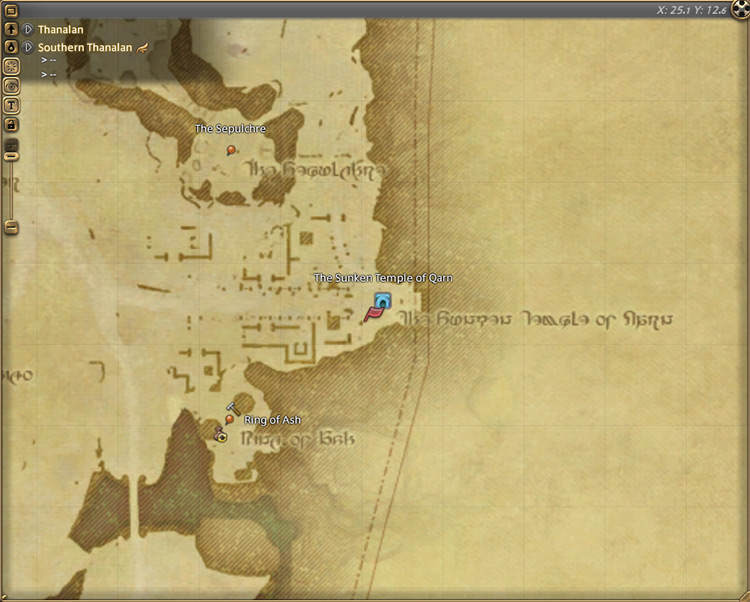
Meet Bibimu outside the temple’s entrance in Southern Thanalan (X:25.1, Y:12.6) to continue.
Bibimu will welcome you to the ruins and give you some background about the place.
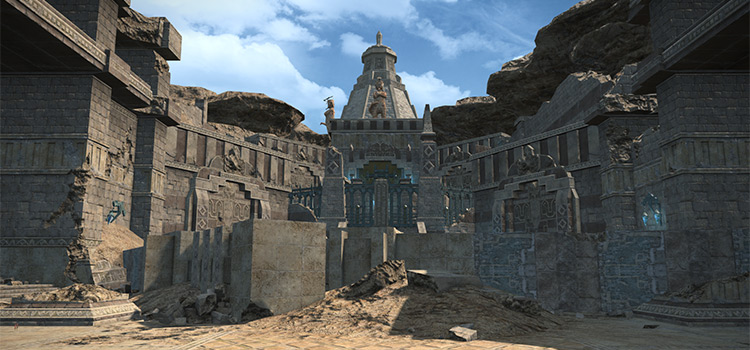
The Sunken Temple of Qarn was used by the ancient people of Belah’dia to worship one of the Twelve Eorzean Gods, Azeyma. Unfortunately, the rest of the temple’s history has been lost to the sands of time.
Investigative teams sent to the temple discovered that the place was rigged with multiple traps and puzzles to deter would-be robbers. Bibimu will ask for your aid in ridding the temple of its traps and uncovering its secrets.
After talking to the Lalafell, The Sunken Temple of Qarn will be unlocked.
This dungeon requires at least a Level 35 Disciple of War or Magic job to enter and has no item level requirement.
Boss #1: Teratotaur
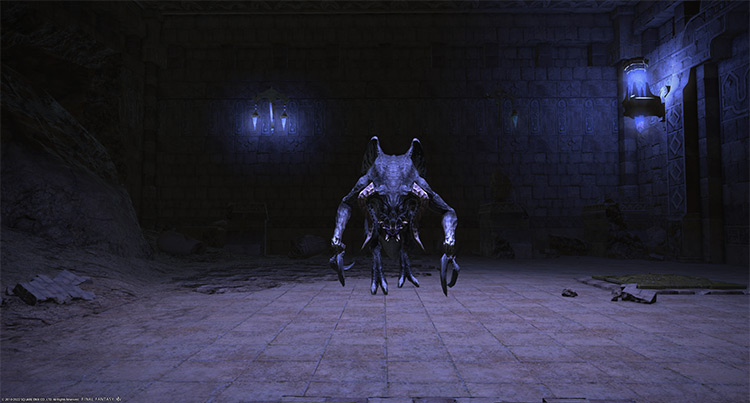
Mechanics:
- Triclip: A single-target tankbuster attack on the primary target. Heal the tank as necessary.
- Mow: A frontal cone AoE that applies a dispellable ”Poison” DoT for 15 seconds.
- Dung Wespe: Starting at around 75% HP, the boss will spawn two bees that need to be killed immediately.
- Final Sting (Dung Wespe): A instant-KO attack that can’t be interrupted. Kill the bees as soon as possible.
- Frightful Roar: A point-blank AoE that applies a 15-second “Physical Vulnerability Up” debuff. Move away from the AoE or dispel the debuff.
- Mortal Ray: A room-wide AoE attack that applies “Doom” for 12 seconds. If this debuff isn’t removed before it reaches 0, the affected player will die. Stand on the glowing pads to dispel. The pads may dim after some time, so always check which ones are glowing.
Rewards
| Name | Type | Rarity |
|---|---|---|
| Qarn Gloves | Hands | Dungeon (Green) |
| Qarn Halfgloves | Hands | Dungeon (Green) |
| Qarn Vambraces | Hands | Dungeon (Green) |
| Qarn Circlet | Head | Dungeon (Green) |
| Qarn Goggles | Head | Dungeon (Green) |
Boss #2: Temple Guardian

Whenever “Golem Soulstone” is up, damage to the boss is greatly reduced. Destroy the soulstone to remove the damage reduction and incapacitate the boss for a few seconds.
The soulstone will regenerate at 75%, 50%, and 20% HP.
Mechanics:
- Boulder Clap: A frontal cone AoE attack.
- True Grit: Another frontal cone AoE that applies a “Blind” debuff for 15 seconds, lowering the affected player’s accuracy.
- Obliterate: A room-wide AoE attack. Heal through the damage.
- Rockslide: A frontal column AoE attack.
- Stone Skull: A single-target knockback attack on a random player that stuns them for three seconds.
Rewards
| Name | Type | Rarity |
|---|---|---|
| Qarn Chainmail | Body | Dungeon (Green) |
| Qarn Cowl | Body | Dungeon (Green) |
| Qarn Jackcoat | Body | Dungeon (Green) |
| Qarn Breeches of Magic | Legs | Dungeon (Green) |
| Qarn Breeches of Resilience | Legs | Dungeon (Green) |
| Qarn Breeches of War | Legs | Dungeon (Green) |
Scales of Judgement Puzzle
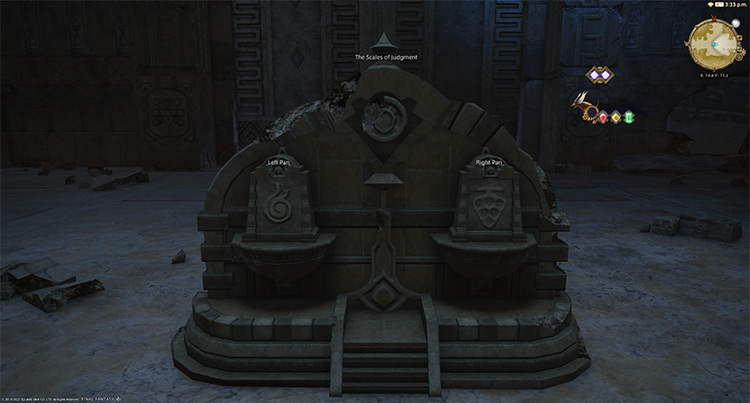
On your way to the final boss, you’ll encounter the Scales of Judgement mini puzzle.
If done correctly, the door to the final boss will open. But if done incorrectly, more mobs will spawn before the door opens.
Here’s how to solve the puzzle correctly:
- Place The Flame of Magic on the left scale
- Place the Fruit of Knowledge on the right scale
Boss #3: Adjudicator
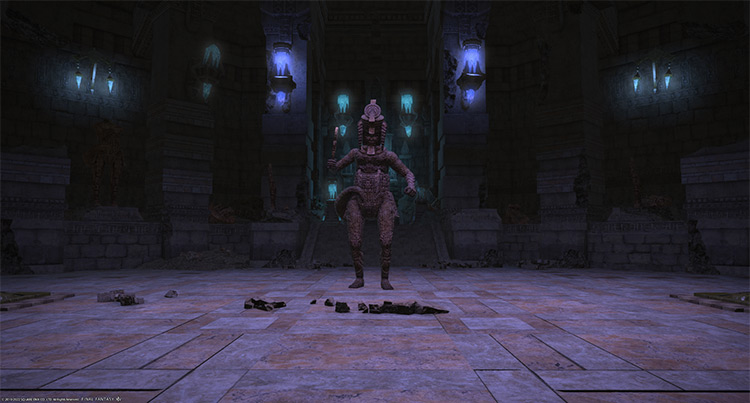
Mechanics:
- Sun Juror: Mobs that respawn unless they’re killed on top of glowing pads. These mobs will stop spawning once “Mythril Verge” mobs begin to spawn.
- Darkness (Adjudicator and Sun Juror): A frontal cone AoE attack.
- Paralyze: A single-target attack that applies a dispellable “Paralysis” debuff for 15 seconds. Stun or interrupt the boss to avoid.
- Creeping Darkness: A room-wide AoE attack. Heal through the damage.
- Mythril Verge: Multiple spires will spawn around the room that fire line attacks on random players. Having too many spires up at once can be overwhelming, so kill them immediately.
Some spires may spawn black square puddles around them. Once the puddle disappears, players standing outside the puddle will deal reduced damage to the spire. Have at least one DPS standing inside the black puddles to destroy the spire quickly. - Verge Line (Mythril Verge): A blue line attack on a random player.
- Verge Pulse (Mythril Verge): A room-wide AoE attack. Heal through the damage.
Rewards
| Name | Type | Rarity |
|---|---|---|
| Pupil’s Book of Silver | Book | Dungeon (Green) |
| Kokoroon’s Nestpicker | Bow | Dungeon (Green) |
| Bloodcry | Cane | Dungeon (Green) |
| Banos Del Sol | Daggers | Dungeon (Green) |
| Qarn Boots | Feet | Dungeon (Green) |
| Qarn Duckbills | Feet | Dungeon (Green) |
| Qarn Jackboots | Feet | Dungeon (Green) |
| Hellfire | Firearms | Dungeon (Green) |
| Fists of the Sixth Sun | Fist Weapon | Dungeon (Green) |
| Boar’s Bane | Greataxe | Dungeon (Green) |
| Platoon Sword | Greatsword | Dungeon (Green) |
| Paladin’s Flametongue Arms (Lv. 35) | Other | Dungeon (Green) |
| Shellsplitter | Polearm | Dungeon (Green) |
| Anathema | Staff | Dungeon (Green) |
| Altair | Star Globe | Dungeon (Green) |
| Belah’dian Glass | Crafting material | Basic |
Extra Treasure Coffers
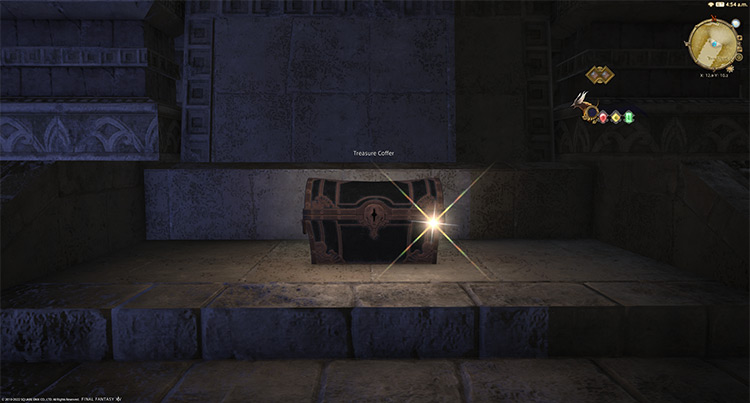
Apart from the boss rewards, there are seven treasure coffers located throughout the dungeon that you can open for more gear, shards, and crafting material rewards.
Note: Some chests may be locked behind doors with stone pedestals outside. Match the symbol with the stone tablet you’ve picked up along the way to open the locked doors.
Here’s the coordinates of all the extra treasure coffers:
- (X: 13.0 Y: 10.1)
- (X: 13.0 Y: 12.3)
- (X: 14.2 Y: 10.3)
- (X: 15.0 Y: 10.4)
- (X: 12.9 Y: 11.1)
- (X: 14.2 Y: 12.1)
- (X: 15.1 Y: 10.4)
-
Final Fantasy XIV
- The Sunken Temple of Qarn (Normal): Unlock + Dungeon Guide for FFXIV
Related Posts:
 FFXIV The Temple of the Fist: Unlock + Boss Guide
 FFXIV Pharos Sirius (Normal): How To Unlock + Dungeon Guide
 FFXIV Amdapor Keep (Hard): How To Unlock + Dungeon Guide
 FFXIV Copperbell Mines (Hard): How To Unlock + Boss Guide
 FFXIV The Qitana Ravel: Unlock + Boss Guide
 FFXIV Dohn Mheg: How To Unlock + Boss Guide
 FFXIV Malikah’s Well: How To Unlock + Dungeon Guide
 The Sunken Temple of Qarn (Hard): How To Unlock + Boss Guide for FFXIV