
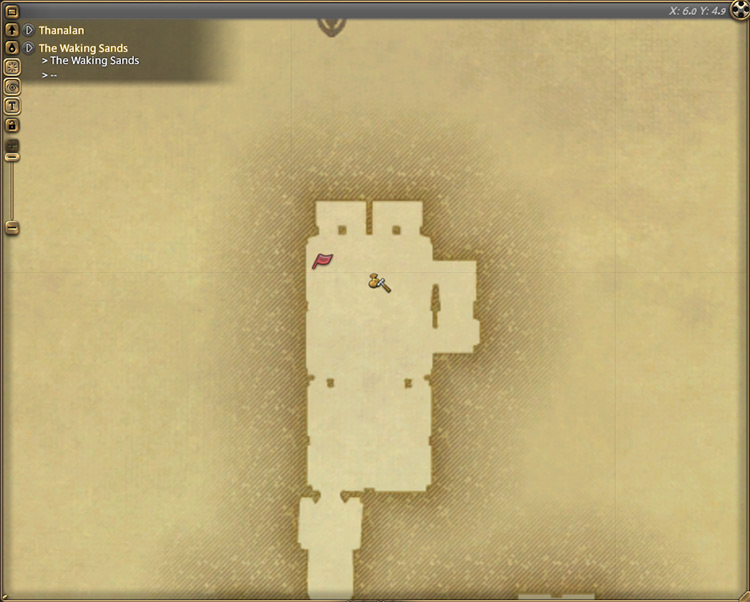
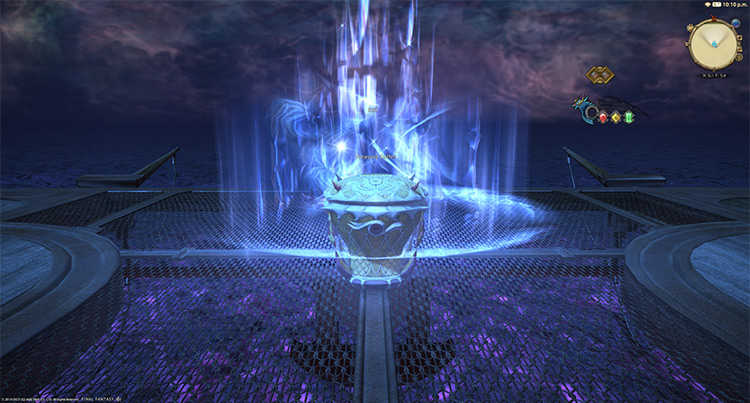
You can unlock the Level 50 trial The Whorleater (Extreme), also known as Leviathan EX, by accepting the Level 50 quest “Whorl of a Time” from Urianger in The Waking Sands (X:6.0, Y:4.9).
This quest is locked behind the MSQ “Through the Maelstrom” from Yugiri in Limsa Lominsa Lower Decks (X:8.9, Y:14.3).
TABLE OF CONTENTS
Step-by-Step Unlock Guide
- Complete the Level 50 MSQ “Through the Maelstrom” from Yugiri in Limsa Lominsa Lower Decks (X:8.9, Y:14.3).
- Accepting the Level 50 quest “Whorl of a Time” from Urianger in The Waking Sands (X:6.0, Y:4.9).
- Speak with R’ashaht Rhiki at the Maelstrom Command in Limsa Lominsa Upper Decks (X:13.1, Y:12.8).
- Speak with Styrnlona in Lower La Noscea (X:24.6, Y:33.2).
Detailed Unlocking Guide
Start by completing “Through the Maelstrom” from Yugiri in Limsa Lominsa Lower Decks (X:8.9, Y:14.3) as part of the patch 2.2 main story questline for A Realm Reborn. Completing this quest unlocks access to the quest “Whorl of a Time”.
Once you’re done, talk to Urianger in The Waking Sands (X:6.0, Y:4.9) to continue.
Similar to previous extreme trials in A Realm Reborn, “Whorl of a Time” will allow you to fight Leviathan’s extreme version through Urianger.
He’ll bring word from Maelstrom Command that the Lord of the Whorl has reappeared, and R’ashaht Rhiki is requesting your assistance once more.
Meet the Storm Commander in Limsa Lominsa Upper Decks (X:13.1, Y:12.8) to proceed.
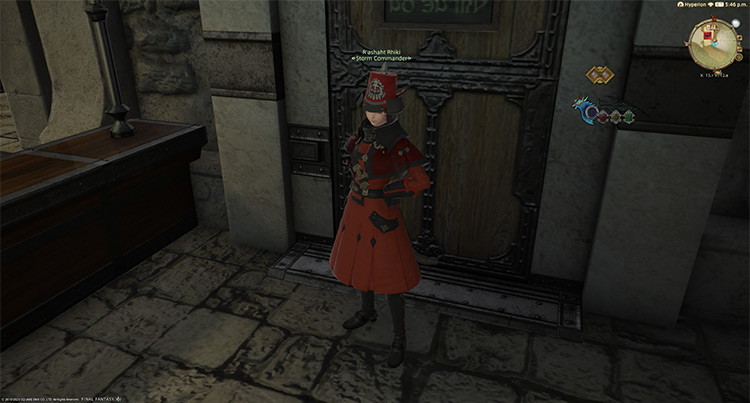
Upon arriving, R’ashaht Rhiki will confirm Urianger’s news and report that a merchant fleet was completely destroyed in the open sea.
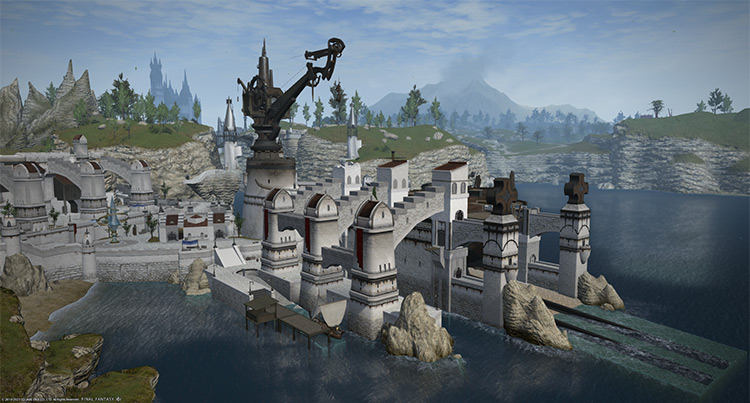
A lone surviving vessel managed to arrive in Moraby Drydocks and confirmed that Leviathan destroyed their fleet. The Storm Commander will ask you to meet Styrnlona in Lower La Noscea (X:24.6, Y:33.2) to make the necessary preparations.
Sergeant Styrnlona is happy to report that the Whorleater is once again ready to depart for the fight.
After talking to the sergeant, The Whorleater (Extreme) will be unlocked.
This trial requires at least a Level 50 Disciple of War or Magic job and an average item level of 80 to enter.
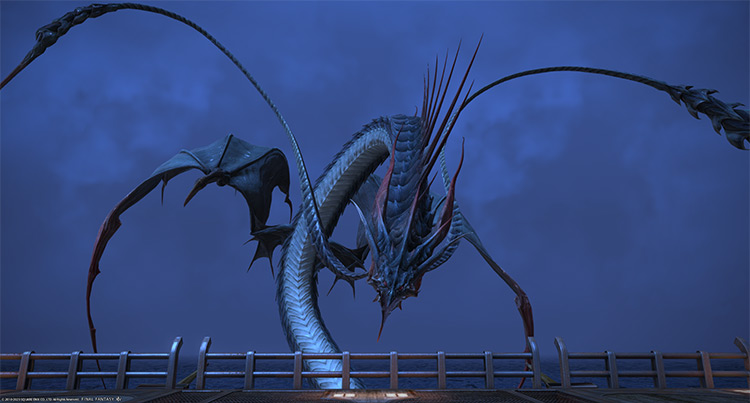
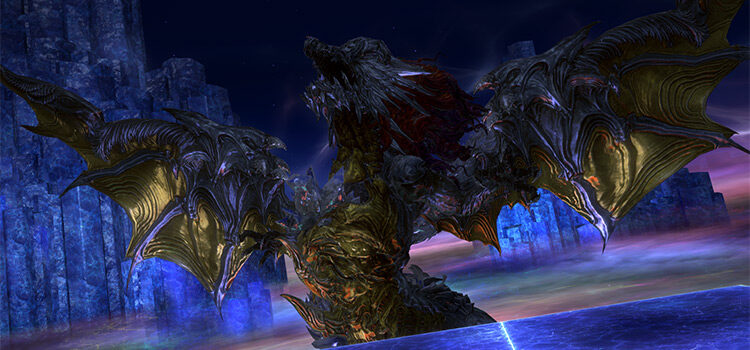
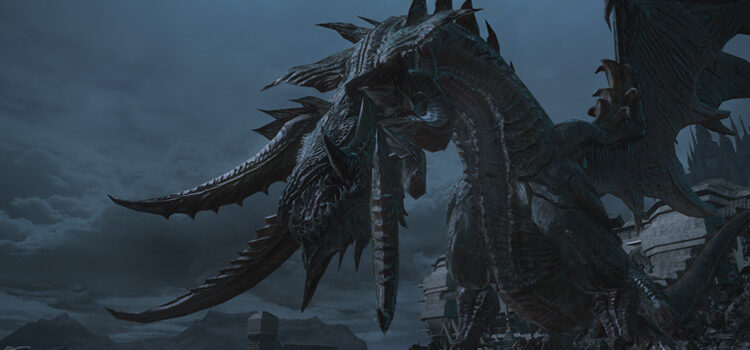
Trial Boss: Leviathan (Extreme)
Leviathan EX can be easily solo’d with a high-level character if you enter the trial while unsynced. Make sure to position yourselves on the other side of the arena or use knockback-immunity skills to survive “Body Slam.”
If you want to do the trial with your friends while synced, read the mechanics and rotations below.
Phase 1: Head and Tail
Rotation:
DPS the boss until 90% HP > Body Slam > Split to Head and Tail
At the start of the fight, you’ll get a free damage phase until the boss reaches 90% HP before it splits into two (head and tail). Due to the nature of the fight, the rotations listed in this guide will only show the boss’ notable mechanics.
Leviathan
The head should only be attacked by tanks, melee, and caster DPS.
- Veil of the Whorl: A buff that reflects ranged attacks.
- Attack: A single-target attack on the head’s primary target.
- Dread Tide: A strong tankbuster attack on the primary target.
- Aqua Breath: A point-black AoE attack in front of the boss.
- Waterspout: Non-telegraphed circle AoEs under random players. Spread out to avoid overlapping damage.
- Body Slam: The boss will dive underwater and reappear on one side of the arena. Then, it’ll slam the arena, damaging anyone in front of him. This attack will also tilt the arena and send players sliding across. Position yourselves on the opposite end of the arena once the boss reappears or use knockback-immunity skills.
Leviathan’s Tail
The tail should only be attacked by tanks, melee, and ranged DPS.
- Mantle of the Whorl: A buff that reflects magic attacks.
- Scale Darts: A single-target attack on the tail’s primary target.
- Tail Whip: An instant, non-telegraphed frontal cone AoE. Always stay away from the tail if you’re using ranged characters.
- Briny Mirror and Briny Veil: A “Briny Mirror” debuff will be placed on the tail’s primary target. Every heal cast on the primary target will give the healer a stack of “Briny Veil.” If the stack reaches 16, the healer will be stunned for the duration of the debuff. Stagger your healing on the off-tank.
Phase 2: Sahagins, Gyre Spumes, and Tidal Wave
Rotation:
2 Wavespines > 1 Wavetooth > Grand Fall > Spinning Dive x2 > Body Slam + Gyre Spume > Grand Fall > Spinning Dive > Use Elemental Converter > Tsunami (Railings will break) > Body Slam.
Kill the mobs that spawn in this order of priority: Gyre Spume > Wavetooth Sahagin > Wavespine Sahagin
- Stun Shot (Wavespine Sahagin): A single-target attack that applies a 30-second “Paralysis” debuff. This debuff can be dispelled.
- Hydroshot (Wavespine Sahagin): A targeted circle AoE that applies a 9-second “Dropsy” DoT. Bait the AoEs away from the center and dispel the DoT as necessary.
- Dreadstorm (Wavetooth Sahagin): Another targeted circle AoE that applies a 10-second “Hysteria” debuff. This debuff causes players to wander around aimlessly.
- Dreadwash (Wavetooth Sahagin): A room-wide AoE attack that deals moderate damage.
- Darkness (Wavetooth Sahagin): A frontal cone AoE attack.
- Tidal Roar: A room-wide AoE attack. Shield and heal through the damage.
- Elemental Converter: An interactable machine that mitigates the damage of “Tidal Wave.” Check the rotation to know when to use the converter.
- Gyre Spume: Four yellow orbs will spawn and start siphoning the “Elemental Conversion” gauge. The gauge reduces the incoming “Tidal Wave” damage based on its current level. Kill the spumes quickly to keep your gauge at a decent level. Each spume will explode for a room-wide AoE attack upon their deaths.
- Grand Fall: Targeted circle AoEs that apply a 30-second “Heavy” debuff. Later in the fight, these AoEs will drop consecutively, so keep moving until they stop.
- Spinning Dive: The boss will appear on one side of the arena and rush across, damaging anyone in its path and applying a stacking “Water Resistance Down” debuff.
- Tidal Wave: The boss will become invulnerable and cast its ultimate AoE attack. Use the Elemental Converter to avoid a party wipe.
Phase 3: Wave Spumes
Rotation:
2 Wavespines > Grand Fall > Spinning Dive x2 > Body Slam > Gyre Spume > Wave Spume > Grand Fall > Spinning Dive > Use Elemental Converter > Tsunami > Body Slam > 1 Wavetooth > Grand Fall > Spinning Dive > 2 Wavespine > Tsunami (wipe)
At this point in the fight, most of the boss’ mechanics will repeat until the hard enrage on the last “Tidal Wave”.
Wave Spume: Four blue spumes will tether to the elemental converter and drain the conversion meter. Have the off-tank grab the tethers and lure them away from the converter.
Rewards
- Leviathan Triple Triad Card (not guaranteed)
| Name | Type | Quality |
|---|---|---|
| Wave Grimoire | Book | Blue (Primal Gear) |
| Wave Codex | Book | Blue (Primal Gear) |
| Wave Bow | Bow | Blue (Primal Gear) |
| Wave Cane | Cane | Blue (Primal Gear) |
| Wave Kris | Daggers | Blue (Primal Gear) |
| Wave Musketoon | Firearms | Blue (Primal Gear) |
| Wave Patas | Fist Weapon | Blue (Primal Gear) |
| Wave Axe | Greataxe | Blue (Primal Gear) |
| Wave Faussar | Greatsword | Blue (Primal Gear) |
| Wave Katana | Katana | Blue (Primal Gear) |
| Paladin’s Tidal Arms (IL 95) | Other | Blue (Primal Gear) |
| Wave Harpoon | Polearm | Blue (Primal Gear) |
| Wave Rapier | Rapier | Blue (Primal Gear) |
| Wave Buckler | Shield | Blue (Primal Gear) |
| Wave Torquetum | Star Globe | Blue (Primal Gear) |
| Leviathan’s Barb | Crafting material | Basic |
| Barb of the Whorl | Crafting material | Basic |
| Faded Copy of Wreck to the Seaman | Orchestrion Roll | Basic |
| Faded Copy of Through the Maelstrom | Orchestrion Roll | Basic |
| Mirror of the Whorl | Other | Basic |
| Tidal Weapon Coffer (IL 95) | Other | Basic |
| Enbarr Whistle | Other | Basic |
-
Final Fantasy XIV
- FFXIV The Whorleater (Extreme): How To Unlock + Trial Guide
Related Posts:
 FFXIV The Whorleater (Hard): Unlock + Trial Guide
 FFXIV The Minstrel’s Ballad: Shinryu’s Domain – Unlock + Trial Guide
 Zurvan EX Unlock & Trial Guide – FFXIV Containment Bay Z1T9 (Extreme)
 FFXIV Emanation (Extreme): How To Unlock + Trial Guide
 FFXIV Minstrel’s Ballad: Nidhogg’s Rage – Unlocking + Trial Guide
 The Akh Afah Amphitheatre (Extreme): Unlock + Trial Guide (FFXIV)
 Sophia EX Unlock & Trial Guide – FFXIV Containment Bay P1T6 (Extreme)
 FFXIV Hells’ Kier (Extreme): How To Unlock + Trial Guide