TABLE OF CONTENTS
Quick Guide
- Catch a Pikachu in Viridian Forest before leaving Pewter (optional, but useful for later)
- Walk east from Pewter City to reach Route 3 and continue onto Mt. Moon
- Enter Mt. Moon and make your way to the north-west corner of the first floor, and take the ladder down
- Continue through Mt. Moon by wrapping around the path, defeat the Rocket Grunts and the Super Nerd, choose a fossil, and exit the cave onto Route 4
- Pick up Mega Punch and Mega Kick from the Karate NPCs on Route 4, then hop over the hill into Cerulean City
Route 3
After you defeat Brock in Pewter City and win the Boulder Badge, it’s time to move onto Mt. Moon.
Mt. Moon is at the end of Route 3, which is to the east of Pewter City. Mt. Moon is a medium-sized cave that leads to Cerulean City, where the next Gym is located.

Before you leave, make sure to heal up at the Pokémon Center and grab a few more Potions and Poké Balls from the Poké Mart if you’re running low.
Tip: I also recommend backtracking and catching a Pikachu from Viridian Forest if you do not have one. Pikachu will come in handy against the Zubats of Mt. Moon, and against the Water-Type Gym Leader in Cerulean City.
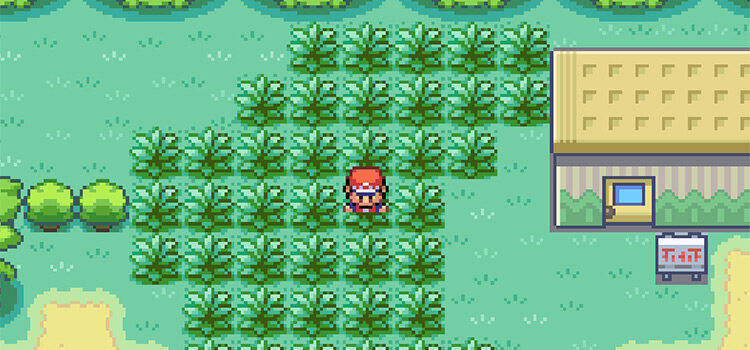
Route 3 is pretty straight forward.
Just keep walking right, beat a few trainers, avoid jumping down hills, and eventually you’ll reach Mt. Moon.
If you’re stealthy enough, you can even avoid a few battles. Although, I recommend fighting the trainers and getting the XP.
Just make sure you still have some Antidotes on you because there are a few Bug Catchers (AKA a lot of Poison Stings) on the Route.
There is a Pokémon Center at the end of Route 3, which is actually home to one of the most infamous (and hilarious) Pokémon scams in the series.
There is a man in the top-left corner of the Pokémon Center. Talk to him and he will offer you a Magikarp for 500 Poké Dollars.

Whether you want to spend the money or not is up to you.
The Magikarp will only know Splash, which is completely useless, so you will have to switch train it until it evolves. Personally, I love the useless fish, so I’m going to buy it!
Mt. Moon Full Guide
Our goal is to get to Cerulean City, which means we have to cross through Mt. Moon.
Make sure to stop by the Pokémon Center and heal your Pokémon (and buy the Magikarp) before you head through the cave. Even if your Pokémon are full HP, you should heal just to set the checkpoint.
Mt. Moon is full of wild Pokémon and random encounters.
Most of the wild Pokémon are Zubats and Geodudes.
- Geodude can be easily taken out by Mankey’s Fighting type moves. Mankey can be caught on Route 4
- Zubat is weak to Electric moves, so a Pikachu from Viridian Forest will be very useful. Pikachu will also be very useful at the Cerulean City Gym, so it’s worth backtracking for one.
Extra Items (Optional)
Mt. Moon is full of items to pick up.
There are Potions, TMs, Stones, etc. However, these items are optional. We’re going to point out some of the locations of the more interesting items.
But if you just want to get through the cave start-to-finish without worrying about any extras, skip down to the section below titled “Mt. Moon Walkthrough (Step-by-Step)”.

I’ll let you explore the cave for yourself if you want to hunt down every piece of loot. But I’ll just tell you about the most important items to pick up while you’re here:
Star Piece Location
The Star Piece is a high value item that can be sold for 4900 Pokédollars. If you’re short on cash, or just want some easy money, then you can find one in Mt Moon fairly quickly:
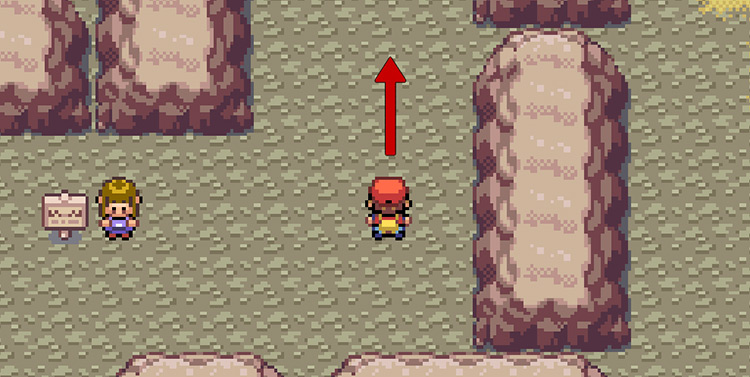
Step 1: Walk north as soon as you enter the cave until you reach the sign and the girl standing next to it, then walk east
Step 2: Once you hit the wall walking east, walk north through the corridor
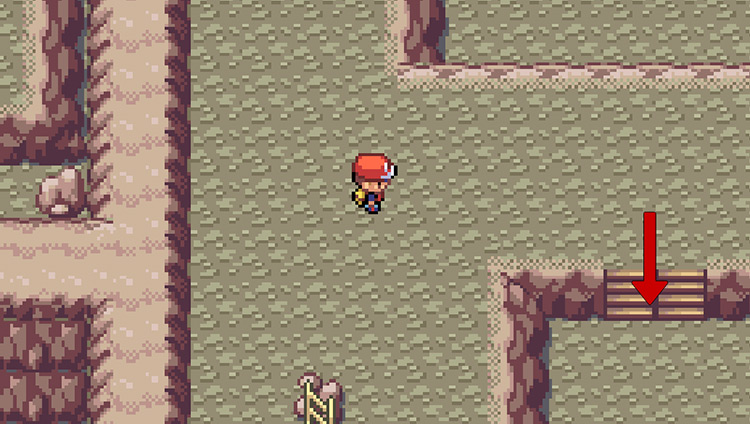
Step 3: At the end of the corridor, take the ladder down, just to the right
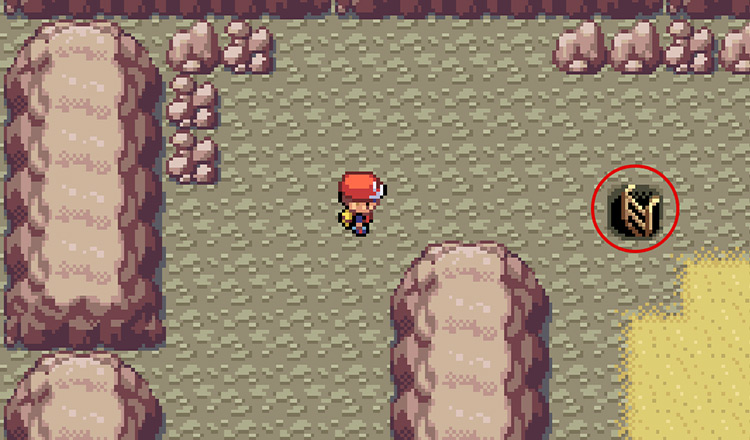
Step 4: Follow the corridor down as far as possible and then to the left as far as possible
Step 5: Take the ladder at the end of the corridor after walking left as far as possible
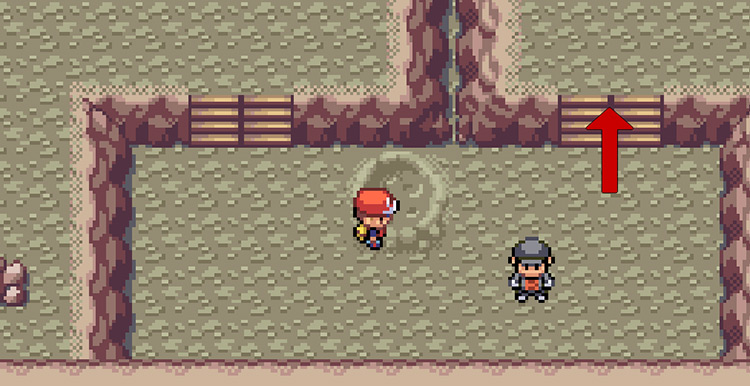
Step 6: Defeat the Team Rocket Grunt waiting for you after climbing down the ladder
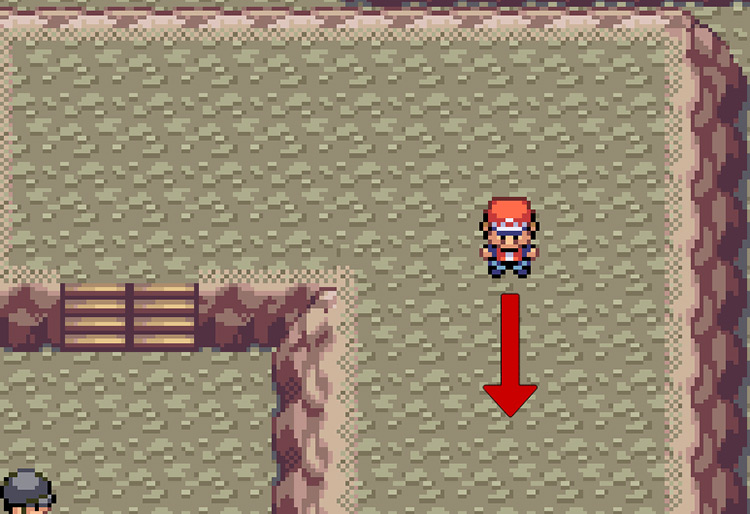
Step 7: After defeating the Grunt, continue walking east
Step 8: Walk right until you see a Poké Ball up the set of stairs hugging the north wall. Pick up this Poke Ball to receive the Star piece.
Rare Candy Location
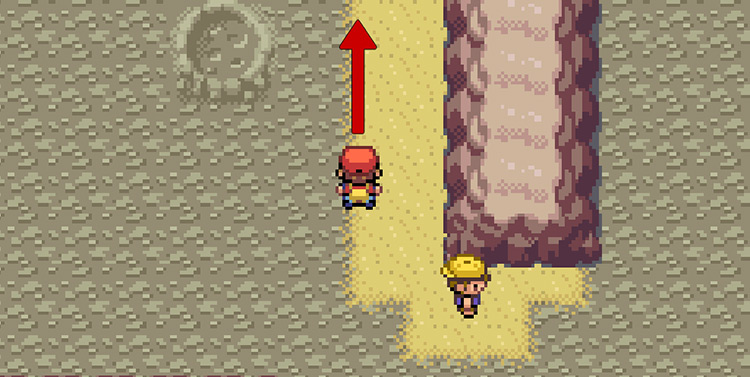
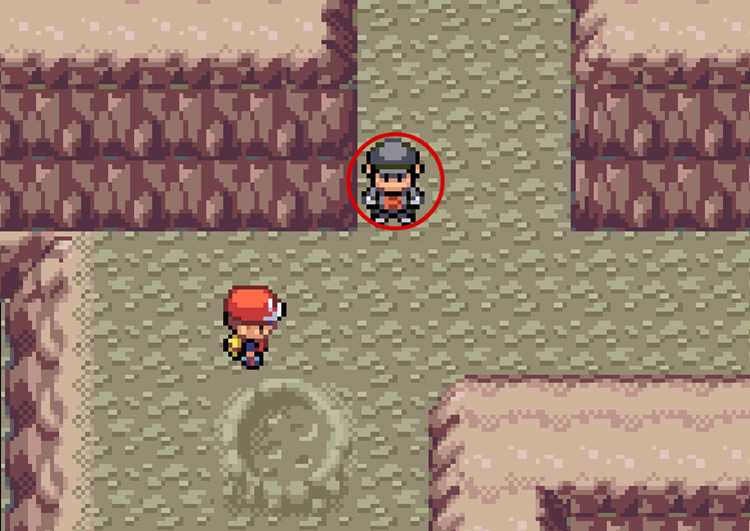
Step 1: Start from the first ladder you find on the first floor (north east of the Mt. Moon entrance). Do not take the ladder down – instead, walk south of the ladder until you see an NPC wearing a hat (the Bug Catcher)

Step 2: Walk past the Bug Catcher (and battle them), then continue south
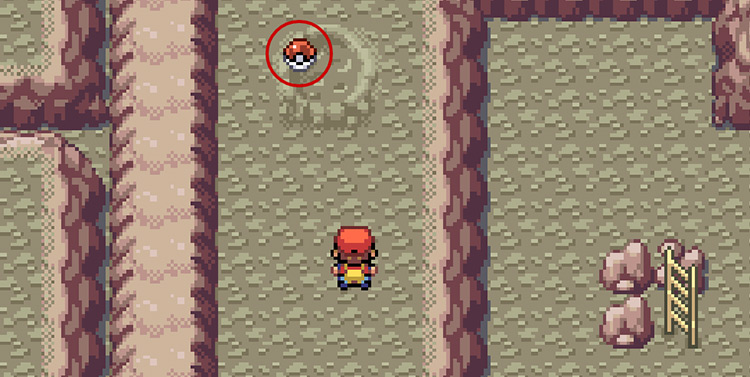
Step 3: After you defeat the Bug Catcher, walk slightly south and then walk east to the Poké Ball on the ground (the Rare Candy)
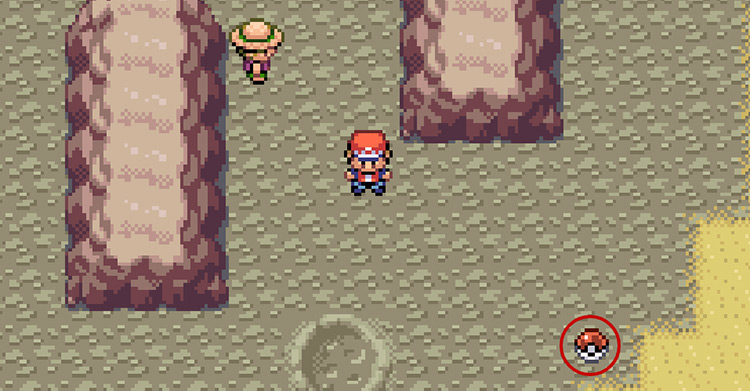
Step 4: Pick up the Poké Ball to receive the Rare Candy

Escape Rope Location
Step 1: Once again, follow steps 1 – 3 of the Star Piece instructions and reach the ladder going down (north east of the Mt. Moon entrance). Do not take this ladder.
Instead, walk east from the ladder. Basically walk all the way east until you reach the very far wall (you’ll need to walk past the rock barrier).
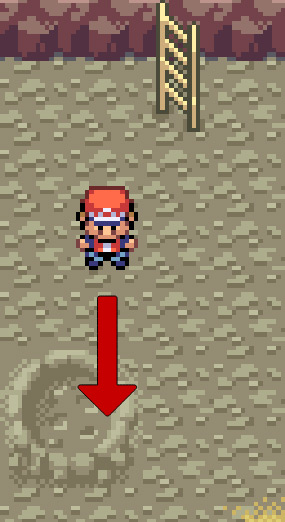
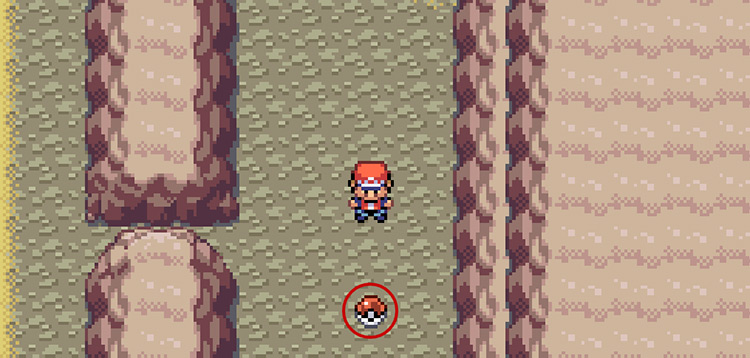
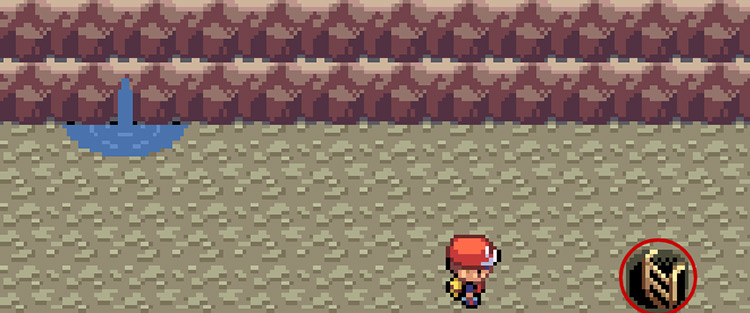
Step 2: After you walk past the rock barrier/divider, walk south.
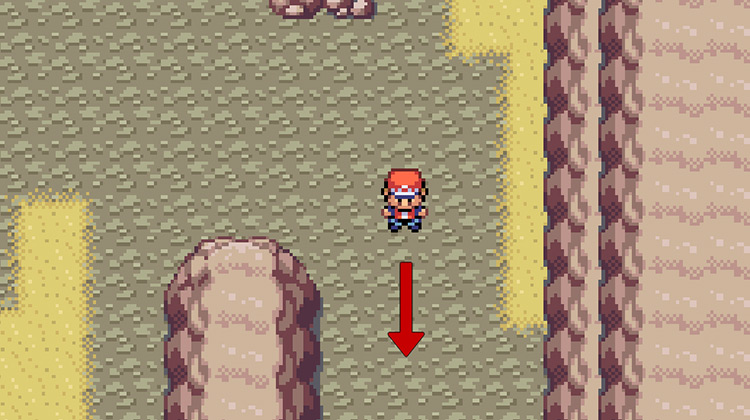
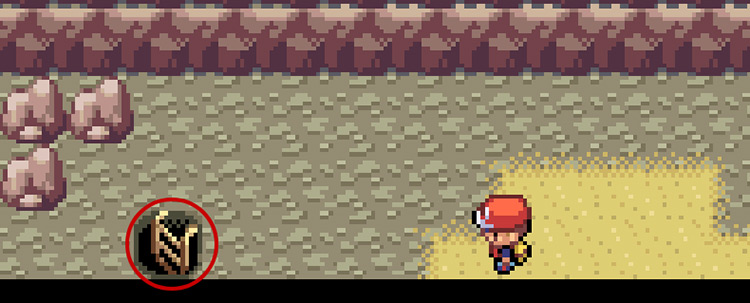
Step 3: Walk south until you find the Poké Ball in the middle of the path – this contains your Escape Rope.
Moon Stone Location
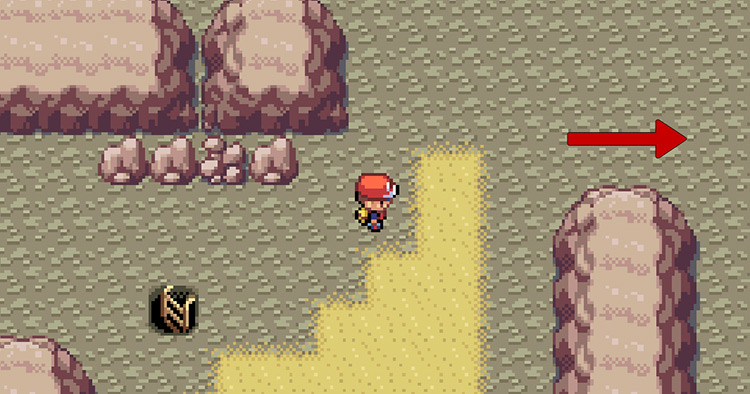
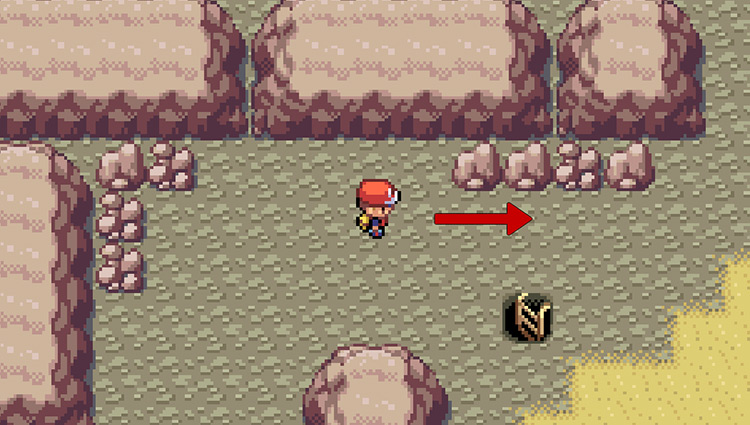
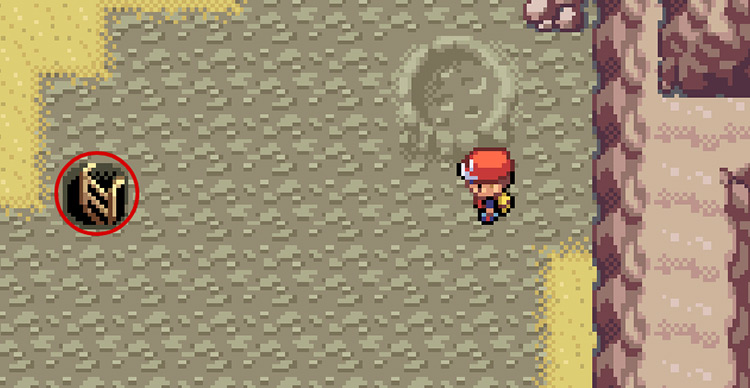
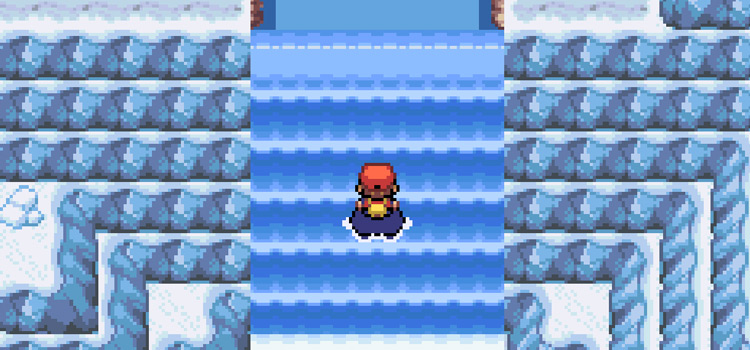
Step 1: Starting back at the ladder just north-east of the Mt. Moon entrance, we’ll need to walk east past the ladder. Do this until you reach the end of the rock wall just above you (see the screenshot below).
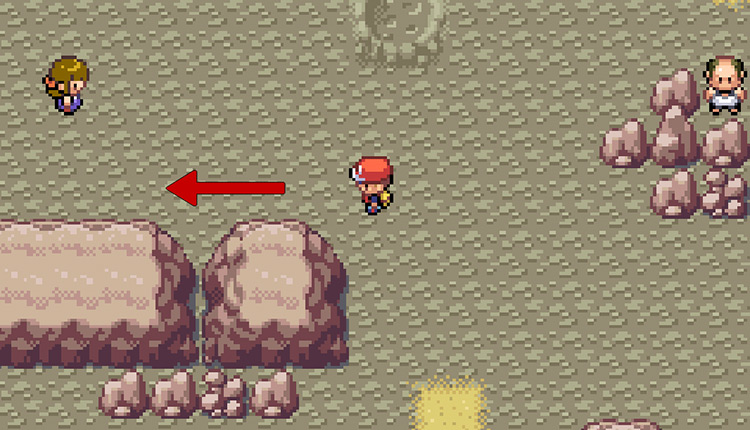
Step 2: From here, walk north around the rock wall, and then start going west as far as possible.
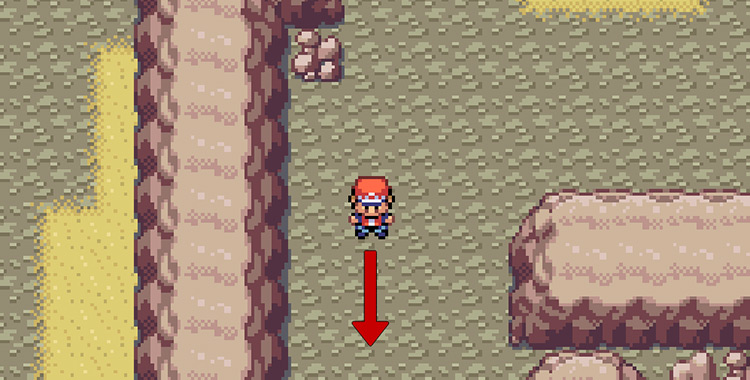
Step 3: Once you hit the western wall, start walking down until you hit a wall again.
Step 4: Walk around the rock wall (going to the west), then continue north as far as possible (do not take the ladder going down when you walk past it).
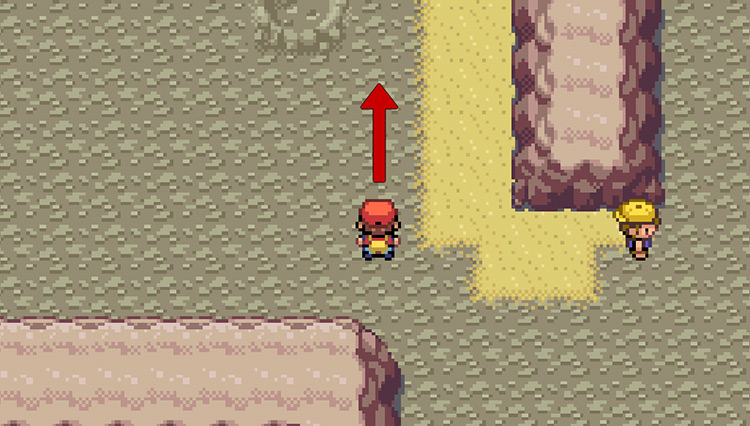
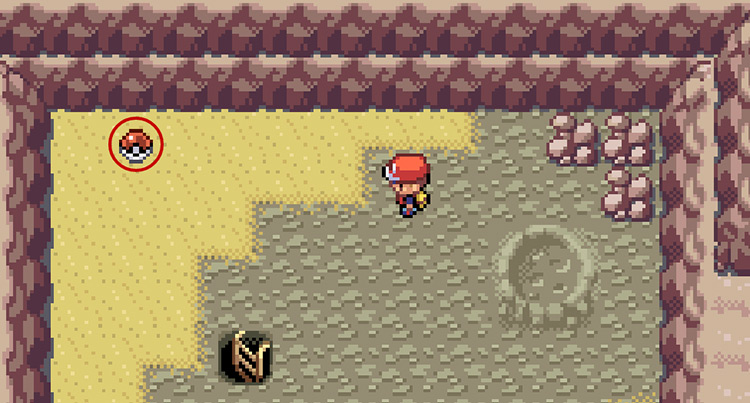
Step 5: Walk just past the ladder, and then walk up to the Poké Ball in the north westcorner of the cave – this is the Moon Stone.
Mt. Moon Walkthrough (Step-by-Step)
There are quite a few different ladders and paths in Mt. Moon, but there is only one path out.
So here’s our step-by-step process to help you get through Mt. Moon:
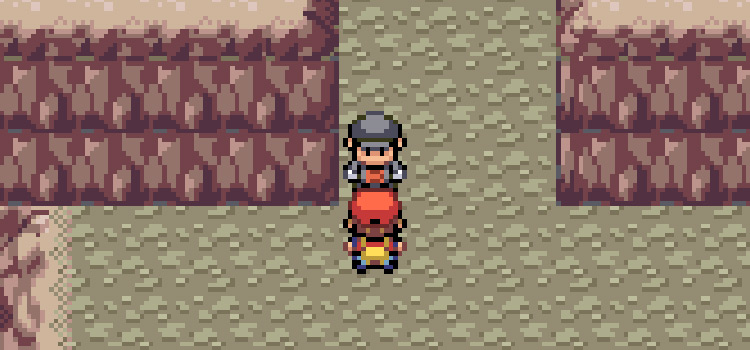
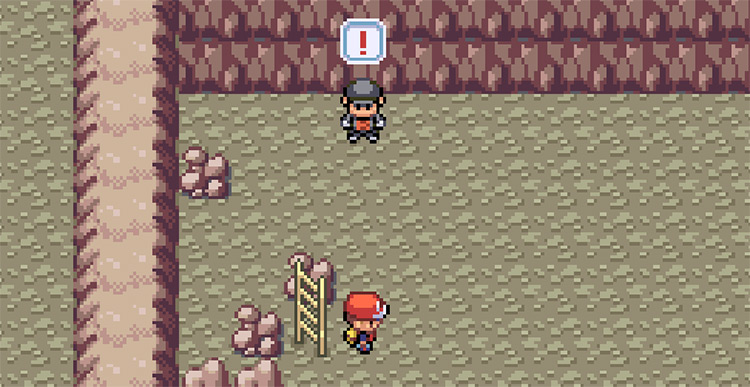
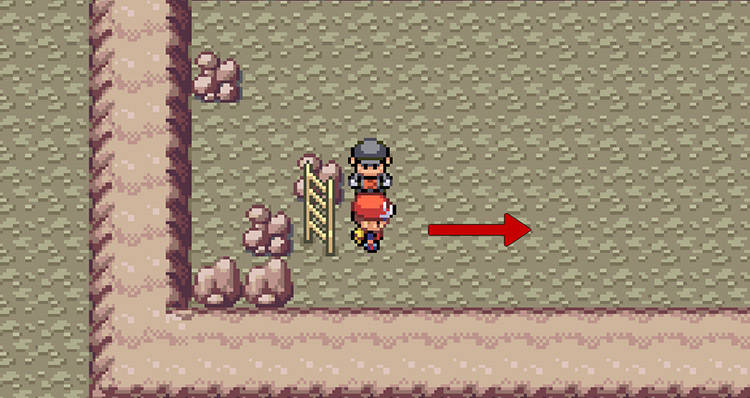
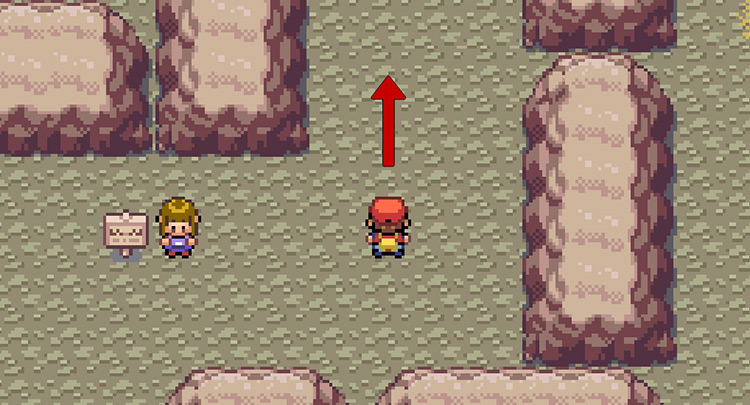
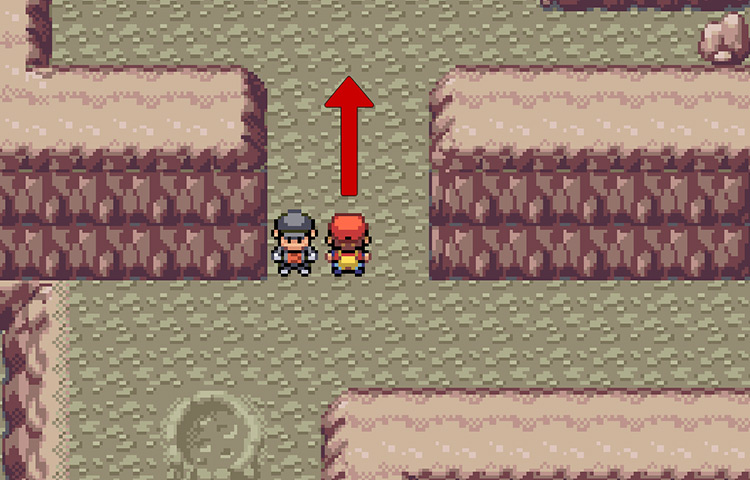
Step 1: From the entrance of Mt. Moon, walk north until you reach the trainer standing by the sign, then walk east (you can battle her or walk behind her).

Step 2: Walk east until you reach the rock divider, then walk north until you see the ladder going down (do not take this ladder).
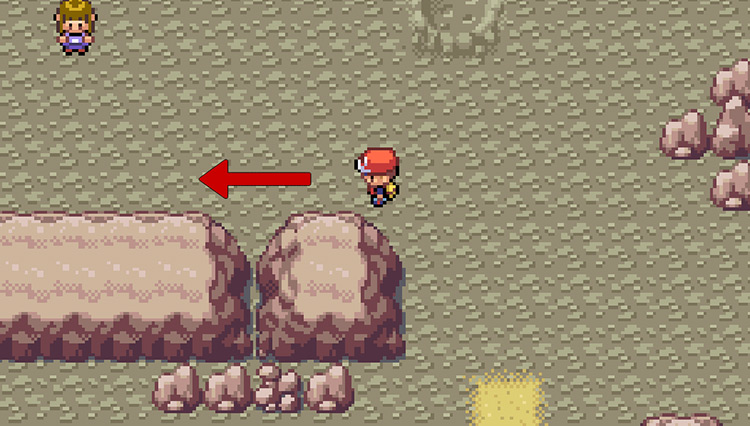
Step 3: Walk east, slightly past the ladder, and then make your way around the northern rock-divider right above you.

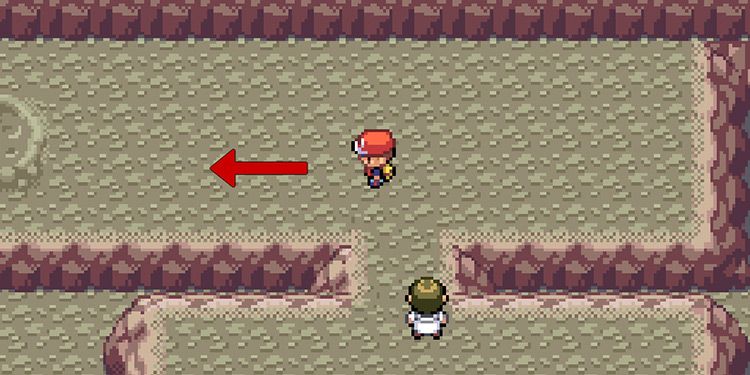
Step 4: Once you’re on the other side of the divider, start heading west and walk as far west as possible.
Step 5: Once you hit the western wall/divider, start going south in order to get to the other side of the rock divider.
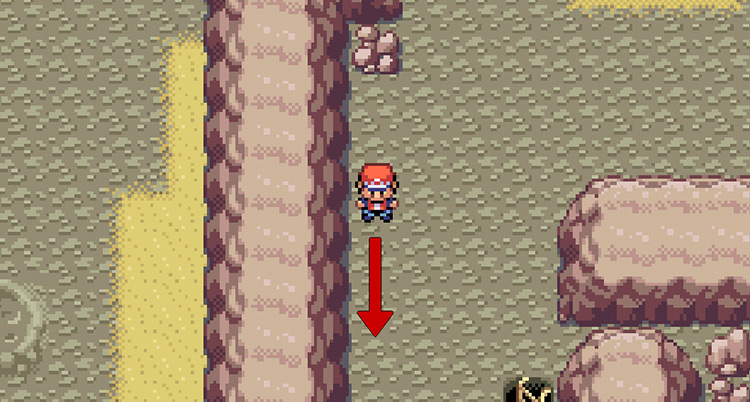
Step 6: Once you are on the other side of the divider, walk north as far as possible until you see a ladder going down.
Step 7: Take the ladder down to the 2nd Mt. Moon floor
Step 8: After you take the ladder down, you will find yourself in a corridor. Follow the corridor down and to the right.

Step 9: Walk to the end of the corridor, then take the next ladder heading down deeper into Mt. Moon.
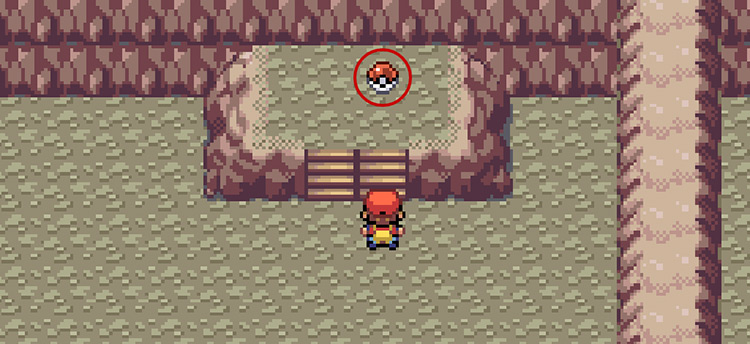
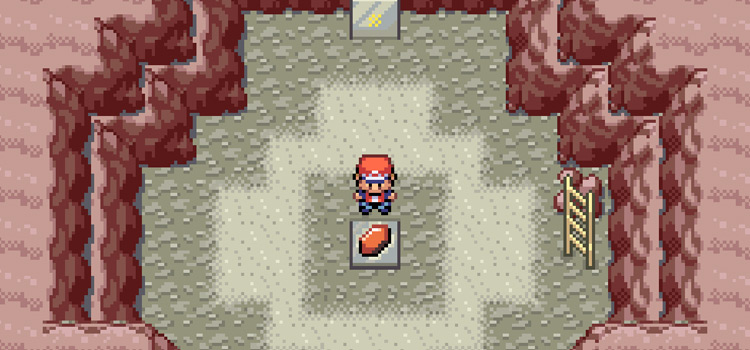
Step 10: As soon as you resurface from taking the ladder, walk north until you see a Poké Ball on the ground. This is a Revive, which will heal a KO’d Pokémon, and it may come in handy later!
Step 11: After you grab the Revive, walk back south near the ladder, then head down the steps to the east.
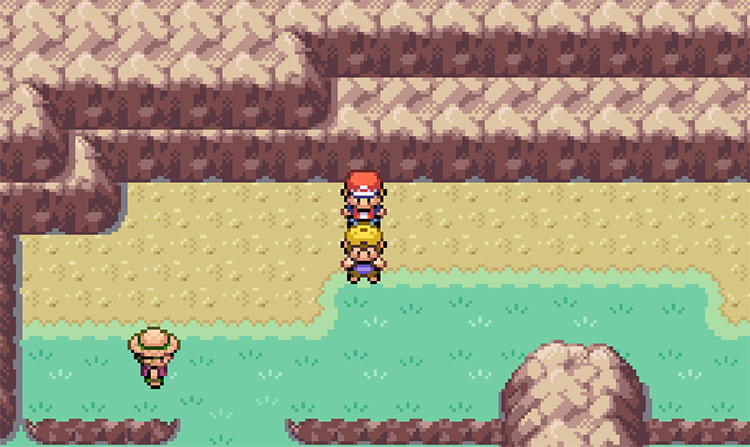
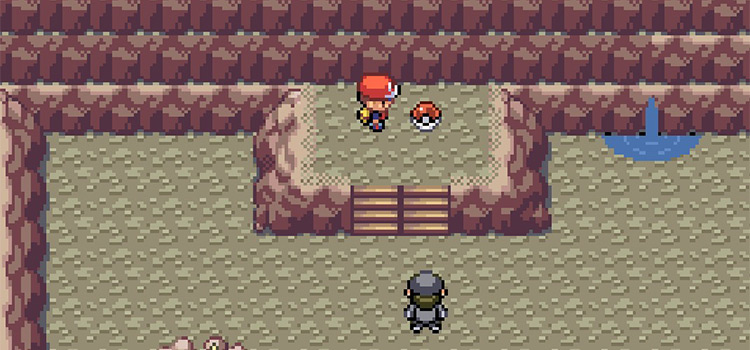
Step 12: Make your way past the Team Rocket Grunt (defeat him or sneak by), and then walk up the next set of stairs to the right. This will bring you on top of a rocky hill section.
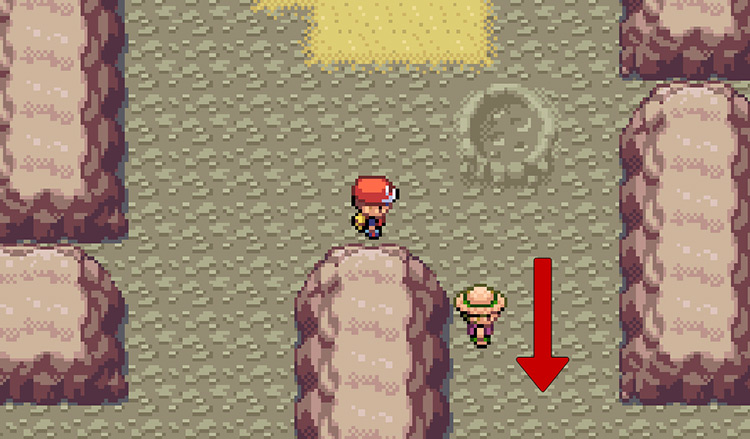
Step 13: Walk south on the rocky hill, and follow along its path until you see a Team Rocket Grunt blocking a small entryway.
Step 14: Once you reach the Grunt, heal your Pokémon if you have to, and then prepare for battle!
You need to defeat this Grunt, but that shouldn’t be a problem if your Pokémon are healthy.
Step 15: After you put this Grunt in his place, continue north. There’s a Super Nerd guarding two fossils.
Step 16: Walk up and talk to the Super Nerd, or try to walk by him – either way he will stop you to challenge you to a battle. Here’s his team:
| Super Nerd Team | ||
|---|---|---|
| Pokémon | Level | Type |
| Grimer | 12 | Poison |
| Voltorb | 12 | Electric |
| Koffing | 12 | Poison |
After you defeat the Super Nerd, you will have to choose between the two Fossils in front of you.
Choose wisely, as you’ll actually be able to turn this fossil into a real Pokémon later.
| Fossil | Pokémon |
|---|---|
| Helix Fossil | Omanyte |
| Dome Fossil | Kabuto |
Step 17: After you defeat the Super Nerd and grab your fossil, just follow the cave’s path ahead and take the next two ladders up to the surface.

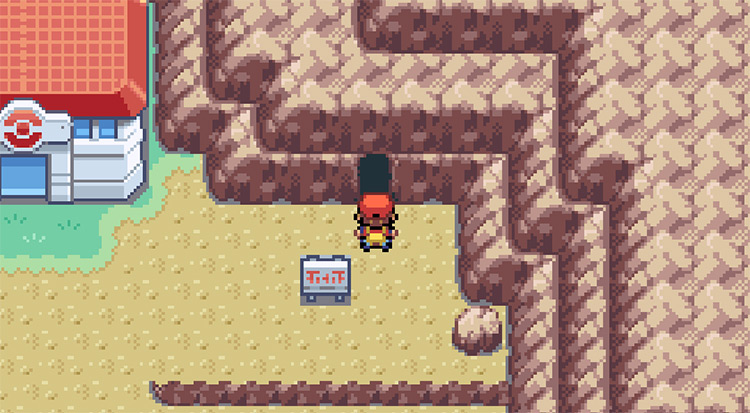
Step 18: When you come across a set of stairs and a ladder leading up, you can take that ladder to start heading back to the surface and leave Mt. Moon

Step 19: In this small corridor you can take the second ladder leading up. This will bring you to the surface and out of Mt. Moon.

This will lead out to Route 4, but don’t run onto Cerulean quite yet – because there are a couple of things to do on this Route. And you won’t be able to come back after you jump the hill.
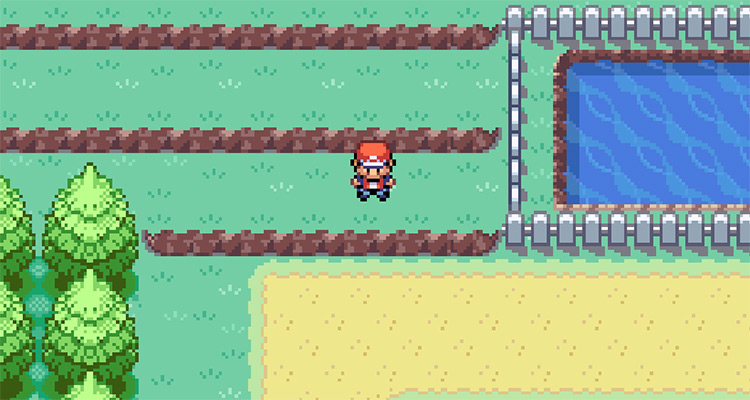
Route 4
If you head right on Route 4, you will reach a hill. Jumping down that hill will lead right to Cerulean City, but we don’t want to do that quite yet.
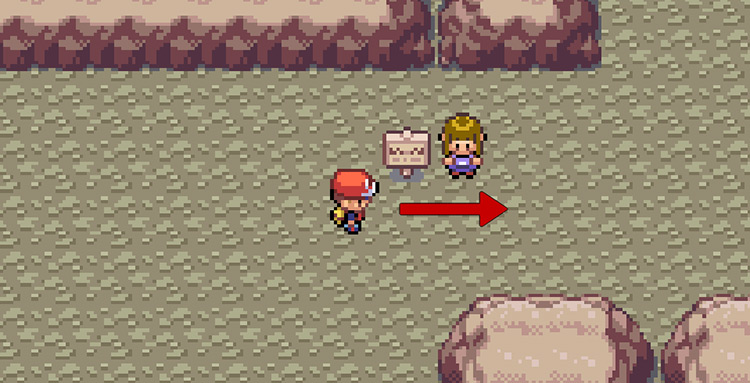
There are two NPCs in the middle of the Route, facing each other and debating whether Mega Kick or Mega Punch is better.
If you talk to each of them, you will be able to teach Mega Kick and Mega Punch to your Pokémon.
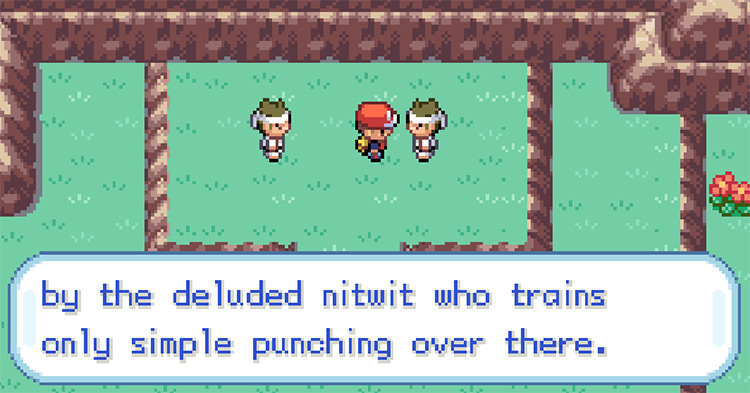
I recommend learning both moves because they’re pretty strong Fighting Type moves!
After that, you can continue east and pick up the Poké Ball on the ground. This will contain the TM for Roar, which may also prove useful.
Then once you’re certain that you’re all set with Mt. Moon for the time being, you can hop over the hill leading southeast and continue onto Cerulean City.

-
Pokémon FRLG
- Mt. Moon: Pokémon FRLG Walkthrough Part 4
Related Posts:
 Rock Tunnel: Pokémon FRLG Walkthrough Part 7
 How To Get Through Victory Road: Pokémon FRLG Walkthrough Part 15
 Celadon City + Rocket Game Corner: Pokémon FRLG Walkthrough Part 8
 Fuchsia City & The Safari Zone: Pokémon FRLG Walkthrough Part 11
 Silph Co. & Saffron City: Pokémon FRLG Walkthrough Part 10
 How To Get the Sapphire in Pokémon FireRed & LeafGreen
 Where To Get TM46 Thief in Pokémon FRLG
 How To Get the Ruby in Pokémon FireRed & LeafGreen