To unlock The Akh Afah Amphitheatre (Extreme), also known as Shiva EX, you’ll need to be at least level 50 in a Disciple of War or Magic job. Then you need to accept the quest “Drop Dead Shiva” from Urianger in The Waking Sands (X:6.0, Y:4.9).
This quest is part of patch 2.4 from A Realm Reborn, so you’ll need to do a few prerequisite quests before you can unlock the trial.
We’ll cover the unlocking process + a detailed guide to this trial’s mechanics.
TABLE OF CONTENTS
Step-by-Step Unlock Guide
- Complete the quest “Let Us Cling Together” from Alphinaud in Northern Thanalan (X:17, Y:18)
- Accept the quest “Drop Dead Shiva” from Urianger in The Waking Sands (X:6.0, Y:4.9)
- Head to Whitebrim Front and speak with Drillemont in Coerthas Central Highlands (X:12.7, Y:17.4)
- Go to Snowcloak and talk to the Stalwart Temple Knight in Coerthas Central Highlands (X:3.2, Y:21.3)
Detailed Unlocking Guide
The first prerequisite quest you need to do is the Main Scenario Quest (MSQ) “Let Us Cling Together” from Alphinaud in Northern Thanalan (X:17, Y:18).
This is the final quest of the MSQ for patch 2.4 of Final Fantasy XIV: A Realm Reborn, so you need to do every quest leading up to “Let Us Cling Together” before you can proceed.
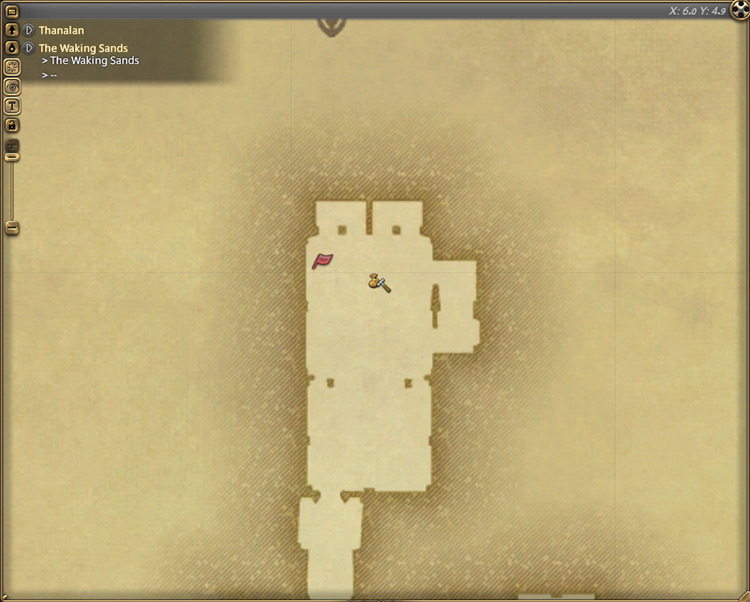
Once you’re finished with the patch 2.4 MSQs, visit Urianger in The Waking Sands (X:6.0, Y:4.9) and accept the quest “Drop Dead Shiva”.
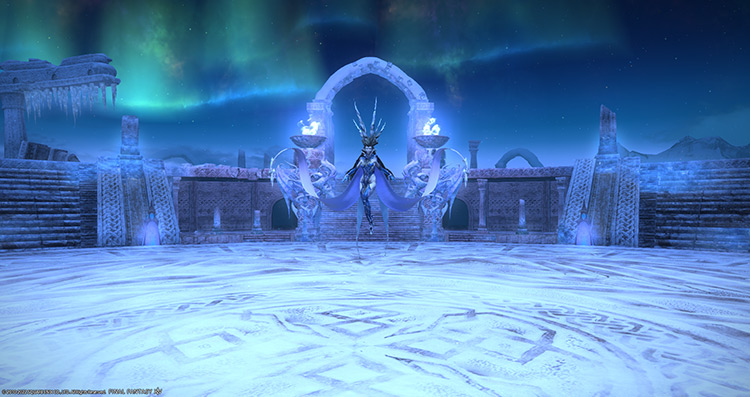
Urianger will inform you about a letter from Lord Drillemont in Coerthas detailing a recent trend of crystals being stolen by Lady Iceheart.
With the heretic leader fully recovered, the return of the primal Shiva is all but certain. Urianger will have you talk to Lord Drillemont to confirm the situation and devise a plan.
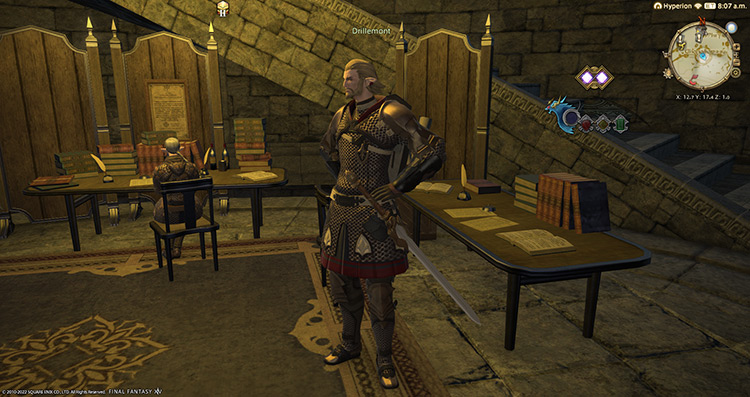
Go to Coerthas Central Highlands and meet Lord Drillemont at his headquarters in Whitebrim Front (Coerthas Central Highlands – X:12.7, Y:17.4).
You’ll learn from Drillemont that his plan to set up an outpost near Snowcloak was interrupted by Lady Iceheart and her followers.
The heretics drove the Ishgardians out of Snowcloak and took their supplies. Lord Drillemont worries that Lady Iceheart is performing another summoning of the primal Shiva. He will ask for your help in confronting Lady Iceheart and Shiva.
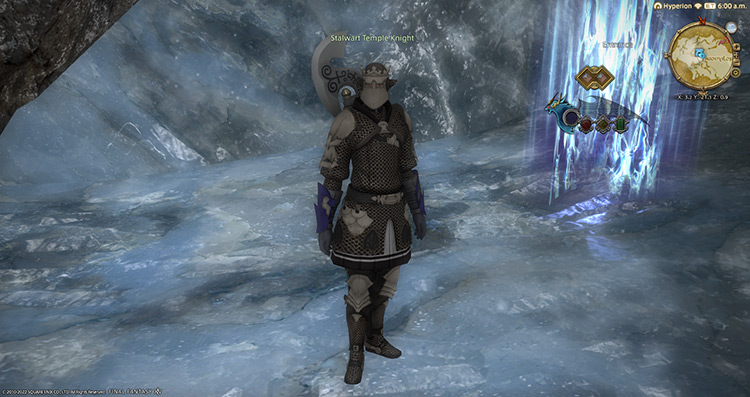
Go to Snowcloak and talk to the Stalwart Temple Knight in Coerthas Central Highlands (X:3.2, Y:21.3).
Talking to the knight will unlock The Akh Afah Amphitheatre (Extreme) trial, allowing you to fight Shiva’s extreme version.
To enter the trial you’ll need at least an average item level of 95 and a level 50 Disciple of War or Magic job.
Here’s an overview of the entire fight, along with the possible rewards upon completion:
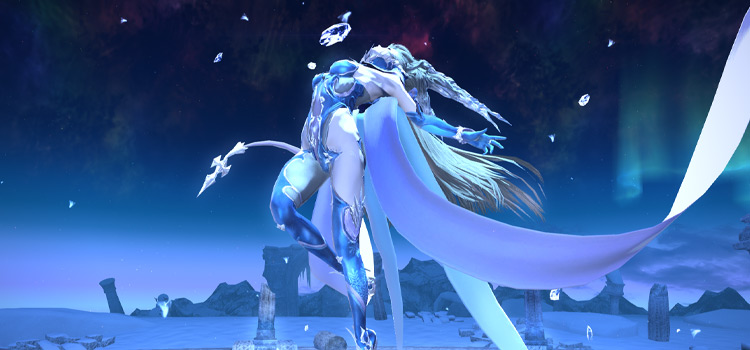
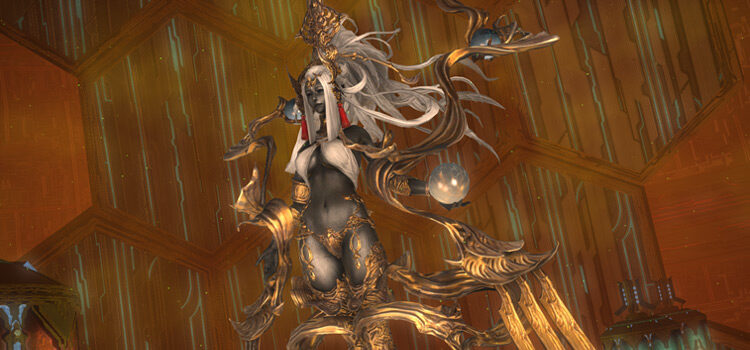
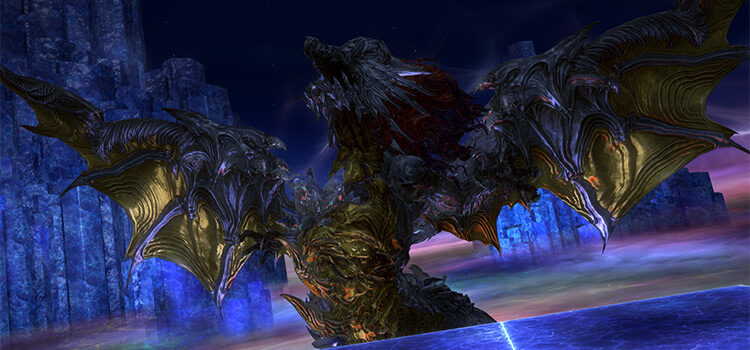
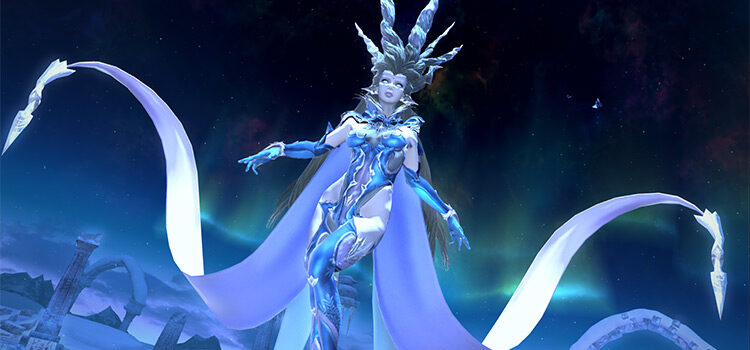
Trial Boss Guide: Shiva (Extreme)
Since Shiva EX was released way back in patch 2.4, it’s easy to solo this when you enter the trial unsynced with a level 90 or above character.
You’ll need to go through each phase, but you won’t have any difficulty dealing with them because of the level difference.
If you want to do the fight while synced, here are the mechanics:
Shiva EX Mechanics:
The boss has three weapons she can use throughout the fight, with each weapon having its own set of mechanics.
The boss will start unarmed, but she’ll raise her hands and turn her body in the air before revealing her next weapon of choice. Most of her weapon attacks are also not telegraphed, so always check what weapon she’s using to handle incoming mechanics correctly.
Weapon: Sword
The boss’ auto attacks will inflict a stacking “Blunt Resistance Down” debuff on the primary target. This debuff will cause the primary target to take more damage when the boss switches to her Staff weapon. Perform a tank swap when the boss switches from Sword to Staff and vice-versa.
- Icebrand: A frontal cone AoE that should be shared with the rest of the party. The boss will use “Icebrand” immediately after switching to a Sword. This attack deals a total of 18000 damage and will kill your primary tank if the attack is not shared. The primary tank should face the boss toward the party as soon as she switches to a Sword.
- Glacier Bash: A frontal cone AoE that will deal high damage and stun anyone in front of the boss. This attack should not be shared with the party and can be dodged. Move past the boss to avoid the attack.
- Whiteout: A room-wide donut AoE that can be dodged by moving into the boss’ hitbox. The entire group should move toward the boss, but be careful not to stand in front of her unless you’re the primary tank.
- Heavenly Strike: Huge pillars will appear, hitting and knocking players back. This knockback effect can be negated by shields or knockback immunity skills.
Weapon: Staff
The boss’ auto attacks will inflict a stacking “Slashing Resistance Down” debuff on the primary target. This debuff will cause the primary target to take more damage when the boss switches to her Sword weapon. Perform a tank swap when the boss switches from Staff to Sword and vice-versa.
- Hail Storm: Players will be targeted with ice AoEs that will explode after some time. The boss will use “Hail Storm” immediately after switching to a Staff. If you’re targeted, move away from the rest of the party to avoid overlapping damage. The boss will usually use this attack along with “Icicle Impact,” so assign specific players toward designated safe zones.
- Absolute Zero: A group-wide AoE attack. Mitigate and heal through the damage. Healers should also keep an eye out for players with vulnerability debuffs and provide extra healing.
Weapon: Bow
The boss will only use her Bow in Phase 3. This weapon doesn’t inflict resistance-down debuffs, but her attacks will deal more damage.
- Glass Dance: A 270-degree frontal AoE attack. The boss will use “Glass Dance” immediately after switching to a Bow. All players should stand directly behind the boss as soon as she switches to a Bow to avoid getting hit.
- Avalanche: The boss will target a random player with a dark blue marker. After a few seconds, she will cast a line attack, knocking the target back and anyone caught with them. The primary tank should move the boss near the northern edge of the platform to give the party more space to be knocked back.
Phase 1: Sword and Staff
The boss will start the fight unarmed, but she will eventually switch to a Sword or Staff weapon. The boss’ skill rotations for each weapon are as follows:
-
Sword Rotation: Icebrand > Glacier Bash > Whiteout
The boss will also randomly cast “Heavenly Strike” in the middle of her rotation. Share the “Icebrand” damage, dodge the “Glacial Bash” cone AoE, and heal through “Whiteout.”
-
Staff Rotation: Hailstorm > Icicle Impact
The boss will also cast “Absolute Zero” in the middle of her rotation. Assign safe zones to players, avoid overlapping damage from “Hailstorm,” and dodge “Icicle Impact” AoEs.
She will also do two mechanics that may be repeated throughout the fight:
- Icicle Impact (Phase 1 and 2): Large circle AoEs with different patterns will appear on the ground. After a few seconds, icicles will drop from above, damaging anyone within the circles. Players caught in these AoEs will be inflicted with a stacking vulnerability debuff. Some patterns may overlap, but there will be narrow safe zones between each circle, so dodge appropriately.
- Dreams of Ice (Phase 1 to 3): Throughout the fight, the boss will slowly gain a damage-increasing buff that stacks up over time. If the fight takes too long and the boss’ buff reaches 11 stacks, your party will wipe. The DPS check for this fight isn’t too tight, but this buff is still something worth noting.
The weapon-switching between Sword and Staff will continue until the boss reaches 80% HP, where Phase 2 will begin.
Phase 2: Ice Soldiers
In Phase 2, the boss will only use her Sword, so you don’t have to worry about switching between two sets of mechanics.
- Ice Soldier: The boss will spawn four “Ice Soldier” mobs around the arena. These mobs should be burned down within 60 seconds before the boss casts “Diamond Dust,” or your party will wipe. The tank that handled the boss during her Staff stance should pick up these soldiers while the party burns them down.
- Diamond Dust: After the soldiers disappear, the boss will swirl around the room and inflict a “Deep Freeze” debuff on every player, stunning them for 20 seconds. The party will wipe If the soldiers aren’t killed before ‘Diamond Dust” goes off. Otherwise, the attack will deal group-wide AoE damage. Mitigate and heal through the damage.
Phase 3: Sword, Staff, and Bow
Starting in Phase 3, walking toward the outer edges of the arena will trap players in an ice boulder. These boulders have low HP, so free your party members if this happens.
Mechanics from previous phases will also overlap with the new mechanics in Phase 3. Familiarize yourself with the weapon rotations while dodging the new “Icicle Impact” patterns.
- Icicle Impact (Overlapping pattern): The patterns from Phase 1 and 2 will appear and overlap. Determine the safe zones for the first pattern and dodge accordingly.
- Icicle Impact (Circular pattern): This attack can now drop a circular pattern that will cover the entire arena. The AoEs will drop consecutively, so you can dodge the first circle AoE in the middle of the arena, then move into it to avoid the rest.
- Permafrost: The boss will cover the entire arena with a thin fog. Then, the platform will change into a slippery ice floor for a few seconds. All players will be inflicted with a “Thin Ice” debuff, causing them to slide around the arena if they move. Moving during this mechanic will risk players sliding toward the outer edges of the arena and getting trapped in ice boulders. You can still use or casts skills, but don’t move until the floor reverts to normal.
Shiva EX Rewards

- 20 Allagan Tomestone of Poetics
- Diamond Dust crafting material (not guaranteed)
- Shiva Triple Triad Card (not guaranteed)
| Name | Type | Rarity |
|---|---|---|
| True Grimoire of Ice | Book | Blue (Primal Gear) |
| True Codex of Ice | Book | Blue (Primal Gear) |
| True Ice Bow | Bow | Blue (Primal Gear) |
| True Ice Bracelet of Slaying | Bracelets | Blue (Primal Gear) |
| True Ice Bracelet of Healing | Bracelets | Blue (Primal Gear) |
| True Ice Bracelet of Fending | Bracelets | Blue (Primal Gear) |
| True Ice Bracelet of Casting | Bracelets | Blue (Primal Gear) |
| True Ice Bracelet of Aiming | Bracelets | Blue (Primal Gear) |
| True Ice Cane | Cane | Blue (Primal Gear) |
| True Ice Daggers | Daggers | Blue (Primal Gear) |
| True Ice Musketoon | Firearms | Blue (Primal Gear) |
| True Ice Claws | Fist Weapon | Blue (Primal Gear) |
| True Ice Axe | Greataxe | Blue (Primal Gear) |
| True Ice Breaker | Greatsword | Blue (Primal Gear) |
| True Ice Katana | Katana | Blue (Primal Gear) |
| True Ice Spear | Polearm | Blue (Primal Gear) |
| True Ice Degen | Rapier | Blue (Primal Gear) |
| True Ice Shield | Shield | Blue (Primal Gear) |
| True Ice Rod | Staff | Blue (Primal Gear) |
| True Ice Astrometer | Star Globe | Blue (Primal Gear) |
| True Ice Brand | Sword | Blue (Primal Gear) |
| Diamond Tear | Crafting material | Basic |
| Ice Tear | Crafting material | Basic |
| Faded Copy of Footsteps in the Snow | Orchestrion Roll | Basic |
| Faded Copy of Oblivion | Orchestrion Roll | Basic |
| Boreas Whistle | Other | Basic |
| Ice Weapon Coffer | Other | Basic |
-
Final Fantasy XIV
- The Akh Afah Amphitheatre (Extreme): Unlock + Trial Guide (FFXIV)
Related Posts:
 Zurvan EX Unlock & Trial Guide – FFXIV Containment Bay Z1T9 (Extreme)
 FFXIV The Minstrel’s Ballad: Thordan’s Reign – Unlock + Trial Guide
 Sophia EX Unlock & Trial Guide – FFXIV Containment Bay P1T6 (Extreme)
 FFXIV The Minstrel’s Ballad: Shinryu’s Domain – Unlock + Trial Guide
 FFXIV Minstrel’s Ballad: Nidhogg’s Rage – Unlocking + Trial Guide
 The Akh Afah Amphitheatre (Hard): Unlock + Trial Guide (FFXIV)
 FFXIV Emanation (Extreme): How To Unlock + Trial Guide
 FFXIV Wreath of Snakes (Extreme): How To Unlock + Trial Guide