You can unlock the Level 70 trial The Minstrel’s Ballad: Tsukuyomi’s Pain, also known as Tsukuyomi EX, by selecting the option “Talk about Tsukuyomi” while speaking with The Wandering Minstrel in Kugane (X:11.6, Y:12.5).
Though this option will only become available after you clear its Level 70 normal version Castrum Fluminis.
TABLE OF CONTENTS
Songs in the Key of Kugane: Tsukuyomi
As with every EX trial in the game, you’ll need to clear Tsukuyomi’s normal mode before her Extreme version can be unlocked.
Check out our guide for Castrum Fluminis to learn how you can unlock and clear it smoothly, either on your own or with your friends.
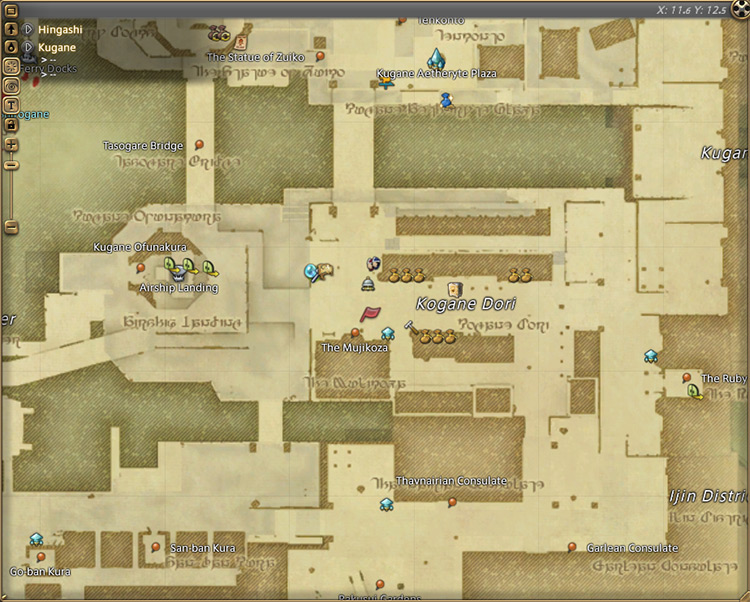
After clearing the normal mode, head to The Wandering Minstrel in Kugane (X:11.6, Y:12.5) and select the option “Talk about Tsukuyomi” to trigger a cutscene where The Wandering Minstrel produces a beautiful ode to your battle with the primal Tsukuyomi.
Once you finish the cutscene, The Minstrel’s Ballad: Tsukuyomi’s Pain will be unlocked. This trial requires at least a Level 70 Disciple of War or Magic job and an average item level of 350 to enter.
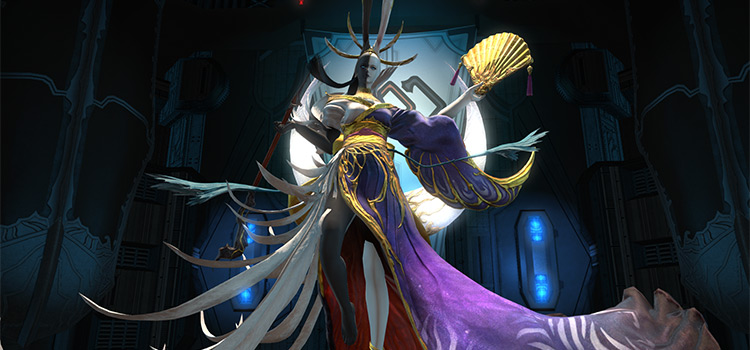
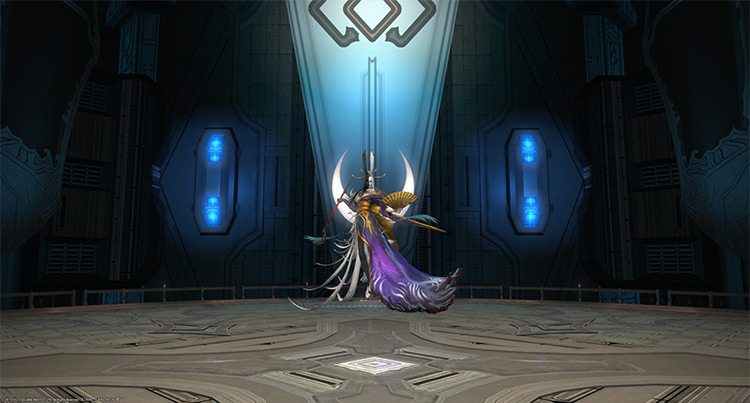
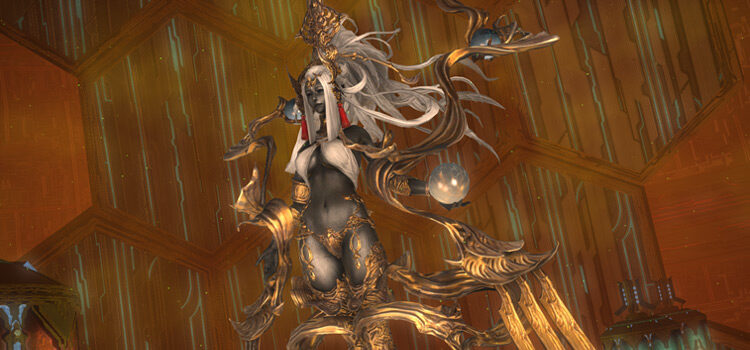
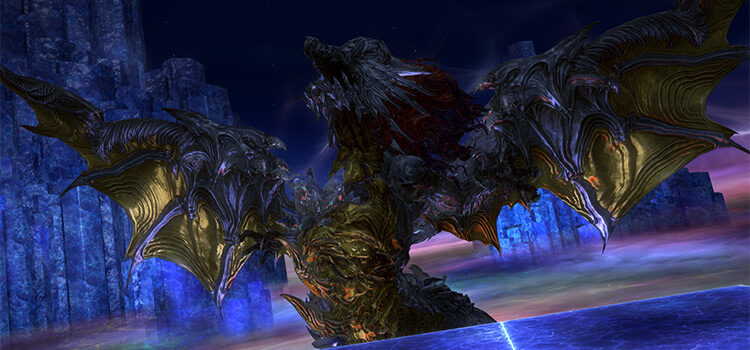
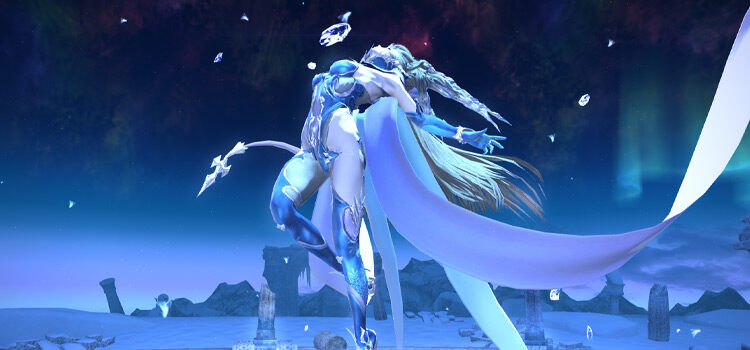
Trial Boss: Tsukuyomi (Extreme)
While already a dated trial, The Minstrel’s Ballad: Tsukuyomi’s Pain can’t be soloed because of the “Meteors” mechanic in Phase 3. It’s difficult but possible to do it with two players as long as you place both meteors in the disappearing color.
To smoothly clear the trial, have at least three people in your party with high-level characters. If you want to do the trial while synced with a full 8-person party, check out the mechanics below:
Pre-fight Preparation
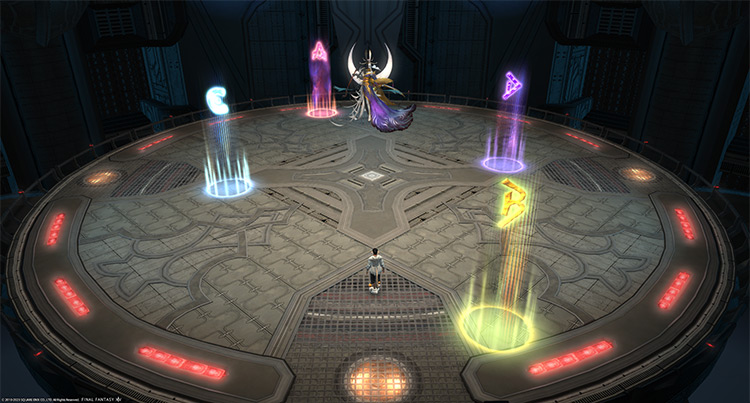
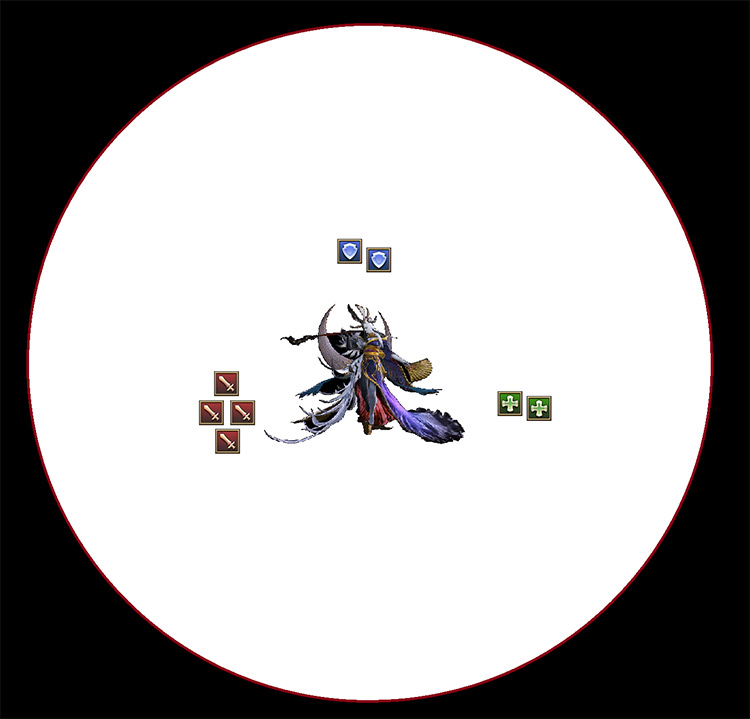
- Before starting the fight, place four waymarkers similar to the image shown above. These waymarkers are crucial in handling the “Meteors” mechanic in Phase 3, which can easily wipe your party if done incorrectly.
- You can also mark each role (Tank, Healer, and DPS) with related markers to group up quickly during “Steel of the Underworld.”
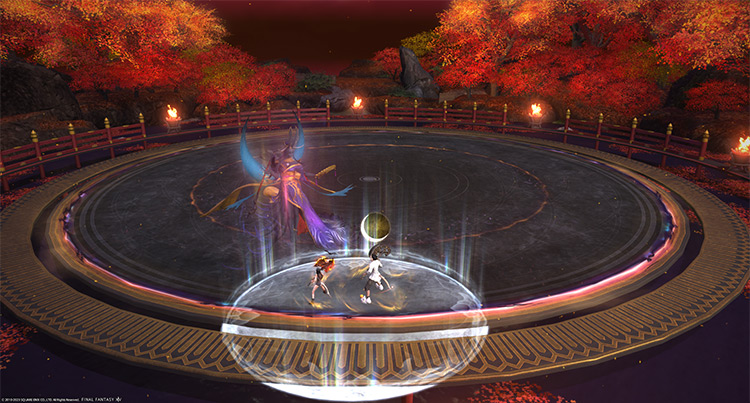
Phase 1: Nightfall
Rotation:
Reprimand > Nightfall x2 > Reprimand > Nightbloom (Phase 1)
- Reprimand: A room-wide AoE attack.
- Nightfall: The boss will pull out a gun or spear to determine its next attack. Check which weapon the boss pulls out or listen to her sound cues.
- Lead of the Underworld: A non-telegraphed stack mechanic on a random player. When the boss says “Beg for mercy!” have everyone stack together to share incoming damage.
- Steel of the Underworld: Three non-telegraphed frontal cone attacks toward each role (Tank, DPS, Healer). When the boss says “Your end is near…” have the tanks stack in front of the boss while the healers and DPS stand on each flank to avoid overlapping damage.
- Nightbloom (Phase 1): A room-wide AoE attack that stuns the party and signals the transition to Phase 2.
Phase 2: Specters and Nightbloom
Rotation:
Three sets of Specter Mobs > Concentrativity > Specter of Zenos > Nightbloom (Phase 2).
- Specter Mobs: Multiple specter mobs will tether to Yotsuyu to charge her “Suffering” gauge. Kill all the mobs before the gauge fills up to survive the incoming ultimate AoE attack.
- Concentrativity (Specter of Zenos): A room-wide AoE knockback attack that stuns players for 10 seconds.
- Nightbloom (Phase 2): A room-wide ultimate AoE attack that deals damage based on the “Suffering” gauge. Defeat all the specters before the gauge reaches 100, or you will wipe.
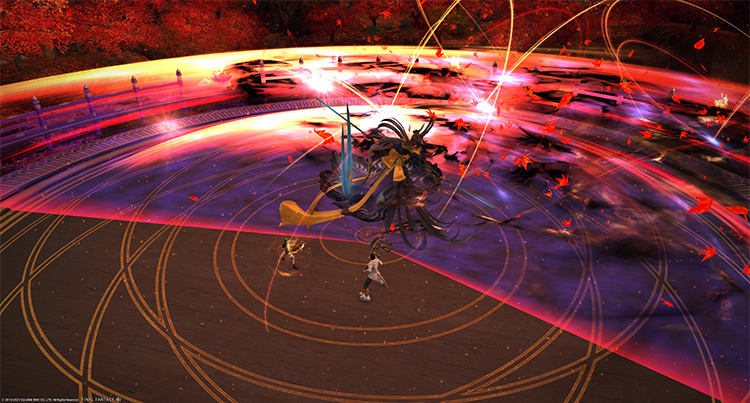
Phase 3: Supreme Selenomancy and Meteors
Rotation:
Supreme Selenomancy > Lunar Halo x2 > Nightfall > Meteors > Midnight Rain > Lunar Halo x2 > Lunar Halo > Meteor Explosion > Antitwilight or Perilune > Reprimand > Tsuki-no-Malogi (Sets) > Nightfall > Torment Unto Death > Repeat once
-
Supreme Selenomancy: The arena will transform and each player will receive four stacks of “Moonlit” or “Moonshadowed.” Similar to Castrum Fluminis, reaching five stacks of either status will result in your death. Refresh your stacks immediately by moving to the opposite-colored section of the arena.
As the mechanic goes on, one color will slowly expand toward the other side and eventually cover the entire arena. This will be important during the “Meteors” mechanic. - Lunar Halo: “Moonlight” orbs that will spawn donut AoEs, applying stacking “Vulnerability Up” debuffs for 60 seconds to anyone hit. Avoid these while refreshing your stacks.
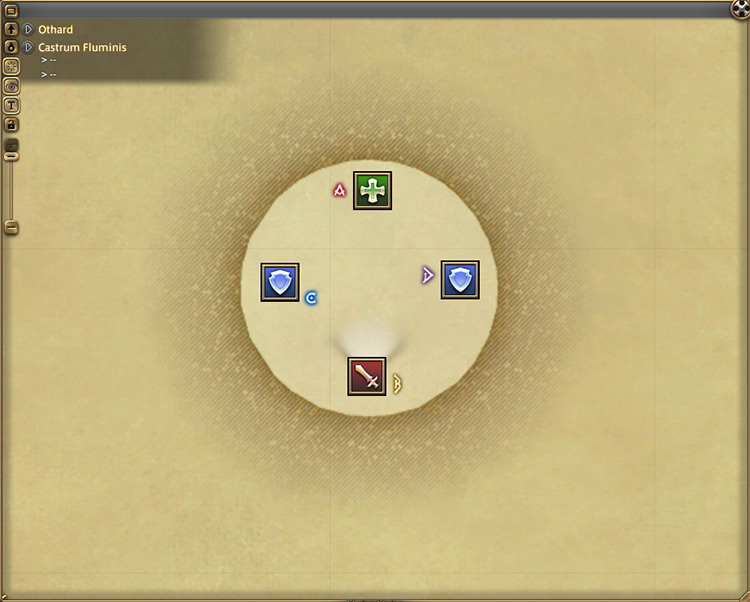
- Meteors: One tank, one healer, and one DPS will receive meteor markers that need to be dropped relative to the expanding color of “Supreme Selenomancy.” These meteors will explode into massive point-blank AoEs that apply stacking “Vulnerability Up” debuffs for 60 seconds.
Further Details on Meteors:
Have each affected player drop their meteors on specific markers as shown in the image above. The tank must drop their meteor on the expanding color’s side. If the meteors are placed too close to one another, they will explode and apply stacking “Damage Down” debuffs for 30 seconds.
Since one color will eventually cover the entire room, the party must drop at least one meteor in the disappearing color to survive the phase. Dropping your meteors on the markers will ensure at least one meteor is placed on the disappearing color, regardless of which color is expanding.
After dropping the meteors, all players must run toward the disappearing color’s side to avoid the AoEs and refresh their stacks.
- Midnight Rain: Grants the boss either a “Full Moon” or “New Moon” status, depending on the color that covers the entire arena (white for “Full Moon” and black for “New Moon”). This buff will determine whether the boss uses “Antitwilight” or “Perilune.”
-
Meteor Explosion: Each meteor will explode into massive point-blank AoEs once more and spawn puddles underneath them that apply “Moonlit” or “Moonshadowed” depending on their color.
If all three meteors are placed correctly, the explosion will convert their colors, leaving at least one meteor with the opposite color, allowing you to refresh your stacks again. Run to the opposite-colored meteor puddle after the AoEs go off. - Antitwilight or Perilune: A room-wide AoE attack that can instantly kill players if they’re not standing in the correct meteor puddle. If the meteors were done correctly, all players should have one meteor puddle opposite of the arena’s color, so just stay in it until this attack goes off.
- Antitwilight: Used if the boss has the “Full Moon” buff and requires the “Veil of Shadow” buff to survive. Stand in a black meteor puddle.
- Perilune: Used if the boss has the “New Moon” buff and requires the “Veil of Light” buff to survive. Stand in a white meteor puddle.
- Tsuki-no-Malogi (Sets): Two sets of fans that will explode into point-blank AoEs, applying stacking “Vulnerability Up” debuffs for 60 seconds to anyone hit. The first set will cover two-thirds of the arena. Avoid the initial set, then move into the safe zone.
- Torment Unto Death: An unavoidable frontal cone tankbuster attack that applies a “Magic Vulnerability Up” or “Physical Vulnerability Up” debuff for 20 seconds depending on the boss’ status. Regardless of the boss’ status, face her away from the party and perform a tank swap after it goes off.
Phase 4: Moon + Blade Attacks and Tsuki-no-Malogi (Staggered)
Rotation:
Dance of the Dead > Moon Buff > Moon + Blade Attack x2 > Reprimand > Moon Buff > Tsuki-no-Malogi (Staggered) + Lunacy > Moon + Blade Attack > Torment Unto Death > Moon Buff > Hagetsu + Tsuki-no-Malogi (Sets) > Moon + Blade Attack > Reprimand x2 > Repeat from Tsuki-no-Malogi
- Dance of the Dead: A room-wide AoE attack that signals the start of Phase 4.
- Moon Buff: The boss will buff herself with “Full Moon” or “New Moon” to determine her next attack.
- Moon + Blade Attack: A point-blank or room-wide donut AoE that applies a stacking “Damage Down” debuff for 30 seconds followed by a 210-degree attack on one of the boss’ flanks that apply a stacking “Vulnerability Up” debuff for 60 seconds.
- Full Moon: A point-blank AoE.
- New Moon: A room-wide donut AoE.
- Bright Blade: The boss will swipe her blade toward the left.
- Dark Blade: The boss will swipe her blade toward the right.
These attacks will happen in quick succession, so always position yourselves to dodge both attacks in one go. For example, if you get a “Full Moon” + “Dark Blade” combo, run toward the left side of the boss, away from her hitbox.
- Tsuki-no-Malogi (Staggered): Fans will drop around the arena one by one starting from the center. Each fan will explode into point-blank AoEs that apply stacking “Vulnerability Up” debuffs for 60 seconds. Run to the final fan that drops, wait for the center fan to explode, then move into the safe zone.
- Lunacy: A four-hit stack marker on a random player that overlaps with “Tsuki-no-Malogi.” Stack with the affected player for all four hits while dodging the fans.
- Hagetsu: One player from each role will receive a red marker that will eventually explode into point-blank AoEs. Spread out to avoid overlapping damage.
Rewards
Lunar Totems can be traded for weapon loot (10 fragments) or the Lunar Kamuy Fife (99 fragments) with Eschina in Rhalgr’s Reach (X:13.8 Y:11.8).
- 20 Allagan Tomestones of Poetics
- Tsukuyomi Triple Triad Card (not guaranteed)
- Lunar Totem (1 per clear)
| Name | Type | Quality |
|---|---|---|
| Tsukuyomi’s Grimoire | Arcanist’s Grimoire | Blue (Primal Gear) |
| Tsukuyomi’s Greatbow | Archer’s Arm | Blue (Primal Gear) |
| Tsukuyomi’s Ephemeris | Astrologian’s Arm | Blue (Primal Gear) |
| Tsukuyomi’s Odachi | Dark Knight’s Arm | Blue (Primal Gear) |
| Tsukuyomi’s Lance | Lancer’s Arm | Blue (Primal Gear) |
| Tsukuyomi’s Revolver | Machinist’s Arm | Blue (Primal Gear) |
| Tsukuyomi’s Greataxe | Marauder’s Arm | Blue (Primal Gear) |
| Tsukuyomi’s Paladin Arms (IL 365) | Other | Blue (Primal Gear) |
| Tsukuyomi’s Crescents | Pugilist’s Arm | Blue (Primal Gear) |
| Tsukuyomi’s Rapier | Red Mage’s Arm | Blue (Primal Gear) |
| Tsukuyomi’s Kunai | Rogue’s Arm | Blue (Primal Gear) |
| Tsukuyomi’s Chokuto | Samurai’s Arm | Blue (Primal Gear) |
| Tsukuyomi’s Codex | Scholar’s Arm | Blue (Primal Gear) |
| Tsukuyomi’s Cane | Two-handed Conjurer’s Arm | Blue (Primal Gear) |
| Tsukuyomi’s Rod | Two-handed Thaumaturge’s Arm | Blue (Primal Gear) |
| Celestial Kimono Remnant | Crafting material | Basic |
| Faded Copy of Under the Moonlight | Orchestrion Roll | Basic |
| Moonlit Tank Trimmings | Other | Basic |
| Blue Moon Phasmascape | Other | Basic |
| Tsukuyomi Weapon Coffer (IL 365) | Other | Basic |
| Lunar Kamuy Fife | Other | Basic |
-
Final Fantasy XIV
- FFXIV The Minstrel’s Ballad: Tsukuyomi’s Pain (Unlock + Trial Guide)
Related Posts:
 Sophia EX Unlock & Trial Guide – FFXIV Containment Bay P1T6 (Extreme)
 FFXIV Emanation (Extreme): How To Unlock + Trial Guide
 FFXIV Thok ast Thok (Extreme): How To Unlock + Trial Guide
 FFXIV The Minstrel’s Ballad: Thordan’s Reign – Unlock + Trial Guide
 Zurvan EX Unlock & Trial Guide – FFXIV Containment Bay Z1T9 (Extreme)
 FFXIV The Minstrel’s Ballad: Shinryu’s Domain – Unlock + Trial Guide
 The Akh Afah Amphitheatre (Extreme): Unlock + Trial Guide (FFXIV)
 FFXIV Minstrel’s Ballad: Nidhogg’s Rage – Unlocking + Trial Guide