The Pokéathlon is a multisport competition for Trainers and their Pokémon teams. It is held at the Pokéathlon Dome.
It features 10 different sports, known as “events”, which are all grouped into Courses. Each event highlights different skills based on Performance, which are a set of Pokéathlon-exclusive stats.
This guide is split into 5 sections:
- The first section shows you where to find the Pokéathlon Dome.
- The second section describes the Pokéathlon’s various facilities. These would be the Athlete Shop, Data Card Shop, Aprijuice Stand, and the basement’s Record Rooms.
- The third section explains how the Pokéathlon works. This includes specific mechanics and features like Performance Stats, Aprijuice, Athlete Points, and Bonus Score Categories (and how they all work).
- The fourth section provides a quick list of all the Pokéathlon’s Courses and their events.
- The fifth section goes into detail about each Pokéathlon event, including rules, mechanics, and tips on how to win each event.
TABLE OF CONTENTS
Finding the Pokéathlon Dome
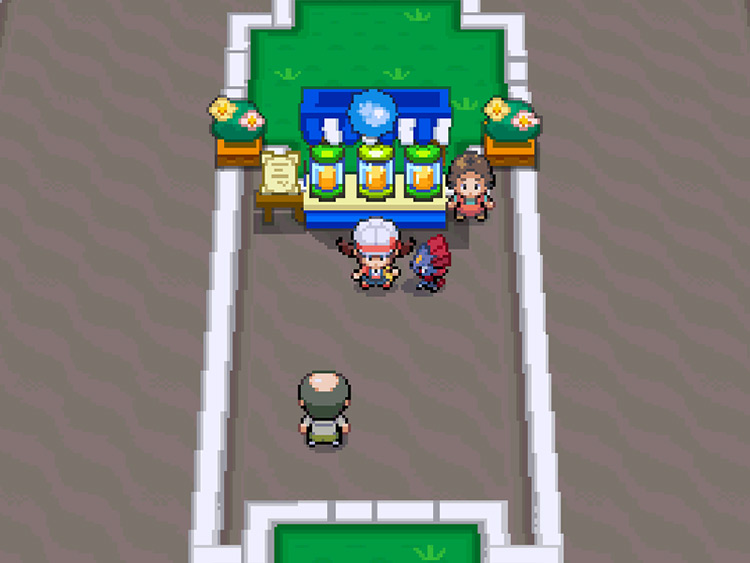
The Pokéathlon Dome is located just to the north of Goldenrod City. Its entrance is at the end of Route 35.
The same gate that leads to the National Park also leads to the Pokéathlon Dome.
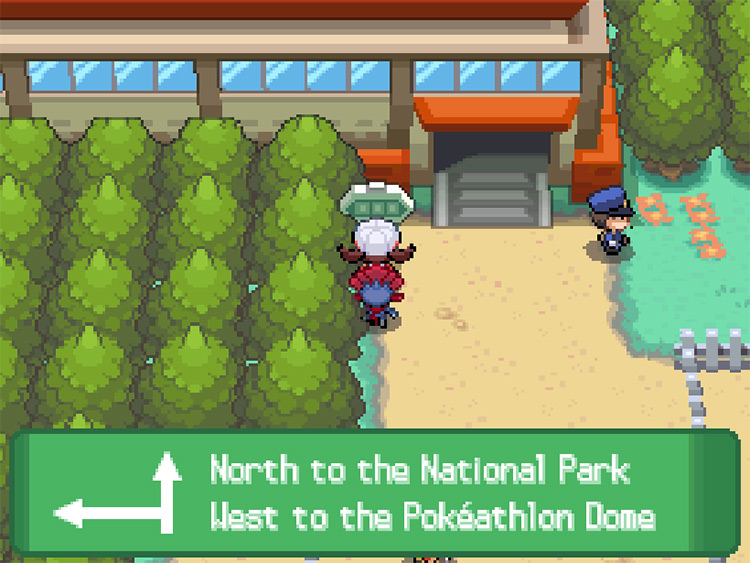
Just take the gate’s left exit to arrive at the Pokéathlon Dome.
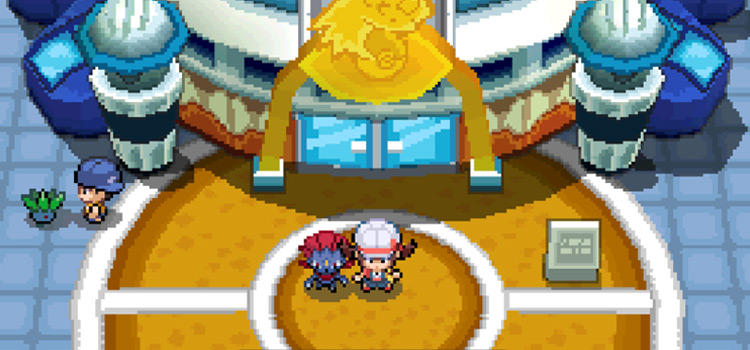
Once you exit the gate, head forward until you see a large, flashy building. This is the actual Pokéathlon Dome. It’s impossible to miss.
If this is your first time here, you will be welcomed by Magnus, the founder of the Pokéathlon Dome.
Pokéathlon Dome Facilities
The area to the left of the Pokéathlon Dome building is an outdoor rest and training area for Pokéathletes. This is where you can find the Aprijuice Stand. There is a male vendor NPC beside it and it has 3 Apriblenders on display.
You can buy premade Aprijuice from here.
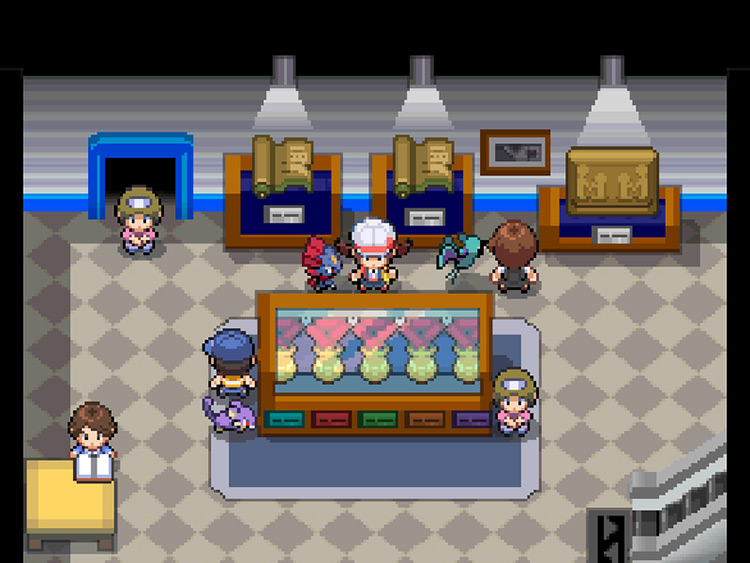
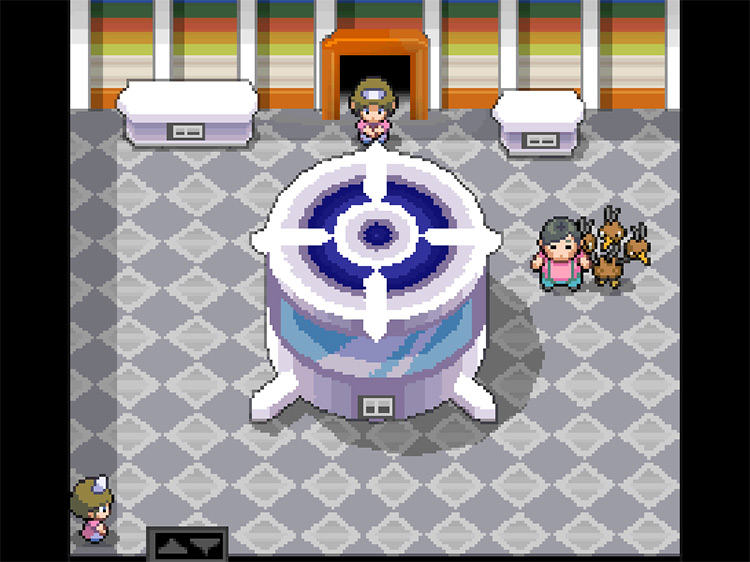
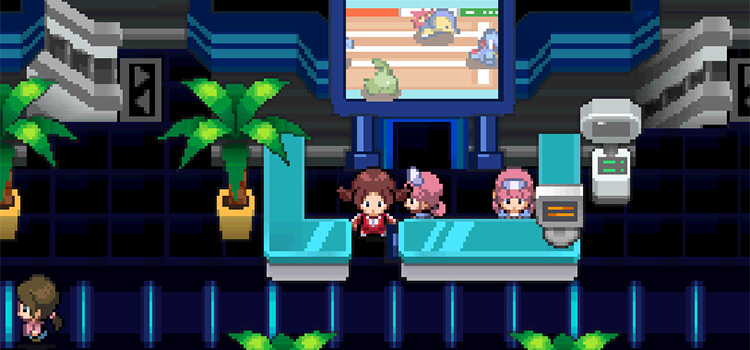
Step inside the Pokéathlon Dome and you’ll find three counters in the lobby.
The central counter is for Singles Pokéathlon and purchasing Data Cards. This is where you can play Pokéathlon courses by yourself against NPC teams. It is manned by two receptionists.
- The NPC in the middle of the counter handles the admissions to the Pokéathlon events.
- The NPC beside her sells Data Cards that allow you to view your own records.
There is also a screen on the corner of the counter. Your records will show up here once you have purchased Data Cards.
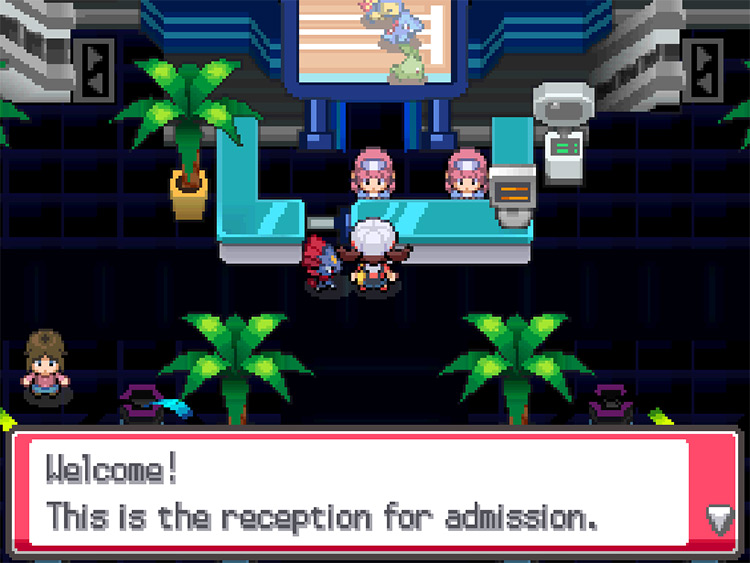
Once you have unlocked the Supreme Cup difficulty, a new NPC will appear here. She will be at the left side of the counter.
The left counter is for Link Pokéathlon, where you can play Pokéathlon courses with your friends over wireless multiplayer.
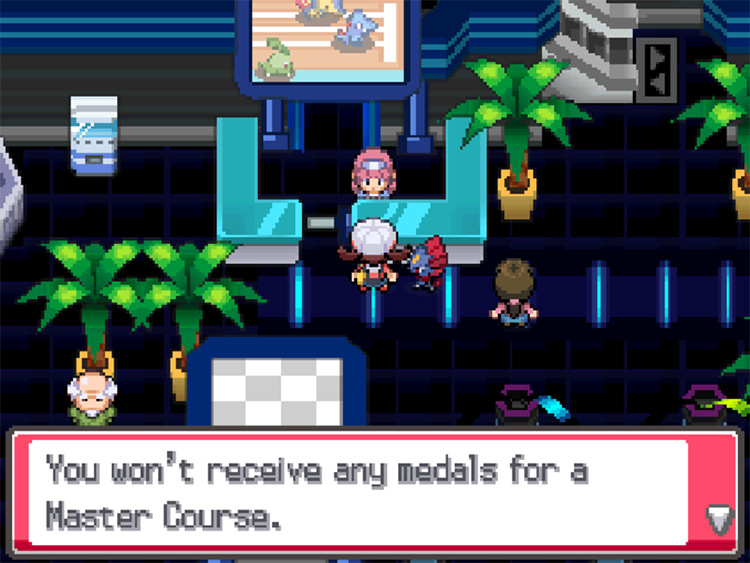
When you unlock the Master Course, it will be added to the list of Link Pokéathlon Courses.
Beside it is a vending machine. You can use either Pokédollars or Athlete Points to buy drinks from it.
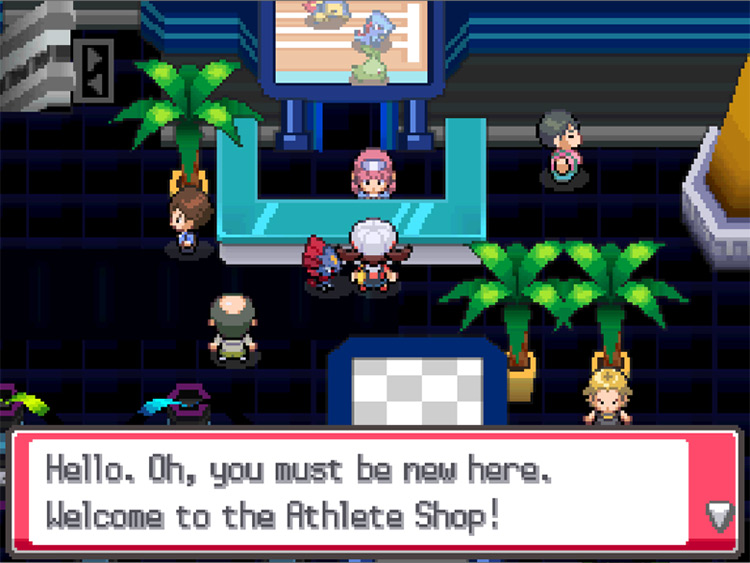
The Athlete Shop is at the right counter. This is where you can trade your Athlete Points for prizes.
To the left of the Athlete Shop is a set of escalators leading down to the basement level. The basement holds various rooms that you can unlock as you achieve certain records.
The Athlete Shop
The Athlete Shop is open every day. Its stock of items rotates from day to day.
Obtaining the National Pokédex will expand the Athlete Shop’s prize selection. This will also make certain prizes available on more days than before.
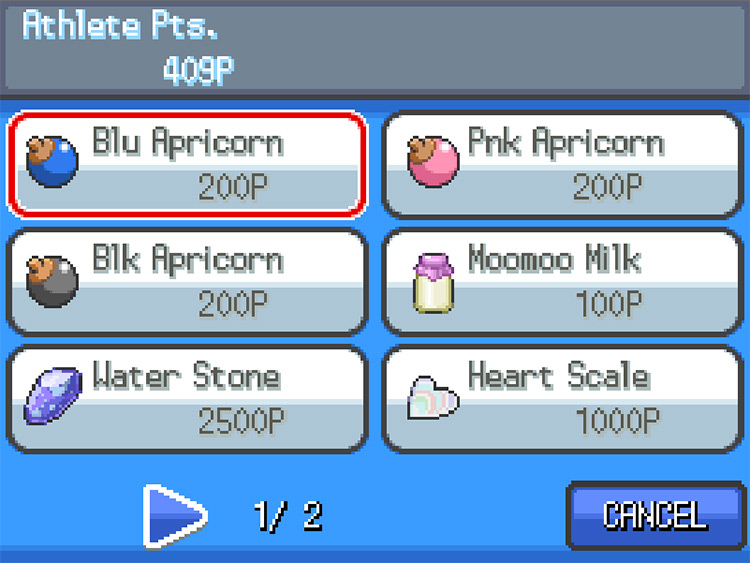
All Athlete Shop Prizes
Below is a table listing all of the available Pokéathlon Dome prizes you can get from the Athlete Shop, plus how many Athlete Points each prize costs, and which days the prizes are available.
Not every prize is available on every day of the week, so keep this chart saved for reference!
Note: Prizes that are unlocked after acquiring the National Pokédex will be marked below with an asterisk. When prizes become available on more days post-National Pokédex, those additional days will be in parentheses.
| Prize | AP Cost | Days Available |
|---|---|---|
| Red Apricorn | 200 pts. | Sunday, Monday, Friday |
| Ylw Apricorn | 200 pts. | Tuesday, Thursday, Friday |
| Grn Apricorn | 200 pts. | Monday, Friday, Saturday |
| Blu Apricorn | 200 pts. | Sunday, Monday, Wednesday |
| Pnk Apricorn | 200 pts. | Tuesday, Wednesday, Thursday |
| Blk Apricorn | 200 pts. | Sunday, Wednesday, Saturday |
| Wht Apricorn | 200 pts. | Tuesday, Thursday, Saturday |
| Moomoo Milk | 100 pts. | Everyday |
| Full Restore* | 500 pts. | Everyday |
| Nugget | 500 pts. | Friday (Sunday) |
| Heart Scale | 1000 pts. | Sunday, Wednesday |
| PP Up | 1000 pts. | Tuesday, Thursday |
| Rare Candy | 2000 pts. | Monday, Saturday |
| Dragon Scale* | 2500 pts. | Wednesday, Friday |
| Metal Coat | 2500 pts. | Friday (Tuesday, Saturday) |
| King’s Rock | 3000 pts. | Sunday (Monday, Thursday) |
| Fire Stone | 2500 pts. | Tuesday (Sunday, Thursday) |
| Water Stone | 2500 pts. | Wednesday (Monday, Tuesday, Friday) |
| Leaf Stone | 2500 pts. | Saturday (Tuesday, Thursday) |
| Thunderstone | 2500 pts. | Thursday (Wednesday, Saturday) |
| Sun Stone* | 3000 pts. | Sunday, Monday, Friday |
| Moon Stone | 3000 pts. | Monday (Wednesday) |
| Dawn Stone* | 3000 pts. | Sunday, Tuesday, Wednesday, Friday, Saturday |
| Shiny Stone* | 3000 pts. | Sunday, Monday, Wednesday, Thursday, Saturday |
| Dusk Stone* | 3000 pts. | Monday, Tuesday, Thursday, Friday, Saturday |
Data Card Shop
The types of records that Data Cards carry for you will be described in the text box at the Data Card Shop exchange menu.
There are 27 Data Cards in total. However, they will only be available to you in batches.
After you have bought all the Data Cards in a batch, the Data Card Shop will restock with the next set of Data Cards the next day.
Most of them are batches of 6, but the final cards come in a set of 3. The first batch is from Cards 01 to 06. The second has Cards 07 to 12, and so on. The last batch is from Cards 25 to 27.
Below is a table listing all the Data Cards from 01 to 27, the types of records they show, and how many Athlete Points they cost.
| Data Card | Records | AP Cost |
|---|---|---|
| Data Card 01 | No. of wins | 500 |
| Data Card 02 | No. of losses | 500 |
| Data Card 03 | No. of dashes | 1,000 |
| Data Card 04 | No. of jumps | 1,000 |
| Data Card 05 | No. of Hurdle Dash wins | 500 |
| Data Card 06 | No. of Relay Run wins | 500 |
| Data Card 07 | No. of Pennant Capture wins | 1,000 |
| Data Card 08 | No. of Block Smash wins | 1,000 |
| Data Card 09 | No. of Disc Catch wins | 1,000 |
| Data Card 10 | No. of Snow Throw wins | 1,000 |
| Data Card 11 | Amount of points scored by your Pokémon | 1,000 |
| Data Card 12 | No. of times your Pokémon failed | 1,000 |
| Data Card 13 | No. of times your Pokémon impeded themselves | 1,500 |
| Data Card 14 | No. of tackles | 1,500 |
| Data Card 15 | No. of falls | 1,500 |
| Data Card 16 | No. of Ring Drop wins | 1,000 |
| Data Card 17 | No. of Lamp Jump wins | 1,000 |
| Data Card 18 | No. of Circle Push wins | 1,000 |
| Data Card 19 | No. of Link Pokéathlon wins | 500 |
| Data Card 20 | No. of Link Pokéathlon losses | 500 |
| Data Card 21 | No. of event wins | 2,000 |
| Data Card 22 | No. of event losses | 2,000 |
| Data Card 23 | No. of Pokémon switches | 1,000 |
| Data Card 24 | No. of Goal Roll wins | 1,000 |
| Data Card 25 | No. of individual prizes won | 2,000 |
| Data Card 26 | No. of times you instructed your Pokémon | 3,000 |
| Data Card 27 | Total amount of time spent in the Pokéathlon | 9,999 |
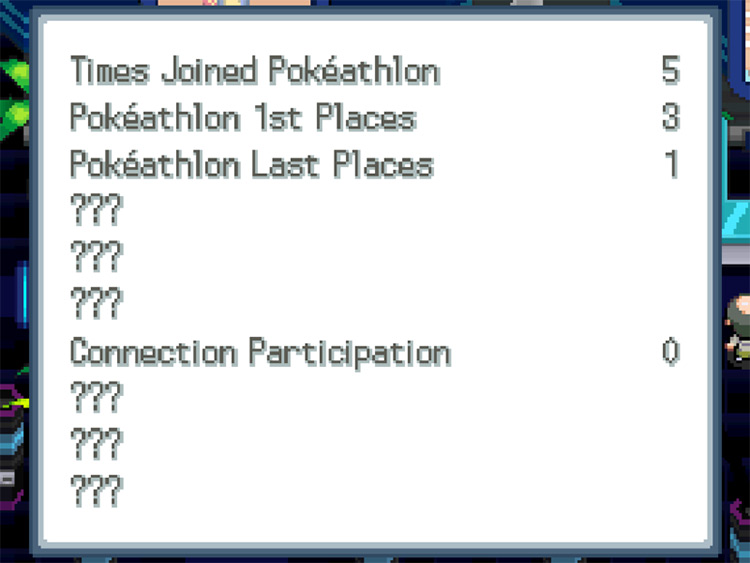
Again, your Data Card records can be viewed at the screen right beside the Data Card Shop attendant.
The records will be grouped under 3 categories. You will be able to choose whether you want to check your Overall Data, Event Data, or Action Data.
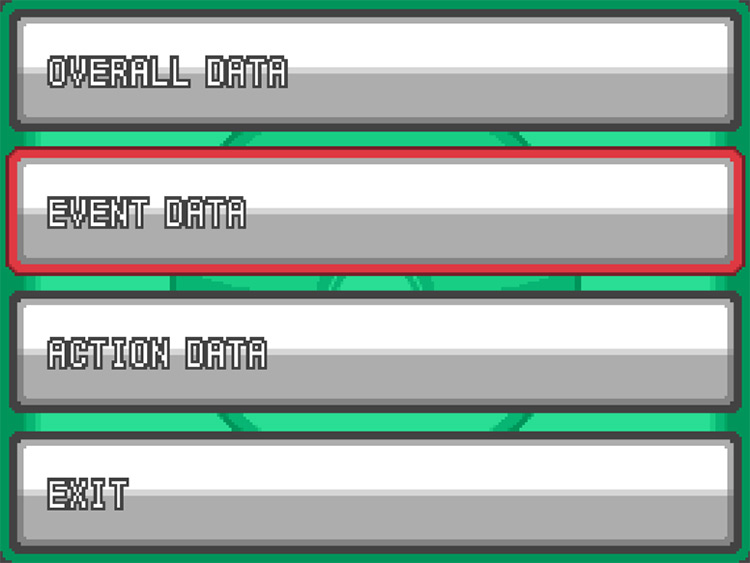
- Overall Data records encompass more general Pokéathlon aspects.
- Event Data records show your number of wins and losses at events.
- Action Data records usually have to do with the amount of times you or your Pokémon have committed certain actions.
Any records you have not unlocked will be represented by a string of question marks.
The Aprijuice Stand
The Aprijuice Stand will always have 3 types of Aprijuice on sale. You can view their labels to check their richness and smoothness.
The selection of Aprijuice changes each day.
Here’s a list of all 5 different types of Aprijuice that you can purchase. This table also shows which days they’re available for purchase, and the label information of each type of juice.
SCROLL
| Aprijuice | Price | Days Available | Richness | Smoothness |
|---|---|---|---|---|
| Victor’s Speed Juice | 100 | Sunday, Tuesday, Thursday, Friday | 32 | 104 |
| Holden’s Power Juice | 100 | Sunday, Monday, Wednesday, Friday, Saturday | 32 | 116 |
| Gilmore’s Skill Juice | 150 | Sunday, Tuesday, Wednesday, Friday | 48 | 125 |
| Elaine’s Stam. Juice | 100 | Monday, Tuesday, Thursday, Saturday | 34 | 120 |
| Krise’s Jump Juice | 100 | Monday, Wednesday, Thursday, Saturday | 38 | 136 |
The first time you approach any of the Apriblenders on display, the vendor beside the stand will call you over.
He will give you an Apriblender of your own so that you can make your own Aprijuice.
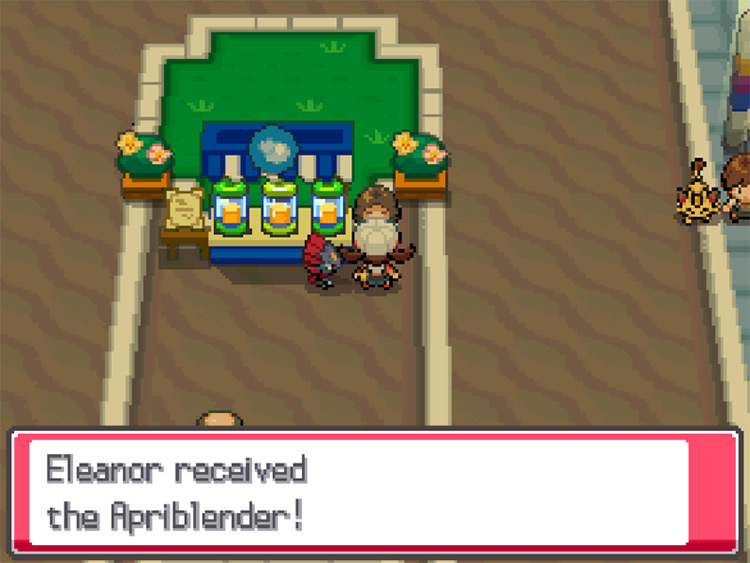
You can find your Apriblender by using the Apricorn Basket in the Key Items pocket of your bag.
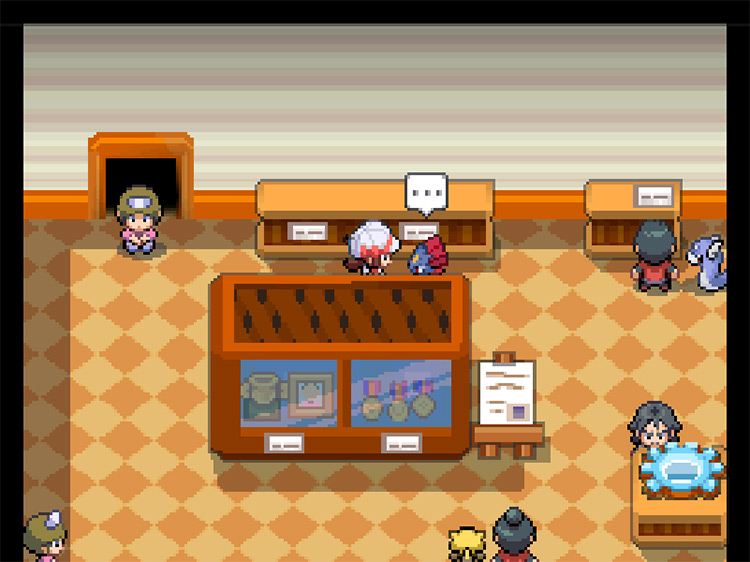
Basement Record Rooms
There are a total of 4 rooms in the Pokéathlon Dome’s basement: the Solidarity, Trust, Potential, and Friendship Rooms.
All the rooms show different kinds of records you’ve made at the Pokéathlon. There are also 10 Trophies per room, which are unlocked by fulfilling certain conditions.
However, the only room that will be accessible to you from the beginning will be the Solidarity Room. The remaining 3 will have to be unlocked.
You will know that you have gained access to them once their entrances are no longer blocked by NPCs.
Below, you’ll find a list of all the rooms, the requirements to unlock each room, and their features.
1. Solidarity Room
This room will be accessible to you by default.
This is where you can learn about the Pokéathlon’s history and see your best scores for each of the Singles Courses and their events.
Pressing A in front of the artifacts displayed here will provide you with text detailing the Pokéathlon’s origins.
To check your high scores, simply interact with the medal display in the center of the room.
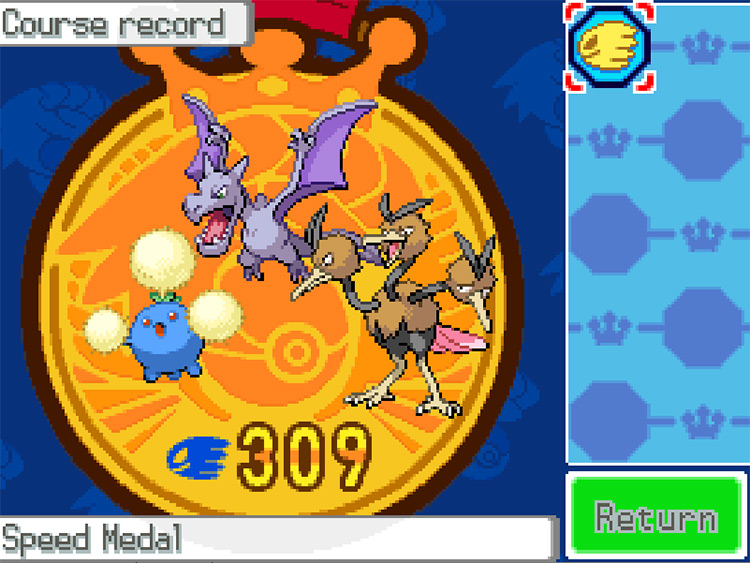
You can also be awarded Collective Trophies that correspond to a Course, with there being 2 per Course. This makes for 10 Trophies in total.
Achieving a high score of greater than 420 but less than 450 in a Singles Course will earn you a Collective Trophy for that Course.
A score higher than 450 will get you two Collective Trophies instead.
You will see that you have obtained a Collective Trophy when the crown-like outlines beside the Course Medals are filled in with gold and a red-jeweled center.
2. Trust Room
Once you have achieved first place in all of the Singles Courses, you’ll be allowed to enter the Trust Room.
You will be awarded with three different items on the displays at the top of the room when you’ve achieved certain milestones. They are listed below:
- Golden replica of the player’s jersey – participate in the Pokéathlon 50 times
- Golden replica of the player’s Running Shoes – make 5,000 dashes
- The player team’s flag – make 200 switches
At the central awards display in the room, you can check the medals that you have achieved for each Pokémon species.
The number of Medalist Pokémon you have will also be displayed here.
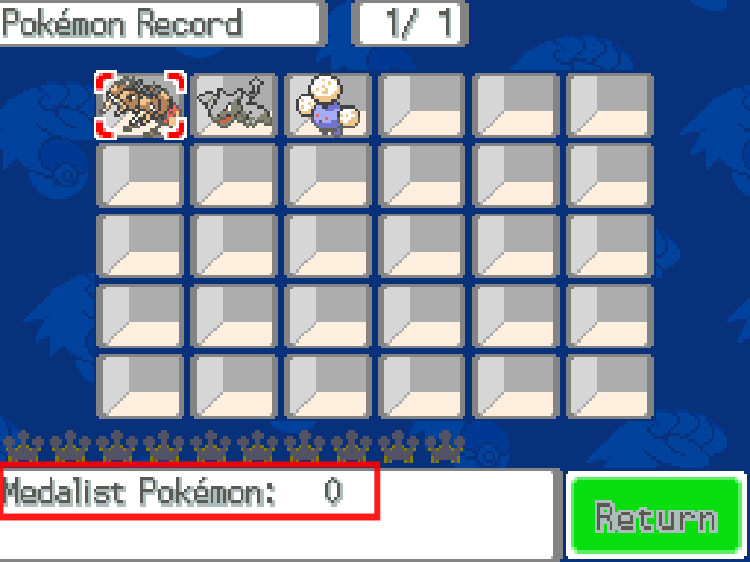
Medalists are the Pokémon species with whom you have acquired all 5 Singles Course medals.
You’ll receive Trust trophies when you’ve reached certain numbers of Medalists. There are 10 Trust Trophies to acquire in total.
A Trust Trophy will be awarded when you earn the following numbers of Medalists: 1, 2, 5, 10, 25, 50, 75, 100, 150, & 200.
3. Potential Room
This room is unlocked once you have managed to cultivate 1 Medalist Pokémon.
Just like the Trust Room, there will be additional displayable awards here that will be unlocked after you make certain accomplishments.
They will be put up on the two counters at the upper side of the room. They are listed below:
- Golden replica of your Pokégear – achieve 1st place in a Pokéathlon Course 100 times
- Engraved Pokéball model in a glass case – achieve 1st place 50 times for each event
There will also be an NPC beside a Dodrio who will give you tips for each Pokéathlon event. They are categorized per Singles Course.
The large computer-like device is the records display for this room.
The records shown here give you a look at your top 5 scores for each event, along with the team of Pokémon you used to earn each score.
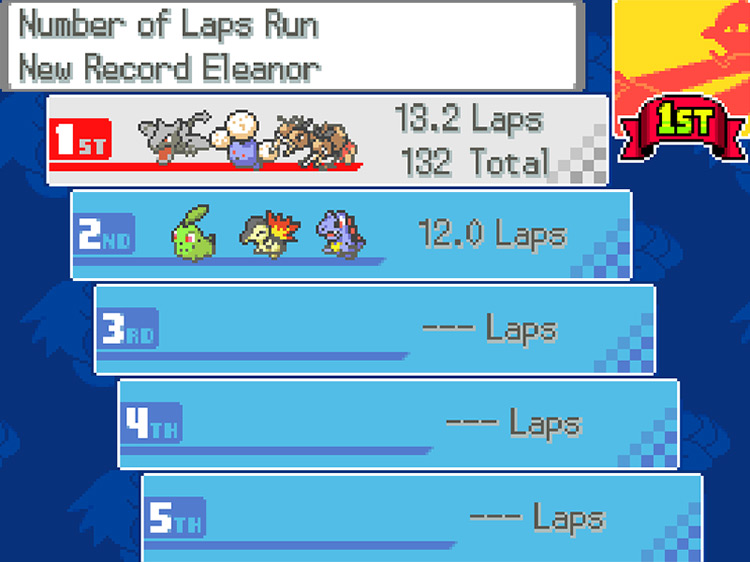
There will also be default records for each event. These are always set by a team of the Johto starters.
When you beat these default records, you will earn the 1st place spot. Achieving all the events’ 1st place records will award you with a new star on your Trainer Card.
Earning 1st place for an will also give you a medal symbol and a color change for the event’s icon on the record selection menu at the bottom screen.
The number of times you’ve participated in an event will also be shown here.
Note: There is a button on the record selection screen to view your Link Pokéathlon records. However, earning the 1st place records for Link Pokéathlon will not count towards the Trainer Card star requirement or the Potential Trophies.
The requirement to earn the Trophies for this room is separate from the 1st place records, however.
The table below shows you the records you need to beat for each event in order to be awarded its corresponding Potential Trophy.
| Event | Potential Trophy Record |
|---|---|
| Hurdle Dash | 80.0 sec |
| Pennant Capture | 50 flags |
| Circle Push | 60 pts. |
| Block Smash | 130 pieces |
| Disc Catch | 70 pts. |
| Lamp Jump | 500 pts. |
| Relay Run | 16 laps |
| Ring Drop | 100 pts. |
| Snow Throw | 55 hits |
| Goal Roll | 9 pts. |
4. Friendship Room
You can unlock this room by achieving 1st place in all 10 of the Potential Room’s Singles Course records. It is the final record hall.
You will also unlock the Supreme Cup for Singles Pokéathlon and the Link Pokéathlon’s Master Course once you have gained access to this room.
It contains a golden statue of the player wearing their jersey. It is surrounded by gold statues of their most recent winning Pokéathlon team.
When you first enter, Magnus will greet you and congratulate you for your feats.
You can check your records by interacting with your statue. There are 2 sets of records here:
- The set of records at the top screen shows your total Pokéathlon score.
- Your bottom screen records show how many Trophies you have earned across all the record rooms.
The total Pokéathlon score is the sum of the following areas:
- Your highest scores in all 5 Singles Pokéathlon Courses
- Your highest scores for each of the 10 events
- The number of medals you have acquired in the Trust Room
You will be awarded with Friendship Trophies whenever you earn a certain amount of points in your Pokéathlon total score.
The first can be earned at 3,000 points. The final one is awarded once you’ve reached 4,500 points.
Pokéathlon Mechanics & Details
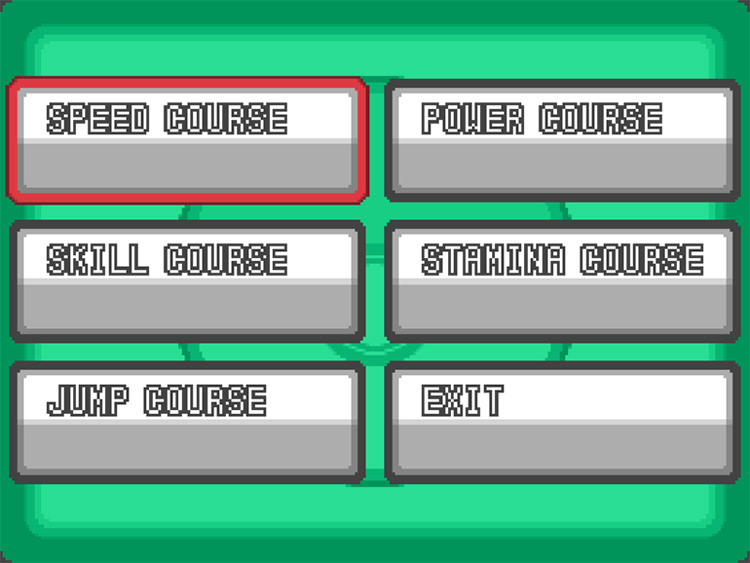
There are 5 Singles Courses, and there are 3 events per course. Each Singles Course corresponds to the main Performance stat they are based on:
- Speed
- Power
- Skill
- Stamina
- Jump
But aside from the Singles Courses, the Link Pokéathlon Courses are instead based on combinations of stats. There are also 6 of them, but they have 4 events per course instead.
You will only have 5 Link Pokéathlon Courses to start with. The final Course, the Master Course, will be unlocked along with the Friendship Room.
Events will always occur in the same order during a Course except for the Link Pokéathlon’s Master Course. This is because the Master Course always has a randomized set and order of events.
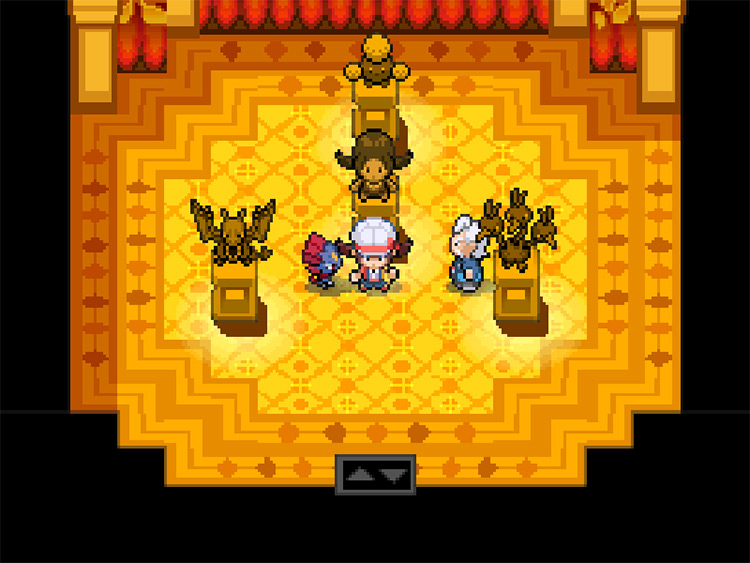
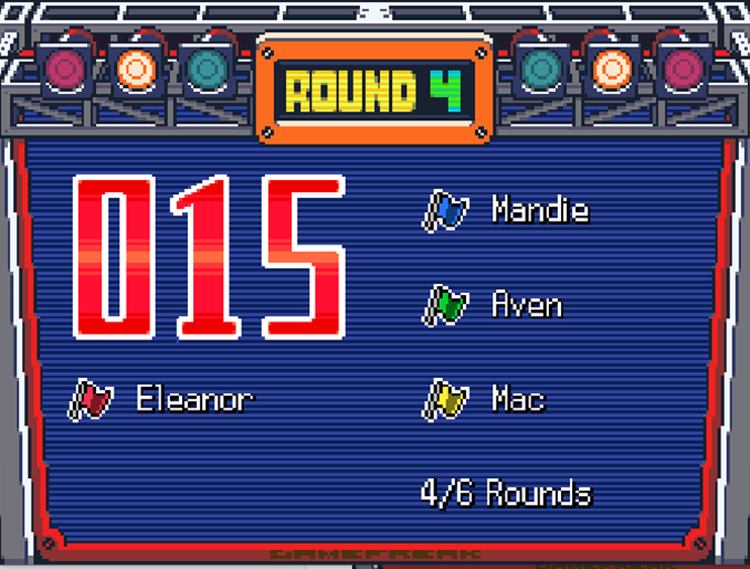
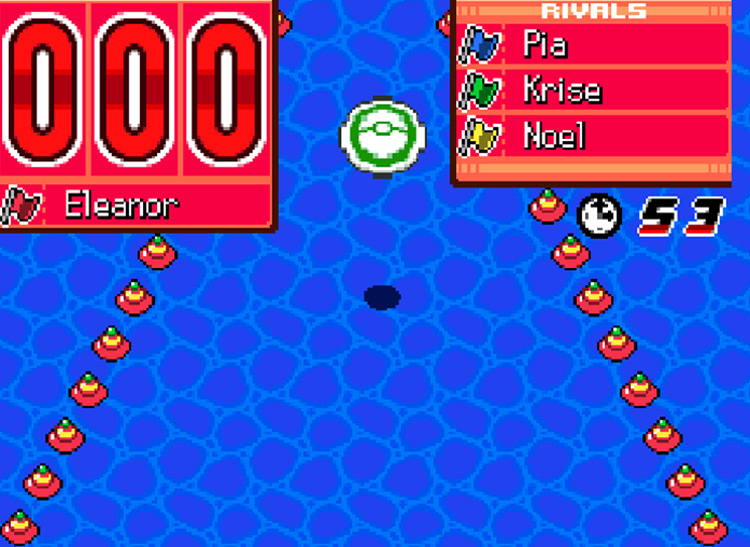
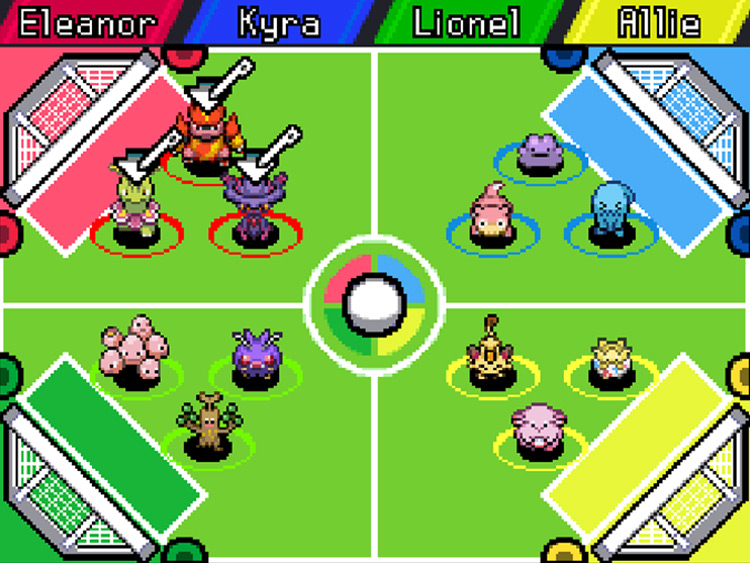
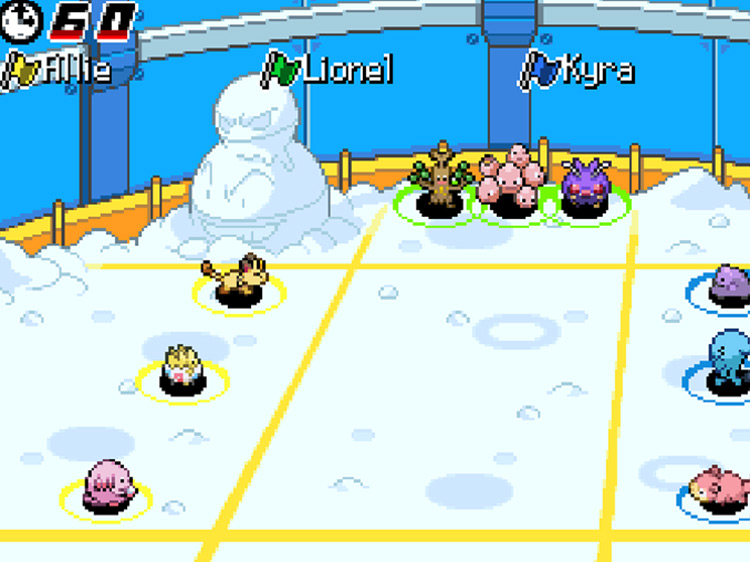
Regardless of which mode or Course you choose, there will always be 4 competitors participating in a Course at a time.
At the start of a Course, you will be welcomed by the announcer and each Pokéathlete team will be introduced.
The sequence of events will then proceed. At the start of each event, you will be briefed on the rules and controls for each event.
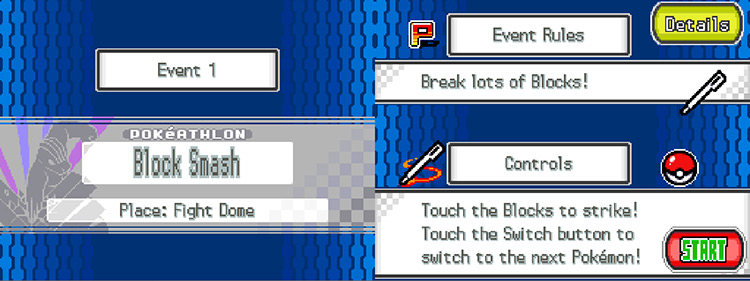
There is also a “Details” button on the upper right of the bottom screen in the pre-event briefing.
This will give you a more in-depth explanation of how the event works, as well as some of the main Performance stats that come into play during the event.
When you surpass your high score for an event, large text will flash on the bottom screen to inform you of your new record.

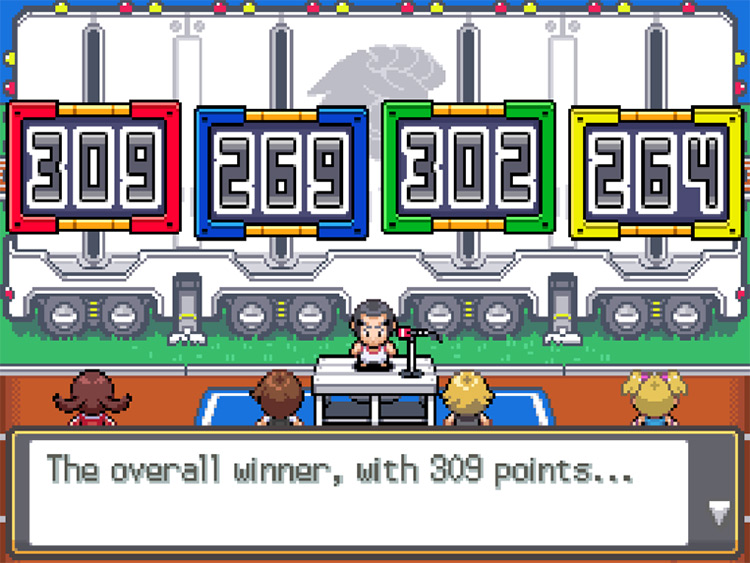
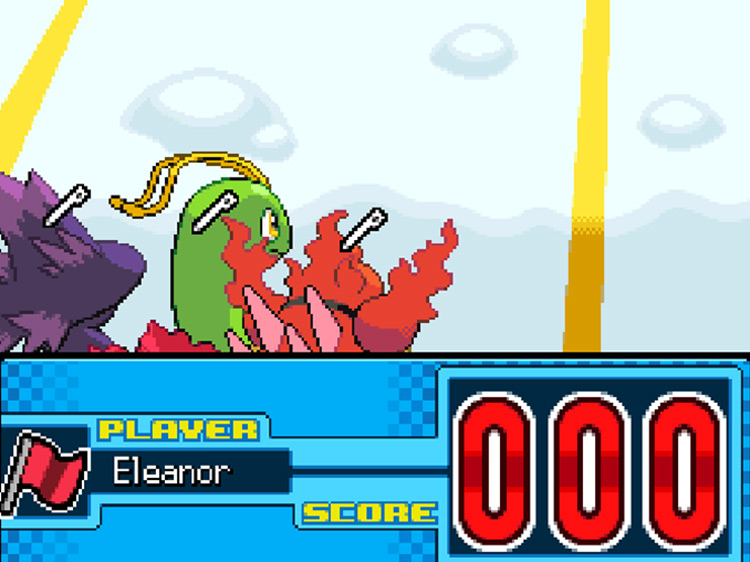
Each event nets you a score depending on how well you do against the other Pokéathletes. A ranking will be shown at the end of every event.
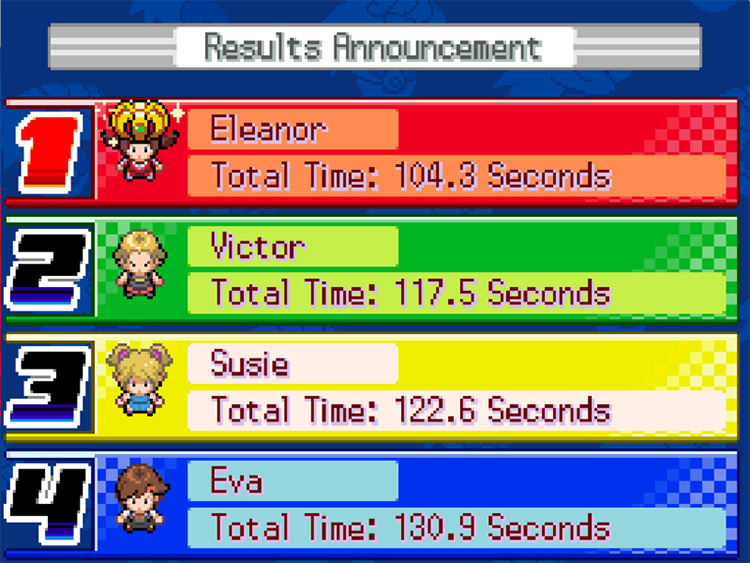
All your scores will be added up for your total score once all events have concluded.
There will also be score bonuses given right before the final tally commences, depending on how the participants perform.
Regardless of whether you are participating in Singles or Link Courses, you will be selecting three Pokémon to make up your team.
The better a Pokémon’s stats correspond to a Course and its events, the easier it will be for you to place higher.
Tip: Though events make use of different stats, it can be difficult to find Pokémon which excel in all of them. It is usually a safe bet to simply focus on the main stat of a Course.
When you achieve first place in a Course, all three members of your Pokémon team will be awarded a medal.
Performance Stats
Performance stats are completely unique to the Pokéathlon mini-games. This set of five stats reflect how well a Pokémon can do in different aspects of the Pokéathlon’s events.
Performance stats do different things depending on the specific mechanics of an event, but generally:
- Speed affects how fast the Pokémon moves.
- Power determines the strength of the Pokémon’s impact-related actions like tackling, throwing, pushing, and damaging.
- Skill influences bonus abilities, such as accuracy, stamina use efficiency, and turning speed.
- Stamina indicates how long a Pokémon can last in an activity before tiring or getting KO’d.
- Jump determines jumping height, distance, and duration.
You can view a Pokémon’s Performance and medals in the team selection menu when signing up for a Course.
After you’ve entered the Pokéathlon Dome for the first time, you can also view these stats from the third screen in a Pokémon’s summary.
You can also view any Ribbons they have acquired here.
The stars in the Performance screen are a measure of how strong a Pokémon is in a given stat.
The maximum number of stars for any stat ranges from 1 to 5, which is based on the species of a Pokémon. This means this number will always be the same for any member of the species.
For example, the maximum number of stars that any Mareep can have in Speed, Power, and Skill is 3 stars.

The actual value of a stat is based on the stars that are filled out. The different styles of stars show how a stat compares to what is considered the “average” value.
This means that even with the same number of stars, your Pokémon can still be below or above the default value for the stat.
The values of the different star symbols are as follows:
- Small, gray stars mean that the stat is below average.
- Regular yellow stars mean that the stat is in line with the average value.
- Large, orange stars mean that the stat is above average.
The values of a Pokémon’s unboosted Performance stats are not constant. These vary each day depending on the Pokémon’s Nature.
Each Nature will only be able to affect 2 Performance stats. They will increase or decrease from anywhere between 1-2 stars.
It is impossible to publish all the info here about the extent of Natures’ effects on Performance stats for each Pokémon species. Still, you can refer to the table below to get an idea of the maximum increases and decreases that a Nature can influence certain Performance stats.
The Natures are ordered alphabetically.
| Nature | Performance Stats Affected | Maximum Effect Values |
|---|---|---|
| Adamant |
|
|
| Bashful |
|
|
| Bold |
|
|
| Brave |
|
|
| Calm |
|
|
| Careful |
|
|
| Docile |
|
|
| Gentle |
|
|
| Hardy |
|
|
| Hasty |
|
|
| Impish |
|
|
| Jolly |
|
|
| Lax |
|
|
| Lonely |
|
|
| Mild |
|
|
| Modest |
|
|
| Naive |
|
|
| Naughty |
|
|
| Quiet |
|
|
| Quirky |
|
|
| Rash |
|
|
| Relaxed |
|
|
| Sassy |
|
|
| Serious |
|
|
| Timid |
|
|
Aprijuice
Aprijuice refers to Apricorn-based drinks that are used to boost a Pokémon’s Performance. However, certain types of Aprijuice may also decrease Performance.
Aprijuice boosts cannot surpass the number of star outlines in a Pokémon’s stat. Its effects also can’t be stacked.
This means that if you give another helping of Aprijuice to a Pokémon, the initial drink’s effects on Performance will be overwritten.
Tip: If a Pokémon with Aprijuice boosts is put into the PC, those effects will disappear.
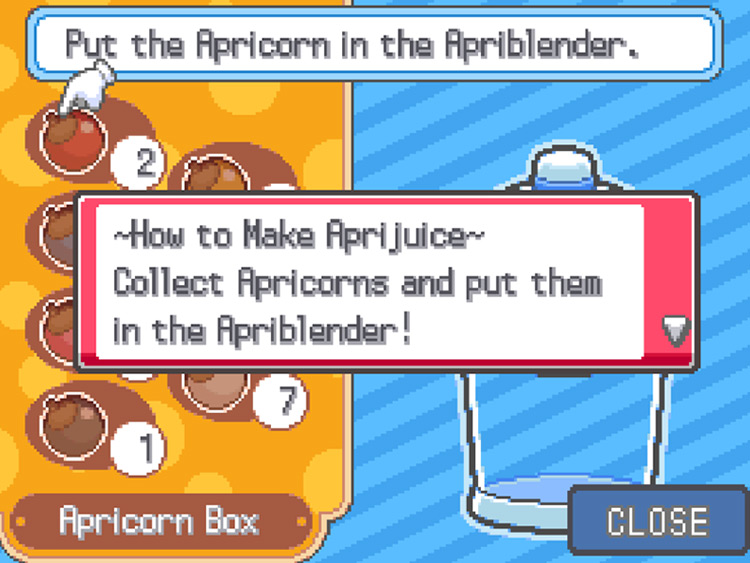
You can purchase premade Aprijuice from the Aprijuice Stand beside the Pokéathlon Dome. But once you have the Apriblender, you can also make your own Aprijuice.
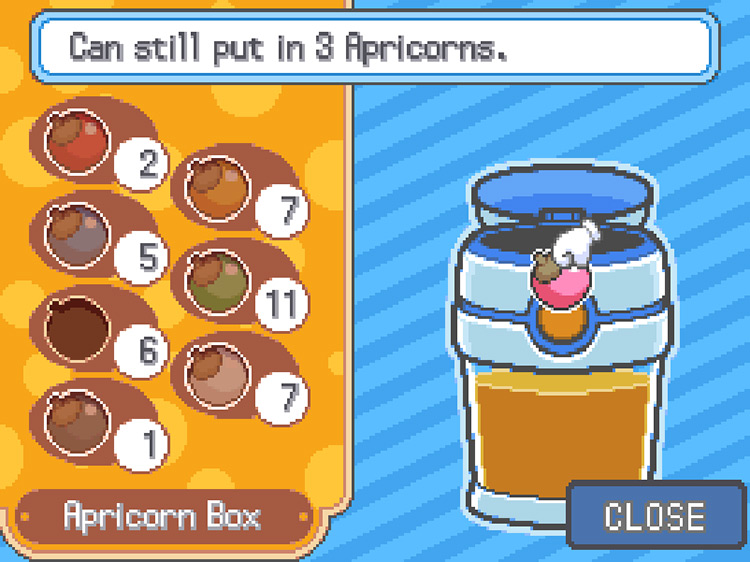
Just put anywhere from 1 to 5 Apricorns into the Apriblender at once then walk 100 steps.
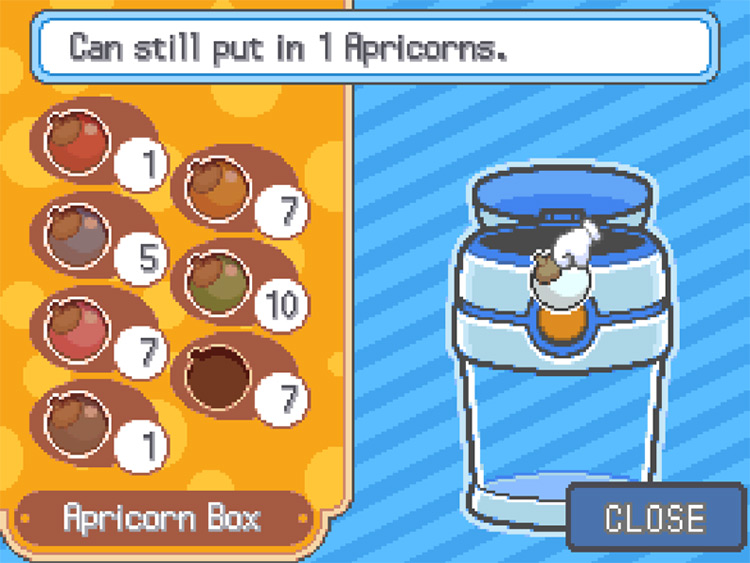
The Aprijuice will be ready to be given to a Pokémon in your party after 100 steps by pressing the yellow button on the Apriblender and selecting “Use.”
The button will also give you the option to “Taste” the current batch of Aprijuice in the Apriblender. This will give you an idea of the dominant flavors in it.
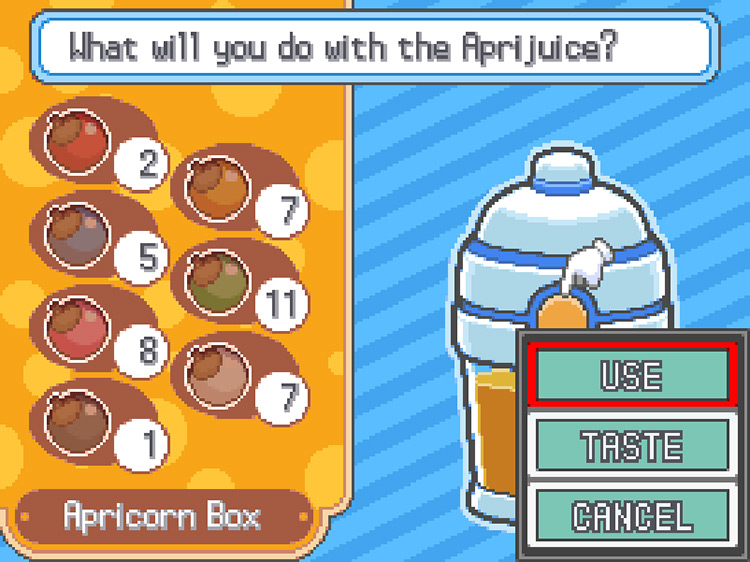
However, you can also put more Apricorns into a finished batch of Aprijuice to boost its flavors further.
Note: This will reset the Aprijuice’s Smoothness level to 0.
Each batch of your homemade Aprijuice, regardless of the number of Apricorns you’ve used, will have three servings.
The stats that Aprijuice will boost depends on the Apricorns used to make it. Each Apricorn has a flavor profile that decides which stats they will influence.
There’s quite a lot of technical components and mechanics that go into making Aprijuice. To keep things simple, here are some basic guidelines you can follow:
- Aprijuice will have a Smoothness level. The higher the Smoothness, the less likely the Aprijuice will negatively affect Performance.
- You cannot see how Smooth your Aprijuice is. However, you can still increase Smoothness. By continuing to walk even after the Aprijuice has finished blending, its Smoothness Increases every 100 steps. Leaving a batch of Aprijuice in the Apriblender will also improve its Smoothness daily.
- Flavor level, or Richness, is what determines the strength of Aprijuice boosts. The higher the Richness, the higher its Performance boosts will be.
- There are 5 different flavors that Apricorns can have. They correspond to the Performance stats that they boost. These are:
- Spicy (Power)
- Sour (Stamina)
- Dry (Skill)
- Bitter (Jump)
- Sweet (Speed)
- The stronger an individual flavor is, the stronger the boost will be to its corresponding stat. You can get an estimate of how strong the flavors are by tasting the Aprijuice.
Apricorn Colors & Flavoring Chart
Below is a table of the types of Apricorns, their flavor attributes, and the strength of the flavors they impart to the resulting Aprijuice.
| Apricorn | Flavors |
|---|---|
| Red Apricorn | Spicy – strong Sour – weak |
| Ylw Apricorn | Sour – strong Dry – weak |
| Blu Apricorn | Dry – strong Bitter – weak |
| Grn Apricorn | Bitter – strong Sweet – weak |
| Pnk Apricorn | Sweet – strong Spicy – weak |
| Blk Apricorn | All flavors – weak |
| Wht Apricorn | All flavors – strong |
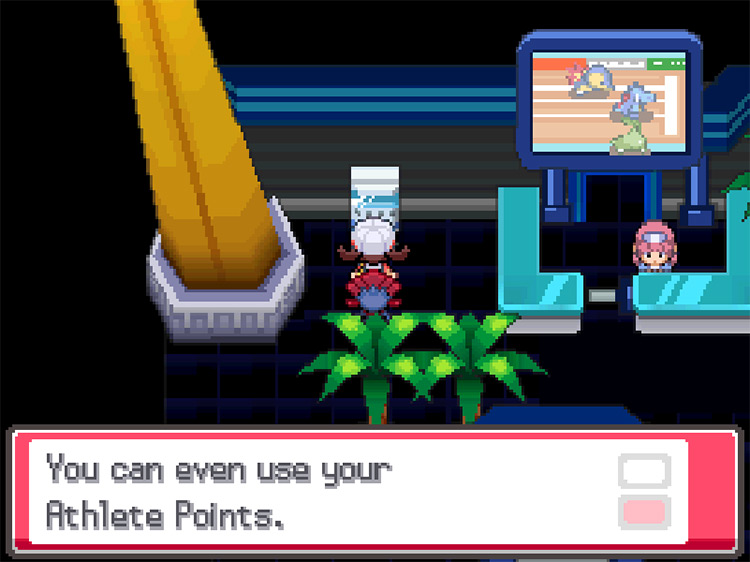
Athlete Points
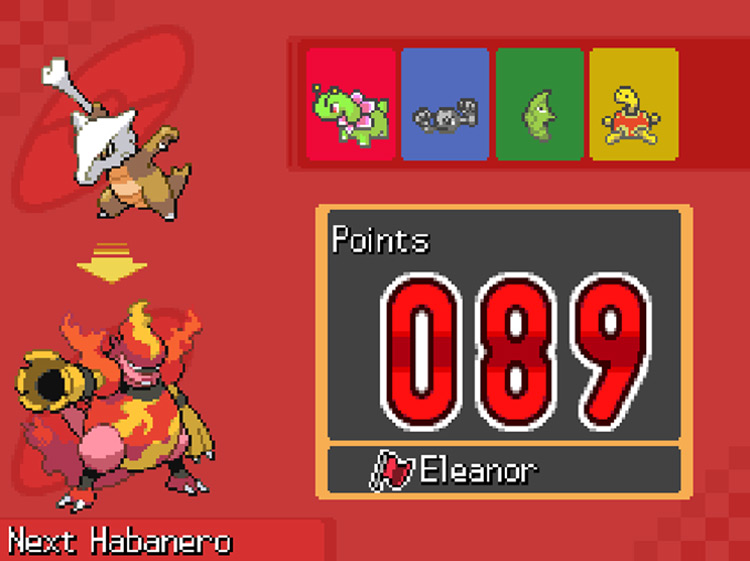
Athlete Points are a currency you earn from participating in any of the 5 Singles Pokéathlon Courses or the 6 Link Pokéathlon Courses. These Athlete Points can be exchanged for prizes at the Athlete Shop or for Data Cards.
You can also use these points to buy drinks at the Pokéathlon’s vending machine.
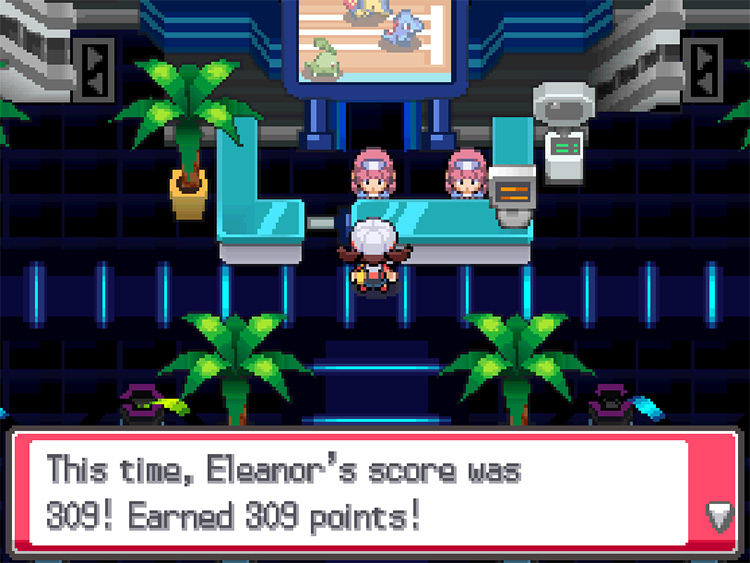
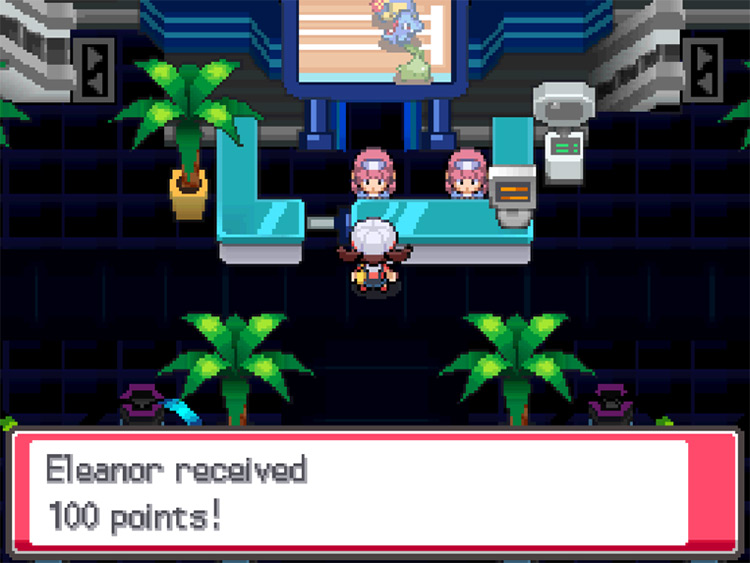
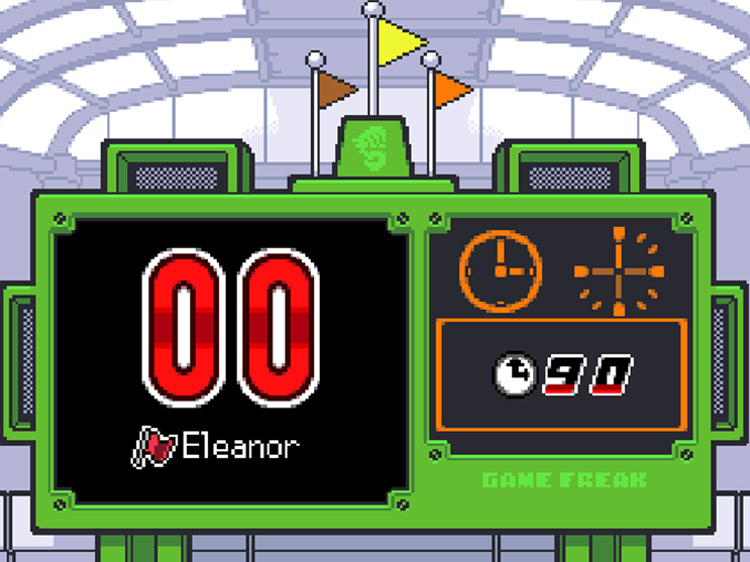
At the end of a Course, you will be awarded an amount of Athlete Points equivalent to your score. You will receive points whether you win or lose.
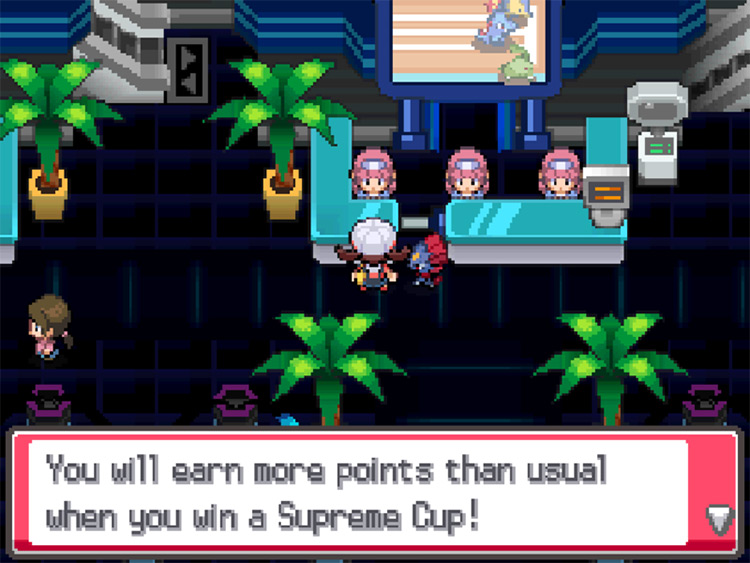
You even earn bonus points if you place 1st overall in the Course. This will be 100 points for Singles and 500 points for Link Pokéathlon.
This amount will be 300 points if you are playing on the Supreme Cup mode.
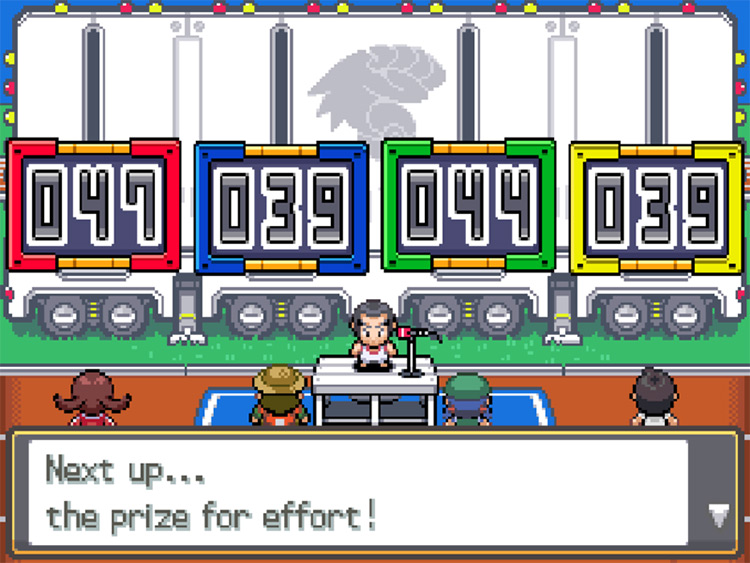
Bonus Score Categories
There are 4 categories of bonuses that can be given before the final score tallies.
1. Challenge bonus
Maximo the announcer describes this as a bonus for the Pokémon team with the greatest fighting spirit.
This is equivalent to whichever team has the lowest Performance stat total among all the other participants.
The amount of the bonus depends on how low the stat total is. You can calculate this using the following formula:
The awarding of the bonus is not affected by Aprijuice stat boosts.
In other words, even if members of your team have improved stats due to Aprijuice, they can still earn the challenge bonus.
2. No-miss bonus
The specific criteria for this bonus differs for each event. But generally, it is given to Pokémon who have not “missed” in any of the events of a Course.
The bonus is equal to 10 points.
The conditions to be met per event are listed below. The events are ordered alphabetically:
- Block Smash – never become exhausted
- Circle Push – remain inside a circle in all rounds
- Disc Catch – never fall off the arena
- Goal Roll – never faint from hits by the balls, never shoot a ball into your own goal
- Hurdle Dash – never break a hurdle
- Lamp Jump – never faint from collisions
- Pennant Capture – never lose a flag from getting tackled
- Relay Run – never become exhausted
- Ring Drop – never fall off the arena, never become exhausted
- Snow Throw – never faint from hits by the snowballs
3. Effort bonus
This bonus will be given to the Pokémon who did the most of a specific action, though this is randomly selected. It amounts to 10 points.
This is commonly given to only a single Pokémon. However, it can be given to multiple Pokémon in the case of a tie.
Even if the tied Pokémon are on the same team, multiple bonuses will still be given.
4. Lead score bonus
This is a bonus given to the Pokémon who has scored the most. It is a 20-point bonus.
Much like the effort bonus, multiple bonuses are given for Pokémon that tie.
Pokéathlon Courses (Singles + Multiplayer)
This section is split into two parts.
The first section provides a table of the Singles Courses, while the second has a table for Link Pokéathlon Courses.
Singles Pokéathlon Course List
The table below lists the Pokéathlon Singles Courses, their corresponding events, and the events’ stat combinations.
Note: The Supreme Cup has the same Courses. The only difference lies in the increased difficulty of the events.
| Pokéathlon Singles | ||
|---|---|---|
| Course | Events | Performance Stats |
| Speed | Hurdle Dash | Speed, Skill, Jump |
| Pennant Capture | Speed, Power, Skill, Stamina | |
| Relay Run | Speed, Power, Skill, Stamina | |
| Power | Block Smash | Power, Skill, Stamina |
| Circle Push | Speed, Power, Stamina | |
| Goal Roll | Speed, Power, Skill, Stamina | |
| Skill | Snow Throw | Power, Skill, Stamina |
| Goal Roll | Speed, Power, Skill, Stamina | |
| Pennant Capture | Speed, Power, Skill, Stamina | |
| Stamina | Ring Drop | Speed, Power, Stamina, Jump |
| Relay Run | Speed, Power, Skill, Stamina | |
| Block Smash | Power, Skill, Stamina | |
| Jump | Lamp Jump | Power, Skill, Stamina |
| Disc Catch | Speed, Power, Jump | |
| Hurdle Dash | Speed, Skill, Jump | |
Link Pokéathlon Course List
The events of the default Link Pokéathlon Courses are instead grouped according to pairs of Performance stats.
The Master Course’s events are randomly generated each time you participate.
Just like with the Singles Courses, these groupings do not mean that they are the only Performance stats that have any bearing on the event.
This table shows the Link Pokéathlon Courses’ events, ordered from Courses A to E.
| Link Pokéathlon | |
|---|---|
| Course | Events |
| A: Speed & Jump | Hurdle Dash |
| Lamp Jump | |
| Disc Catch | |
| Relay Run | |
| B: Jump & Skill | Lamp Jump |
| Disc Catch | |
| Pennant Capture | |
| Snow Throw | |
| C: Skill & Power | Goal Roll |
| Snow Throw | |
| Pennant Capture | |
| Block Smash | |
| D: Power & Stamina | Block Smash |
| Circle Push | |
| Goal Roll | |
| Ring Drop | |
| E: Stamina & Speed | Relay Run |
| Ring Drop | |
| Hurdle Dash | |
| Circle Push | |
All Pokéathlon Events
Below we’ve added details on all 10 Pokéathlon events, their mechanics, and how to win.
The events are arranged below alphabetically.
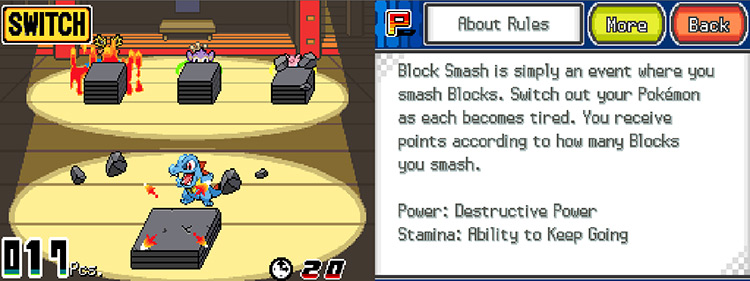
1. Block Smash
Each participant is positioned before stacks of stone blocks. The objective is to destroy as many blocks as possible before the time limit of 30 seconds ends.
You can see your remaining time on the lower right of the touch screen. The number of blocks you’ve smashed will be displayed on the lower left corner.
The top screen will display the number of blocks that all the teams have destroyed.
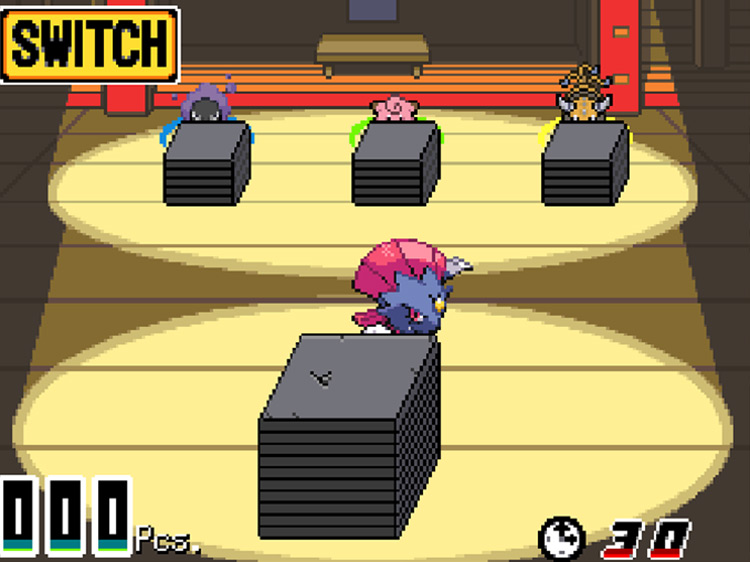
To swap out your current Pokémon with the next in line from your team, press the “Switch” button on the upper left of the touch screen.
You can also see the order your Pokémon will be switched in at the left-hand side of the top screen.
To break a block, tap on its surface on the touch screen. The number of taps to break a block will depend on the Pokémon’s Power.
Smashing blocks will also wear out your Pokémon eventually. How long a Pokémon can last is dictated by the Pokémon’s Stamina and Skill.
When a Pokémon is close to complete exhaustion, the Switch button on the upper left of the touch screen will blink red.
If the Pokémon becomes fully exhausted, it will faint for a few seconds. You will not be able to switch out your Pokémon in this state.
Tip #1: A balance of speed and accuracy is key for this event. Tap on the cracks of a block to break multiple at once. If you manage to do this consecutively, your Pokémon will become surrounded by a blue aura. This aura will turn red once you have successfully aimed at enough cracks. While you have a red aura, you will no longer become exhausted and you can smash multiple blocks at once even without aiming for cracks.
Tip #2: You can switch your Pokémon out faster. Simply flick upward on your Pokémon during the switching animation.
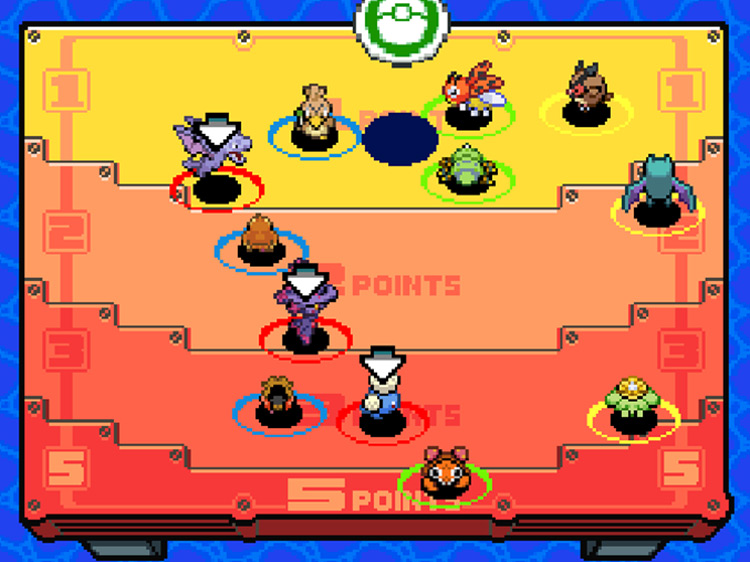
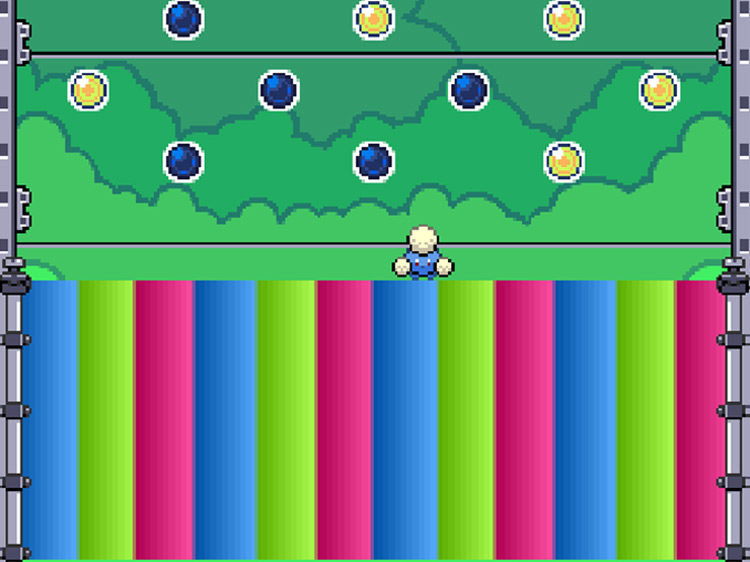
2. Circle Push
All participants will be competing in the arena at once. The goal is to remain inside the numbered circles on the arena’s surface until the end of a round. There are 6 rounds in total.
You can tell how much longer there is in a round from the arrows at the edges of the arena. These arrows will be filled in with red at the start of a round.
Starting from the right of the “Get Points” section, these arrows will gray out in a clockwise direction until they circle back to the “Get Points” spot. At that time, the round ends.
The Pokémon within the circles will then be awarded points based on the numbers inside. The smaller the circle, the higher the point value.
After the points are distributed, the next round proceeds. The time limit shortens with each successive round.
Note: The circles and their point values in each round will always be the same whenever you participate in the event. This means that Round 1 will always have a single circle worth 1 point, Round 2 will always have 2 circles—one worth 2 points and the other worth 3 points, and so on.

The round number will always be shown at the top screen. While a round is ongoing, it will show animations of the Pokémon who are clashing with one another.
At the end of a round, the top screen will show how many points you have scored as well as the number of rounds remaining. On the touch screen, your Pokémon will always be highlighted by brightly-colored arrows of your team color to help you distinguish them.
To move your Pokémon, simply drag them on the touch screen.
Tip: You can have your Pokémon collide and move against other competitors to push them.
How easily and strongly a Pokémon can push depends on their Power. Pushing others will wear out your Pokémon, though. And when they are fully exhausted, they will faint. This immobilizes them for a short time.
- Their pushing endurance is affected by their Stamina.
- How efficiently they use their energy in pushing others is based on Skill.
Just be careful not to fall off the arena. This will eliminate your Pokémon from the current round – although they will return in the succeeding round.
3. Disc Catch
All participants will be competing against one another at the same time during this event. Pokémon will be placed atop an arena above the water to catch the discs thrown in their direction.
The arena is sectioned off into 4 parts. These parts determine how many points a Pokémon earns for any discs they catch within it.
From top to bottom, the sections are valued at 1 point, 2 points, 3 points, and then 5 points.
The event has a time limit of 60 seconds. You can check how much time you have left on the top screen, below the list of rival competitors.
You can also see how many points you have accumulated on the upper left of the top screen.
The most important feature of the top screen in this event is that it shows you incoming discs. You can use this to adjust and position your Pokémon accordingly.
You can move your Pokémon by dragging them on the touch screen. To catch the discs, tap on your Pokémon to make them jump. If they hit a disc as they jump, they will catch the disc.
Note that it is possible to fall off the arena. Any fallen Pokémon will respawn onto their starting position after 3 seconds.
Tip #1: Don’t move around aimlessly. Bumping into other Pokémon, even your own team members, will propel the colliding Pokémon away from each other – this is especially dangerous at the 5-point line and at the edges of the arena.
Tip#2: If you are struggling with timing your jumps to catch the discs, bring flying Pokémon onto your team. Pokémon that fly will be hovering a short distance above the arena’s surface. This means there will be less of a gap between them and the discs when they have to catch them.
4. Goal Roll
Every participant will be competing on a field at once. The objective is to push balls into the rival teams’ goals while defending your own goal.
The event lasts 90 seconds.
Each team will have their own colored goals positioned at the four corners of the field.
Your team will earn 1 point for getting a ball into another team’s goal. 1 point will be deducted from you if a ball is pushed into your goal instead.
Note: It is possible to push a ball into your own goal. You will decrease your score this way, so be careful.
When a ball is moved into a goal, a new one will immediately spawn close to the center of the field. A golden ball may randomly spawn. It’s valued at 2 points instead.
You can see how many points you have on the top screen. The countdown for the event’s time limit will be right beside your score count.
When only 30 seconds remain, the countdown gets replaced by “Second Wind” text. A second ball will spawn at the start of the Second Wind. There will always be 2 balls on the field from that point on.
To move your Pokémon, drag them across the touch screen. If you flick your Pokémon, they will dash.
Move your Pokémon against a ball to roll it around. Dash at a ball instead to launch it.
When a Pokémon is hit by a launched ball, it will grow weaker. This depends on the dasher’s Power and the Stamina of the struck Pokémon. When a Pokémon is highly weakened, they will slow down. They will also be unable to dash.
This state is represented by sweat droplets.
When you push a Pokémon past that point, it will faint. After fainting it will be unable to do anything for a few seconds.
But you can make a weakened Pokémon recover by having it stay still. This will allow it to rest.
Tip: Designate your Pokémon in certain roles to improve efficiency. Situate a Pokémon near your goal so you can focus on instructing it to defend the goal. Keeping another Pokémon near the center of the field will help gain control of the next balls that spawn, and this will add a line of defense for the team goal. Lastly, have your remaining Pokémon stay near an enemy goal of your choice to make it easier to score.
5. Hurdle Dash
This is a sprinting event that features hurdles on a race track. The participant Pokémon will be racing for the fastest record to reach the finish line.
There is no time limit for this event since it only ends once all competitors have finished the race.
Although all competitors will be participating in the event at once, only your team members will be visible to you. They will be on the bottom screen for you to instruct.
As for the other screens in this game:
- The ongoing time of your run will be on the lower left of the bottom screen too.
- The oncoming hurdles within a certain distance will be shown on the top screen.
- The section at the very upper top with numbers and broken lines will show you any Pokémon who have finished racing and the place they ended at.

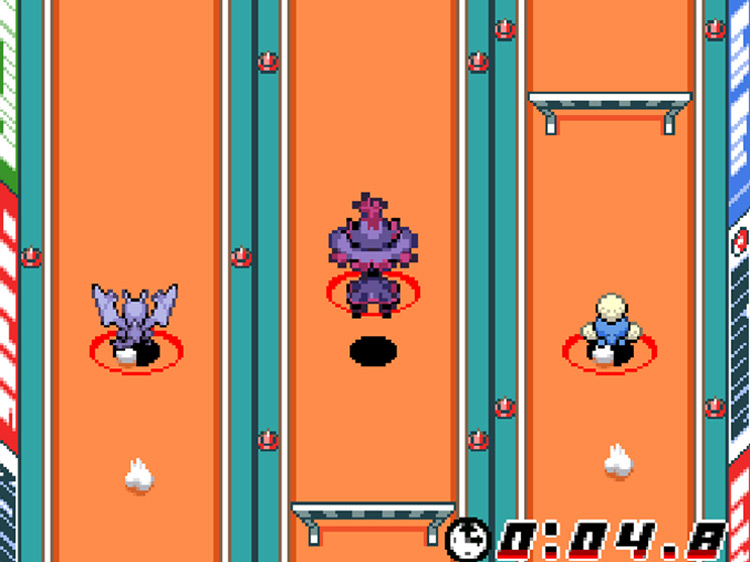
Your Pokémon will move forward automatically at a set pace. Your only form of control will be instructing them to jump.
Note: To make your Pokémon jump, simply tap on them.
If any of your Pokémon run into a hurdle, they will crash into it and slow down briefly.
Tip: Try to time it so that your Pokémon jumps right before the hurdles. The Pokémon that manages this will receive a speed boost that lasts until they collide with a hurdle. A burst of wind will surround them when they are boosted. The wind burst will eventually turn yellow if you achieve a streak of boosts, and then become red at the maximum boost.
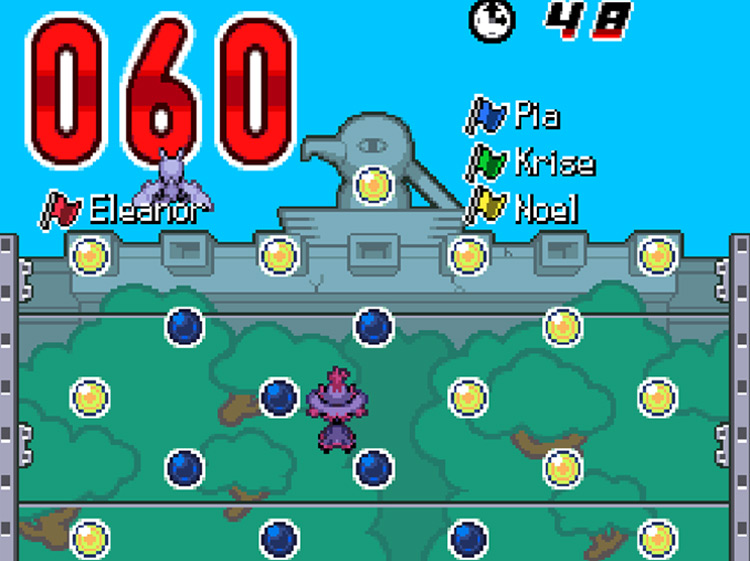
6. Lamp Jump
This event places your team of Pokémon on a stage with a bouncy platform and a tall wall with an array of round lamps. The main objective of the event is to touch and put out as many of these lamps as possible within 60 seconds.
Scoring is based on how many lamps are put out by a Pokémon in a single jump.
- Lamp values start from 1 point, then successively increase by 1 point depending on how many other lamps have already been put out before it.
- This increase is maxed out at 5 points.
- Example: if a Pokémon puts out 6 lamps in a single jump, the score calculation would be 1+2+3+4+5+5.
The bottom screen shows the bottom half of the stage, which includes the bouncy platform.
The upper screen shows the rest of the stage wall, along with the player’s score counter in the upper left and the time limit on the upper right.
Your Pokémon can appear on both screens since it will reflect how high they jump.
To make your Pokémon jump, drag down on the bottom screen to pull back the bouncy platform. When you release, you will launch your Pokémon into the air.
Note: You can pull downwards diagonally if you want to launch your Pokémon at an angle.
Any lamps touched by the Pokémon while they are in the air will be put out and counted towards your score. After a lamp is put out, it will re-light after 8 seconds.
Also note that your Pokémon can crash into each other as they jump, which will stun them and leave them immobile for a while.
Tip #1: Pokémon with high Jump stats will end up bouncing off the platform again after landing even without your input. While this means less work on your part to maintain your Pokémon’s jumping, it may also make things more difficult to control. Plan accordingly.
Tip #2: Time your Pokémon’s jumps in order to minimize collisions. For example, try to send up one Pokémon while another is still launching upward in the air. This will help them avoid crossing paths, as opposed to a Pokémon flying up while another is falling down.
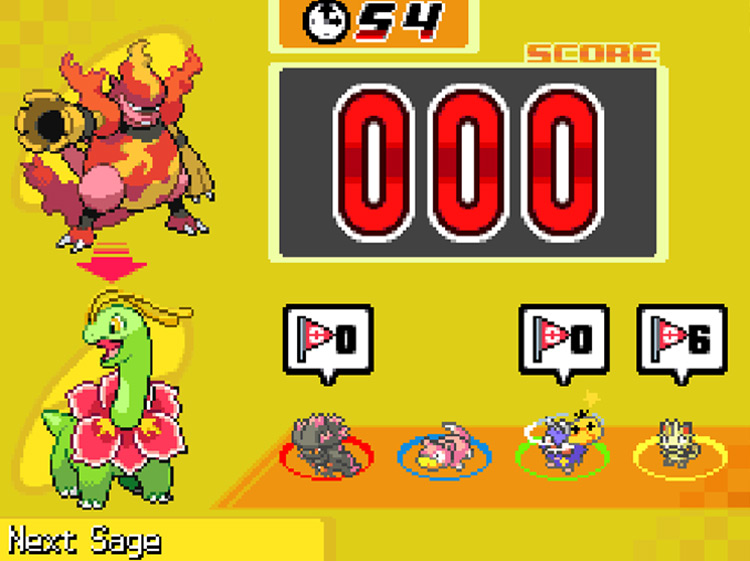
7. Pennant Capture
Team representatives will be racing around a sand arena to capture as many pennant flags as possible and bring them back to the starting line within 60 seconds.
Quick info to keep in mind:
- A Pokémon can carry a maximum of 9 flags.
- Captured flags will not be counted towards the team’s score until they are returned.
- Whenever a Pokémon goes to the starting point to hand over flags to the team, it will be replaced by one of its teammates.
- The bottom screen shows:
- Your view of the current participant of your team in the arena.
- Any flags, opponents, or opponents that will come into view will also be shown on the bottom screen as well.
A variety of informational displays will be visible on the top screen.
- The very left side of the top screen will show who is next in your team to replace your current participant in the arena.
- The upper center of the top screen shows your score, which is the total number of flags you have returned. The time remaining for the event will be above the score display.
- Icons of the current representatives of each team will be below the score display. There will be bubbles above them that show the number of flags each representative is holding.
To move your Pokémon, flick it in the direction you want it to head toward. Capture a flag by making your Pokémon touch it.
Note: You can steal flags by bumping into any Pokémon from behind. This will give you 2 of its flags, and even stun the Pokémon you’ve stolen from. However, you can also be stunned and have your flags stolen from you.
It’s wise to plan accordingly and protect your flags by turning your Pokémon’s back away from any nearby opponents.
Tip #1: Don’t be afraid to wait until the very last second to return your last batch of flags. This is because the entirety of your final batch of flags will be counted towards your score, even when time runs out before the depositing animation finishes. Just make sure you can get back to the starting point before time runs out in the first place!
Tip #2: Try to steal your opponents’ flags while they are on their way back to the starting point. This will make it more difficult for them to steal their flags back from you since you will already be close to where you need to go to deposit them.
Tip #3: The parasols scattered around the arena can sometimes be hiding flags away from view. Dash under them when you have the chance to possibly score some extra flags.
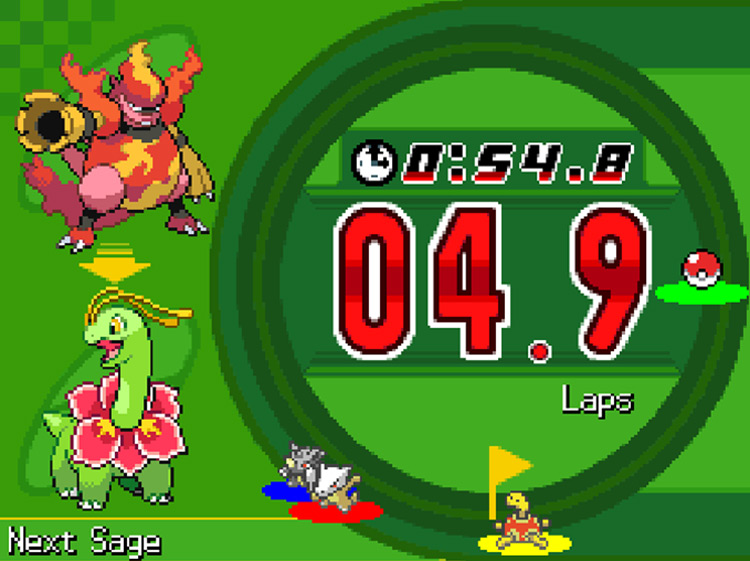
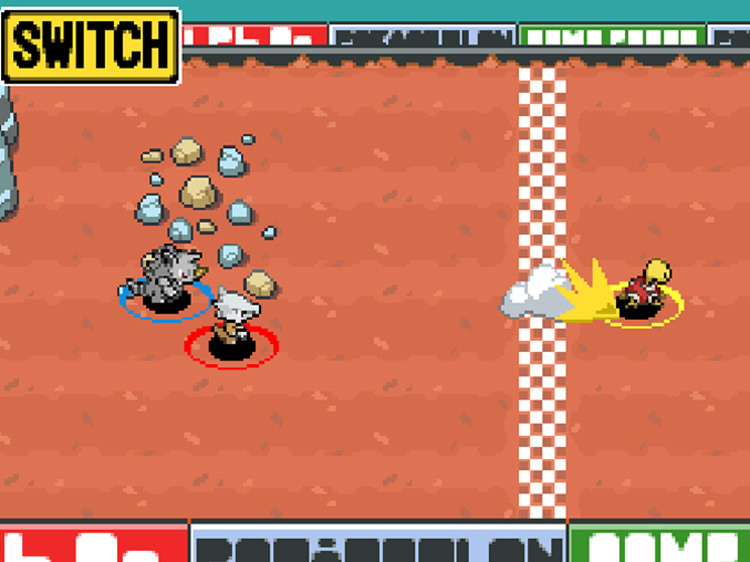
8. Relay Run
A representative from each team will be running laps around a looping track. The main objective is to complete as many laps as possible within the event’s 90-second time limit.
- The bottom screen shows your Pokémon as it runs along the track. This includes any obstacles and opponents that will come into view.
- There will also be a “Switch” button on the upper left of the bottom screen. Pressing this will switch out your Pokémon on the track with the one next in line from the team.
- The top screen will help you keep track of various elements of the event. The far left of the screen will show which of your Pokémon is next in the switching order.
- Most of the top screen is taken up by a circle, which will show where all the competitors are on the track. A Pokémon’s icon will also be replaced by Pokéball while it is undergoing a teammate switch.
- Enclosed within that circle is a counter for the number of laps you’ve finished.
- The top of the lap counter shows the time limit countdown.
Flick your Pokémon to the right to make it dash forward. Flick it diagonally upward or downward if you want it to change course.
As your Pokémon runs, it will get more and more tired. You can also tire it out by bumping into other Pokémon.
You’ll see your Pokémon produce sweat droplets once it’s exhausted. It may even faint if it is pushed even further, which will make it impossible to move.
Switching out a Pokémon will make it recover instantly.
Tip #1: Make sure to navigate carefully instead of dashing ahead blindly. There will be obstacles all over the track. These come in the form of large stone statues and patches of scattered stones. The statues will bounce you backward and the rock patches will slow you down as you run over them. You can also bump into your opponents, which will stun you both at once.
Tip #2: Switch your Pokémon out before it slows down and starts sweating. This will make it easier to keep up your momentum.
9. Ring Drop
Team representatives will be battling to stay inside a floating ring and knock their opponents off it. This event goes on for 60 seconds.
A team receives points for successfully attacking a Pokémon, but the amount of points they receive depends on how they went about doing that.
- Tackles will net you 1 point.
- Jumping and landing on a Pokémon will get you 2 points.
If you manage to knock a Pokémon off the ring with an attack, you will earn 10 points on top of the points you get from your attack.
Note: It is possible to accidentally fall off the ring. When this happens, your score will be deducted by 10 points. Be careful!
The touch screen provides your view of the ring and the Pokémon on it. It will also show the remaining time left at the bottom of the screen, and a Switch button is at the top.
The upper screen shows your total score, and above the score counter is a display of the currently participating Pokémon.
Beside the score counter, you should see the order that your other team members will be switched in.
Make your Pokémon move around the ring by dragging on it. Flick your Pokémon to make it tackle in the direction you flicked.
You can also make your Pokémon jump by tapping it. You can move it slightly while it is in the air by dragging it.
How much you can manipulate a Pokémon’s movement mid-jump depends on its Jump stat.
Note: To switch your current participant Pokémon out, you need to have it return to your team’s corner of the ring. If your Pokémon falls off, a teammate switch will be forced and it will spawn at your corner.
Tackling an opponent will knock it back, but the knockback distance depends on the tackler’s Power and the struck Pokémon’s Stamina and exhaustion level.
Jumping up in the air and managing to slam on top of another Pokémon will knock it back much more strongly than tackling does.
Getting attacked will weaken a Pokémon and make it less resistant to getting knocked away.
You will know a Pokémon is greatly weakened when it begins producing sweat droplets. When weakened enough, it will faint and be unable to move.
Tip: Try to slam on top of your opponents as often as possible. Not only is this a powerful move that easily sends opponents flying, but it also renders your Pokémon invulnerable to the others’ attacks while it’s in the air.
10. Snow Throw
This event has all participating Pokéathletes competing in a snowball fight. The goal is to pelt your rivals with as many snowballs as possible.
The snow field is marked with yellow lines to set the teams apart in equal distances. The event goes on for 60 seconds.
The top screen shows your view of the field and of your rival competitors. The bottom screen shows your Pokémon.
You can also find the score counter on the lower right of the bottom screen. It shows the number of your team’s snowball shots that have successfully hit any of your opponents.
In this event, you cannot move your Pokémon.
You can only make and throw snowballs.
- To create snowballs, tap on a Pokémon. The more you tap, the bigger the snowball will be.
- To throw any snowballs you’ve created, simply flick outward from your Pokémon in the direction that you want to throw the snowball in.
Note: If a Pokémon with an unthrown snowball gets hit by an opponent, the snowball it’s holding will get destroyed.
The more that a Pokémon is hit by a snowball, the more it will tire out. It will eventually faint at max exhaustion. This will immobilize it, but it will recover after a few seconds.
Tip #1: You can block incoming snowballs by throwing your own snowballs at them. This is a good way to protect your Pokémon since dodging snowballs is impossible. Also note that your snowballs don’t have to match the size of the incoming snowballs. Even if the snowball you’re attempting to block is larger than yours, you’ll still be able to destroy it by throwing a smaller snowball.
Tip #2: When you’re throwing to hit opposing players, try to make bigger snowballs as much as possible. The bigger the snowball, the bigger its impact on your opponents, which means they will get weakened faster.
-
Pokémon HGSS
- Complete Pokéathlon Guide for Pokémon HGSS (Prizes, Stats & Mechanics)
Related Posts:
 How To Get Athlete Points Fast in Pokémon HGSS
 Where To Get PP Ups in Pokémon HGSS (All Locations)
 Where To Get Dawn Stones in Pokémon HGSS
 How To Get Metal Coats in Pokémon HG/SS
 Where To Get Dusk Stones in Pokémon HGSS (All Methods)
 Pokémon HG/SS Complete Breeding Guide + Tips
 Where To Get Thunderstones in Pokémon HGSS
 Where To Get Leaf Stones in Pokémon HGSS