| All Shell Bell Locations | ||
|---|---|---|
| # | Location | Repeatable? |
| 1 | Shoal Cave — Give the old man NPC 4 Shoal Shells and 4 Shoal Salts | Yes |
You can obtain a Shell Bell by trading 4 Shoal Salts and 4 Shoal Shells to an old man standing near Shoal Cave’s entrance. The cave’s appearance changes based on the time of day, with Shoal Salts being found exclusively during low tide and Shoal Shells only available during high tide.
Additionally, you’ll need a Pokémon with HM03 Surf to gather the required items to exchange for the Shell Bell.
If you ever need more Shell Bells you can simply repeat this process, since this exchange can be done any number of times.
Shoal Cave Mechanics
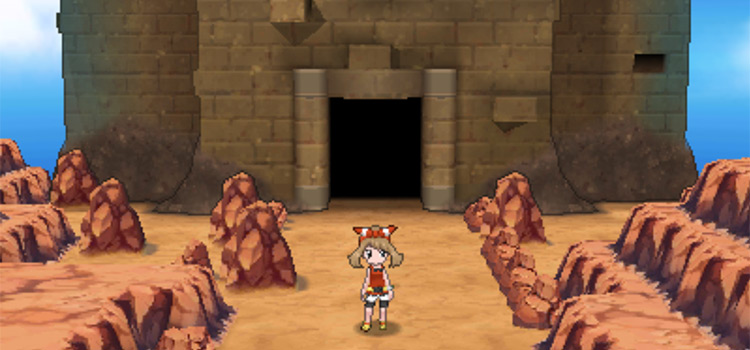
Shoal Cave is situated on Route 125, and it can be reached by surfing north from Mossdeep City. This unique cave features a high tide and low tide mechanic, making certain areas accessible only at specific times of day.
During low tide the underground sections of the cave become accessible, enabling you to find the four Shoal Salts needed for the Shell Bell
During high tide the cave is filled with water, making the underground sections inaccessible while providing access to the second floor. That’s where you can find the four Shoal Shells.
Here are the times when Shoal Cave is at low or high tide, and what the cave looks like during those times:
| Low Tide | High Tide |
|---|---|
| 3:00 – 8:59 (3:00 AM – 8:59 AM) | 9:00 – 14:59 (9:00 AM – 2:59 PM) |
| 15:00 – 20:59 (3:00 PM – 8:59 PM) | 21:00 – 2:59 (9:00 PM – 2:59 AM) |
So for a small list of prerequisites, here’s what you need before heading to Shoal Cave for Shell Bells:
- Have access to Route 125
- Bring a Pokémon that knows HM03 Surf
- Time your visit to either high or low tide depending on which item you currently need (adjust your 3DS or emulator’s time if needed)
Tip: To leave Shoal Cave quickly after you get the items you need, bring a Pokémon with Dig or an Escape Rope.
Getting Shell Bells (Step-by-Step)
With all this information in mind, plan your visit to Shoal Cave carefully to gather both items during their respective tides for the Shell Bell.
When you’re prepared, fly to Route 125 to get started.
Finding 4 Shoal Salts (Low Tide)
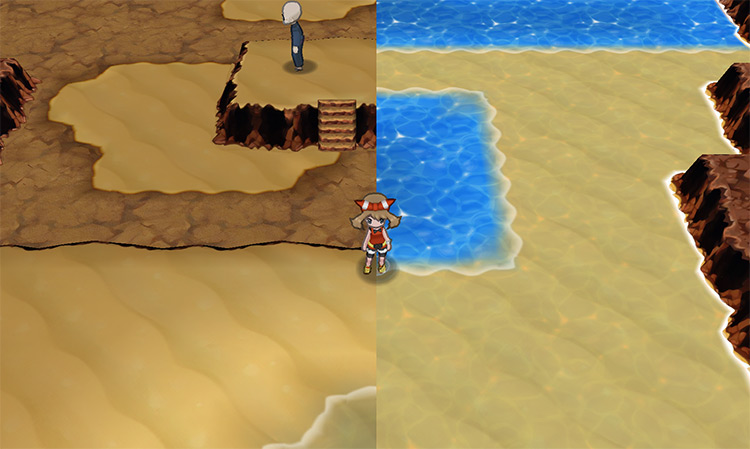
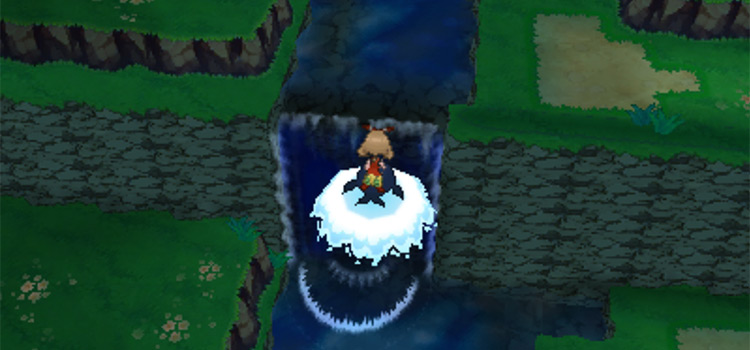
Step 1: Once you’ve flown back to Route 125, make your way northeast and Surf across the water to reach the entrance of Shoal Cave.
Step 2: If you’ve arrived during low tide, the water inside the cave will have receded. Go down the nearby stairs and start heading north through the cave.
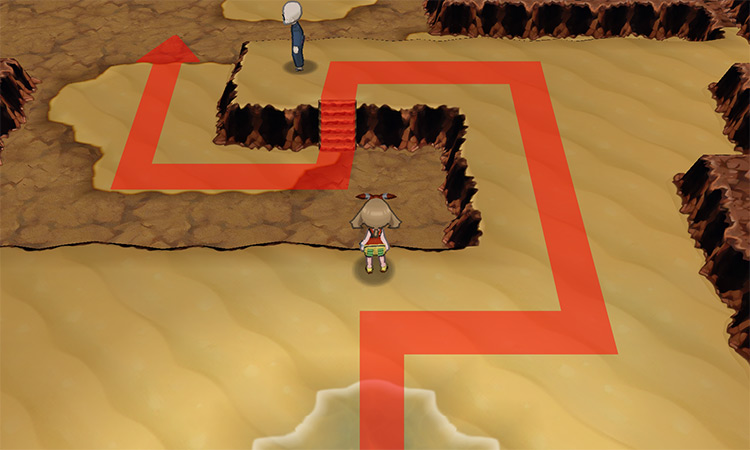
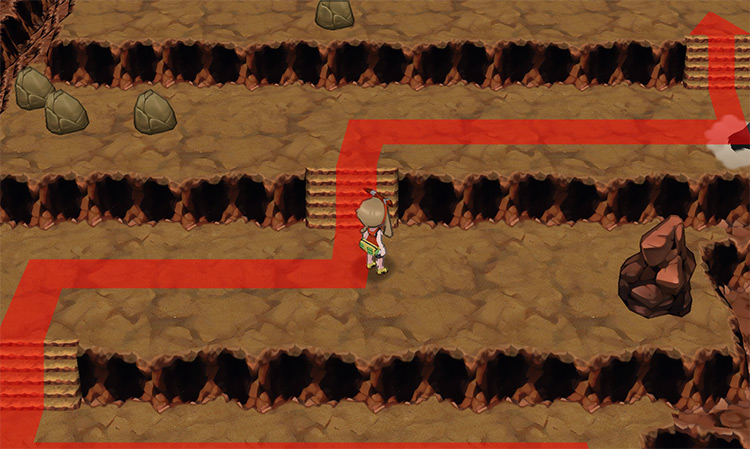
Step 3: Continue north until you discover a cave entrance in the north wall, then enter it to proceed deeper into Shoal Cave.
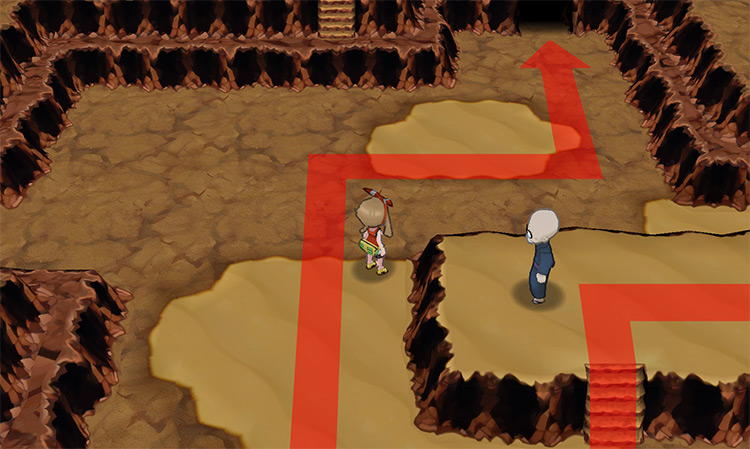
Step 4: In the following room, climb up the stairs in the middle.
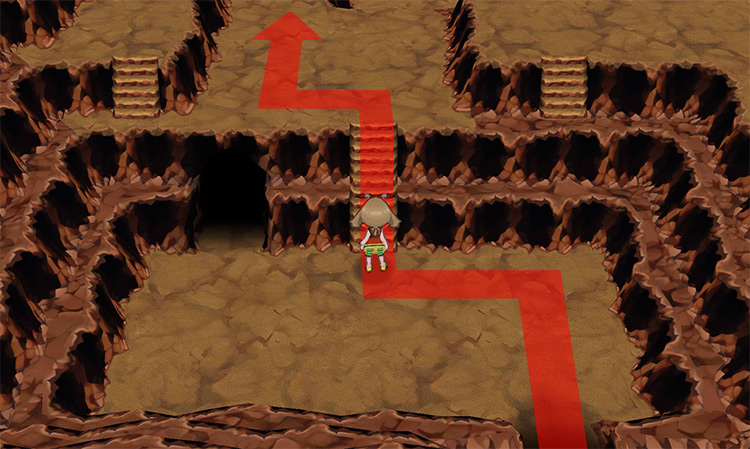
Step 5: From the top of the stairs, head north and go down the ladder situated on the room’s right side.
Step 6: After descending the ladder, go east and pick up the first Shoal Salt located on the room’s right side.
Step 7: After obtaining the first Shoal Salt, locate and climb four consecutive staircases in the middle of the room. These will bring you to the northernmost part of this area.
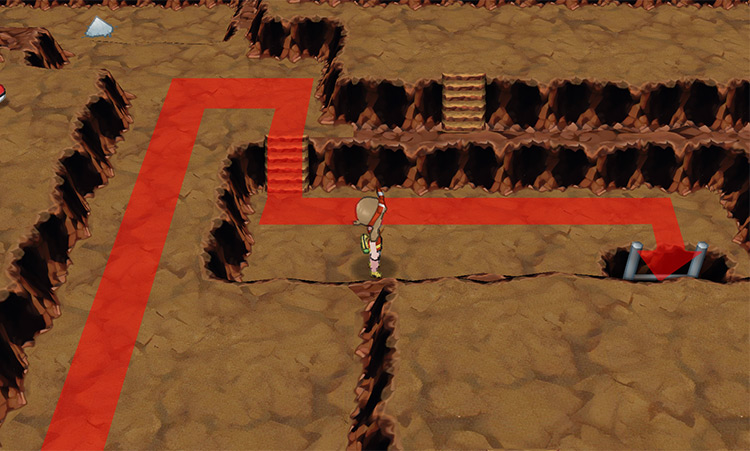
Step 8: In the highest area of the room, locate a ladder on the left and ascend it.
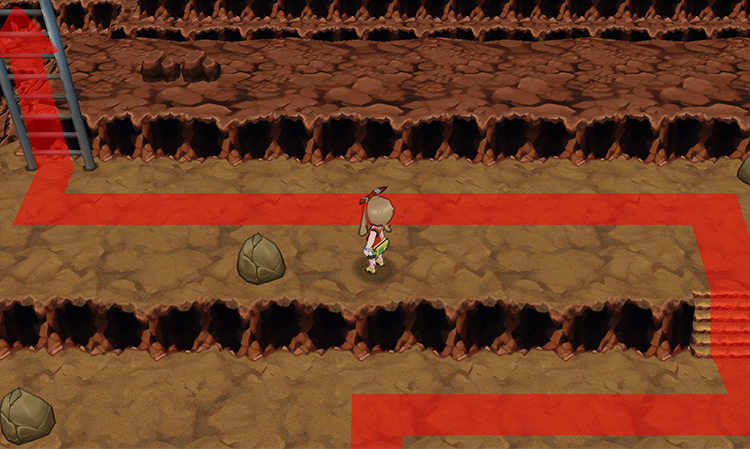
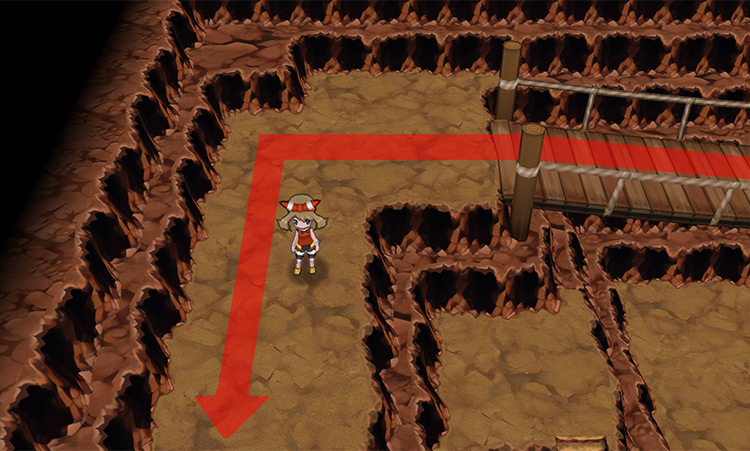
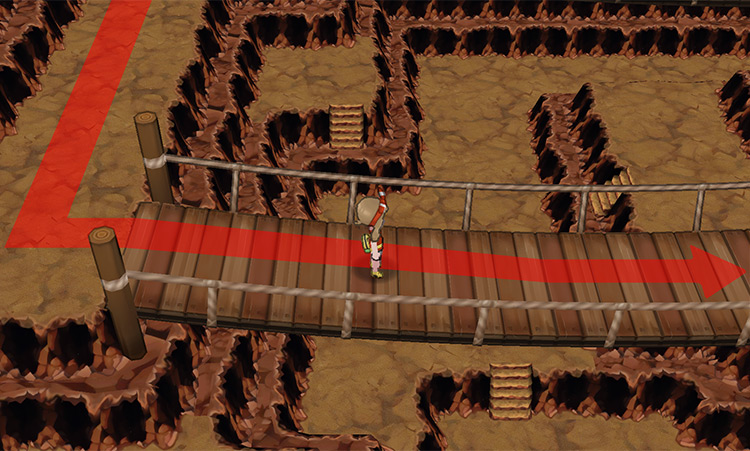
Step 9: After climbing the ladder, head west and cross the wooden bridge on the left-hand side.
Step 10: Upon reaching the other side, travel straight down the nearby passageway.
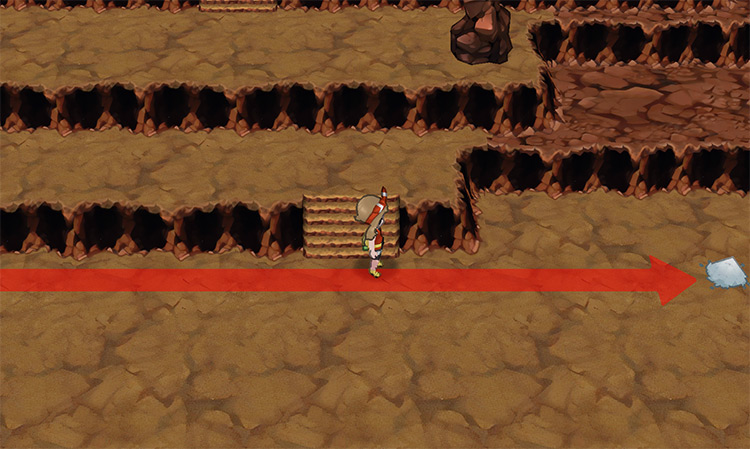
Step 11: You’ll eventually find another bridge on the right-hand side; cross this next bridge.
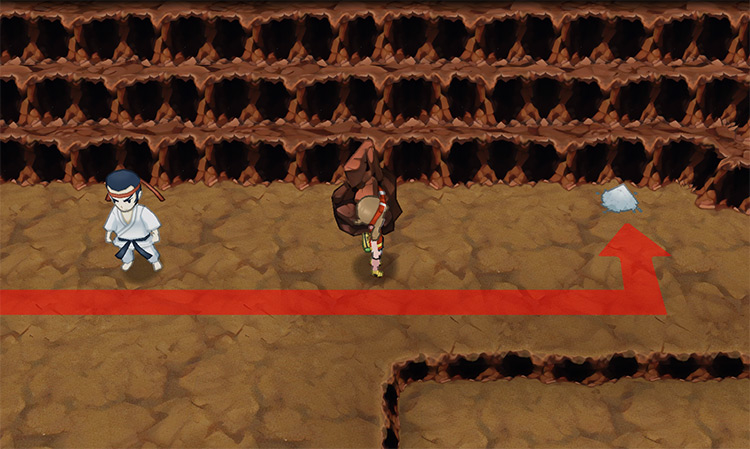
Step 12: After crossing the second bridge, look for the nearby ladder and make your way down it.

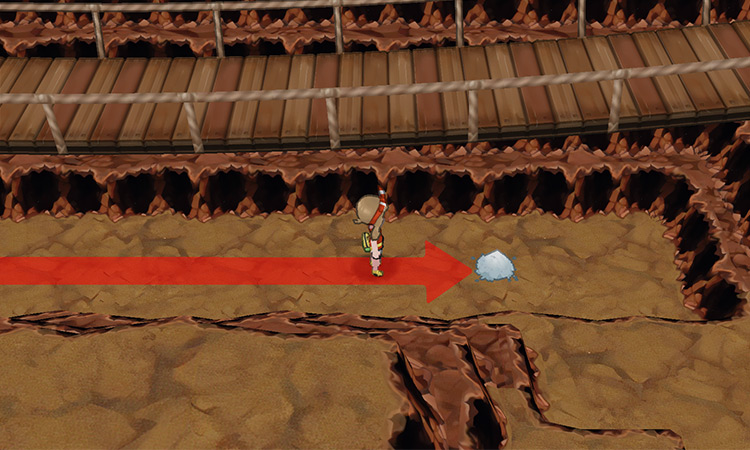
Step 13: After climbing down, immediately head east past a Black Belt and pick up the second Shoal Salt.
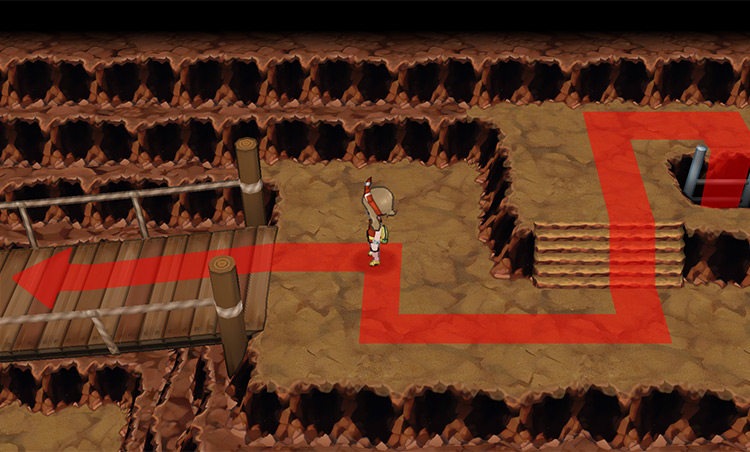
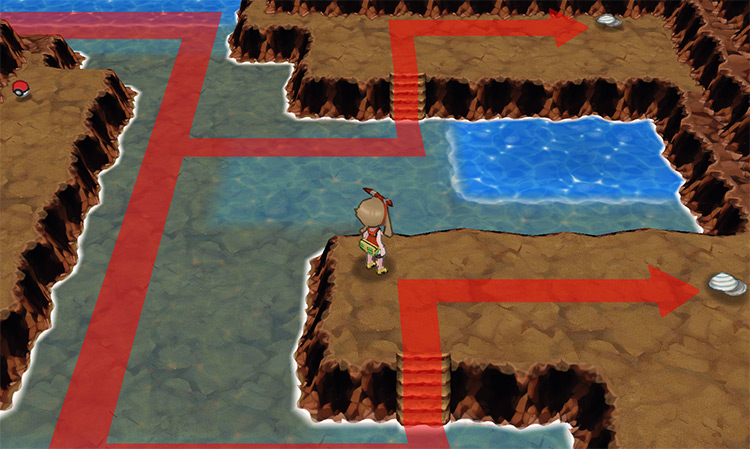
Step 14: After securing the second Shoal Salt, head west and go past the original ladder you climbed down – just past that should be another ladder placed even further west.
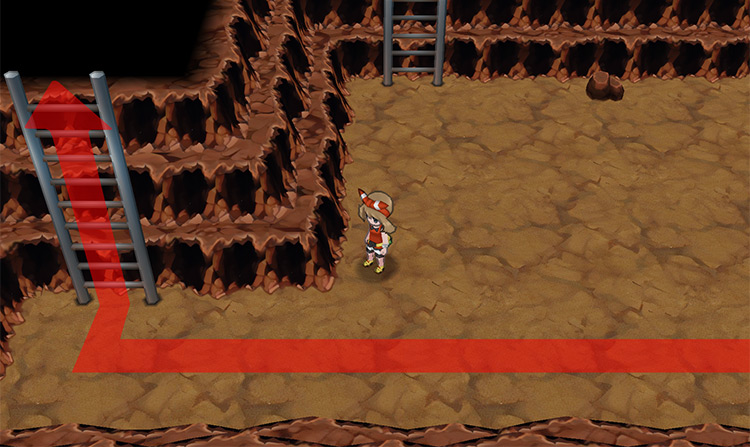
Step 15: Once you’ve gone up that furthest ladder, you can collect the third Shoal Salt located directly to the left.
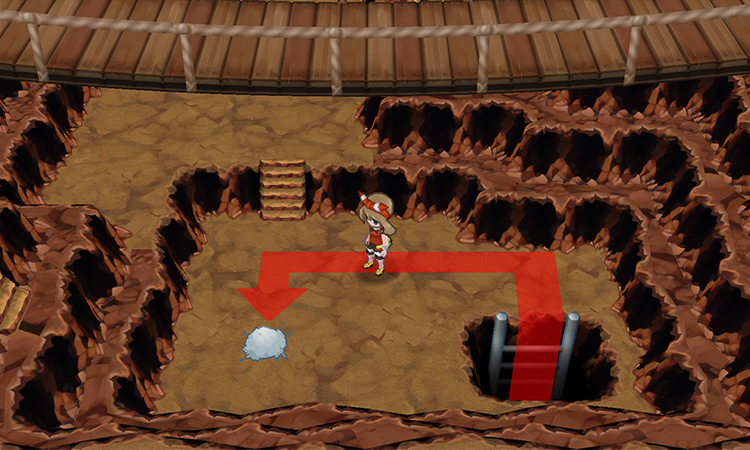
Step 16: With the third Shoal Salt in hand, make your way north and take a right when you reach the top of the room.
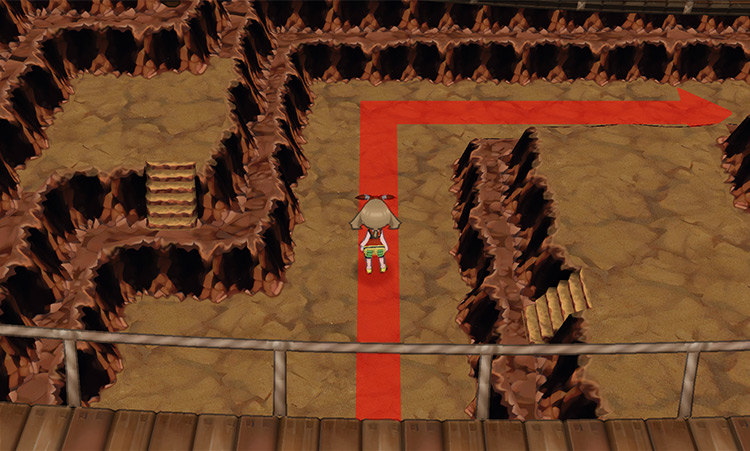
Step 17: At the end of the path collect the fourth and final Shoal Salt you need.
Finding 4 Shoal Shells (High Tide)
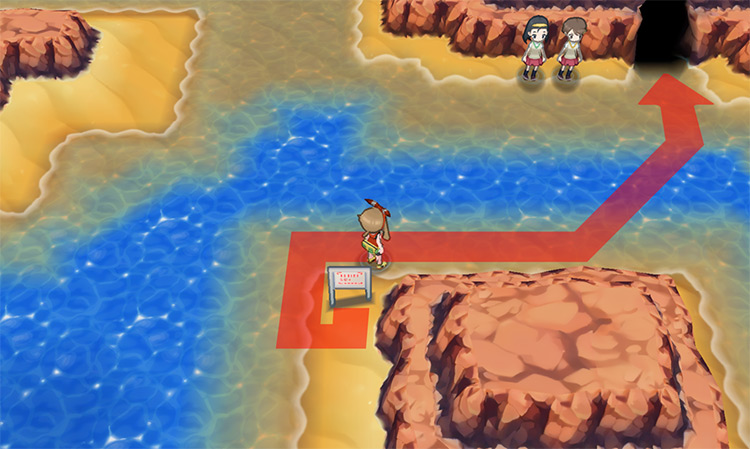
Step 1: With all 4 Shoal Salts collected, return to Shoal Cave during high tide.
If timed correctly, the cave should be filled with water. So once you enter the cave just Surf north past the old man using HM03.

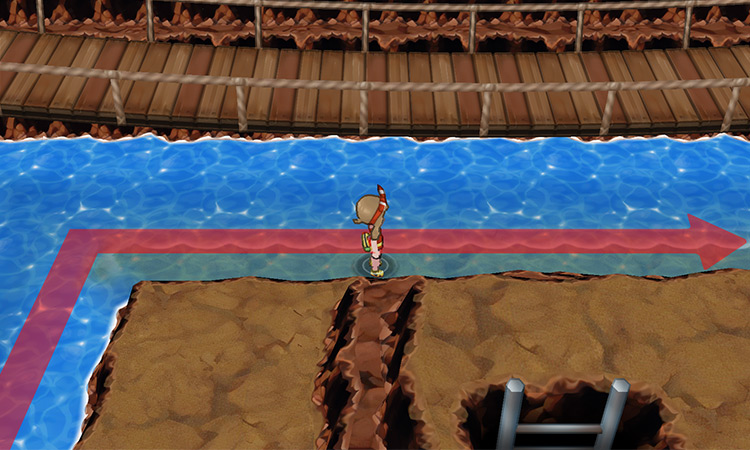
Step 2: Disembark near the stairs at the northern end, then enter the cave entrance located on the room’s northwest side.
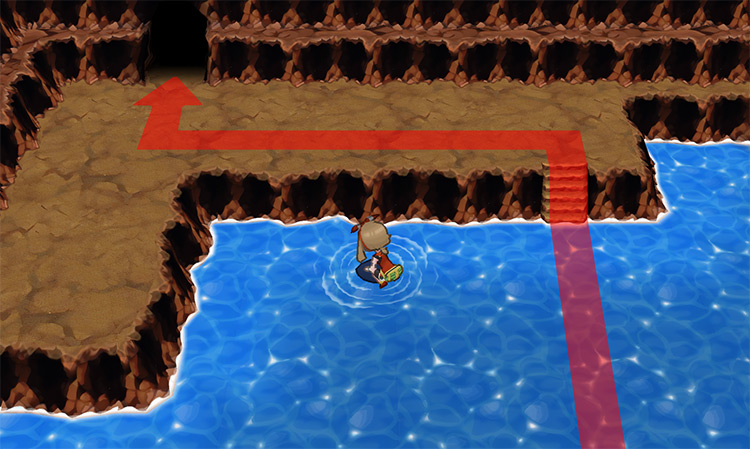
Step 3: In the next room, find where the stairs meet the water on the left side and use Surf again.
Step 4: After passing under the bridge you should see the first two Shoal Shells — one on the left and one on the right.
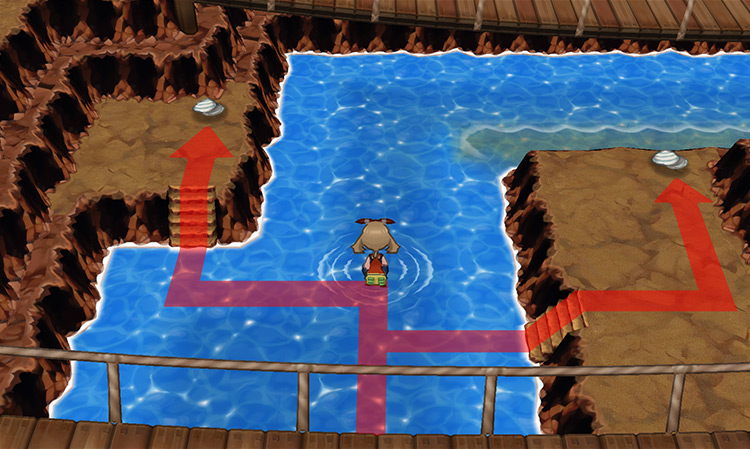
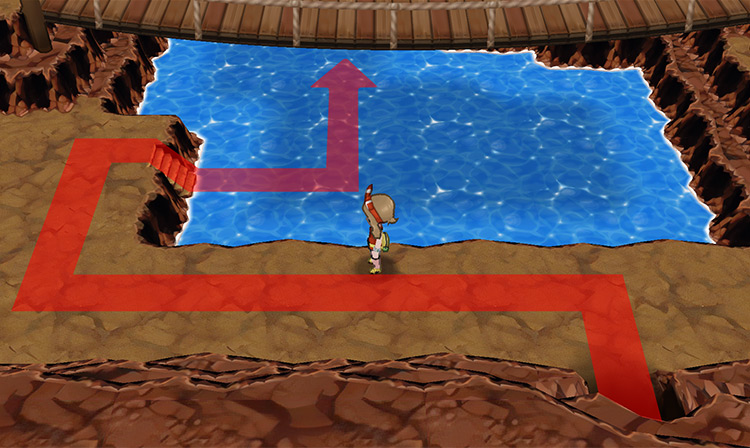
Step 5: Once you’ve grabbed the first pair of Shoal Shells, return to the water and proceed north, then take a right at the top of the room to follow the watery passageway.
Step 6: As you make your way to the room’s right side, you’ll find the last two Shoal Shells each sitting on their own platforms.
Exchanging Shoal Items for a Shell Bell

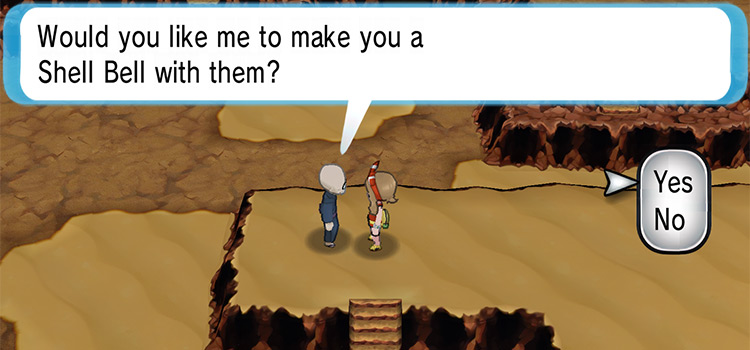
After collecting 4 Shoal Salts and 4 Shoal Shells, make your way back to the old man located near the entrance of Shoal Cave.
Speak to him and he’ll ask if you’d like him to create a Shell Bell for you.
Choose “Yes,” and he will give you a Shell Bell – this is also a repeatable process that you can do as many times as you’d like.
How the Shell Bell Works
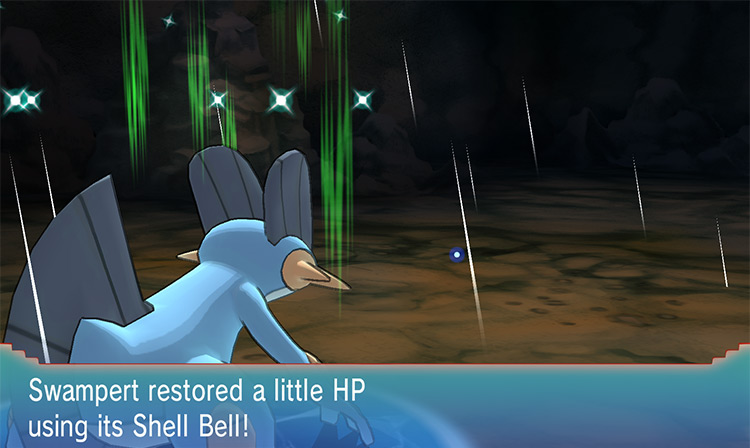
When your Pokémon is holding the Shell Bell as an item in battle, it restores 1/8 of the damage inflicted on the opposing Pokémon as HP to your Pokémon.
In certain situations like during your regular playthrough, the Shell Bell can be a helpful recovery item to restore a bit of a Pokémon’s HP during battle.
However, the Shell Bell isn’t very popular in competitive battles because it’s just not good enough.
For attackers, they would typically prefer an item that boosts their damage or Speed, such as the Life Orb or Choice Scarf.
On the other hand, defensive or support Pokémon tend to favor the consistent healing provided by Leftovers. As a result, the Shell Bell often gets overshadowed by these better options. But it’s still a great choice for any single-player playthrough of Omega Ruby or Alpha Sapphire.

-
Pokémon ORAS
- How To Get Shell Bells in Pokémon ORAS
Related Posts:
 How To Get the Slowbronite in Pokémon ORAS
 How To Get the Glalitite in Pokémon ORAS
 How To Get TM79 Frost Breath in Pokémon ORAS
 Where To Get the Never-Melt Ice in Pokémon ORAS
 How To Get TM07 Hail in Pokémon ORAS
 How To Get TM81 X-Scissor in Pokémon ORAS
 Where To Get TM64 Explosion in Pokémon ORAS
 How To Get TM65 Shadow Claw in Pokémon ORAS