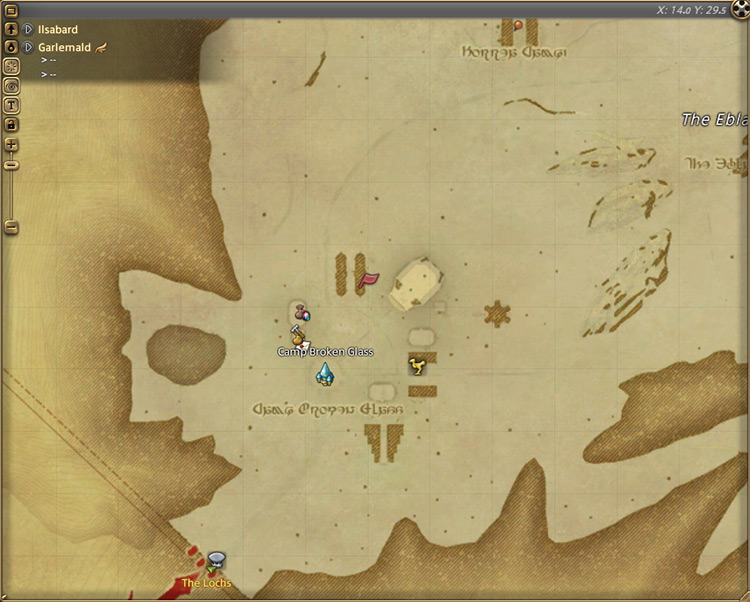
You can unlock the Level 83 dungeon The Tower of Babil by accepting the Level 83 MSQ “Gateway of the Gods” from Lucia at Camp Broken Glass in Garlemald (X:14.0, Y:29.5).
This MSQ is part of the patch 6.0 Main Scenario Questline for the Endwalker expansion.
TABLE OF CONTENTS
Step-by-Step Unlock Guide
- Accept the Level 83 MSQ “Gateway of the Gods” from Lucia at Camp Broken Glass in Garlemald (X:14.0, Y:29.5).
- Speak with Lyse in Garlemald (X:12.2, Y:14.6).
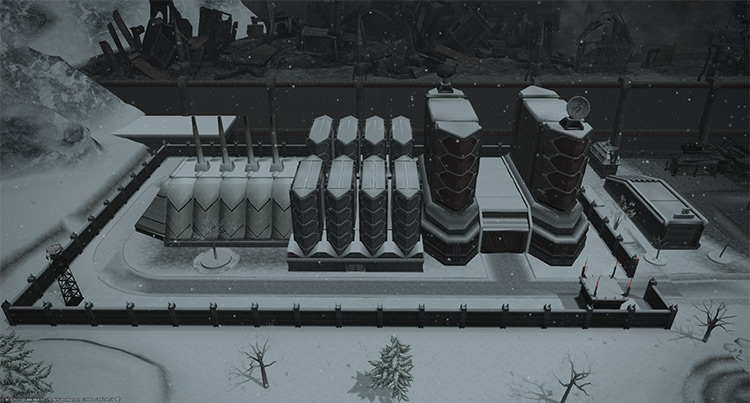
- Meet Pipin outside the Enceladeum in Garlemald (X:11.9, Y:7.9).
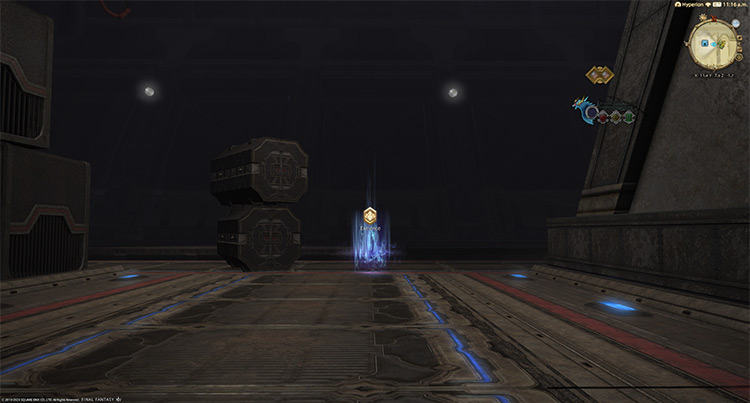
- Talk to the Lente’s Arrow nearby to enter the Enceladeum and interact with the destination point inside.
Detailed Unlocking Guide
The Tower of Babil is the second story dungeon you’ll unlock in the Endwalker expansion. So you’ll need to finish every MSQ leading up to “Gateway of the Gods” before it can be unlocked.
Once you’ve unlocked the quest, talk to Lucia at Camp Broken Glass in Garlemald (X:14.0, Y:29.5) to begin.
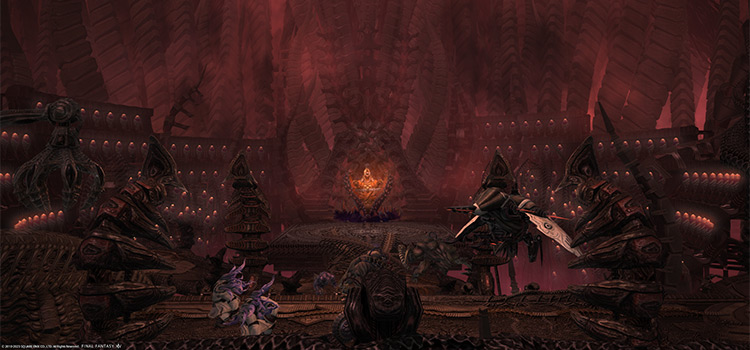
At this point in the main story, you’ve just recovered your body from Zenos’ control and are now preparing to enter the Tower of Babil to defeat the primal Anima.
Maxima proposes a plan to send a diversionary contingent to “storm” the tower directly while your party infiltrates the tower from the Enceladeum.
After finalizing the plan, speak with Lyse in Garlemald (X:12.2, Y:14.6) to meet your allies and review your roles for the mission.
Then talk to Pipin outside the Enceladeum in Garlemald (X:11.9, Y:7.9).
The marshal reports that a path toward the tower has been secured and the operation is about to begin.
Once you’re ready, talk to the Lente’s Arrow nearby to enter the station and interact with the destination point to unlock The Tower of Babil. This dungeon requires at least a Level 83 Disciple of War or Magic job and an average item level of 505 to enter.
Boss #1: Barnabas
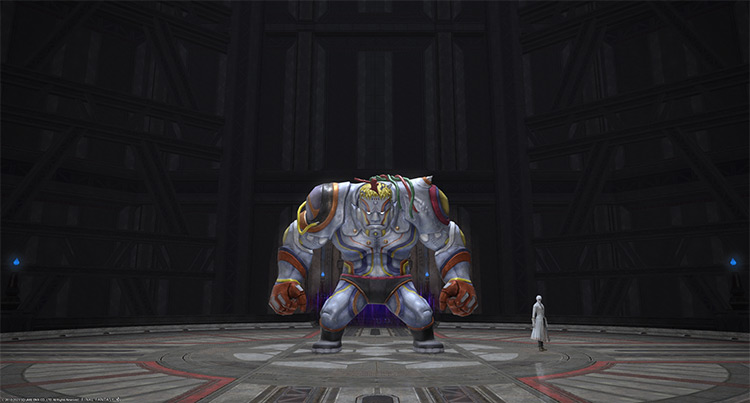
After the boss attacks Dr. Lugae with “Ground and Pound,” the outer ring of the arena will be covered with electricity. Standing in it will result in a 15-second “Electrocution” DoT.
Most of the boss’ attacks apply stacking “Vulnerability Up” debuffs for 60 seconds.
Mechanics
- Ground and Pound: A large column attack with a delayed telegraph on a random player. This attack can be used consecutively.
- Dynamic Scrapline: Each player will receive either a positive or negative charge while the boss prepares a point-blank AoE attack that can knock players back. Check the boss’ charge and move appropriately to avoid the point-blank AoE and the outer ring.
- If you have the same charge as the boss, stand just outside the point-blank AoE.
- If you have the opposite charge as the boss, stand near the outer ring.
- Shocking Force: A stack marker on a random player. Run toward the affected player to share incoming damage.
- Dynamic Pound: The boss will move to the north and charge a knockback column attack down the middle with a specific charge, similar to “Dynamic Scrapline.”
- If you have the same charge as the boss, stand just outside the column attack.
- If you have the opposite charge as the boss, stand on the eastern or western edge of the arena.
- Thunderball + Rolling Scrapline: Four thunder orbs will spawn while the boss charges a point-blank AoE. Stand near the outer ring between two thunder orbs to avoid.
Rewards
| Name | Type | Rarity |
|---|---|---|
| Imperial Bracelet of Aiming | Bracelets | Dungeon (Green) |
| Imperial Bracelet of Casting | Bracelets | Dungeon (Green) |
| Imperial Bracelet of Fending | Bracelets | Dungeon (Green) |
| Imperial Bracelet of Healing | Bracelets | Dungeon (Green) |
| Imperial Bracelet of Slaying | Bracelets | Dungeon (Green) |
| Imperial Boots of Aiming | Feet | Dungeon (Green) |
| Imperial Boots of Casting | Feet | Dungeon (Green) |
| Imperial Boots of Fending | Feet | Dungeon (Green) |
| Imperial Boots of Healing | Feet | Dungeon (Green) |
| Imperial Boots of Maiming | Feet | Dungeon (Green) |
| Imperial Boots of Scouting | Feet | Dungeon (Green) |
| Imperial Boots of Striking | Feet | Dungeon (Green) |
| Imperial Cap of Aiming | Head | Dungeon (Green) |
| Imperial Cap of Fending | Head | Dungeon (Green) |
| Imperial Cap of Maiming | Head | Dungeon (Green) |
| Imperial Hood of Scouting | Head | Dungeon (Green) |
| Imperial Ushanka of Casting | Head | Dungeon (Green) |
| Imperial Ushanka of Healing | Head | Dungeon (Green) |
| Imperial Ushanka of Striking | Head | Dungeon (Green) |
| Imperial Ring of Aiming | Ring | Dungeon (Green) |
| Imperial Ring of Casting | Ring | Dungeon (Green) |
| Imperial Ring of Fending | Ring | Dungeon (Green) |
| Imperial Ring of Healing | Ring | Dungeon (Green) |
| Imperial Ring of Slaying | Ring | Dungeon (Green) |
Boss #2: Lugae
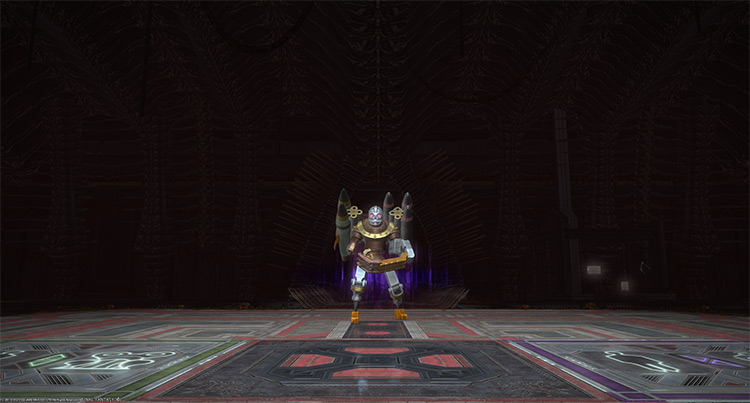
Most of the boss’ attacks apply stacking “Vulnerability Up” debuffs for 60 seconds.
Mechanics
- Thermal Suppression: A room-wide AoE attack.
- Magitek Missile: Ground AoEs on two random players.
- Magitek Ray: A column attack on a random player.
- Downpour: The boss will apply “Heavy” and stacking “Breathless” debuffs on all players. Getting eight stacks of “Breathless” will instantly kill you. Stand on the green platform to dispel the debuffs and turn into a frog for 20 seconds.
- Magitek Chakram: Five column AoEs will cover the entire arena. Stand on the purple platform to receive a “Minimum” debuff for 20 seconds which will allow you to dodge the chakrams.
- Magitek Explosive: Three spiked balls will drop from above and eventually explode into cross-shaped AoEs.
Rewards
| Name | Type | Rarity |
|---|---|---|
| Imperial Earring of Aiming | Earrings | Dungeon (Green) |
| Imperial Earring of Casting | Earrings | Dungeon (Green) |
| Imperial Earring of Fending | Earrings | Dungeon (Green) |
| Imperial Earring of Healing | Earrings | Dungeon (Green) |
| Imperial Earring of Slaying | Earrings | Dungeon (Green) |
| Imperial Gloves of Aiming | Hands | Dungeon (Green) |
| Imperial Gloves of Casting | Hands | Dungeon (Green) |
| Imperial Gloves of Fending | Hands | Dungeon (Green) |
| Imperial Gloves of Healing | Hands | Dungeon (Green) |
| Imperial Gloves of Maiming | Hands | Dungeon (Green) |
| Imperial Gloves of Scouting | Hands | Dungeon (Green) |
| Imperial Gloves of Striking | Hands | Dungeon (Green) |
| Imperial Bottoms of Casting | Legs | Dungeon (Green) |
| Imperial Breeches of Aiming | Legs | Dungeon (Green) |
| Imperial Breeches of Fending | Legs | Dungeon (Green) |
| Imperial Breeches of Scouting | Legs | Dungeon (Green) |
| Imperial Breeches of Striking | Legs | Dungeon (Green) |
| Imperial Longkilt of Healing | Legs | Dungeon (Green) |
| Imperial Longkilt of Maiming | Legs | Dungeon (Green) |
| Imperial Choker of Aiming | Necklace | Dungeon (Green) |
| Imperial Choker of Casting | Necklace | Dungeon (Green) |
| Imperial Choker of Fending | Necklace | Dungeon (Green) |
| Imperial Choker of Healing | Necklace | Dungeon (Green) |
| Imperial Choker of Slaying | Necklace | Dungeon (Green) |
Boss #3: Anima
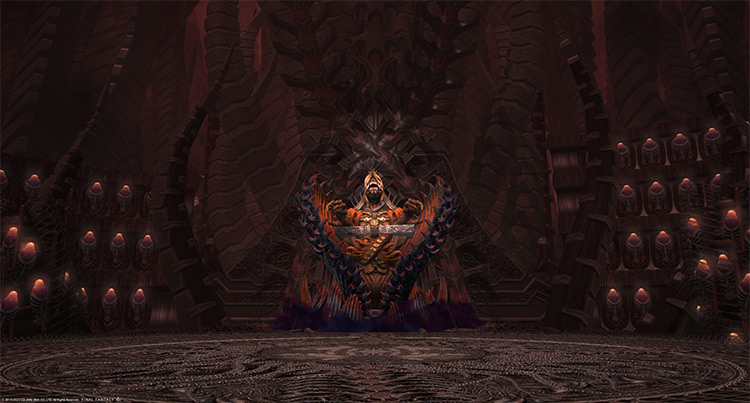
Most of the boss’ attacks apply stacking “Vulnerability Up” debuffs for 60 seconds.
Mechanics
Phase 1: Anima’s Upper Half
- Lunar Nail + Phantom Pain: Purple nails will appear and eventually tether to one another before exploding into AoEs. Stand in a quadrant without a nail in the corner.
- Mega Graviton: A room-wide AoE attack that spawns “Mega-Graviton” black holes in each corner of the arena.
- Aetherial Pull: Each player will be tethered to a “Mega-Graviton” black hole. Keep running away from the black hole until your tether becomes a thin orange line to avoid taking massive damage.
- Pater Patriae: A large column attack down the middle.
- Boundless Pain: The boss will draw aether from its surroundings and pull players toward the center. Then, it’ll use a continuous AoE that expands outward. Run away from the center as soon as possible.
- Imperatum: All players will be stunned for 10 seconds as the fight transitions into Phase 2.
Phase 2: Anima’s Lower Half
In this phase, you must defeat the boss’ lower half before its “Chaos” gauge reaches 100. After doing so, the fight will repeat from Phase 1 (except for Imperatum) until the boss dies.
- Obliviating Claw: Two sets of nails will appear on both sides of the arena. These nails will eventually rush to the other side, damaging anyone in their paths. Determine which set of nails spawned first and dodge accordingly.
- Erupting Pain: Two random players will be marked with AoEs that will follow them for some time. Drop your AoEs away from your party.
- Oblivion: A multi-hit, room-wide ultimate AoE attack that deals damage based on the boss’ “Chaos” gauge. Kill the boss’ lower half before the gauge reaches 100, or you will wipe.
Rewards
- Anima Triple Triad Card (not guaranteed)
| Name | Type | Rarity |
|---|---|---|
| Imperial Magitek Index | Arcanist’s Grimoire | Dungeon (Green) |
| Imperial Magitek Bow | Archer’s Arm | Dungeon (Green) |
| Imperial Magitek Planisphere | Astrologian’s Arm | Dungeon (Green) |
| Imperial Coat of Aiming | Body | Dungeon (Green) |
| Imperial Coat of Casting | Body | Dungeon (Green) |
| Imperial Coat of Fending | Body | Dungeon (Green) |
| Imperial Coat of Healing | Body | Dungeon (Green) |
| Imperial Coat of Maiming | Body | Dungeon (Green) |
| Imperial Coat of Scouting | Body | Dungeon (Green) |
| Imperial Coat of Striking | Body | Dungeon (Green) |
| Imperial Magitek Glaives | Dancer’s Arm | Dungeon (Green) |
| Imperial Magitek Guillotine | Dark Knight’s Arm | Dungeon (Green) |
| Imperial Magitek Sawback | Gunbreaker’s Arm | Dungeon (Green) |
| Imperial Magitek Spear | Lancer’s Arm | Dungeon (Green) |
| Imperial Magitek Handgonne | Machinist’s Arm | Dungeon (Green) |
| Imperial Magitek Axe | Marauder’s Arm | Dungeon (Green) |
| Paladin’s Imperial Arms (IL 530) | Other | Dungeon (Green) |
| Imperial Magitek Baghnakhs | Pugilist’s Arm | Dungeon (Green) |
| Imperial Magitek War Scythe | Reaper’s Arm | Dungeon (Green) |
| Imperial Magitek Tuck | Red Mage’s Arm | Dungeon (Green) |
| Imperial Magitek Cleavers | Rogue’s Arm | Dungeon (Green) |
| Imperial Magitek Wings | Sage’s Arm | Dungeon (Green) |
| Imperial Magitek Samurai Blade | Samurai’s Arm | Dungeon (Green) |
| Imperial Magitek Codex | Scholar’s Arm | Dungeon (Green) |
| Imperial Magitek Cane | Two-handed Conjurer’s Arm | Dungeon (Green) |
| Imperial Magitek Rod | Two-handed Thaumaturge’s Arm | Dungeon (Green) |
| Wind-up Anima | Minion | Basic |
| Garlemald Express Orchestrion Roll | Orchestrion Roll | Basic |
Extra Treasure Coffers
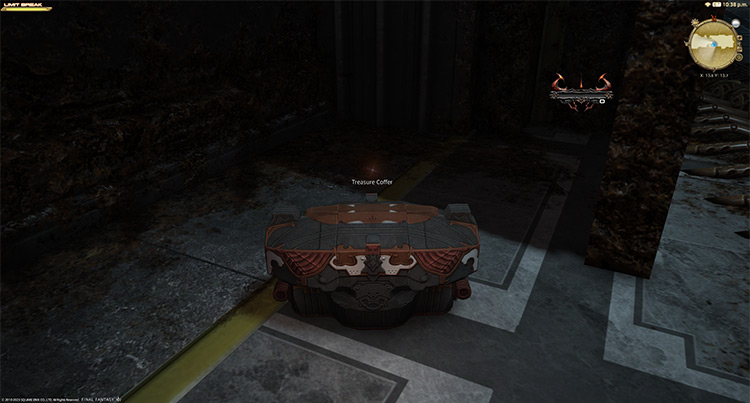
Apart from the boss rewards, there are four treasure coffers located throughout The Tower of Babil that you can open for more gear rewards. Here are their coordinates:
- (X:13.4, Y:13.8)
- (X:10.8, Y:13.6)
- (X:11.2, Y:11.9)
- (X:10.3, Y:10.8)
-
Final Fantasy XIV
- FFXIV The Tower of Babil: Unlock + Dungeon Guide
Related Posts:
 FFXIV Ala Mhigo Dungeon: Unlock + Boss Guide
 FFXIV Lapis Manalis: Unlock + Dungeon Boss Guide
 FFXIV The Qitana Ravel: Unlock + Boss Guide
 FFXIV Dohn Mheg: How To Unlock + Boss Guide
 FFXIV Malikah’s Well: How To Unlock + Dungeon Guide
 FFXIV The Tower of Zot: Unlock + Boss Guide
 FFXIV Doma Castle: Unlock + Boss & Loot Guide
 FFXIV Holminster Switch: How To Unlock + Boss Guide