
To unlock the Level 81 dungeon The Tower of Zot you need to accept the Level 81 MSQ “In the Dark of the Tower” from Krile at the Main Hall (X:6.0, Y:6.1) in Old Sharlayan.
This MSQ is part of the patch 6.0 Main Scenario Questline for the Endwalker expansion.
In this guide we’ll cover the mechanics for each boss in this dungeon, plus a list of all the loot you can get from each one.
TABLE OF CONTENTS
Step-by-Step Unlock Guide
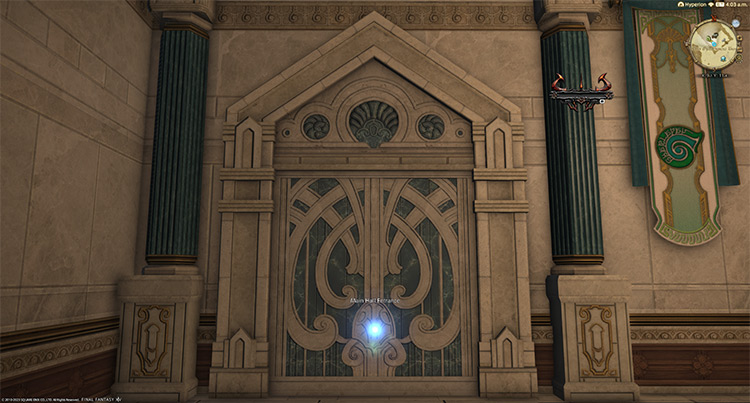
- Accept the Level 81 MSQ “In the Dark of the Tower” from Krile at the Main Hall (X:6.0, Y:6.1) in Old Sharlayan. The Main Hall can be accessed through the Baldesion Annex in Old Sharlayan (X:9.0, Y:11.1).
- Speak with Nahbdeen at the Hamsa Hatchery in Thavnair (X:10.0, Y:10.0).
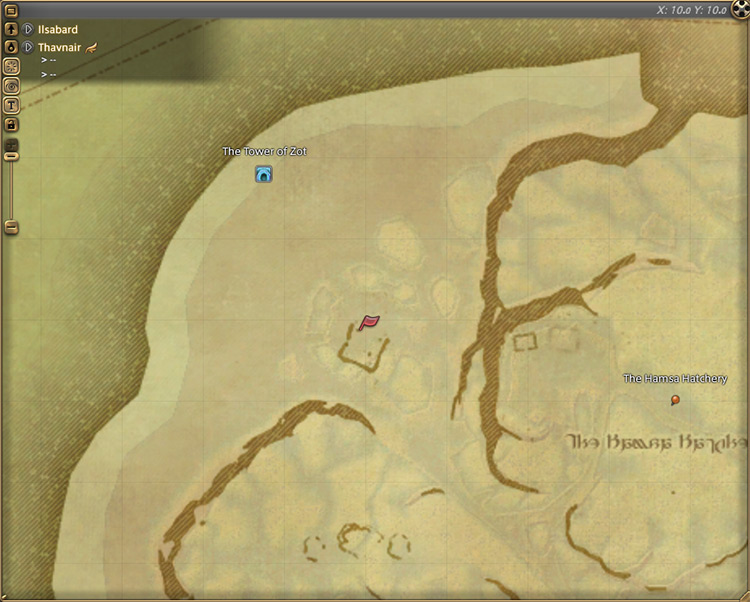
- Interact with the destination point in Thavnair (X:8.8, Y:8.3).
Detailed Unlocking Guide
The Tower of Zot is the first story dungeon that can be unlocked from the Endwalker expansion.
So you’ll need to finish every MSQ leading up to the Level 81 MSQ “In the Dark of the Tower” before it can be unlocked, including the MSQs all the way back to A Realm Reborn.
After that, talk to Krile at the Main Hall (X:6.0, Y:6.1) in Old Sharlayan to begin.
You can enter the Main Hall through the Baldesion Annex in Old Sharlayan (X:9.0, Y:11.1).
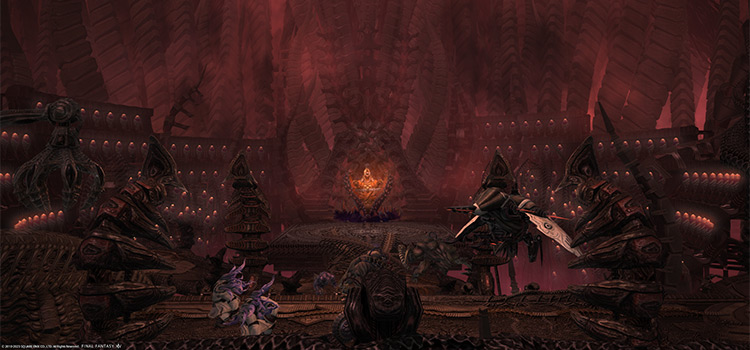
At this point in the main story, The Tower of Zot continues to wreak havoc in Thavnair. Recent kidnappings have prompted the scions to take action. Upon careful deliberation, the scions agree that infiltrating the tower and deactivating its core should be the main priority.
Finish the cutscene before talking to Nahbdeen at the Hamsa Hatchery in Thavnair (X:10.0, Y:10.0) to continue.
The satrap’s trusted warrior informs you that the warding scales used to avoid tempering are arriving soon and asks you to wait by the docks.
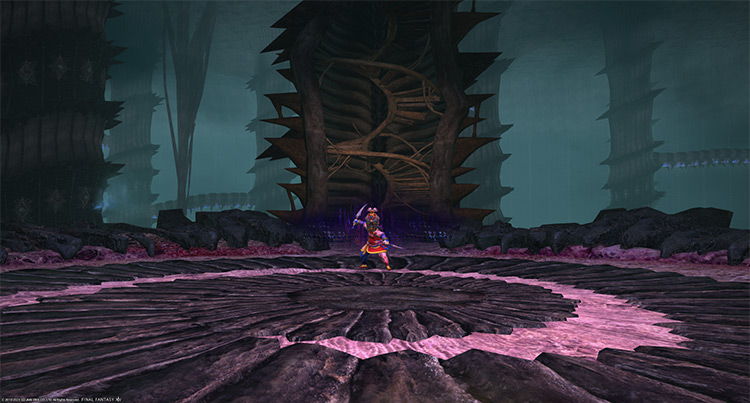
Head to Thavnair (X:8.8, Y:8.3) and interact with the destination point to unlock The Tower of Zot. This dungeon requires at least a Level 81 Disciple of War or Magic job and an average item level of 500 to enter.
Boss #1: Minduruva
Most of the boss’ attacks apply stacking “Vulnerability Up” debuffs for 60 seconds and happen in quick succession.
Mechanics
- Manusya Bio: A red tankbuster marker on the primary target that applies a 15-second “Poison” DoT. Dispel the DoT and heal through the damage.
- Manusya Blizzard III: Narrow cone AoEs around the boss. Stand between the gaps to avoid.
- Manusya Fire III: A room-wide donut AoE.
- Manusya Thunder III: A small point-blank AoE followed by consecutive circle AoEs toward the boss’ cardinal directions.
- Manusya Bio III: A 180-degree frontal AoE that spans the entire arena.
- Manusya Fire: A strong single-target attack on a random player.
- Transmute: The boss will spawn an orb that’ll float toward an area and use the mechanic it transmuted. The following attacks can be transmuted: Bio III, Blizzard III, Fire III, and Thunder III. For example, if the boss used “Transmute Fire III,” it’ll use a room-wide donut AoE on where the orb lands, so run toward the orb.
- Dhrupad: The boss will use three different DoTs on the two DPS and healer. Each DoT (Burns, Electrocution, and Frostbite) lasts for 12 seconds and can’t be dispelled.
Rewards
| Name | Type | Rarity |
|---|---|---|
| Manusya Amulet of Aiming | Bracelets | Dungeon (Green) |
| Manusya Amulet of Casting | Bracelets | Dungeon (Green) |
| Manusya Amulet of Fending | Bracelets | Dungeon (Green) |
| Manusya Amulet of Healing | Bracelets | Dungeon (Green) |
| Manusya Amulet of Slaying | Bracelets | Dungeon (Green) |
| Manusya Greaves of Casting | Feet | Dungeon (Green) |
| Manusya Greaves of Striking | Feet | Dungeon (Green) |
| Manusya Sabatons of Aiming | Feet | Dungeon (Green) |
| Manusya Sabatons of Fending | Feet | Dungeon (Green) |
| Manusya Sabatons of Healing | Feet | Dungeon (Green) |
| Manusya Sabatons of Maiming | Feet | Dungeon (Green) |
| Manusya Sabatons of Scouting | Feet | Dungeon (Green) |
| Manusya Helm of Aiming | Head | Dungeon (Green) |
| Manusya Helm of Fending | Head | Dungeon (Green) |
| Manusya Helm of Striking | Head | Dungeon (Green) |
| Manusya Mask of Casting | Head | Dungeon (Green) |
| Manusya Mask of Healing | Head | Dungeon (Green) |
| Manusya Visor of Maiming | Head | Dungeon (Green) |
| Manusya Visor of Scouting | Head | Dungeon (Green) |
| Manusya Ring of Aiming | Ring | Dungeon (Green) |
| Manusya Ring of Casting | Ring | Dungeon (Green) |
| Manusya Ring of Fending | Ring | Dungeon (Green) |
| Manusya Ring of Healing | Ring | Dungeon (Green) |
| Manusya Ring of Slaying | Ring | Dungeon (Green) |
Boss #2: Sanduruva

Mechanics
- Isitva Siddhi: A red tankbuster marker on the primary target. Mitigate and heal through the damage.
- Prapti Siddhi: Line attacks toward each player used one after another.
- Manusya Berserk: Purple orbs that cover most of the arena and eventually explode into massive point-blank AoEs. Anyone hit will receive a “Manusya Berserk” debuff, causing them to run to the boss and get hit by “Prakamya Siddhi.” Run to small safe spaces near the outer edges.
- Prakamya Siddhi: A point-blank AoE attack that applies a stacking “Vulnerability Up” debuff for 60 seconds.
- Manusya Stop: The boss will apply “Temporal Displacement” debuffs on all players with varying timers before using “Prapti Siddhi.” Spread out to avoid overlap and heal through the damage.
- Manusya Confuse: Five clones will reappear along with the boss. After some time, the clones will transform into “Manusya Berserk” orbs. Run behind the real Sanduruva to avoid getting hit. Each clone will be dancing or using an emote, and the boss will retain any DoTs it received in its hotbar.
Rewards
| Name | Type | Rarity |
|---|---|---|
| Manusya Earrings of Aiming | Earrings | Dungeon (Green) |
| Manusya Earrings of Casting | Earrings | Dungeon (Green) |
| Manusya Earrings of Fending | Earrings | Dungeon (Green) |
| Manusya Earrings of Healing | Earrings | Dungeon (Green) |
| Manusya Earrings of Slaying | Earrings | Dungeon (Green) |
| Manusya Gauntlets of Aiming | Hands | Dungeon (Green) |
| Manusya Gauntlets of Casting | Hands | Dungeon (Green) |
| Manusya Gauntlets of Fending | Hands | Dungeon (Green) |
| Manusya Gauntlets of Healing | Hands | Dungeon (Green) |
| Manusya Gauntlets of Scouting | Hands | Dungeon (Green) |
| Manusya Gauntlets of Striking | Hands | Dungeon (Green) |
| Manusya Gloves of Maiming | Hands | Dungeon (Green) |
| Manusya Sarouel of Casting | Legs | Dungeon (Green) |
| Manusya Sarouel of Striking | Legs | Dungeon (Green) |
| Manusya Trousers of Aiming | Legs | Dungeon (Green) |
| Manusya Trousers of Fending | Legs | Dungeon (Green) |
| Manusya Trousers of Healing | Legs | Dungeon (Green) |
| Manusya Trousers of Maiming | Legs | Dungeon (Green) |
| Manusya Trousers of Scouting | Legs | Dungeon (Green) |
| Manusya Choker of Aiming | Necklace | Dungeon (Green) |
| Manusya Choker of Casting | Necklace | Dungeon (Green) |
| Manusya Choker of Fending | Necklace | Dungeon (Green) |
| Manusya Choker of Healing | Necklace | Dungeon (Green) |
| Manusya Choker of Slaying | Necklace | Dungeon (Green) |
Boss #3: Cinduruva and The Magus Sisters
A few seconds after pulling the boss, Minduruva and Sanduruva will join the fight. Defeat Cinduruva first to stop “Delta Attack” from being cast and prevent her from resurrecting her fallen sisters.
Mechanics
- Manusya Glare: A constant single-target attack on the primary target that deals moderate damage.
- Samsara: A room-wide AoE attack.
- Minduruva and Sanduruva: Both sisters will use many of their mechanics from the previous fights. Kill Cinduruva before the other sisters to prevent her from resurrecting the fallen sisters.
- Delta Attack: The Magus Sisters will charge an attack that can be one of three elements: Ice, Fire, or Thunder. The resulting mechanic will be a constant stream of AoEs that must be handled depending on the element.
- Delta Attack – Blizzard III: Indicated by the text “Glacial ice, entomb our foes!” Two proximity markers will spawn one after the other while column and conal AoEs are spammed throughout the arena.
- Delta Attack – Fire III: Indicated by the text “Insatiable flame, consume our foes!” A room-wide donut attack followed by massive column AoEs. Then, another room-wide donut AoE will appear while all players receive targeted circle AoEs.
- Delta Attack – Thunder III: Indicated by the text “Thunderous tempest, smite our foes!” A barrage of line and circle AoEs finished off with a stack marker on a random player.
Rewards
- Magus Sisters Triple Triad Card (not guaranteed)
| Name | Type | Rarity |
|---|---|---|
| Manusya Chestpiece of Healing | Body | Dungeon (Green) |
| Manusya Chestpiece of Scouting | Body | Dungeon (Green) |
| Manusya Coat of Aiming | Body | Dungeon (Green) |
| Manusya Coat of Fending | Body | Dungeon (Green) |
| Manusya Jacket of Casting | Body | Dungeon (Green) |
| Manusya Jacket of Striking | Body | Dungeon (Green) |
| Manusya Mail of Maiming | Body | Dungeon (Green) |
| Monstrorum Astrometer | Astrologian’s Arm | Dungeon (Green) |
| Monstrorum Battleaxe | Marauder’s Arm | Dungeon (Green) |
| Monstrorum Claws | Pugilist’s Arm | Dungeon (Green) |
| Monstrorum Codex | Scholar’s Arm | Dungeon (Green) |
| Monstrorum Foil | Red Mage’s Arm | Dungeon (Green) |
| Monstrorum Fork | Lancer’s Arm | Dungeon (Green) |
| Monstrorum Greatsword | Dark Knight’s Arm | Dungeon (Green) |
| Monstrorum Grimoire | Arcanist’s Grimoire | Dungeon (Green) |
| Monstrorum Gunblade | Gunbreaker’s Arm | Dungeon (Green) |
| Monstrorum Katana | Samurai’s Arm | Dungeon (Green) |
| Monstrorum Knives | Rogue’s Arm | Dungeon (Green) |
| Monstrorum Longbow | Archer’s Arm | Dungeon (Green) |
| Monstrorum Pistol | Machinist’s Arm | Dungeon (Green) |
| Monstrorum Rod | Two-handed Thaumaturge’s Arm | Dungeon (Green) |
| Monstrorum Sickle | Reaper’s Arm | Dungeon (Green) |
| Monstrorum Signum | Two-handed Conjurer’s Arm | Dungeon (Green) |
| Monstrorum Syrinxi | Sage’s Arm | Dungeon (Green) |
| Monstrorum War Quoits | Dancer’s Arm | Dungeon (Green) |
| Paladin’s Monstrorum Arms (IL 520) | Other | Dungeon (Green) |
| Tower of Zot Orchestrion Roll | Orchestrion Roll | Basic |
| Wind-up Magus Sisters | Minion | Basic |
Extra Treasure Coffers

Apart from the boss rewards, there are four treasure coffers located throughout the dungeon that you can open for more gear rewards:
- (X:10.1, Y:11.1)
- (X:12.5, Y:10.9)
- (X:12.0, Y:11.4)
- (X:12.4, Y:10.2)
-
Final Fantasy XIV
- FFXIV The Tower of Zot: Unlock + Boss Guide
Related Posts:
 FFXIV The Tower of Babil: Unlock + Dungeon Guide
 FFXIV The Qitana Ravel: Unlock + Boss Guide
 FFXIV Dohn Mheg: How To Unlock + Boss Guide
 FFXIV Malikah’s Well: How To Unlock + Dungeon Guide
 FFXIV Holminster Switch: How To Unlock + Boss Guide
 FFXIV The Temple of the Fist: Unlock + Boss Guide
 FFXIV Ktisis Hyperboreia: Unlock + Dungeon Boss Guide
 FFXIV Vanaspati: Unlock + Dungeon Boss Guide