TABLE OF CONTENTS
- Full Walkthrough
- Traveling to the Floating Empire
- Exploring the Floating Empire South
- Exploring the Floating Empire West
- Taking the South Portal (Floating Empire West)
- Puzzle Room in Floating Empire West
- The Yellow Switch & Extra Chests
- Finding the Red Switch
- Finding the Mini-Boss
- Option #1: Taking the Portal to the Treasure Chest
- Option #2: The Path to the Mini-Boss
- Floating Empire West’s Mini-Boss: Sechs Golem
- Getting Two Extra Treasure Chests
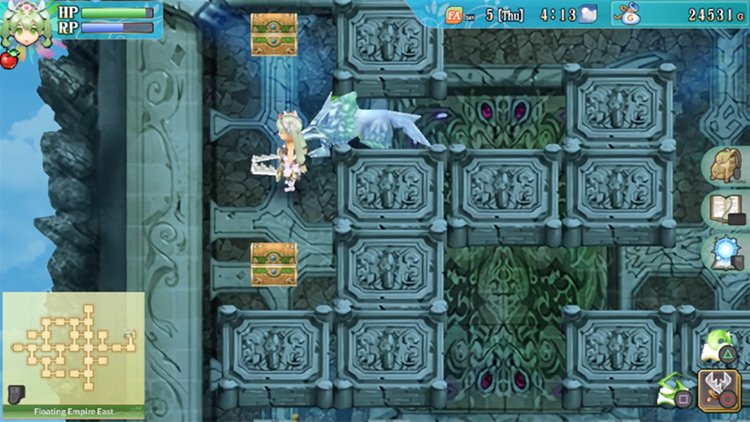
- Exploring the Floating Empire East
- Finding the Yellow Switch (Floating Empire East)
- Finding the Blue Switch (Floating Empire East)
- Finding the Green Switch (Floating Empire East)
- Finding the Red Switch (Floating Empire East)
- Finding the Pink Switch (Floating Empire East)
- (Optional): Getting a Chest with Double Steel
- Getting To the Mini-Boss
- (Optional) Finding the Chests
- (Optional) Finding the Purple Switch (Floating Empire East)
- (Optional) Getting Grand Impact
- (Optional) Getting Avenger Rock & Round Break
- Floating Empire East’s Mini-Boss: Sechs Tank Lv. 140
- Floating Empire East Puzzle Chests
- Boss Battle: How To Defeat Ethelberd
| Summary Info | |
|---|---|
| Recommended Level | Level 80+ |
| Monsters to Find |
|
| Field Items to Find |
|
Full Walkthrough
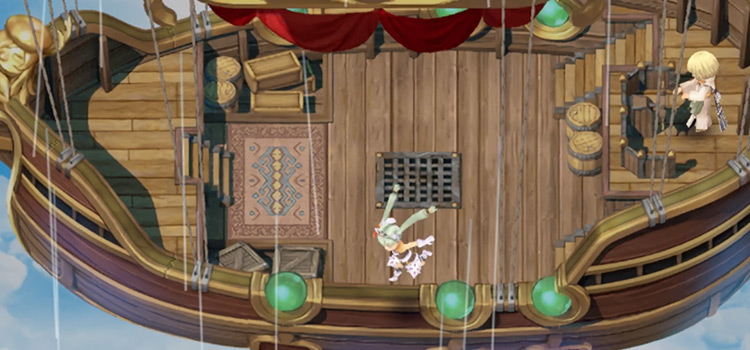
You’ll begin the final chapter of Rune Factory 4 by returning to the airship that you fell from at the start of the game. The airship can be found parked along the north edge of Selphia Town (pictured below).
Once you board the ship, interact with the helm.
You’ll be given a list of destinations to travel to.
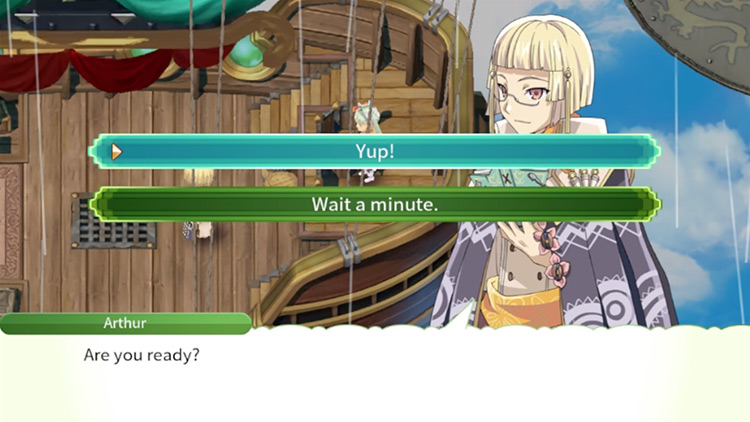
Pick the “Floating Empire”, then Arthur will arrive and will ask if you’re ready to go. Tell him that you’re ready, then a cutscene will play out.
Traveling to the Floating Empire
While you’re in transit, monsters will board the ship and attack you. You’ll need to defeat all the monsters to get to the Floating Empire safely.

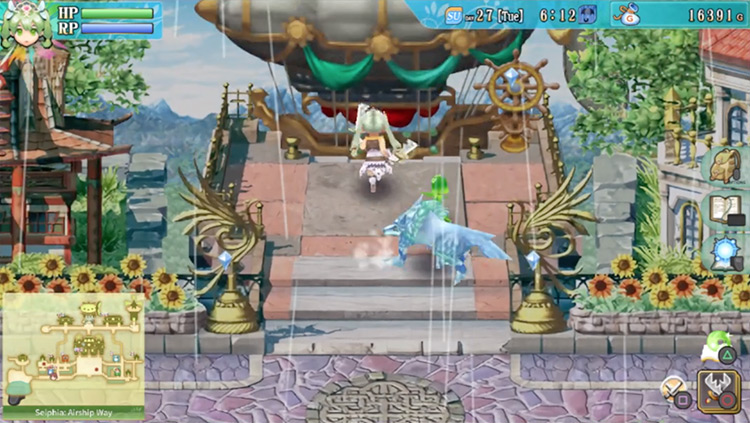
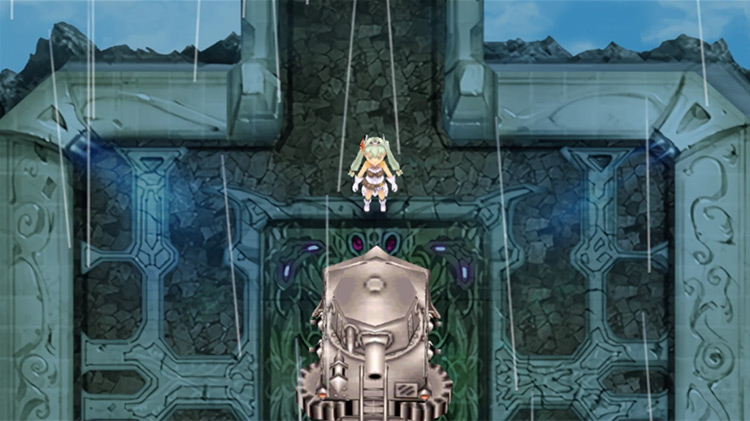
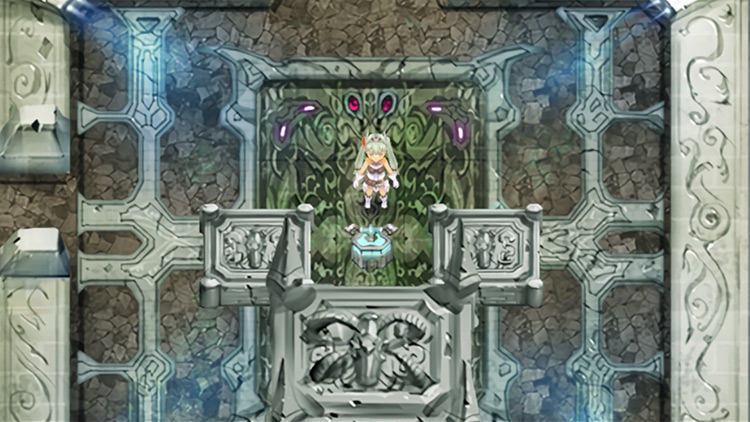
After defeating the monsters, you’ll eventually arrive at the entrance of the Floating Empire.
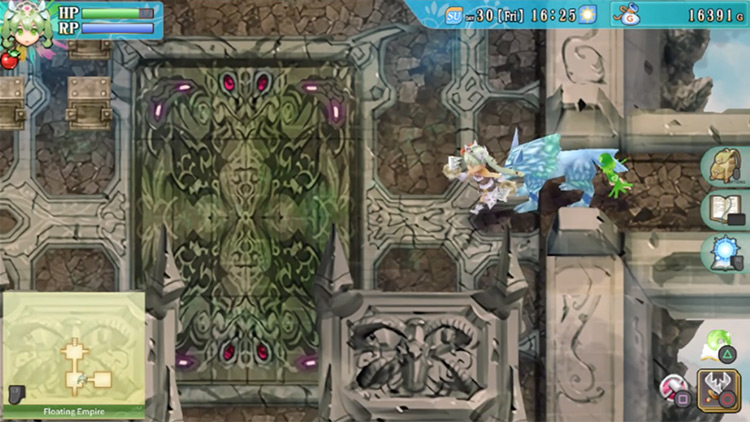
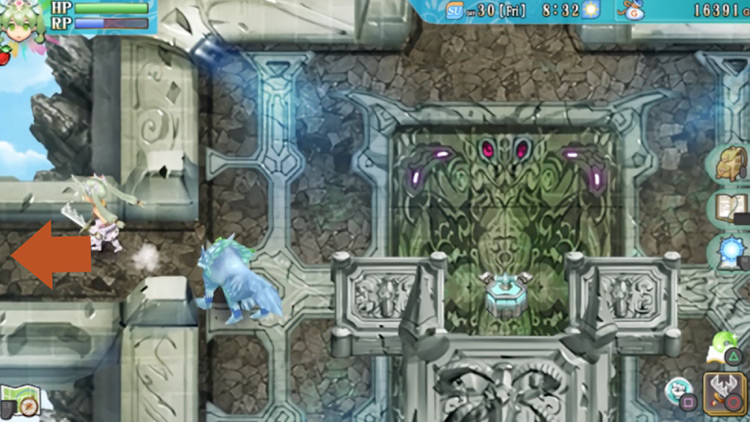
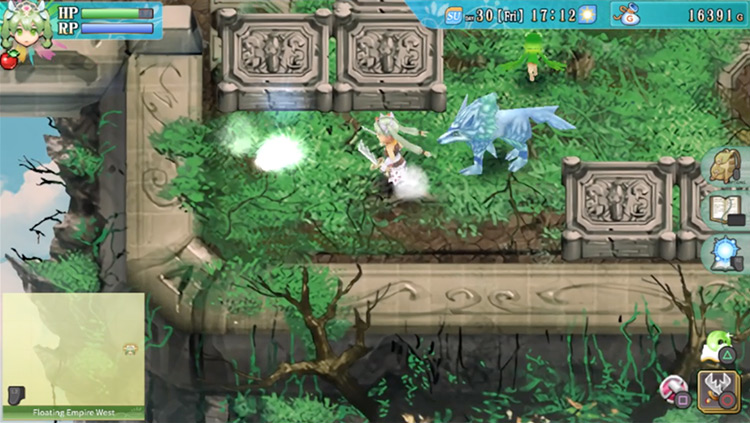
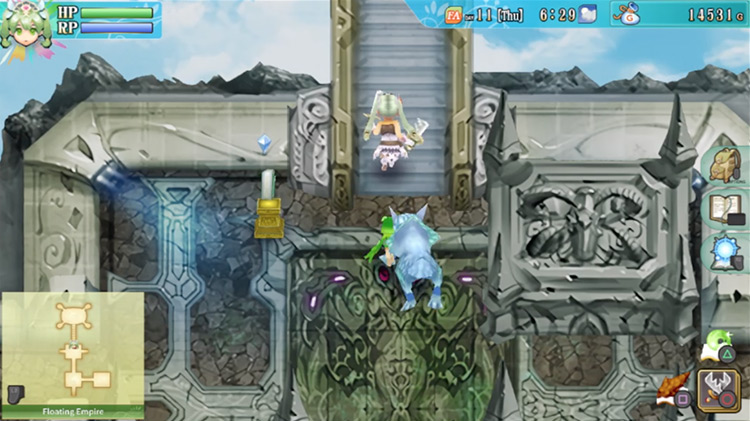
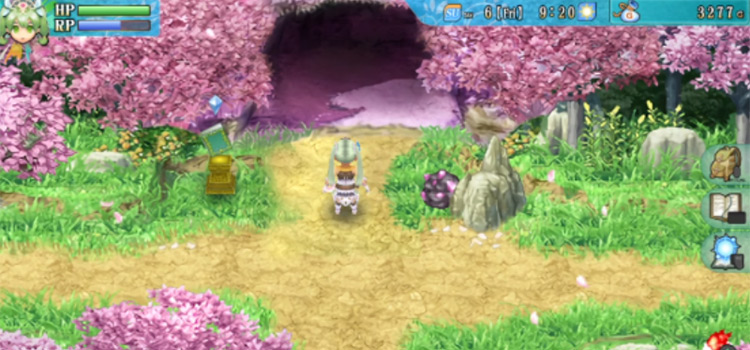
Once you land, head west down the pathway.
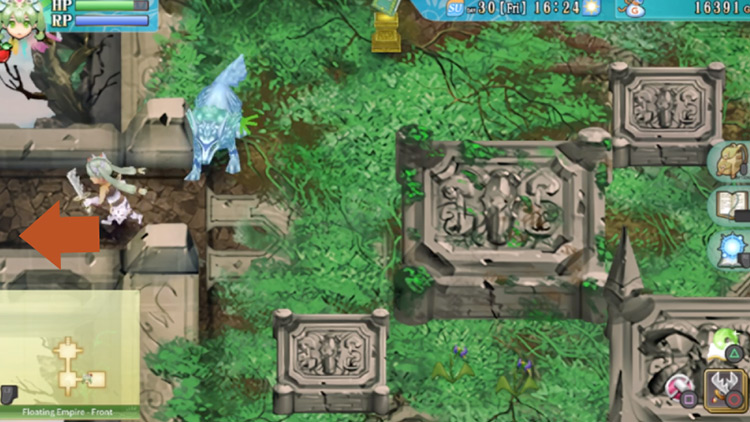
North of this area you’ll find the gates leading to the main boss.
But before you can get to the main boss of the Floating Empire, you need to first defeat three mini-bosses. Each of them can be found in different areas of the empire.
One of these areas is directly south of you, and the other two areas are in the west and the east.
So our next tasks are to track down & defeat these mini-bosses.
Exploring the Floating Empire South
We’ll start by going south to find one of the mini-bosses in the Floating Empire.
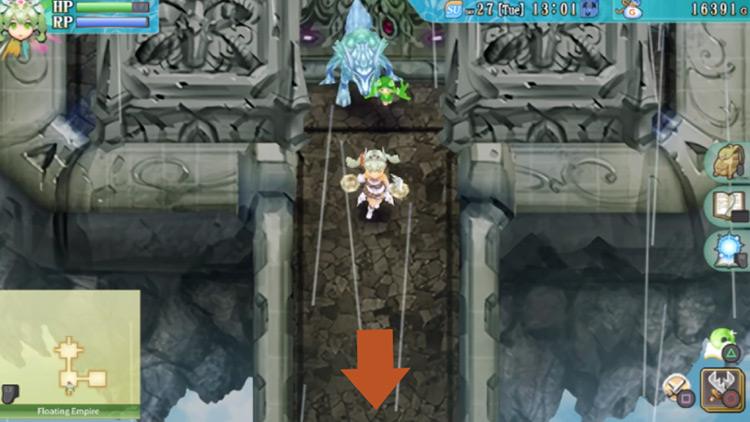
The Floating Empire South has a lot of areas where strong gusts of wind will prevent you from entering certain areas, so just keep this in mind during your travels.
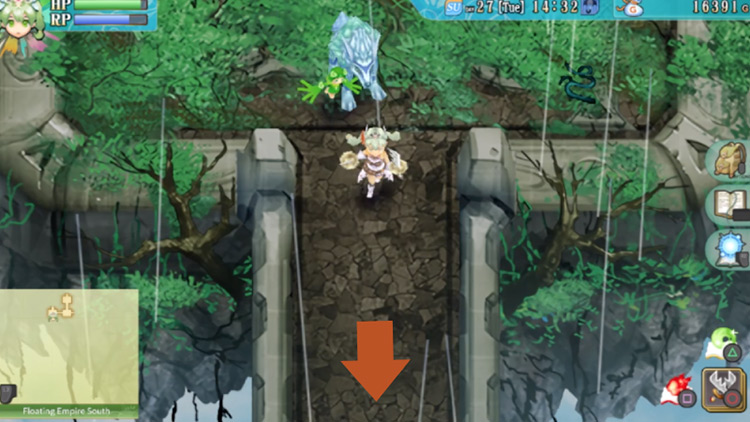
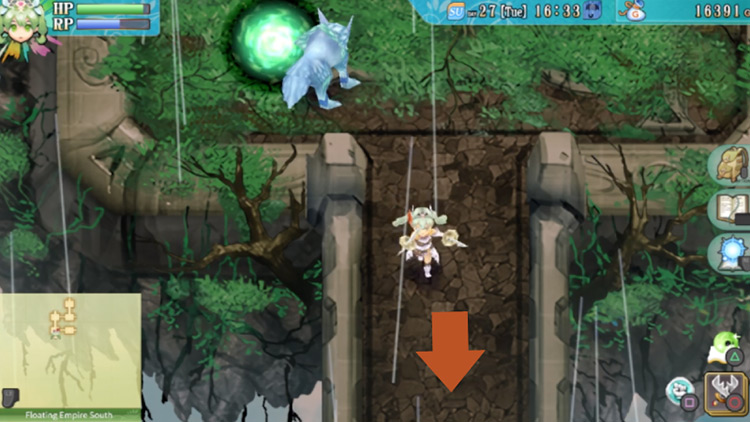
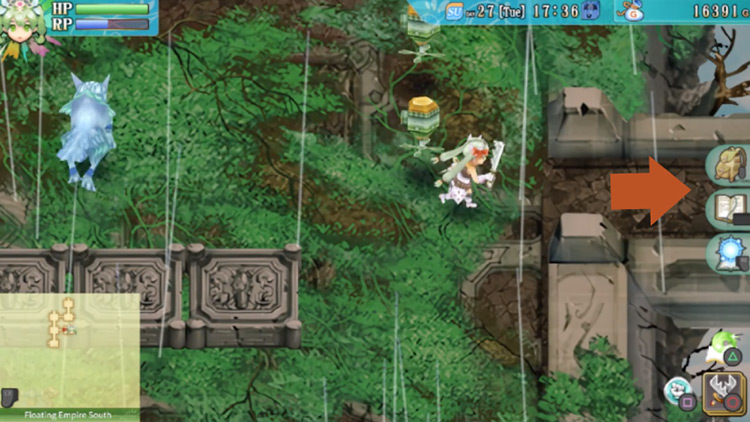
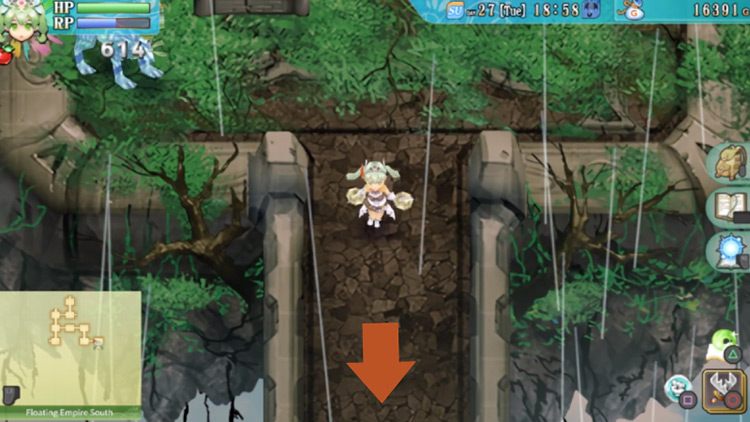
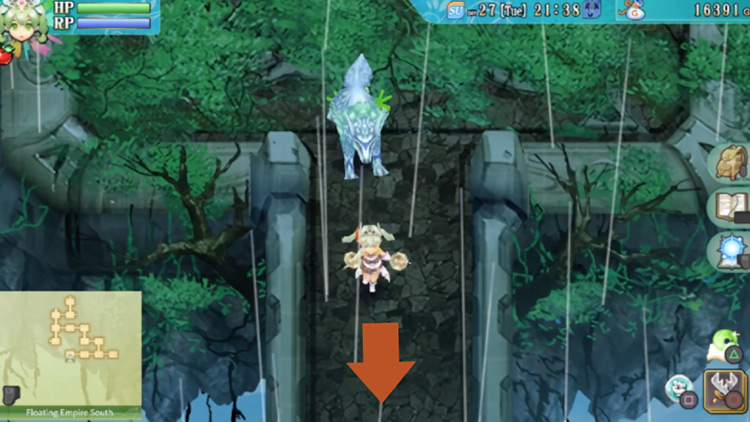
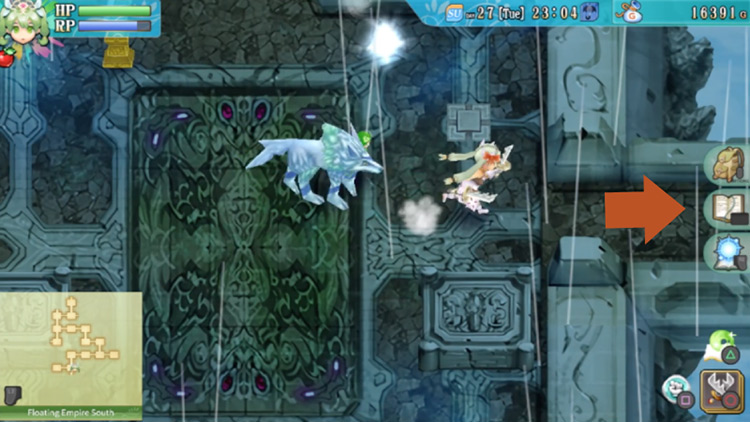
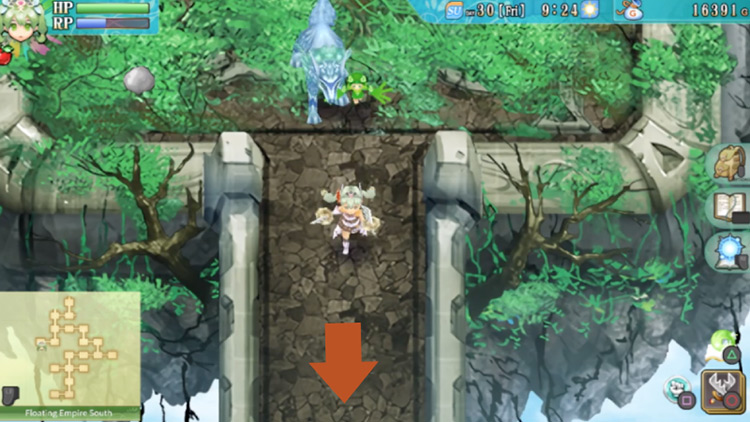
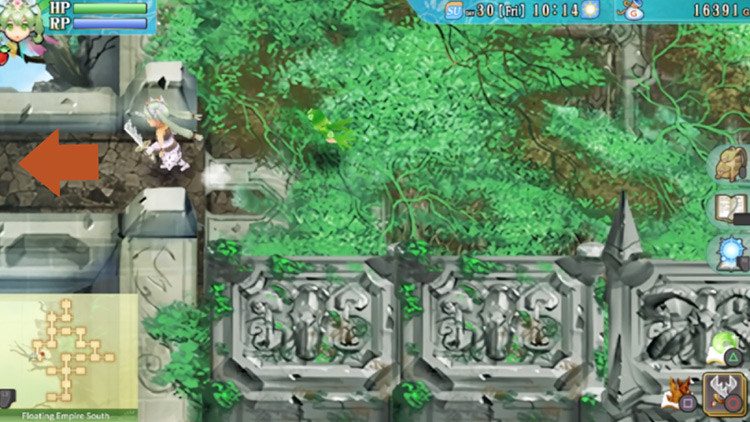
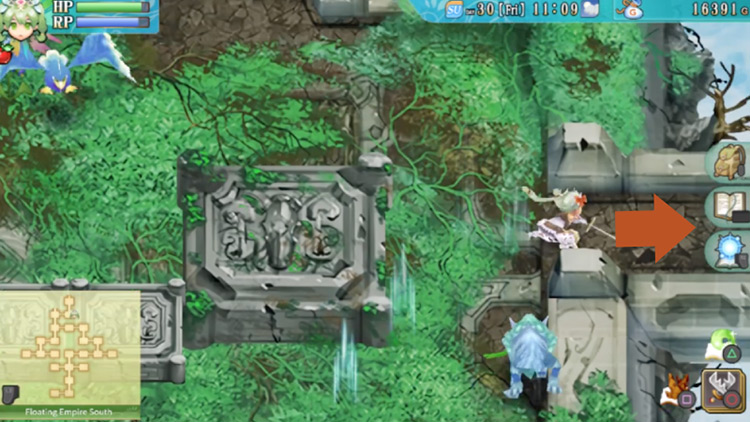
Head south again when you’re ready to explore.
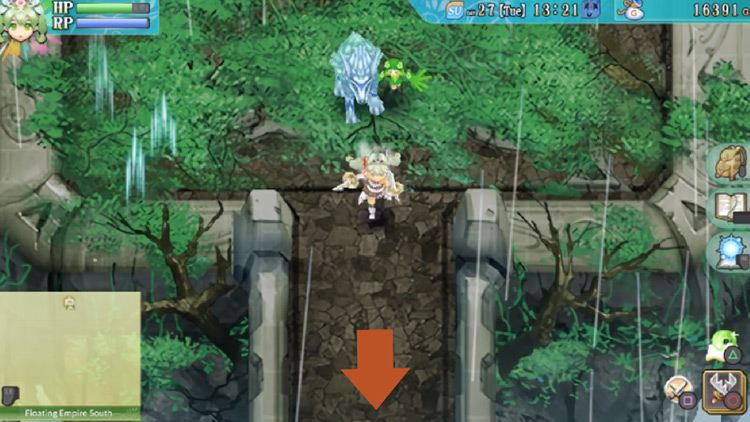
The next area will have strong winds from the south, preventing passage along the section on the right.
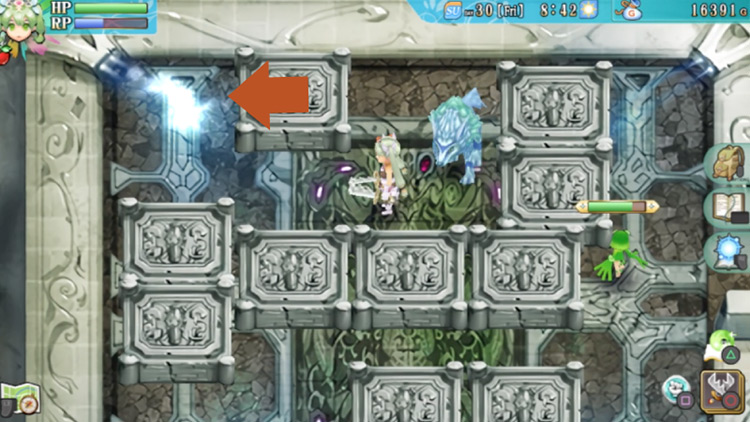
So from here, head west.
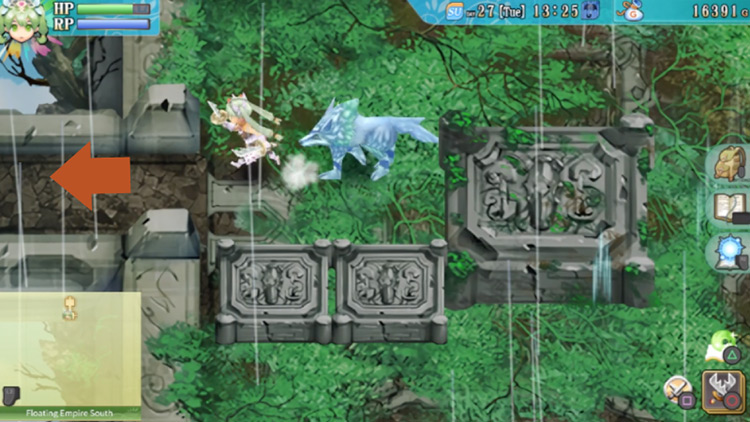
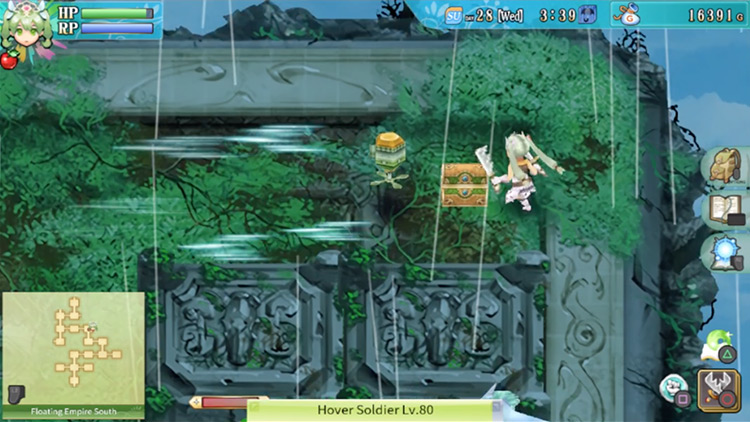
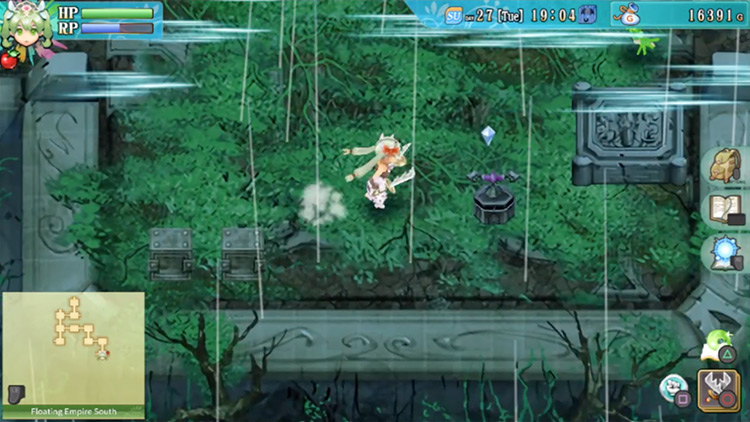
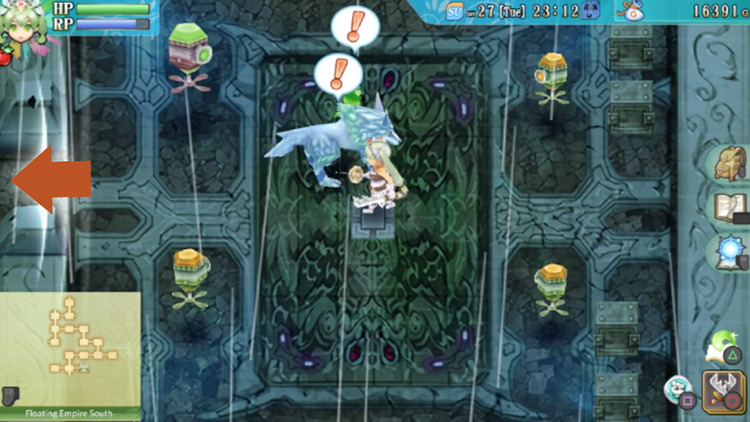
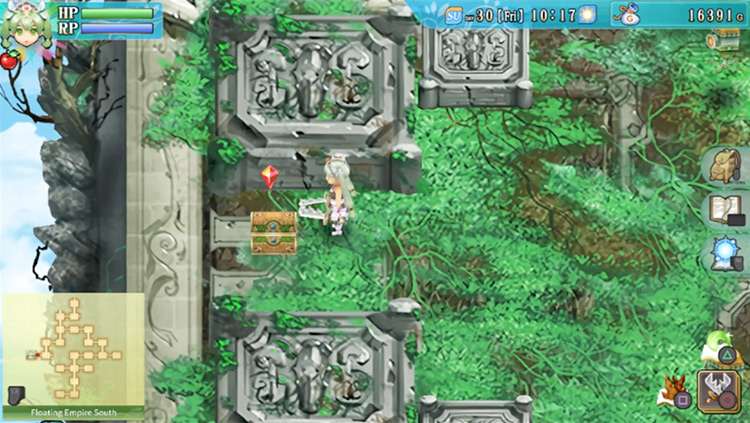
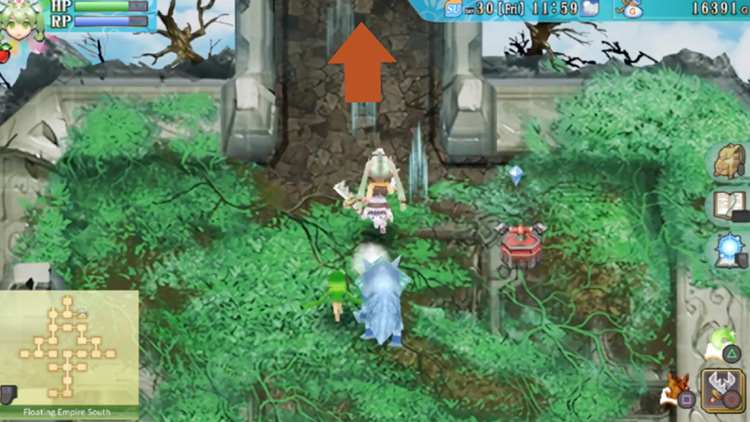
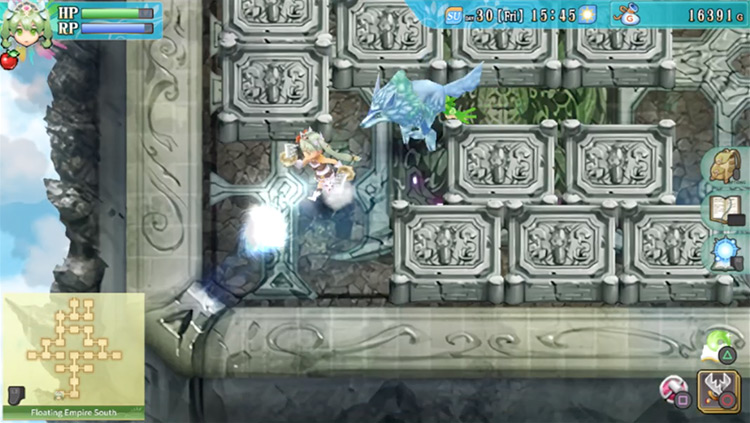
The next area will have a barrier blocking the path in the south and strong winds blocking the path heading north.
Clear all the enemies and gates in the area, then you can make your way south.
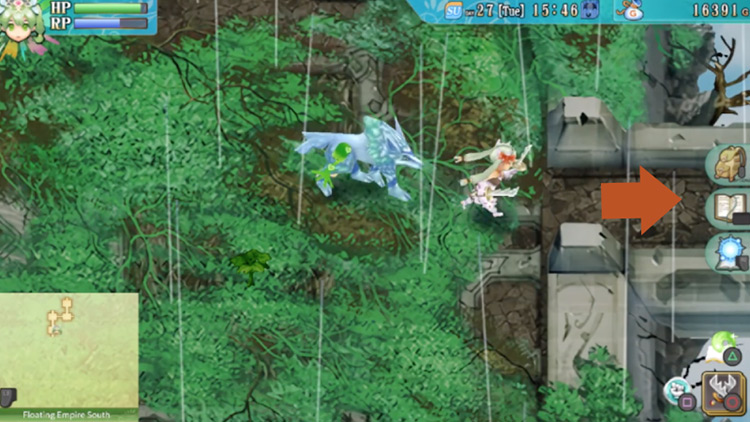
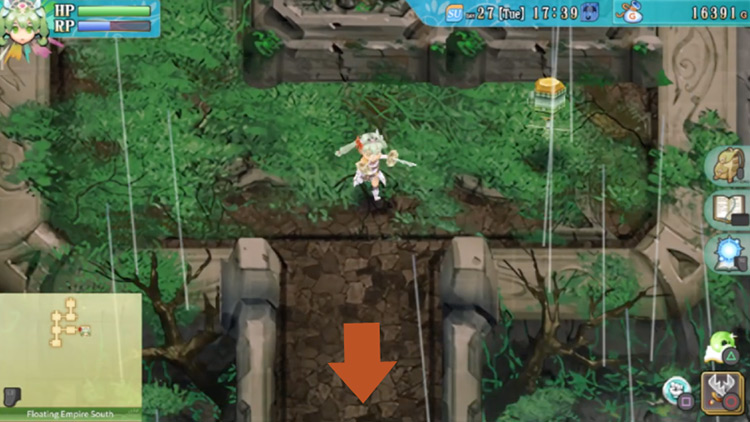
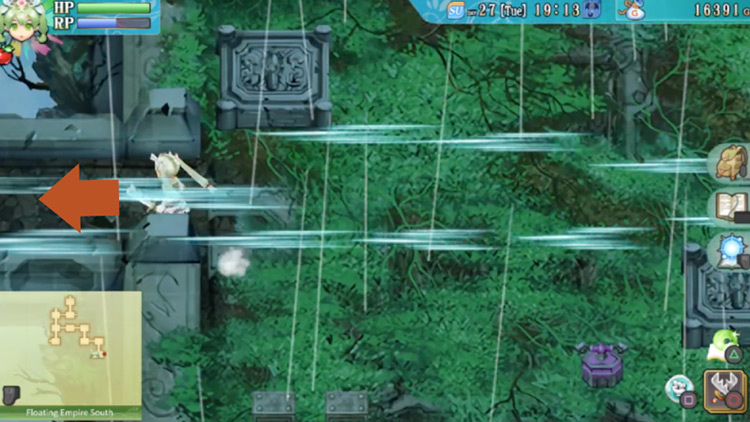
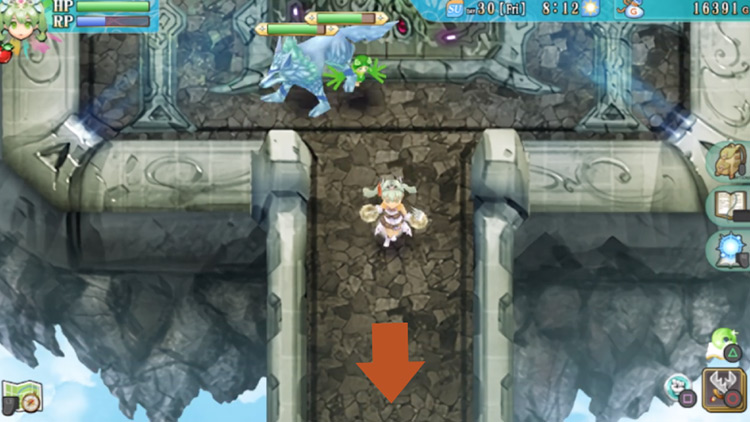
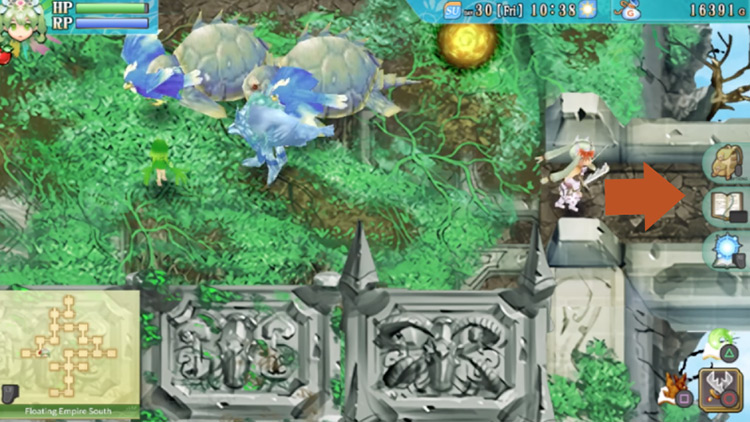
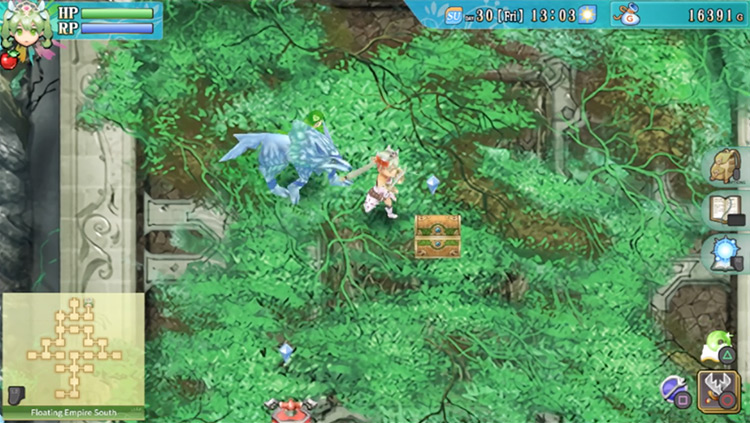
The next area will have a barrier blocking the path on the right.
The path in the south will have strong gusts of wind preventing you from going that way too.
So you’ll need to remove the barrier by clearing the area, then just head east.
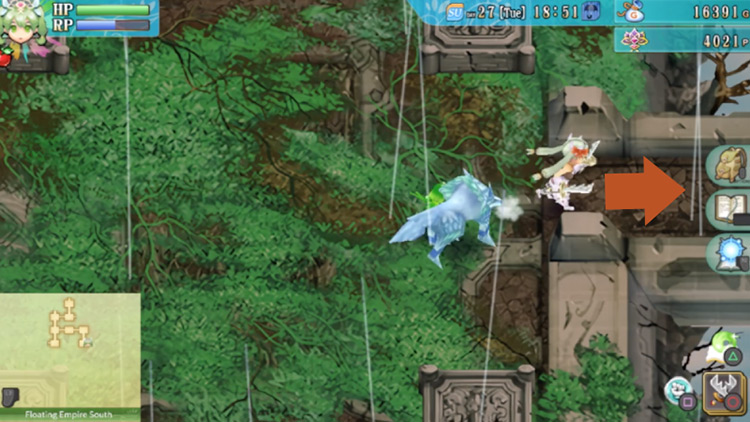
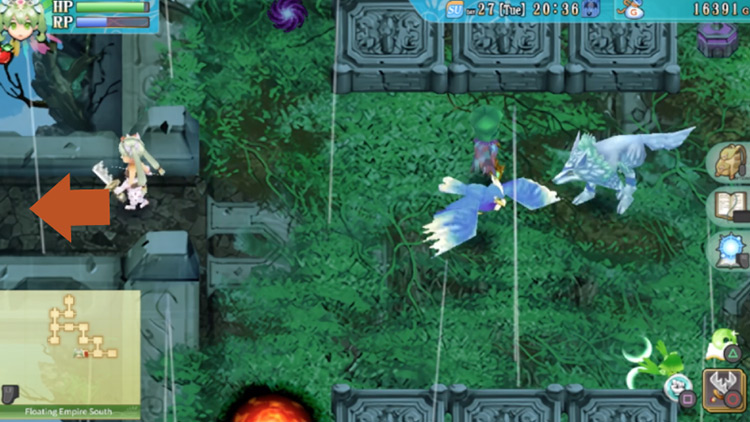
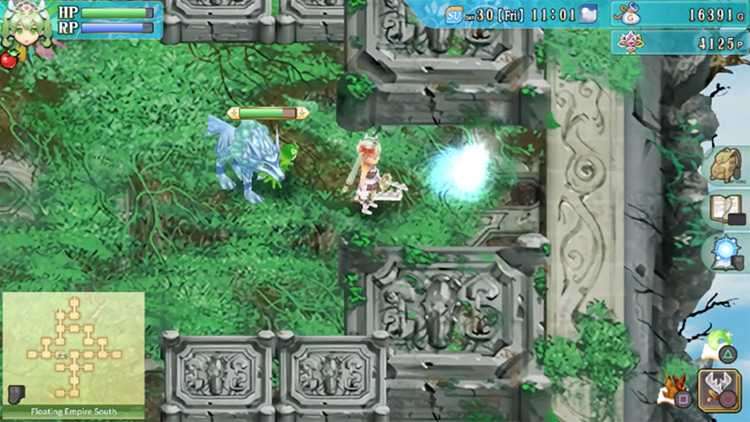
There’s a blue switch in the lower left corner of the next area.
Make your way to it and then give it a push.
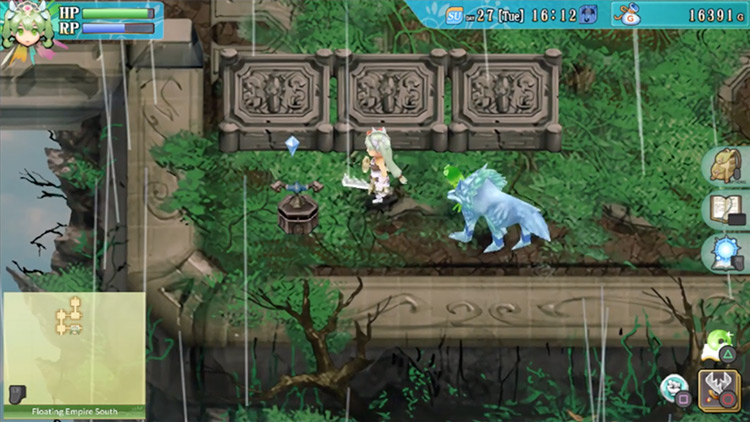
Then head back to the previous area via the west exit when you’ve pushed the switch.
The path heading south should now be passable, so head south from here.
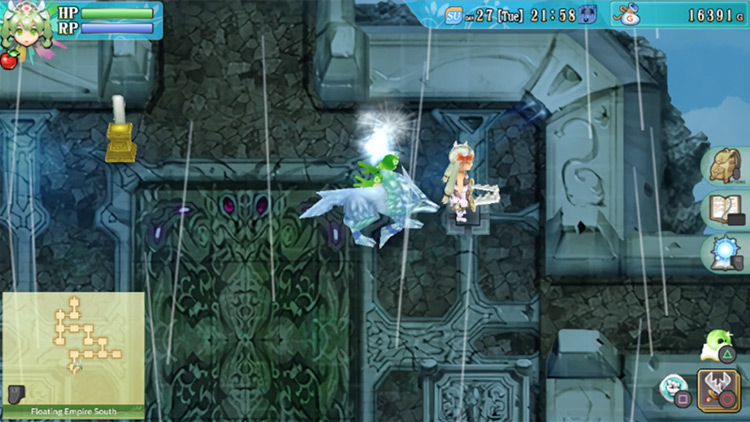
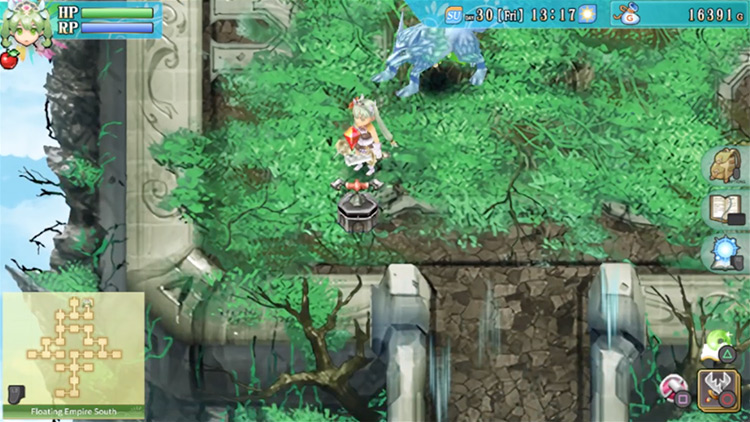
There’s now a green switch in the upper right corner of this next area. But wind will be blowing in from the north, preventing you from getting to the green switch.
Thankfully there’s a button you can press to deactivate the winds. This button is in the center of the room.
Just find the button and then leave an item on it to keep it pressed.
The wind should be gone at that point, so then you can go up to the green switch and give it a push.
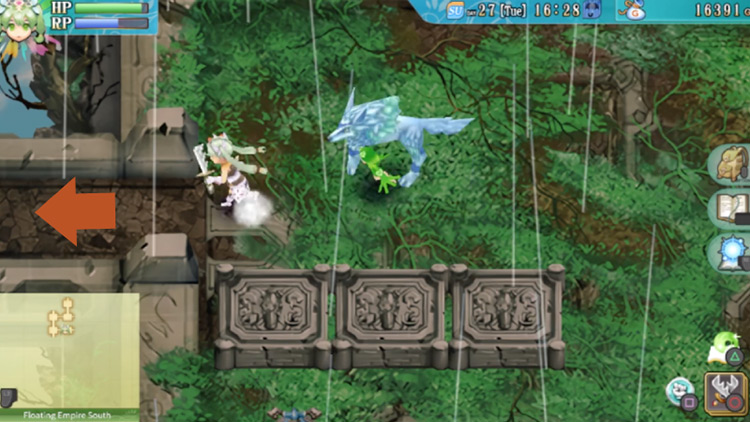
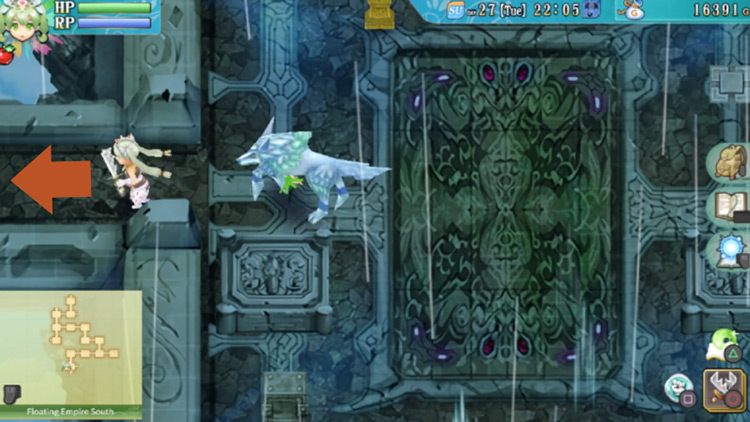
Now head back north to the previous area (go north) when you’re finished here.

After that, head east.
Now you should be in the area with the blue switch from earlier.
From here, you need to head all the way to the east.
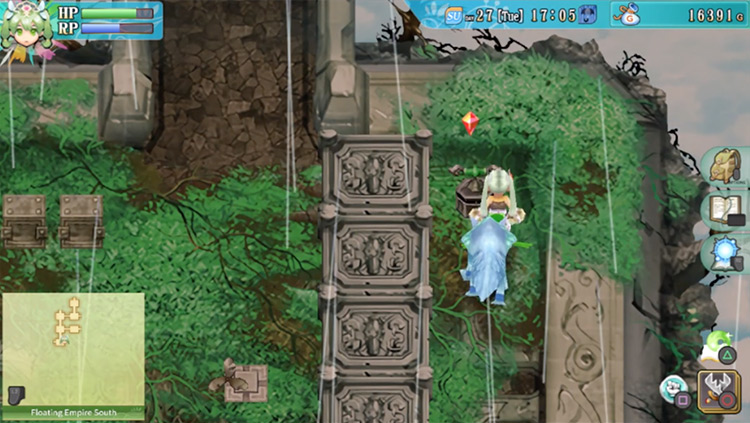
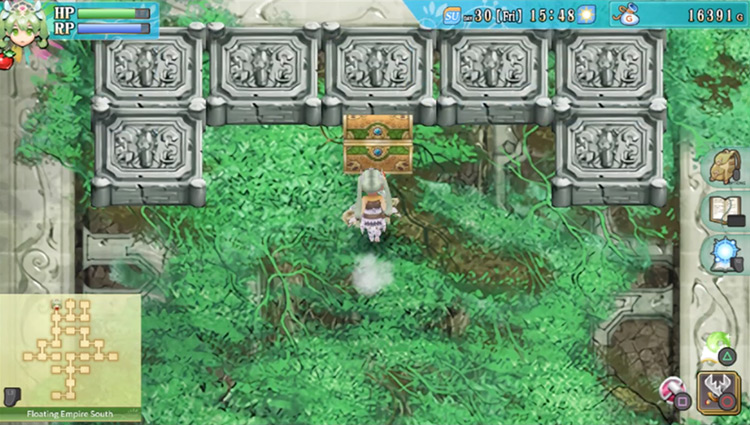
Next, you’ll find yourself in an area with a treasure chest in the upper right corner. Wind will be blowing against you as you run towards the chest.
Simply dash against the wind until you get to the chest.
Then open it to find some Platinum inside.
Once you’re done with this area, head south.
Next up is an area with a barrier blocking the path to the east. So clear all the enemies in the area, then head east.
Next is an area with rock pillars in each corner.
From this area, take the path heading south.
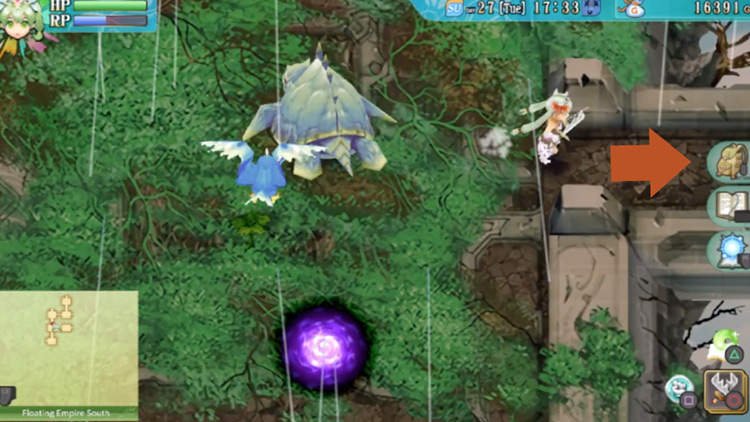
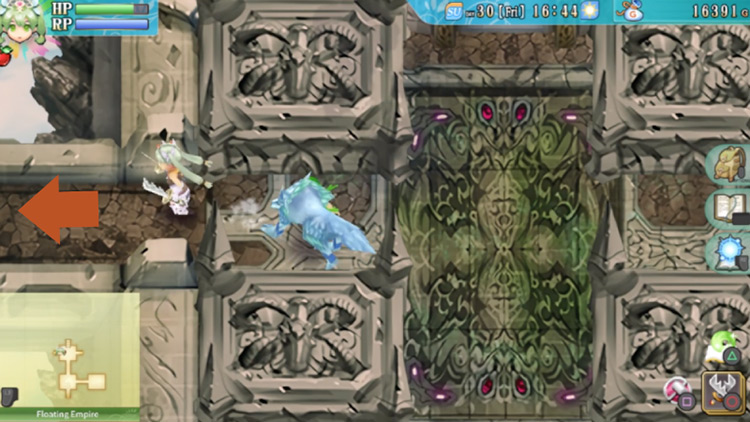
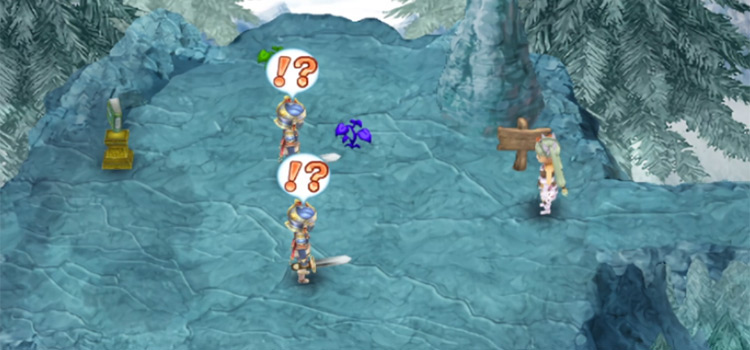
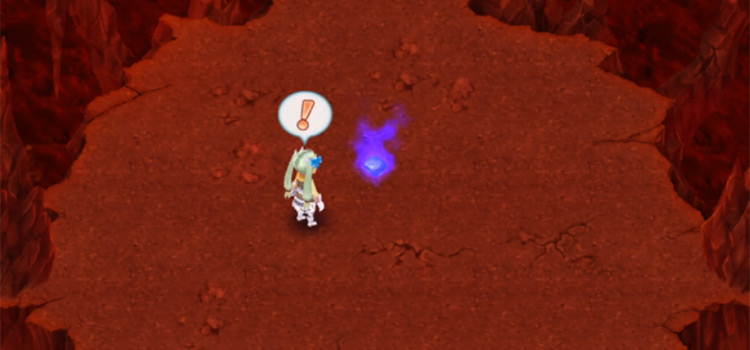
A violent gust of wind will be blowing in from the west in the next area. There’s also a purple switch in the south section of this area that you’ll need to push.
Tip: If you accidentally end up getting pushed by the wind into the path in the east, don’t worry! There’s a portal that will take you to the previous area (pictured below).

When you’re ready to get to the purple switch, head to the west of the area. Then stand right above the wind.
Use your dash to counter the wind while heading south to make it to the purple switch.
Pushing the purple switch will cause the wind to blow in the opposite direction.
After you do that, head west.
Next, head all the way to the west again.
You’ll then reach an area where a barrier is blocking the path heading south.
Defeat all the monsters in the area, then head south.
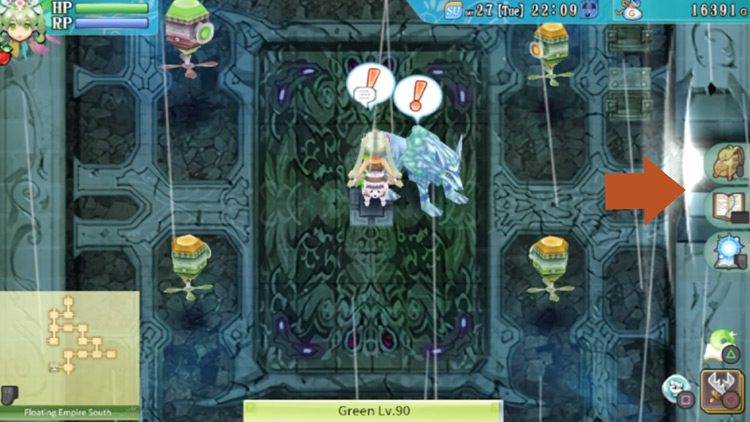
Once you enter the next area, you’ll see a save point on your left and a button on your right.
Step on the button to activate a portal that will take you back to the entrance (don’t use the portal unless you need to leave).
South Wind Buttons
When you’re ready to proceed, head west.
There’s a button in the center of the next room.
Once you stand on it, you’ll be ambushed by a few mobs and a barrier will come up on your east.
Defeat all the enemies to dispel the barrier. Then head back to the intersection on your east.
Back at the intersection, you’ll need to take the path all the way to the east this time.
In the next room is another button in the center.
When you step on the button, you’ll be ambushed again and a barrier will block your exit.
Defeat all the monsters, then head back to the intersection by going back to the left.
After you’ve pressed both buttons on either side of the intersection, the wind blocking the path heading south should be gone.
Now you can head down south to face the boss of the Floating Empire South.

Floating Empire South’s Mini-boss: Armored Tank +Lv.140
| Armored Tank +Lv.140 Attacks | |
|---|---|
| Normal Phase | In the first phase, the tank will remain stationary. It will only turn its top section in order to face and attack its targets.
|
| Enraged Phase | Once the tank gets enraged, it will start moving across the area. Its attacks can also fire in both directions in this phase.
|
After defeating the mini-boss, head south.
The next room will have a light blue switch.
Push the switch, and then you’ll see a cutscene showing that one of the gates by the entrance of the Floating Empire has gone down.
Once you’re done here, head west.
The next area will have two portals.
Each portal will take you to previously inaccessible areas of the Floating Empire South.
Taking the North Portal (Floating Empire South)
Take the north portal to continue your exploration of the Floating Empire South.
The portal will take you to an area somewhere on the west.
From here, take the south exit.
You’ll then find yourself in an area where barriers will be blocking the paths on the west and on the east.
Clear the area of the mobs and gates, then head west.
Head all the way to the west of the next area to find a treasure chest. Open it and you’ll find an Invisible Stone inside.
Then return to the previous area.
When you get there, head to the path on the east.
There’s a portal on the east side of this next area and you’ll need to take this portal to continue.
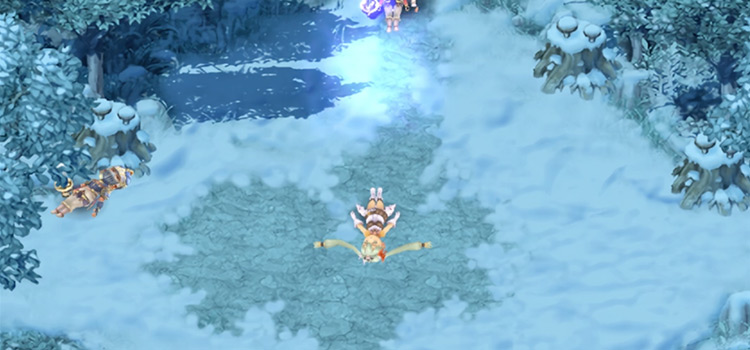
You’ll then find yourself back in a previous area where strong winds are blowing from the south.
You need to get to the path on the right-hand side, so dash quickly to the right to make it there & take the eastern path out.
In the next area you’ll need to defeat all the mobs.
Once the area is clear, a red switch will appear in the upper right corner.
Push the switch to have the wind in the north blow in the opposite direction. Then go through the path in the north when you’re ready.
Here, you’ll need to clear the entire area again. Once you do, a treasure chest will appear in the center of the room.
Open it to find a Tornado Swing ability inside.
Then push the red switch on the left side of the area.
This switch should reverse the direction of the wind in the south. After that, go through the path in the south to reach another portal.
Taking the South Portal (Floating Empire South)
The portal on the southern side of this area will take you to another previously inaccessible area of the Floating Empire South.
And this will give you a handy spell (plus it’s quick to get!) so take the portal when you’re ready.
The area you’re teleported to has a giant treasure chest in the upper section.
Open it to find a Penetrate Sonic spell inside.
After that, you can return to the Floating Empire entrance.
You’ll now have to explore another section of the Floating Empire, and our next step is the western side.
Exploring the Floating Empire West
To explore the Floating Empire West, you’ll need to head west at the intersection where the main boss area’s gates are located.
Exploration of this section will require you to take several portals that will take you to different sections of the map.
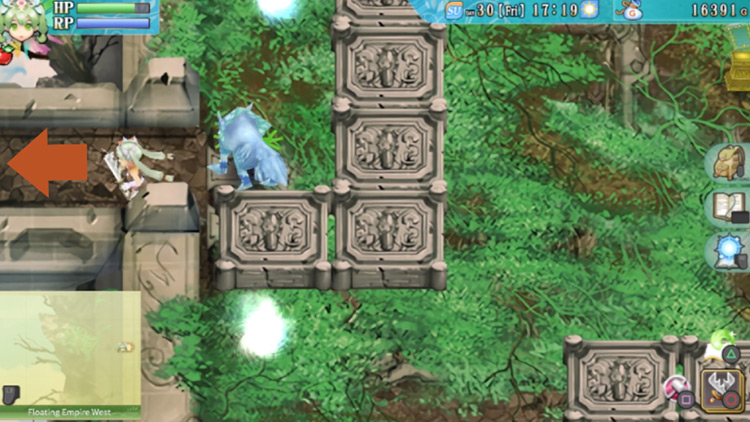
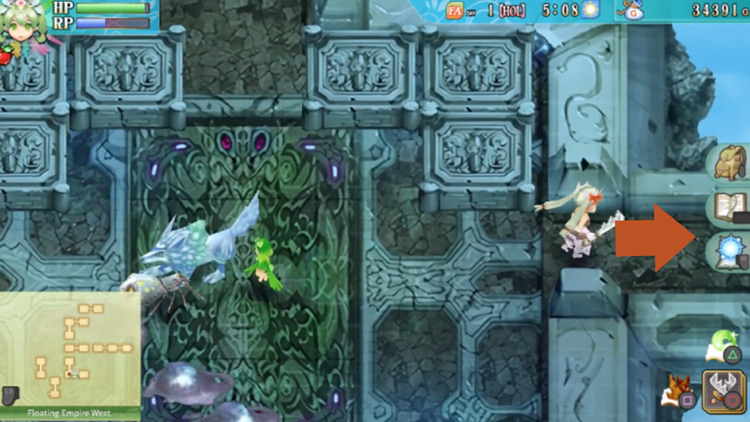
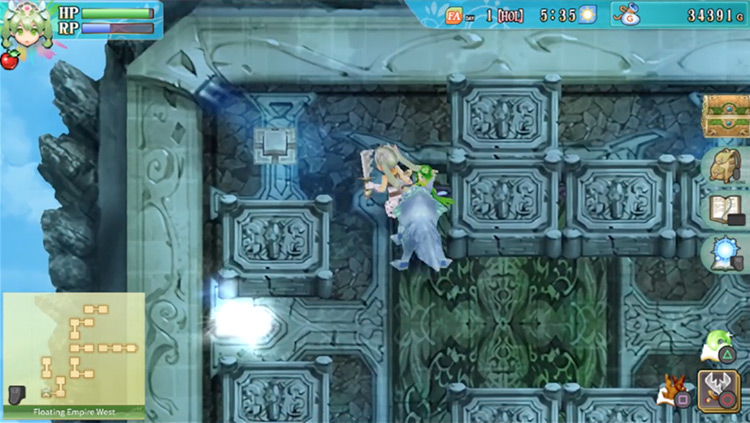
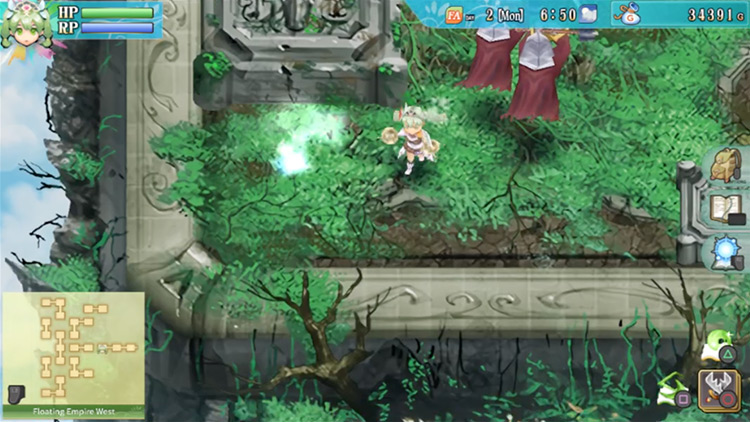
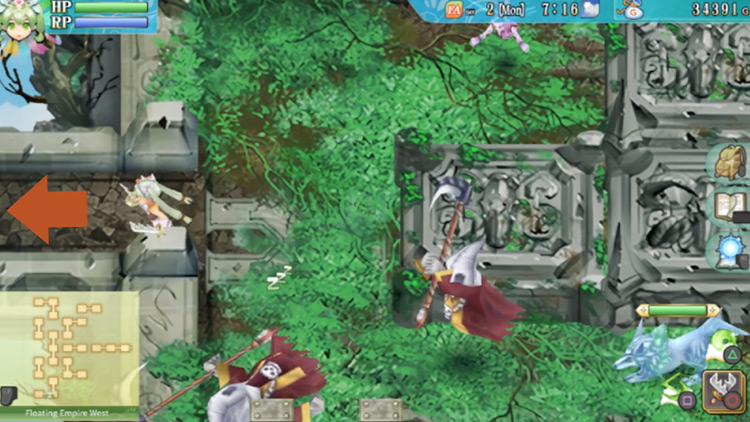
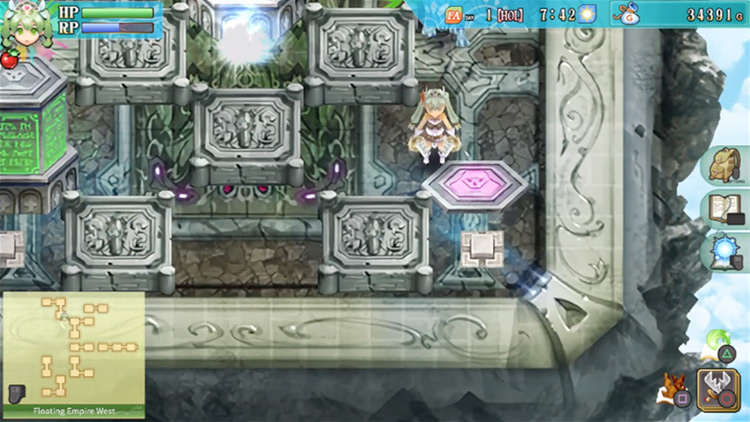
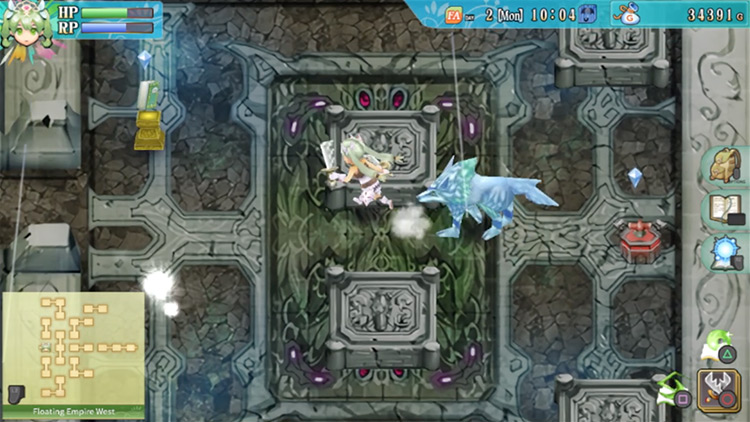
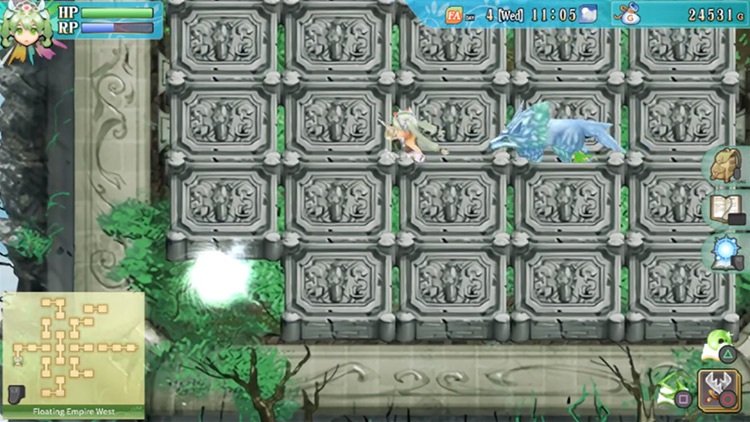
When you first head west from the original boss gates, there are two portals in the next room.
The portal in the north is behind a barrier of rock walls. So first we’ll take the portal in the southern section (pictured below).
Taking the South Portal (Floating Empire West)
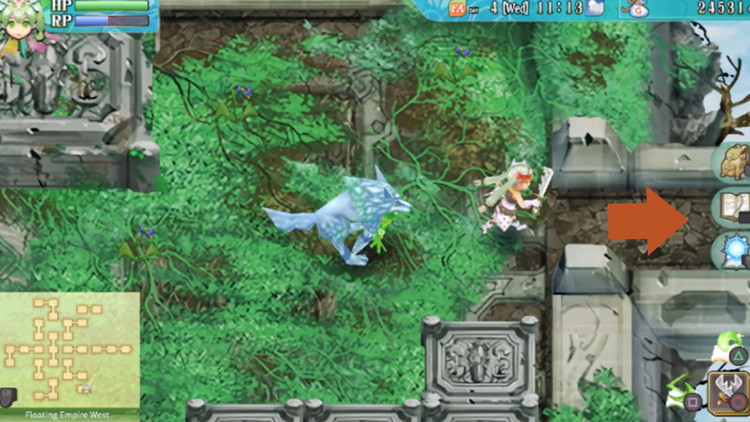
You’ll be teleported to where the other portal is behind the rock wall. From here, head west.
There’ll be a portal right in front of you in the next area. Take it to get teleported above the rock wall.
Once you get to the other side of the rock wall, head west.
You’ll find two portals in the next area.
Take the path going to the south first.
You’ll be taken to an area in the southern part of the Floating Empire West.
You will need to defeat all the enemies here first. Once they’re all defeated, the barrier in the east will be dispelled.
Then you can head through the path in the east.
In the next area, the path ahead of you will have a portal at the very end.
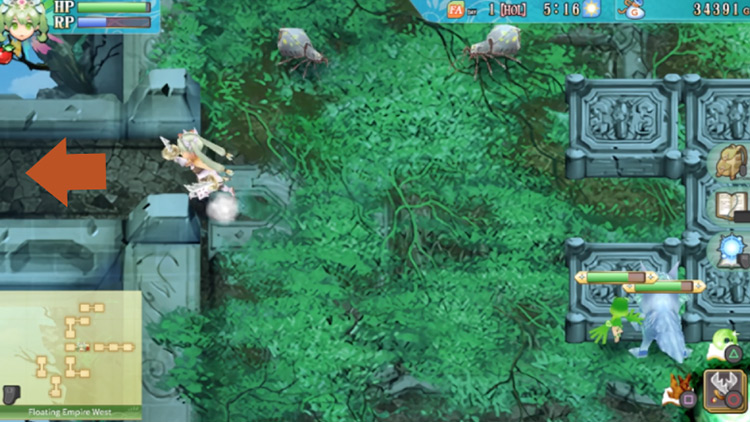
Take it to be teleported to an area somewhere in the center of the Floating Empire West.
When you get there, head through the path on the west.

The portal in the next room will be behind a rock wall.
To reach it, you’ll need to defeat all the mobs in the area. Once all the mobs are gone the rock wall in the center will disappear, and then you can get to the portal.
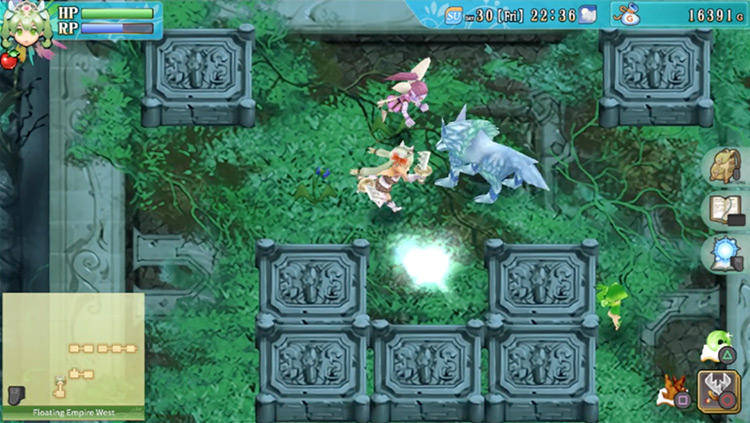
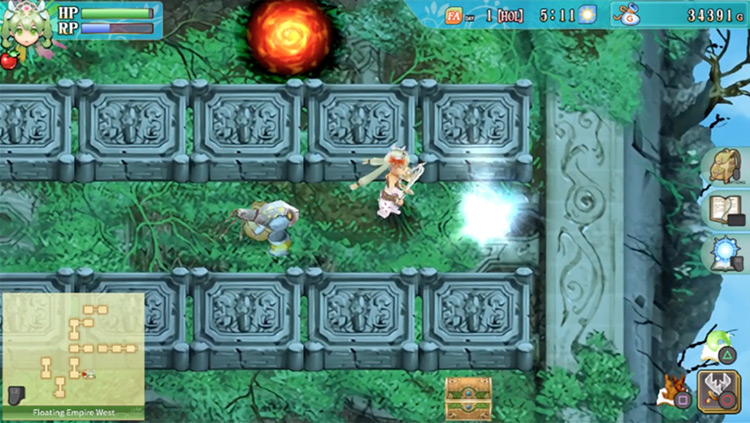
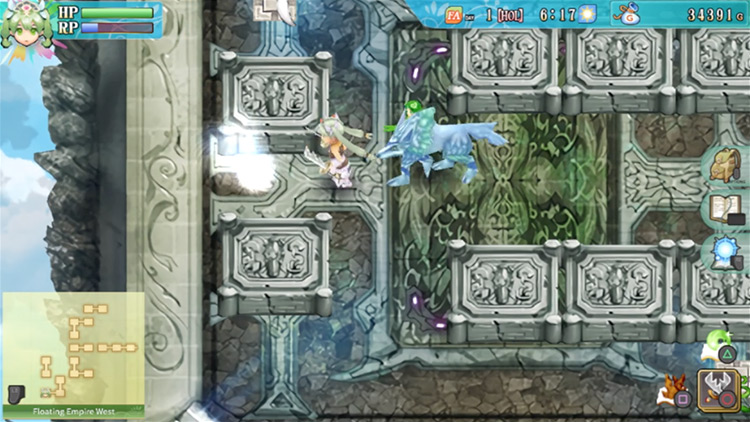
The portal will take you somewhere south of the map of the Floating Empire West.
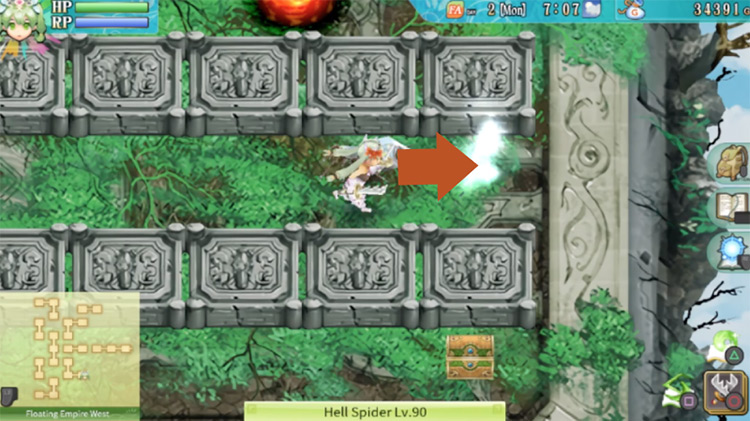
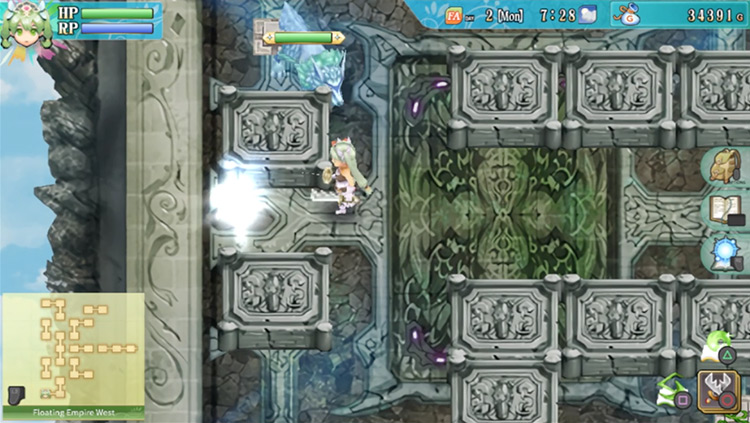
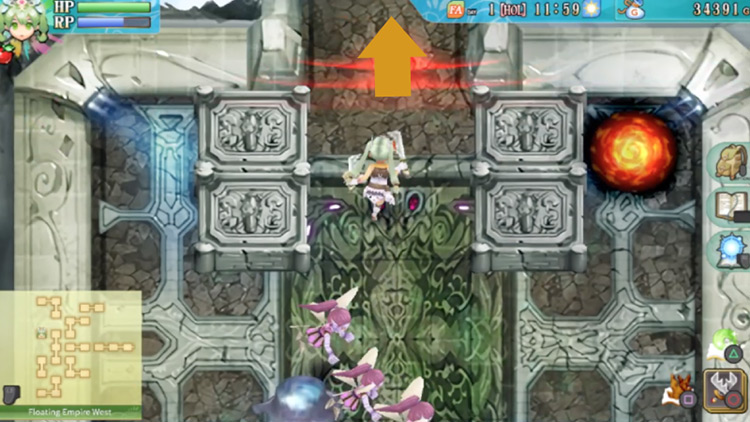
From here, you’ll need to head north.
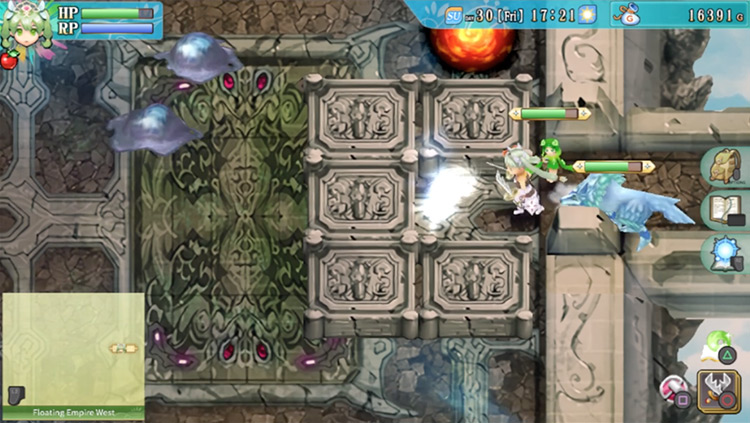
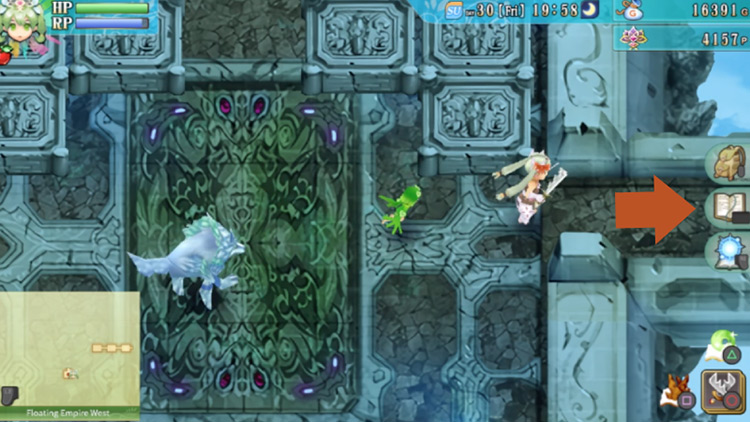
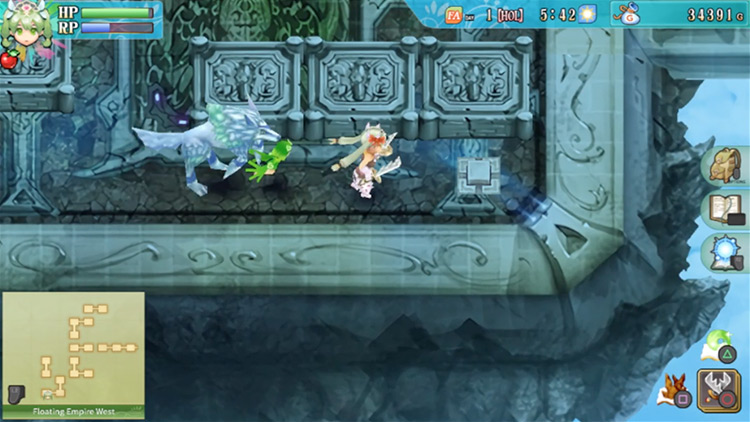
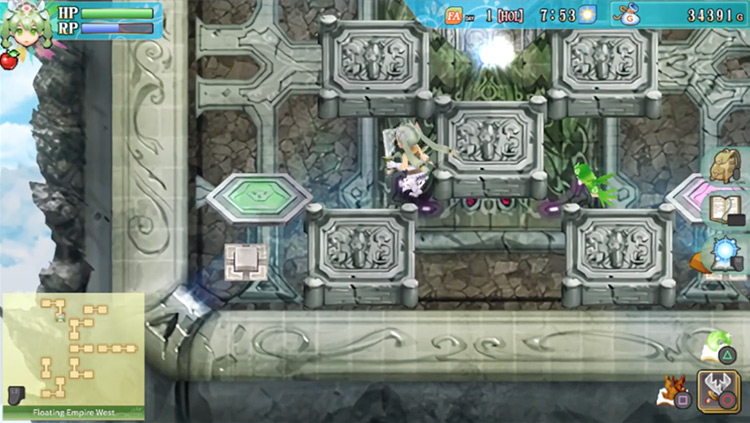
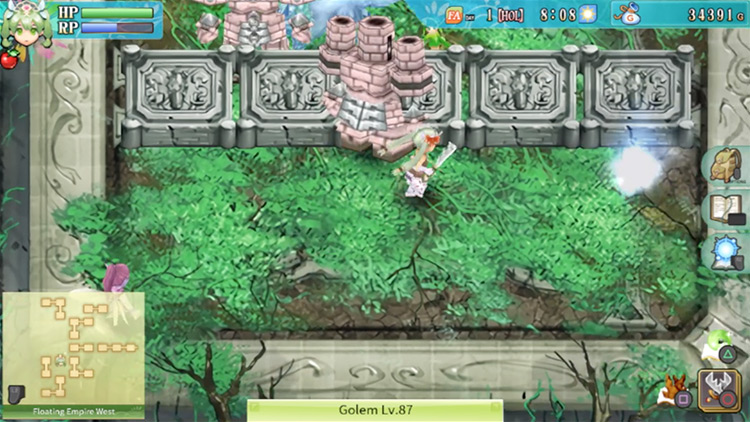
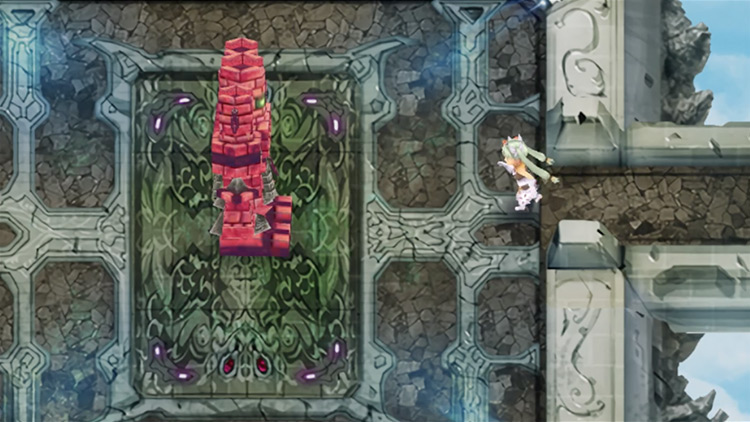
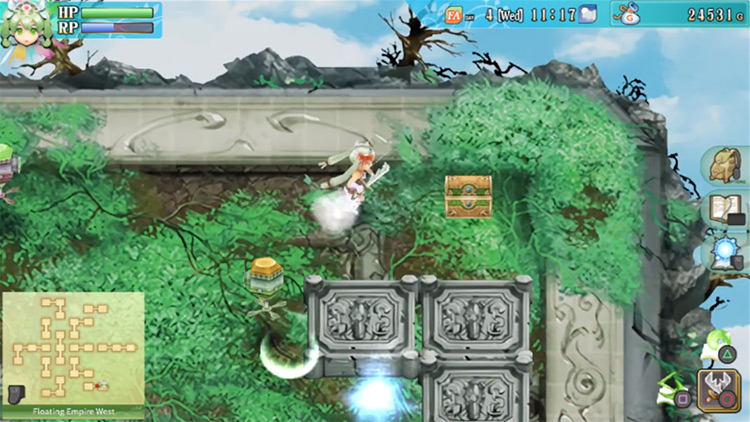
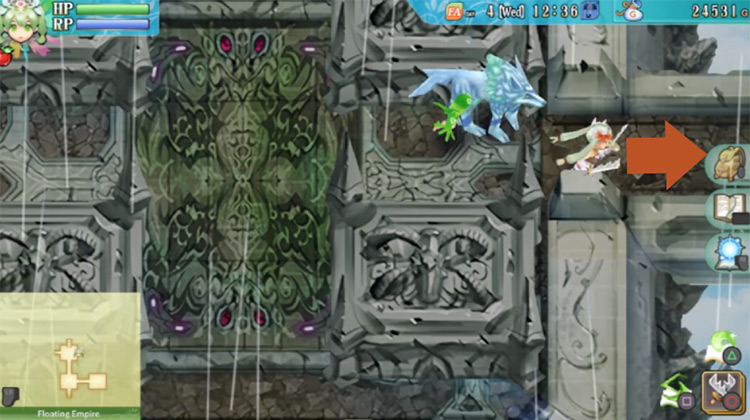
You’ll then find yourself in an area with a portal in the center (pictured below).
You need to take that portal to continue.
That portal will take you to the eastern side of the Floating Empire West.
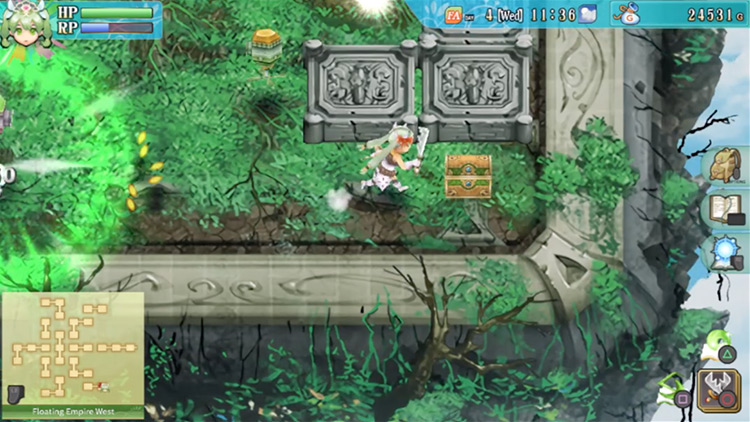
And in this area, a barrier will be blocking your path heading south. So defeat all the mobs here, then go through the path in the south.
The next area has a treasure chest in the center. Open the chest to find 18000G inside.
Then proceed to the portal just below the chest.
You’ll be taken back to the area with two portals near the entrance.
Take the portal on the southern side.
You’ll be taken to the south area of this map.
And from here, head east.
Then head east and go through the portal at the very end of the path.
After that, you’ll be transported back to the center region of the map.
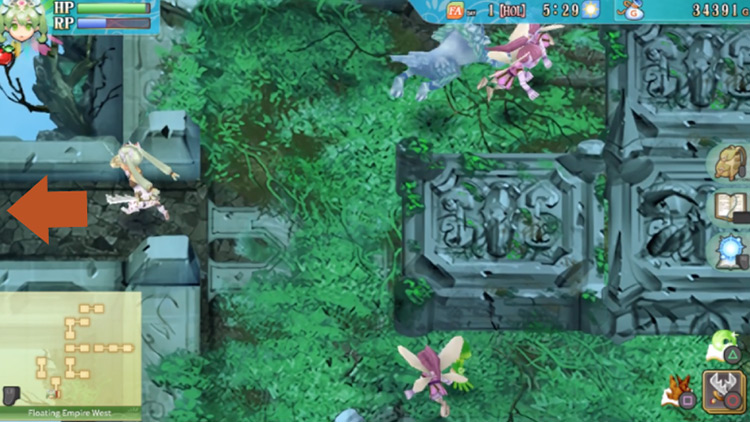
Head west from here.
Then head for the portal by the west wall of this area & take that portal.

You’ll then be transported back to the southern region of the map.
From here just head west and take the western exit.
Puzzle Room in Floating Empire West
The next room has a simple puzzle.
There’s a chest in the upper right corner, and buttons in the upper left corner and the lower right corner of the room. There’s also a portal along the west edge.
Here’s what to do here:
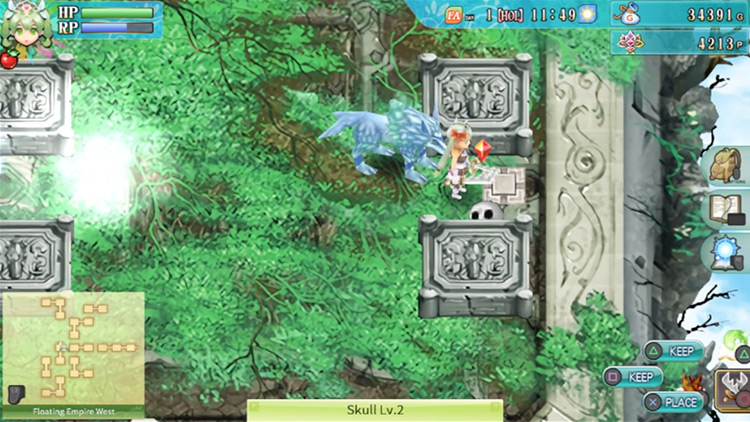
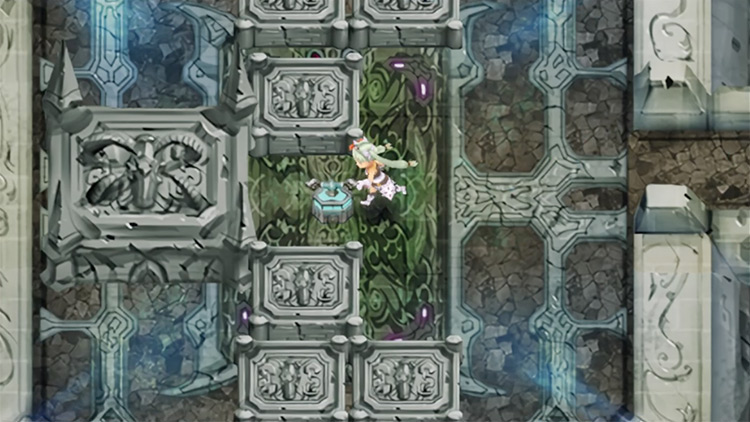
First, leave an item on the button located in the upper left corner (pictured below).
Then head for the button in the lower right corner of the room. Leave an item on that one as well.
Then head for the chest in the upper right corner of the room and open it to find Platinum inside.
Tip: Opening this chest will also trigger an ambush, so be ready to battle.
Once you’re done here, go through the portal along the western wall.
The Yellow Switch & Extra Chests
You’ll then find yourself somewhere in an area somewhere in the northwest. Barriers will be blocking your paths to the south and to the west here.
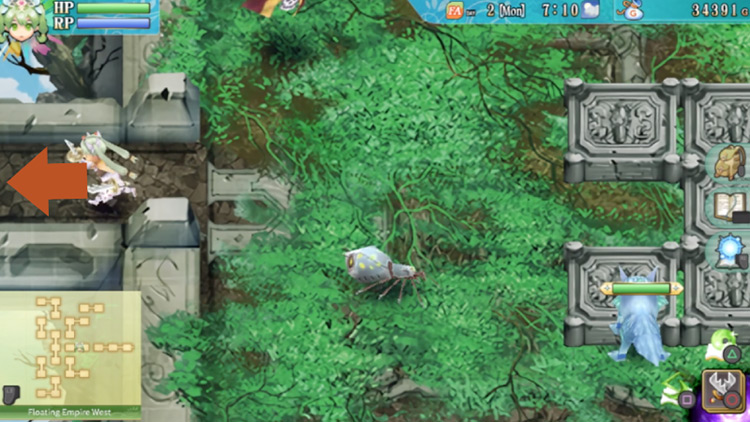
Clear all the enemies in the area, then head west.
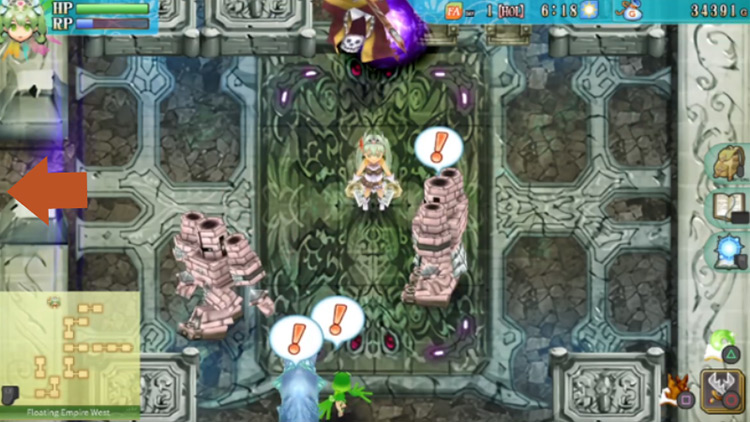
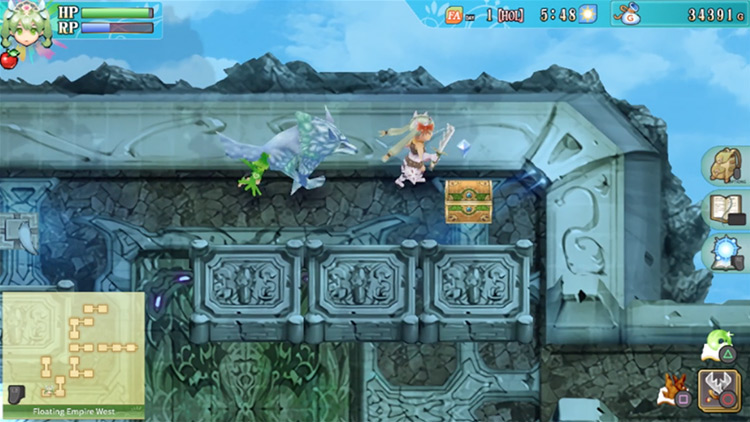
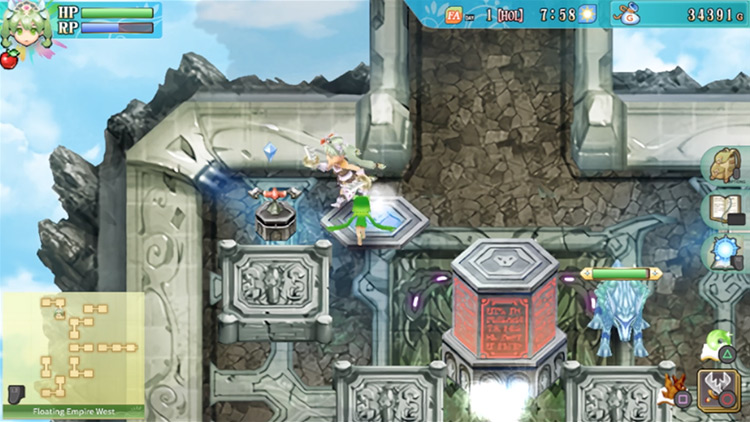
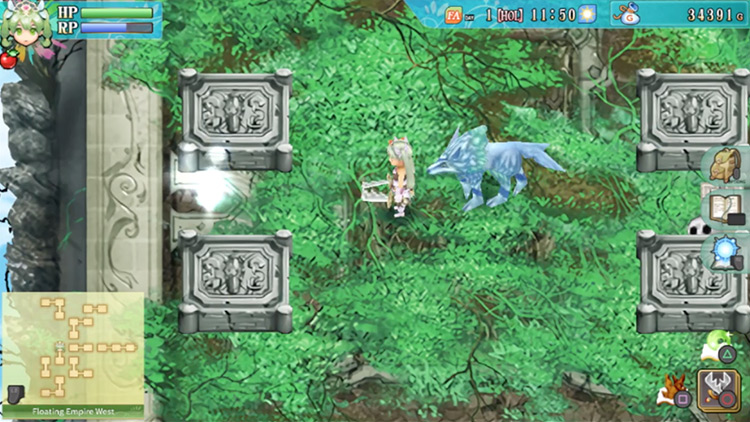
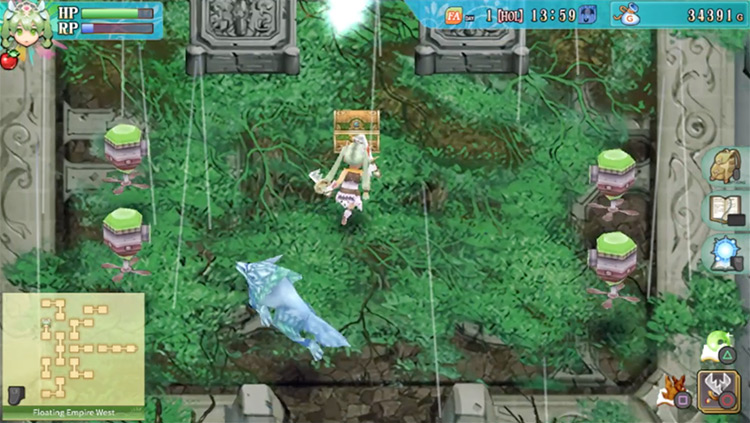
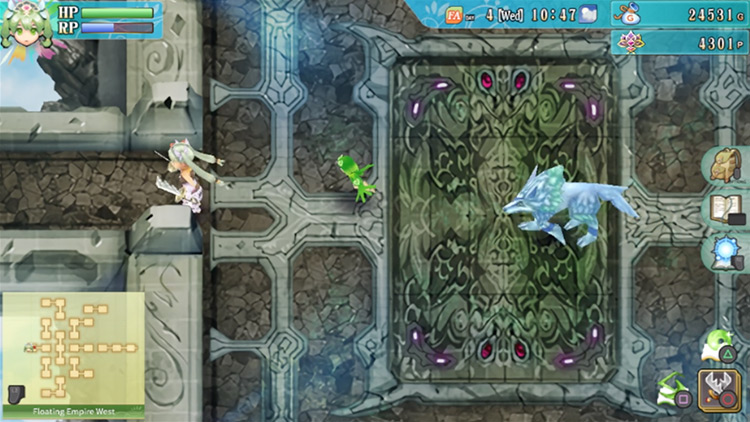
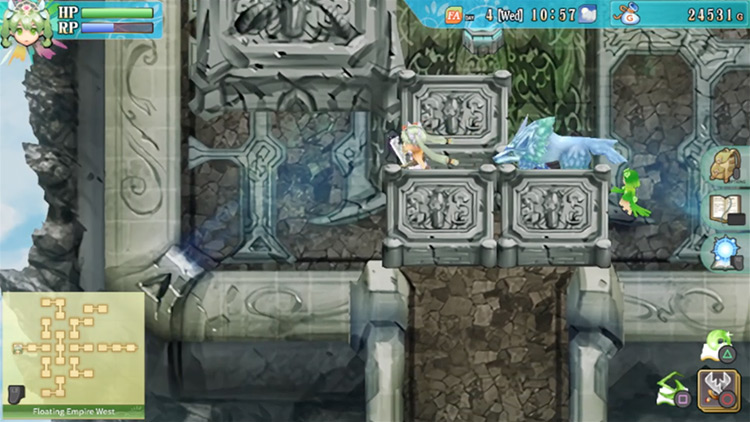
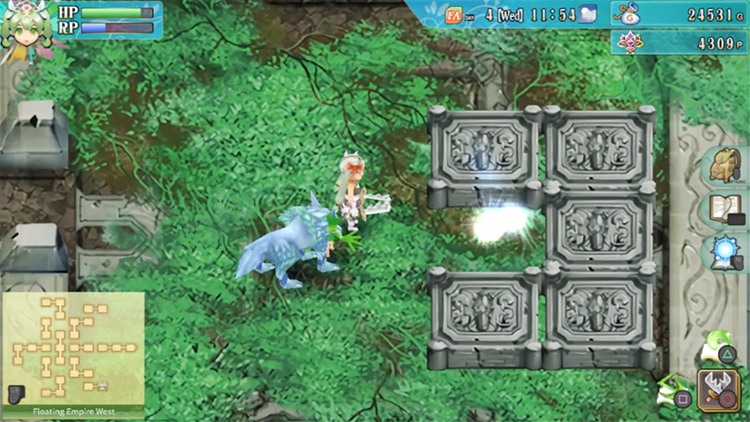
You’ll then find yourself in a room with several yellow pillars and a single yellow switch.
Stand on the deactivated yellow pillar as displayed in the screenshot below, then push the switch while standing there.
The path to the portal should then be clear, so you can go through the portal once you’re ready.
You’ll then be taken somewhere along the northern part of the map. From here, head east.
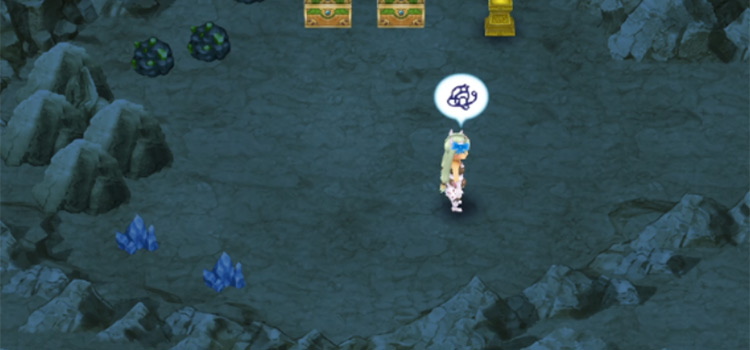
You’ll see two chests and a portal in the next room.
If you pushed the yellow switch a couple of areas ago, the pillars here should no longer be blocking the paths to the chests, and here’s what you’ll get:
- The chest near the top holds Mystery Potions
- The chest near the bottom contains a Magic Ring
When you’re done, head through the portal to return to the room with two portals by the entrance.
Finding the Red Switch
From here, take the south portal.
You’ll be transported to the area in the south.
From here, head east.

You’ll then need to go through the portal at the end of the path in this room.
After that, head through the path all the way to the west.
Next, go through the portal along the west wall of the room you’re in.
You’ll be in the southwest section of the map again.
Head west from here.
Go through the portal at the very end of the room once more.
You’ll now be back in the northwest section of this area. This time, head south.
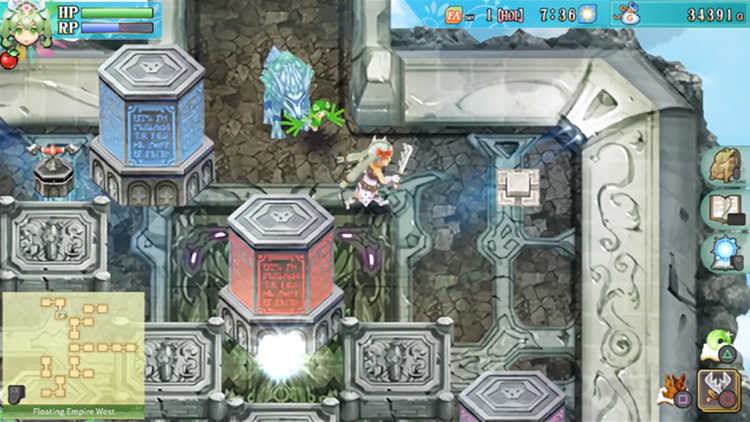
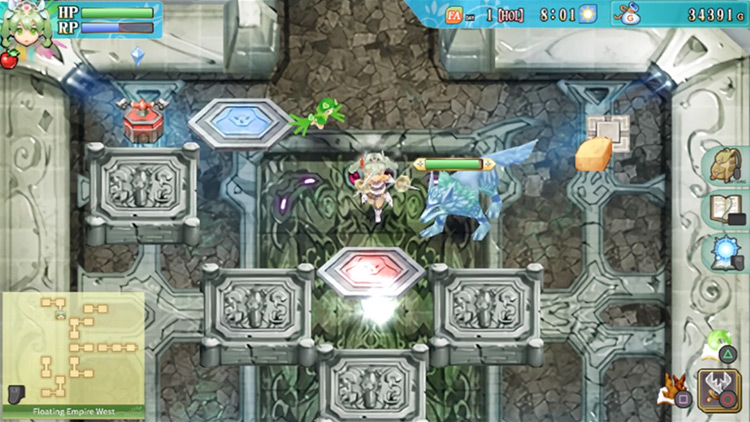
Next up is a room with multiple colored pillars.
There are also buttons and switches scattered around this area, so it’s a bit cluttered.
First, leave an item on the button located in the upper right corner of the area (pictured below).
The magenta pillar right below you will go down.
There’s a button right below that pillar that you’ll now need to push.
After you push down that button, the green pillar located in the lower left corner of the room will come down.
Make your way to that section of the area and press the button right below it.
The blue pillar directly above should no longer be blocking the path to the red switch.
So push the red switch to get rid of the red pillar blocking the path to the portal in the center of the room.
Once the red pillar goes down, go through the portal in the center of the area.
You’ll be teleported to a room with two portals and a rock wall in between them. The portals can be used to get to the opposite side of the room.
Finding the Mini-Boss
A barrier is blocking your way north here, so you’ll need to use the portals to clear all the monsters in the room.
Once you’ve successfully dispelled the barrier, head north.
The next room will have a portal on the left and a button on the right. Both are blocked by rock walls.
Clearing all the monsters in the area will unblock the button on the right.
Then pushing the button on the right will allow you to get to the portal on the left.
At this point, you’ll have two options:
- Take the portal to an optional treasure chest
- Or go north to fight the area’s mini-boss
We’ll cover both options below, but if you want to skip to the boss that’s fine too!
Option #1: Taking the Portal to the Treasure Chest
Go through the portal on your left if you’d like to find another treasure chest.
You’ll then find yourself in an area where a barrier is blocking the path up north.
Clear the area, then go through the north path.
A chest will be in the center of the room in the next area.
Open it to find a Stay-up Ring inside. Then a portal will be right above it, and you can use it to go back to the area with two portals near the entrance of the Floating Empire West.
Option #2: The Path to the Mini-Boss
If you want to fight the mini-boss at this point, head north of the area before you left to get the treasure.
Then you’ll need to take the portal right above you.
You’ll be taken to the room right beside the mini-boss area.
You can save using the journal here, and you can activate a portal that leads back to the entrance by pushing the red switch in the east.
When you’re ready, head through the path on the west to face the Floating Empire West’s mini-boss.
Floating Empire West’s Mini-Boss: Sechs Golem
| Sechs Golem Attacks | |
|---|---|
| Normal Phase |
|
| Enraged Phase |
|
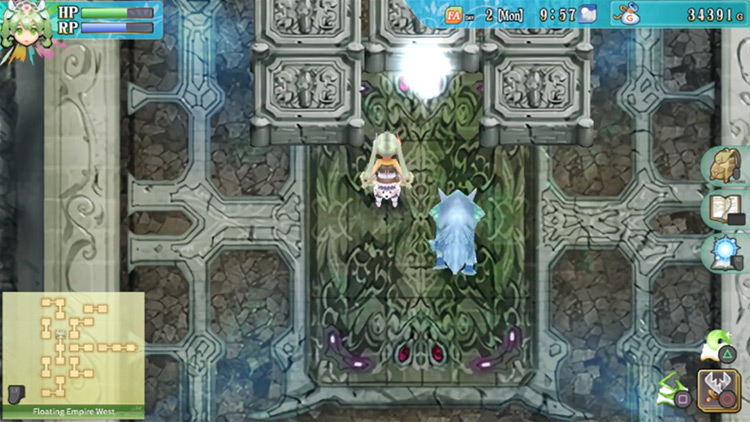
Once the Sechs Golem is defeated, proceed to the path on your left.
There will be another light blue switch in the next room.
Push that switch to get rid of another gate blocking the path to the final boss.
Getting Two Extra Treasure Chests
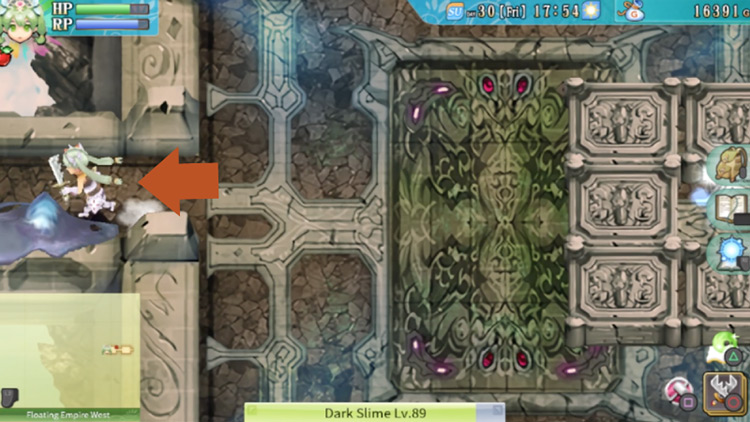
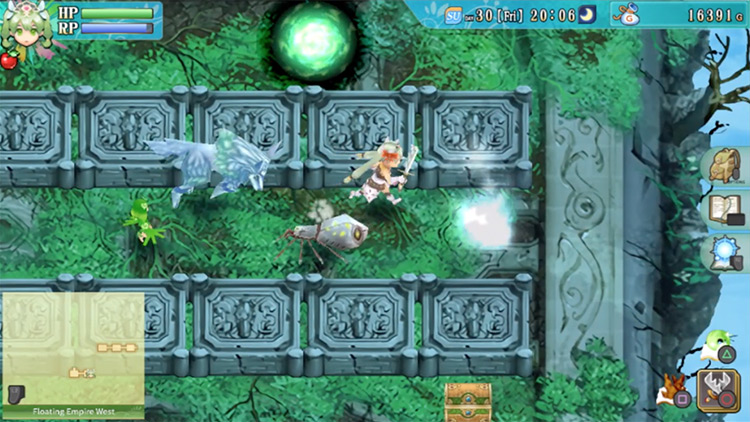
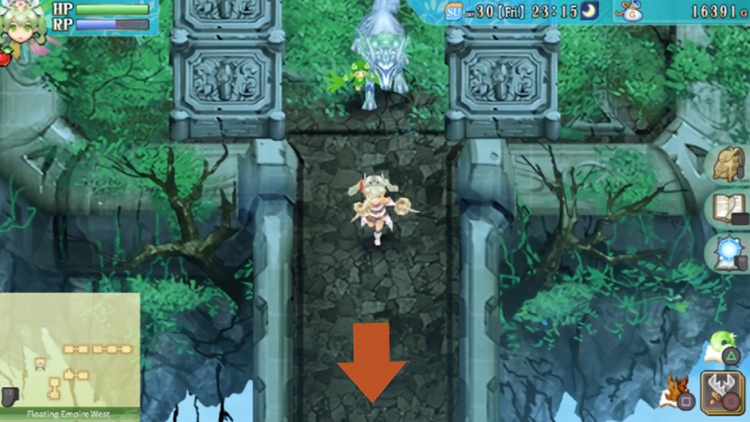
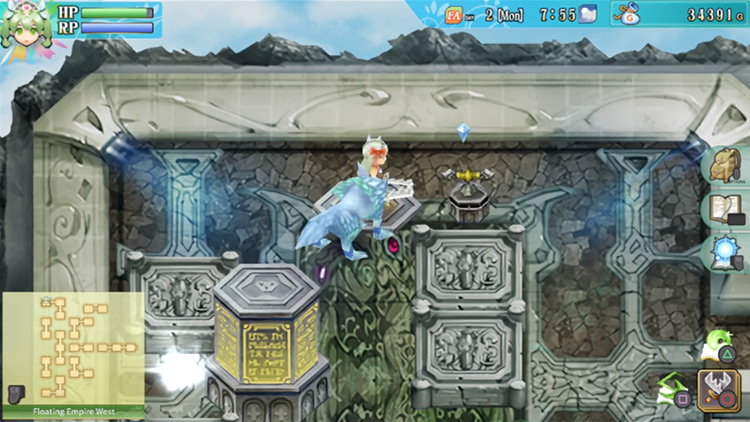
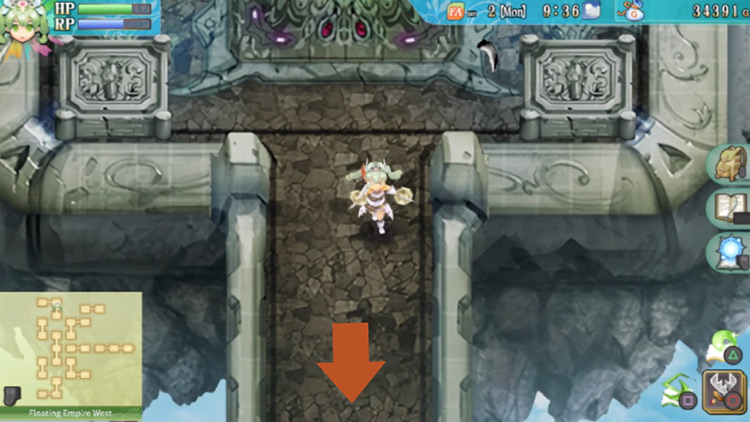
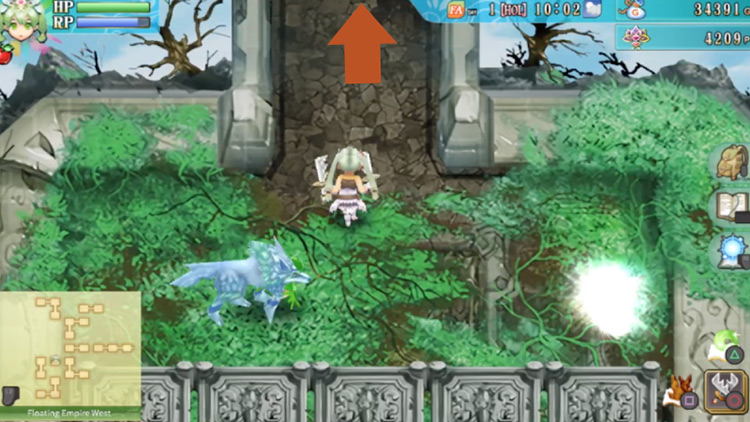
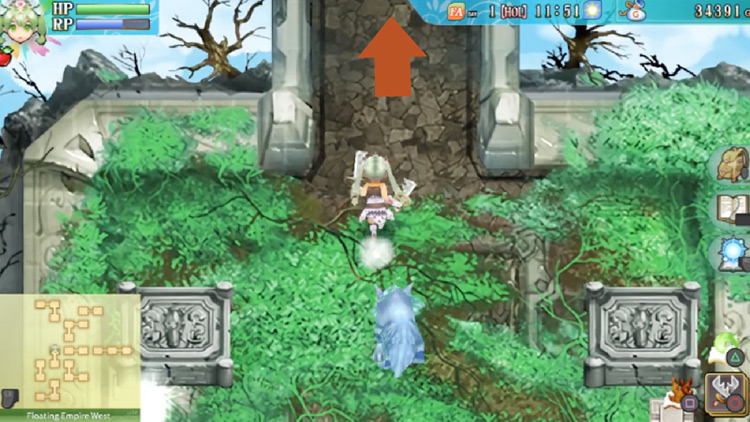
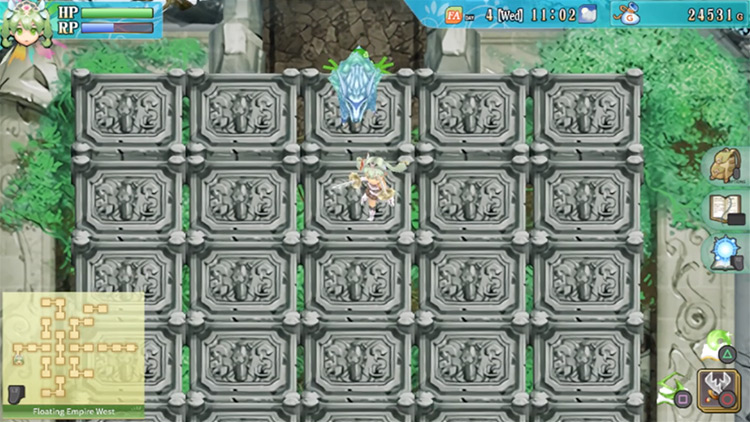
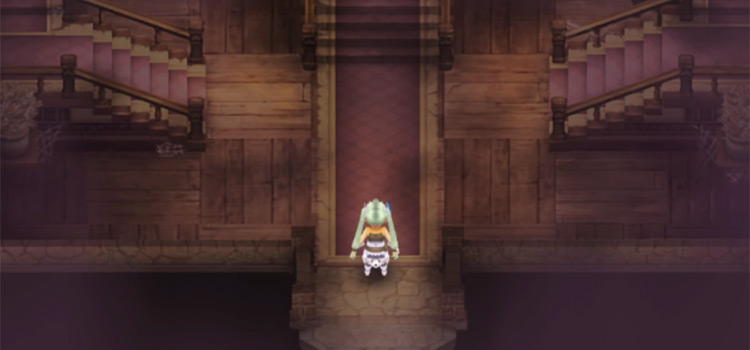
After that, use a gap in between the rock walls to get through to the path on the south (pictured below).
You’ll then be faced with a puzzle using the rock walls – and you can actually pass through some of them.
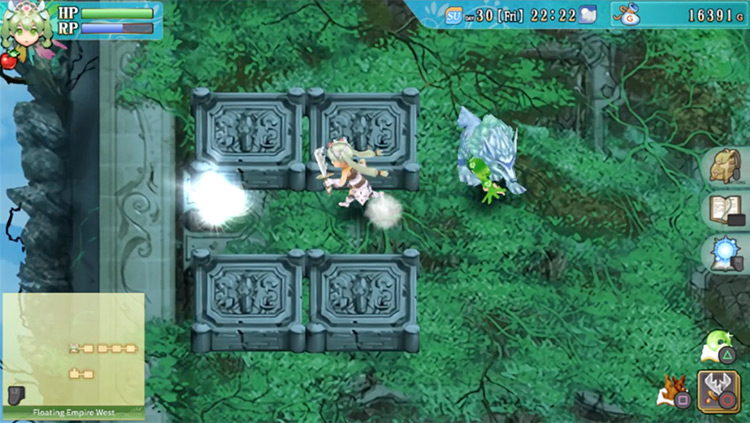
First, head directly south until you hit a dead end (pictured below).
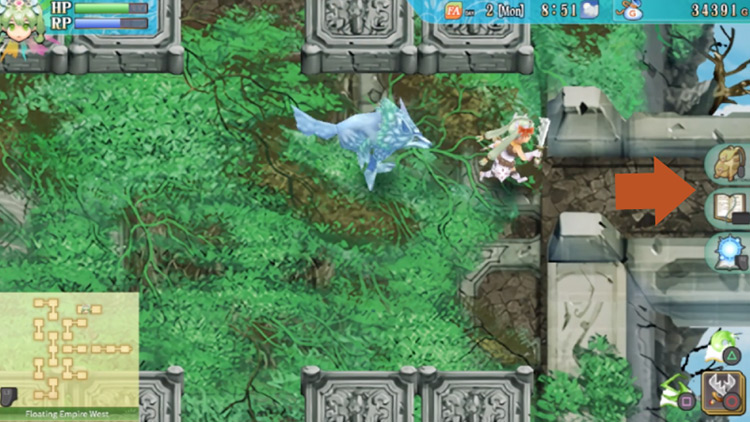
Then from here, head all the way to the right.
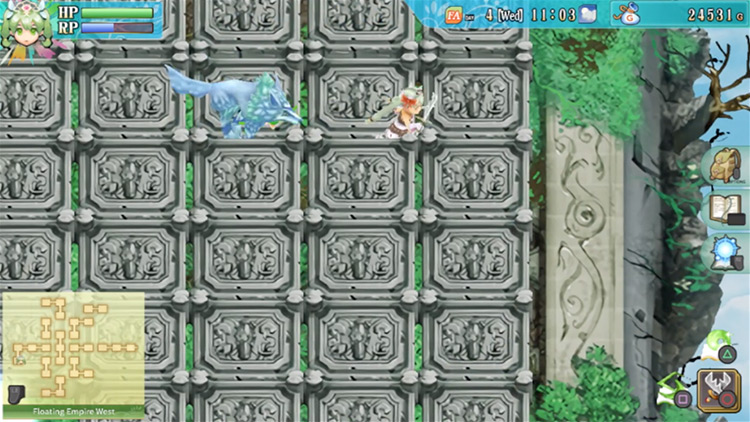
Then right by the edge of the room, you can head straight down by about two blocks.
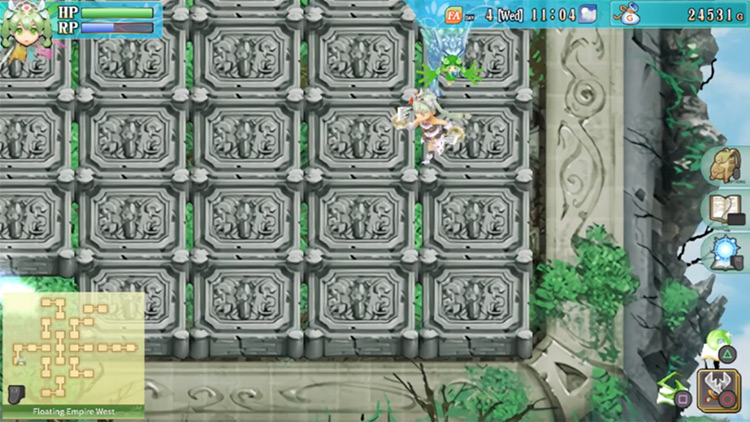
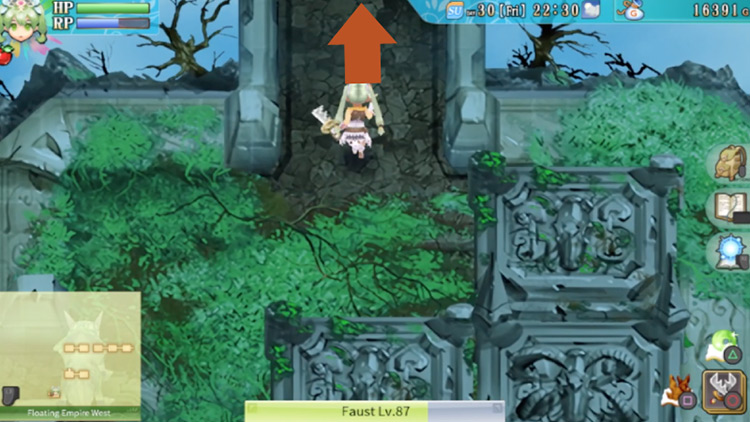
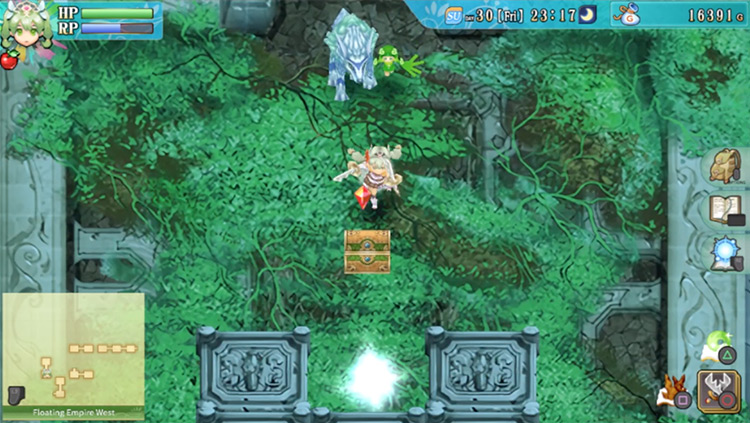
Then go all the way to the west until you hit a dead end. You’ll notice that there’s a portal in the southwest corner of the room.
You just need to head south from here, and you should be able to reach the portal.
Now go through the portal to teleport to another part of the map.

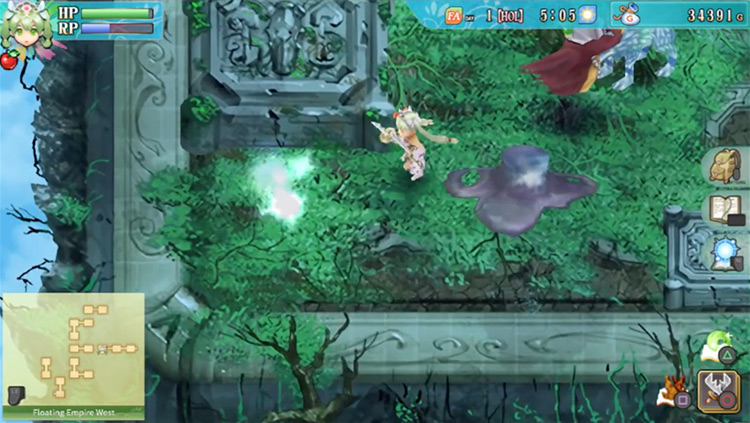
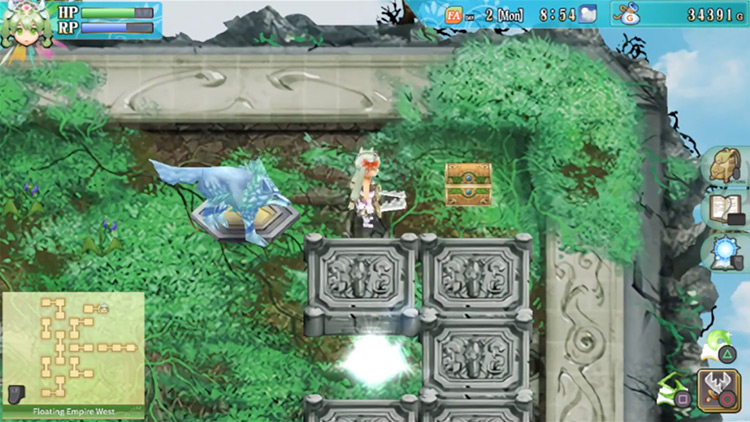
Taking the portal will teleport you somewhere in the southeast region of the map. From here, go east.
There are two chests and a portal in the next room. Open the chest on top to find a Delta Laser inside.
Next, head to the bottom right corner of the room and open the chest located there. You’ll find a Cyclone ability inside.
When you’re ready to proceed, go through the portal by the center of the room. This will take you back to the area with the two portals by the entrance of the Floating Empire West.
Tip: If you’re done with this area, you can use your spell to warp back to the entrance of the Floating Empire.
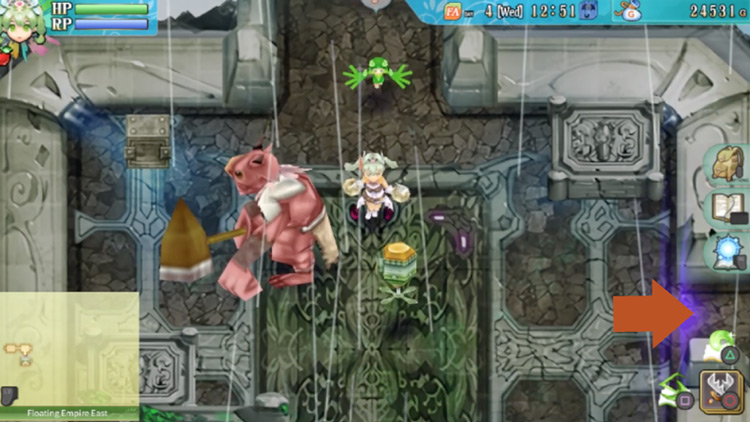
Exploring the Floating Empire East
The next region to explore is the east.
To get there, go through the path on the east at the intersection with the gates to the final boss.
In the next room, you’ll see several colored pillars.
Each of these will come down as you explore the Floating Empire East region.
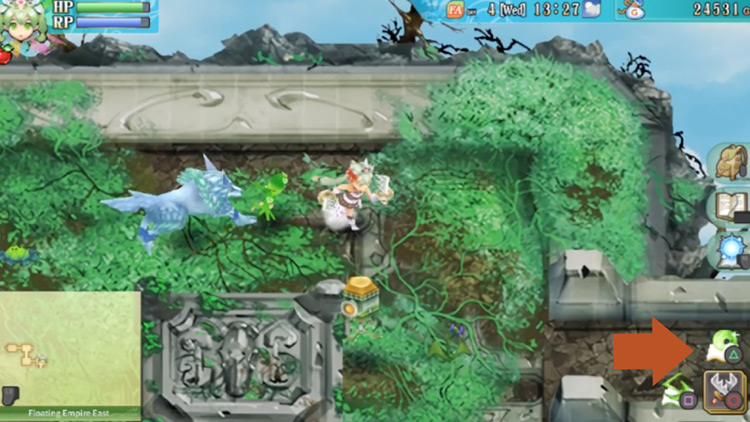
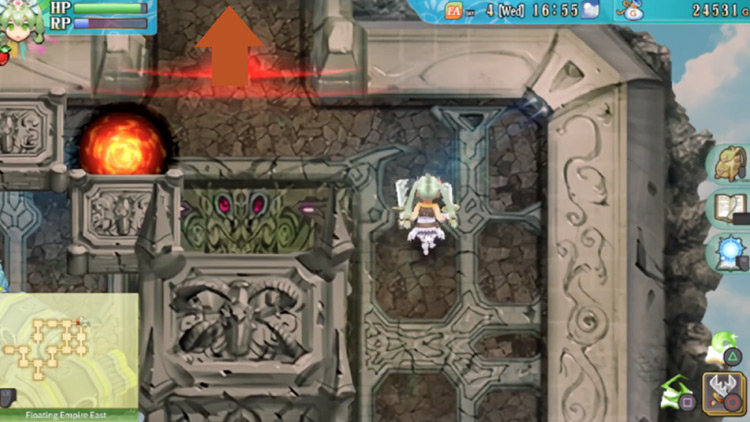
From this room, head east.
Finding the Yellow Switch (Floating Empire East)
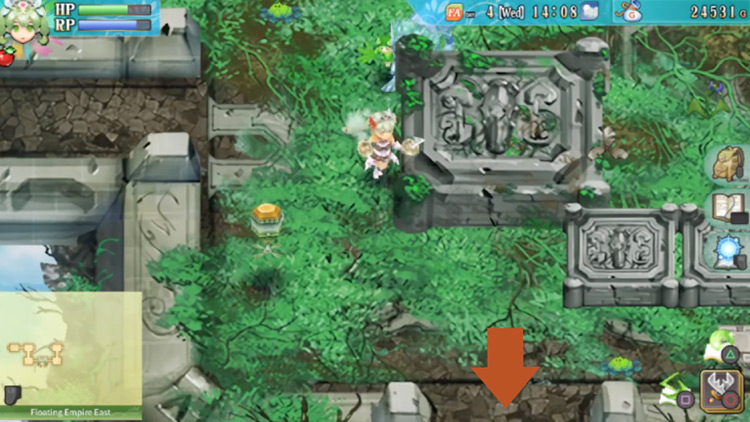
Next up is a room with several yellow pillars.
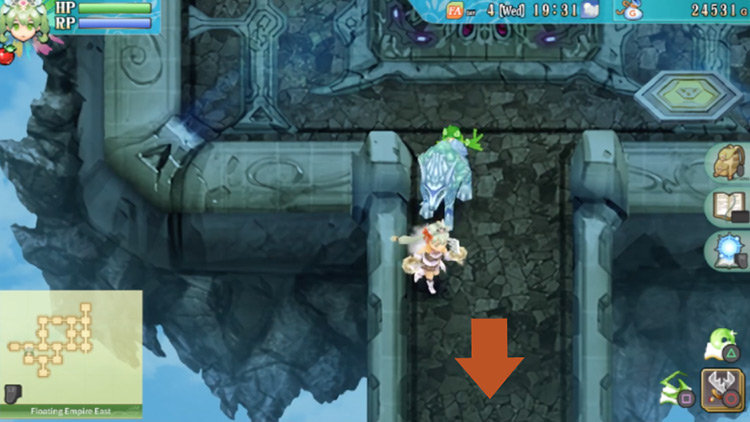
Head south from here.
A barrier is blocking your way going east in the next room.
You’ll need to clear the entire room in order to dispel the barrier. Once the barrier is gone, head on east.
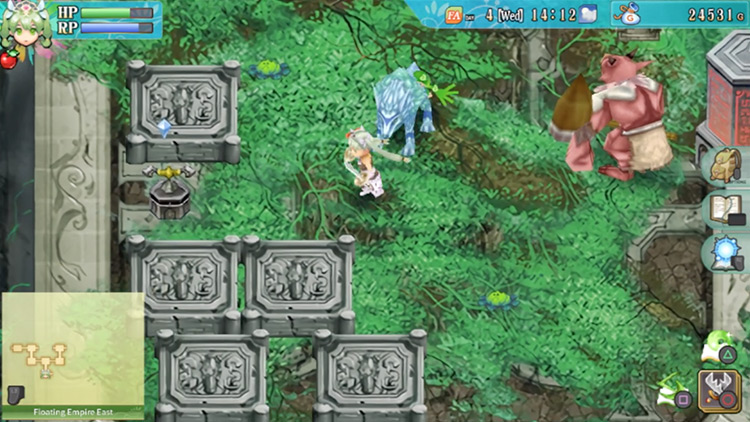
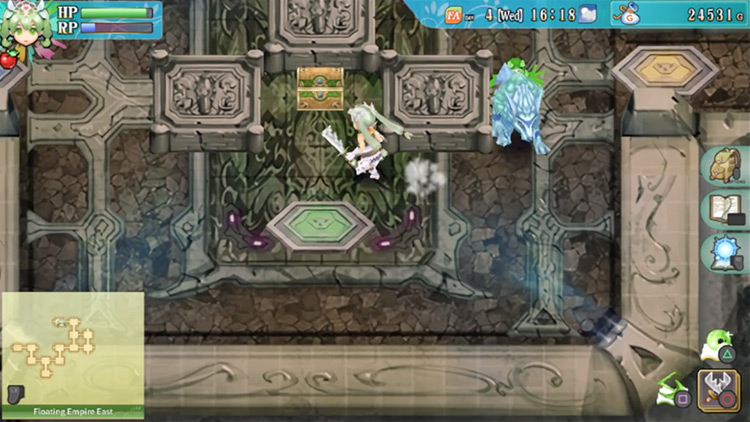
In the next room there are a few carnivorous plants lying on the ground.
There’re also rock walls blocking your way to the upper right part of the room.
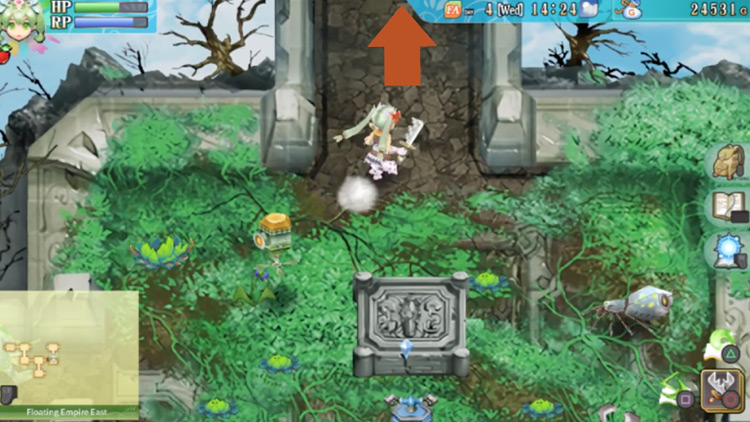
So first, let’s head south.
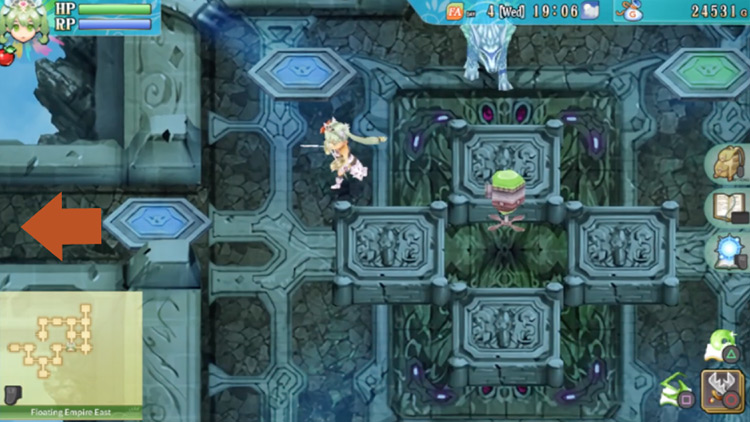
In the next room there’s a red pillar on the right and a yellow switch on the left.
Push the yellow switch, then return to the previous room up north.
Finding the Blue Switch (Floating Empire East)
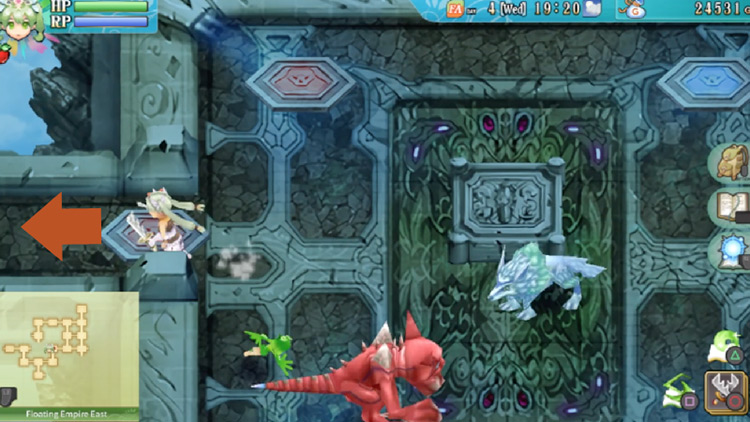
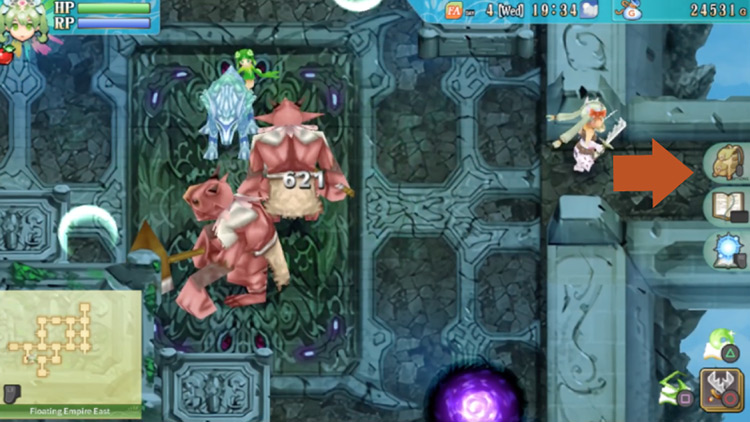
Now go to the bottom right corner of this room and throw an item on the button there.
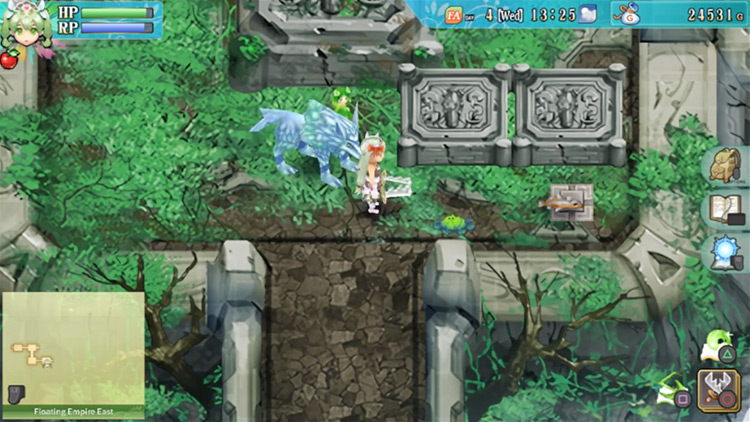
This will get rid of one of the rock walls blocking your path above.
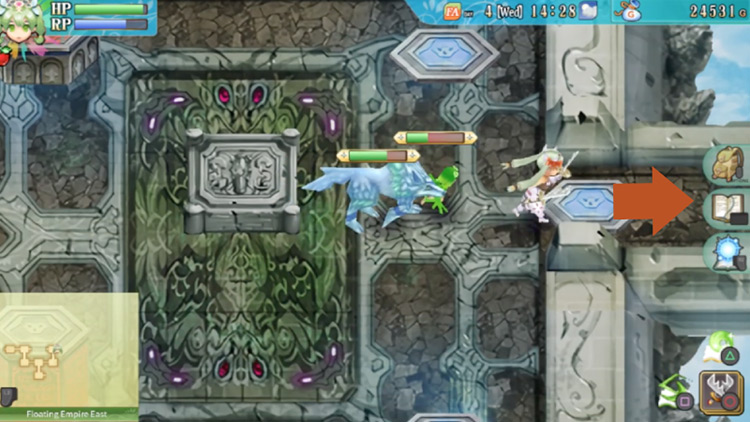
Now you can go through the top, then make your way through the path on the east.
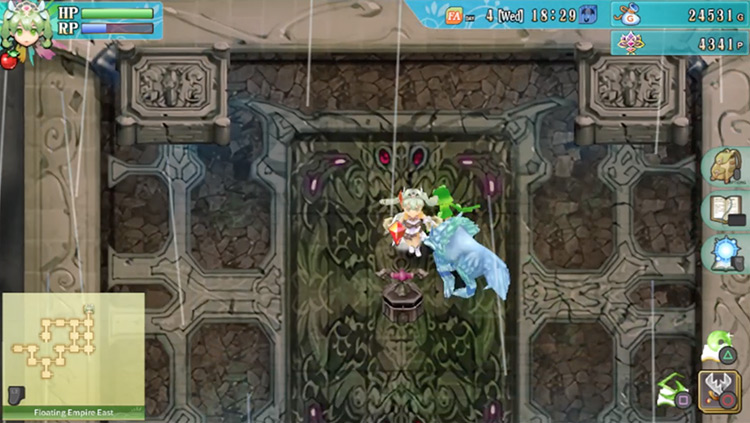
The next room will have several carnivorous plants sprouting all over the ground. You need to carefully make your way past them to get to the blue switch located in the center of the room.
Press the switch once you reach it.

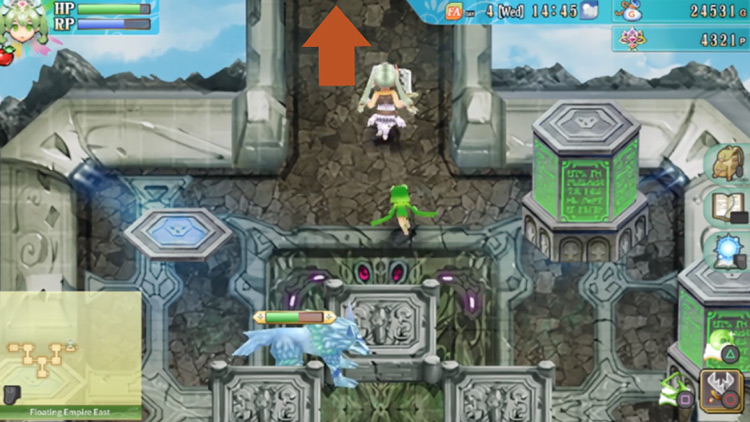
Finding the Green Switch (Floating Empire East)
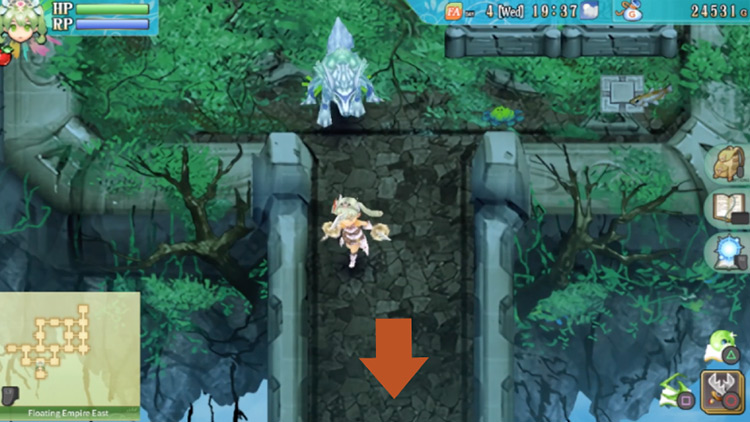
After that, head north.
In the next room are several red pillars and deactivated blue pillars.
Thanks to the switch you just pushed, you’ll be able to make your way through the path on the east.
You’ll then be in a room with green pillars on the right and deactivated blue pillars on the left.
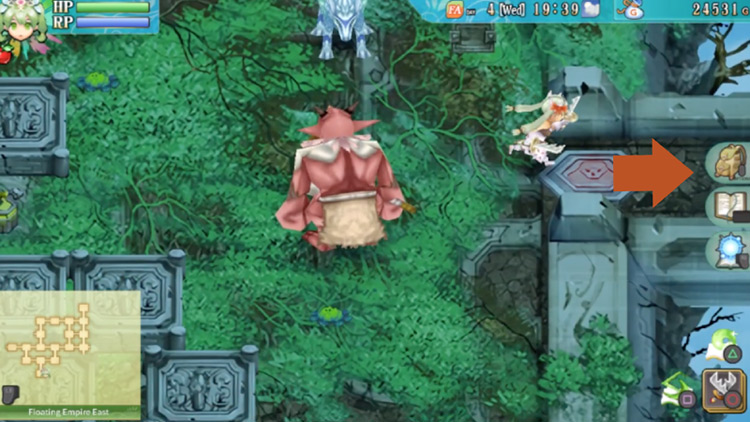
From here, head north.
A barrier will be blocking the path to the east in the next room. Defeat the mobs in the room to dispel the barrier.
Once the barrier is gone, head east.
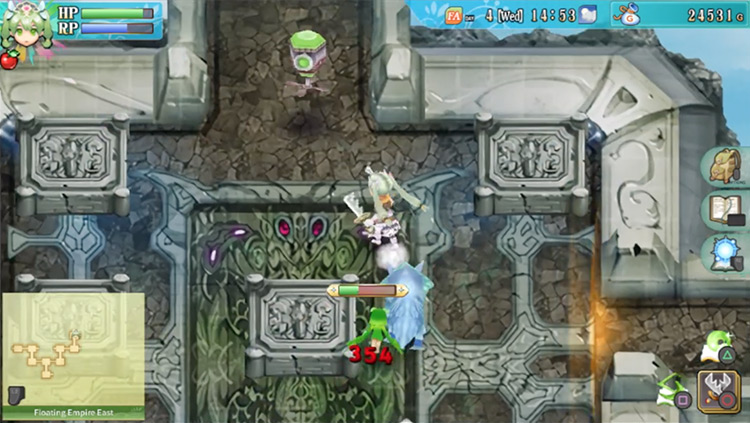
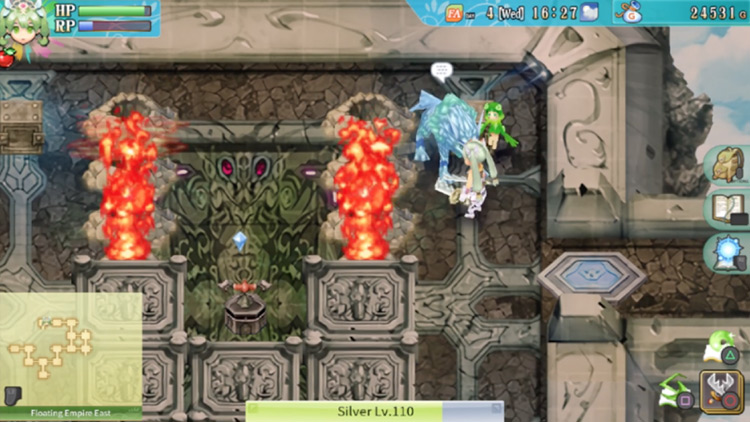
There’s another barrier blocking the path to the south in the next room.
You’ll need to clear the room, but a gate will be tucked behind flame-spouting geysers. You can easily get rid of it using long-range attacks.
Once the barrier is gone, head south.
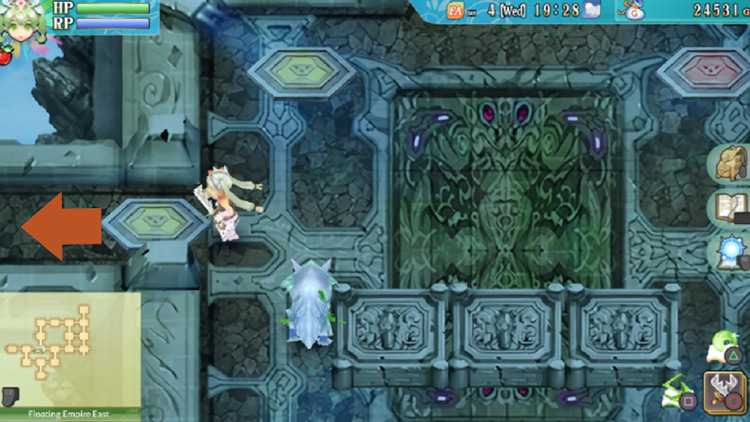
There’s a green switch by the entrance of the next room. The rest of the room will be blocked by a rock wall so there’s not much else you can do here.
For now just push the green switch and then head back to the previous room by going back north.
Finding the Red Switch (Floating Empire East)
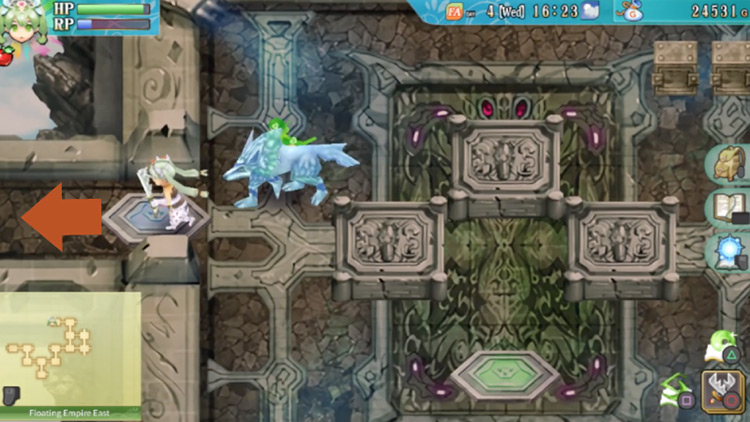
Now back in the previous room, head west here.
After that, head north.
You’ll see a deactivated yellow pillar on your left and a deactivated green pillar on your right in this room.
Head towards the western path first.
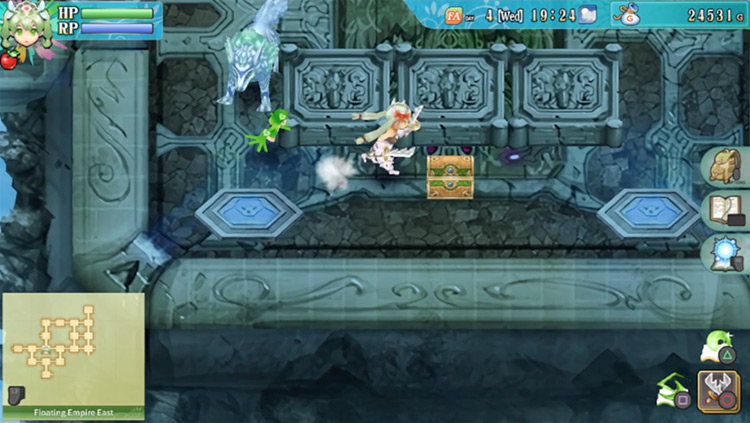
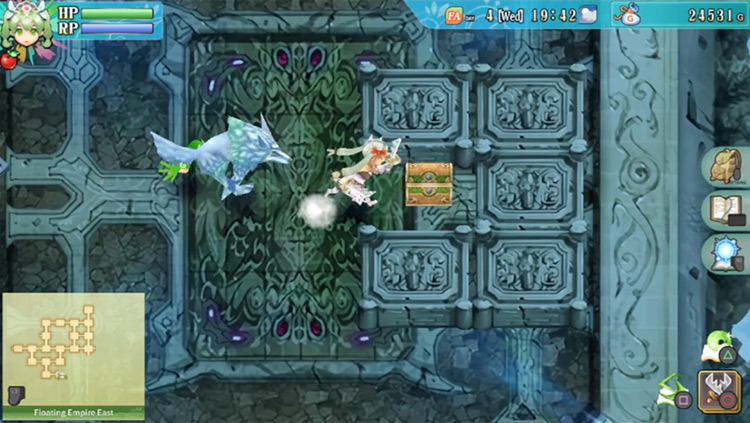
There’s a chest in the center of this next room right above a deactivated green pillar. Open it to find Curry Udon inside.
Then head west past a deactivated blue pillar.
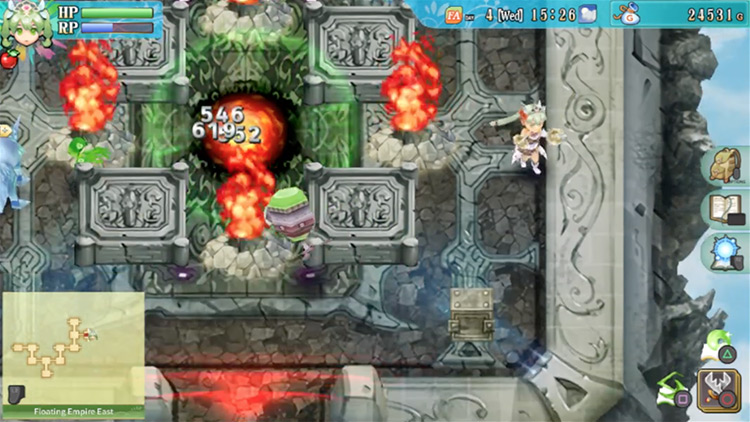
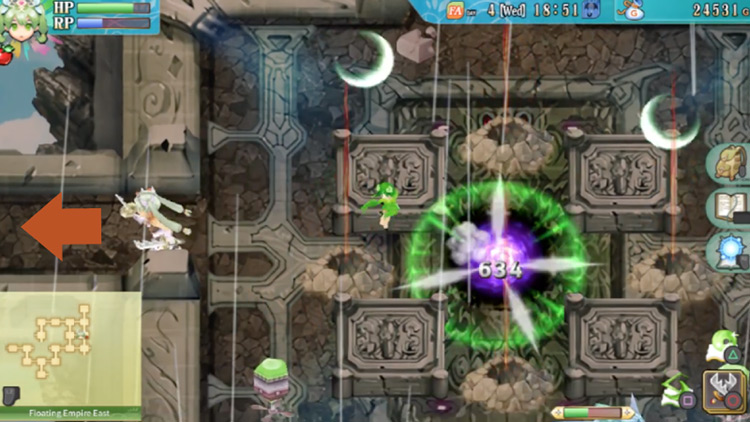
The next room has a red switch in the center. Unfortunately, it’s behind rows of flame-spouting geysers.
Carefully make your way past them and push the red switch.
Once you’ve done that, head back to the previous room on your east.
And then take the path all the way to the right to go east again.
Finding the Pink Switch (Floating Empire East)
There’s a barrier blocking the path up north here.
Clear all the enemies in the area to dispel the barrier. Then head north.
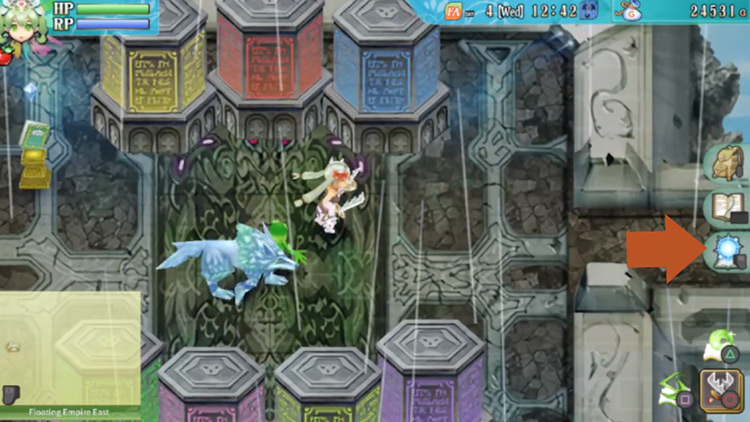
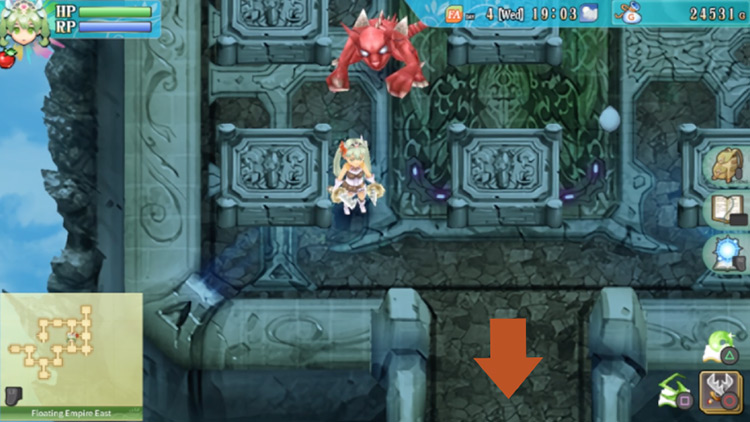
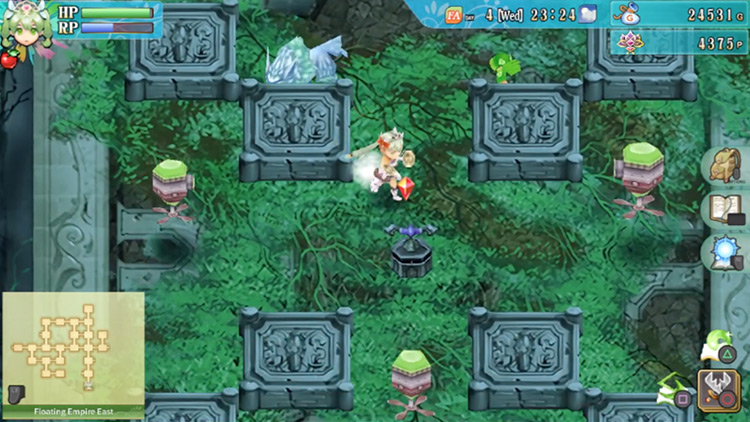
The next room has a pink switch on top of a huge rock platform.
Defeat all the monsters in the area to make the platform go down. Then push the pink switch.
Once it’s pushed you can head south to the previous room.
Then proceed south again, now passing the deactivated pink pillar.

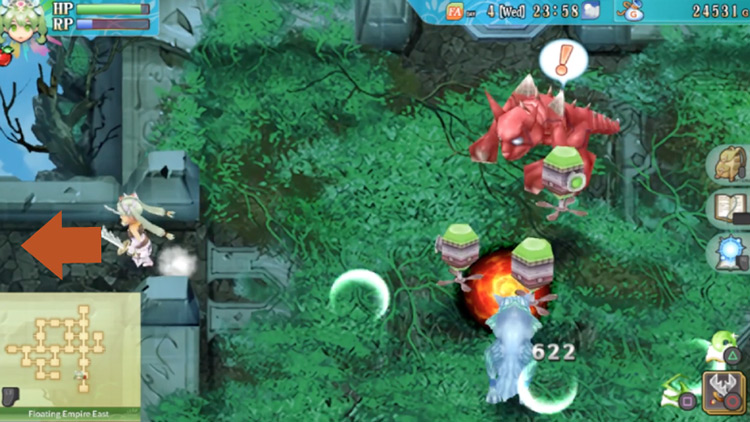
After that, head west.
And then take the south exit in the next area.
You’ll be back in the room with the blue and green pillars. But this time, the green pillars are deactivated.
For now, head west.
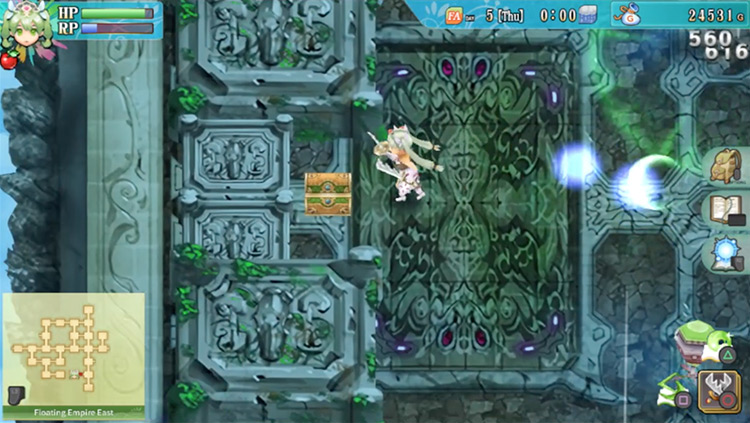
You’ll find that the red pillars have been deactivated as well in the next room. You can proceed past them and go west.
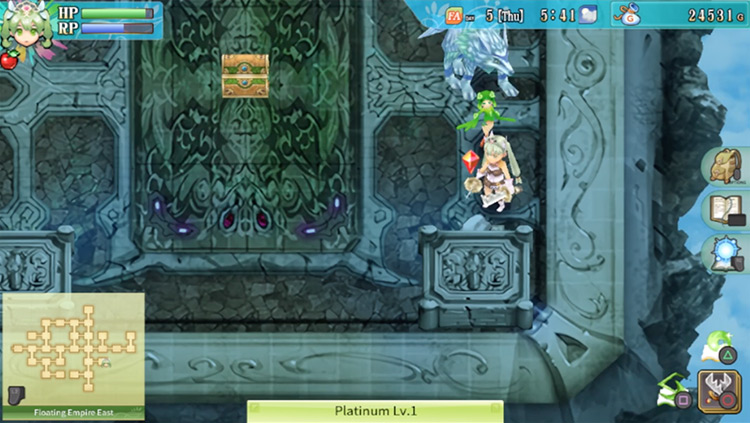
There’s a chest along the south edge of this next room, and you can open it to find some Platinum inside.
(Optional): Getting a Chest with Double Steel
From the chest with the Platinum, you can proceed west past the deactivated yellow pillars.
You’ll find yourself back in one of the earlier rooms with the yellow pillars. This time they’re deactivated.
From here, head south.
Then go east.
After that, you’ll need to head south.
The path on the east that was being blocked by a red pillar area will now be accessible.
So from here, head east.
There’s a chest in this next room with Double Steel inside. Once you open it though, you’ll be ambushed, so be prepared to fight!
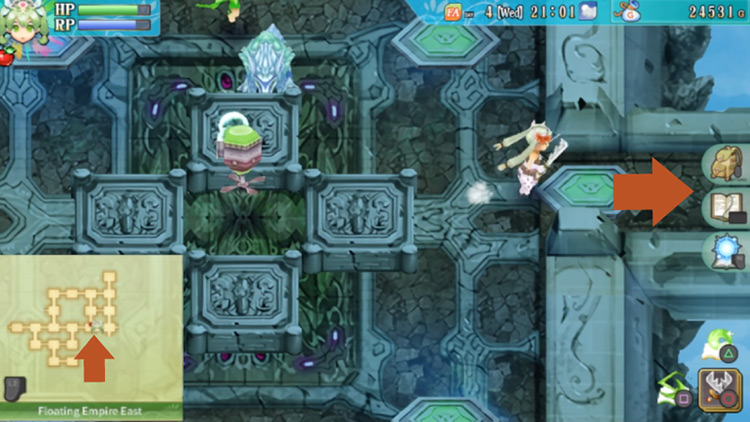
When you’re ready, proceed back to the area with the deactivated blue and green pillars (It’s marked on the map in the screenshot below).
Getting To the Mini-Boss
From the room in the map above, you’ll need to head east.
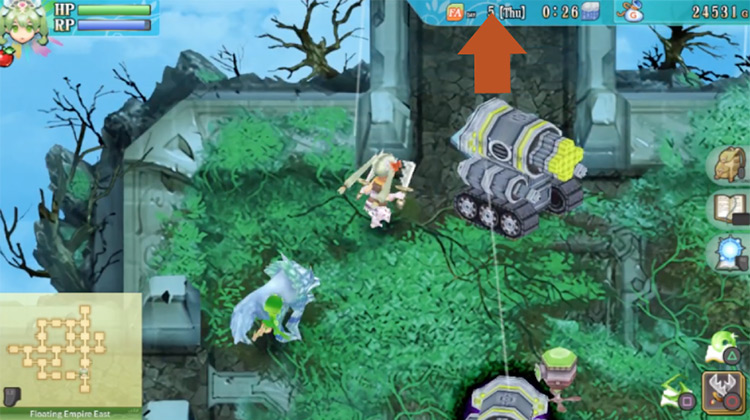
There’s a Master Giant that’s easy to beat in the next room. You’ll also find the green and pink pillars here deactivated.
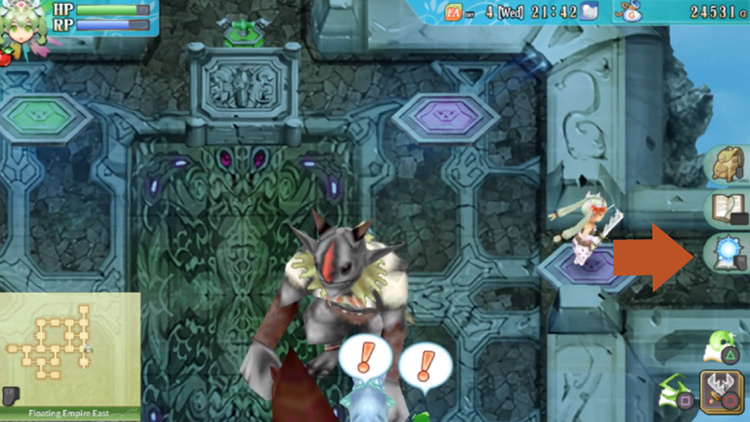
From this room, head south.
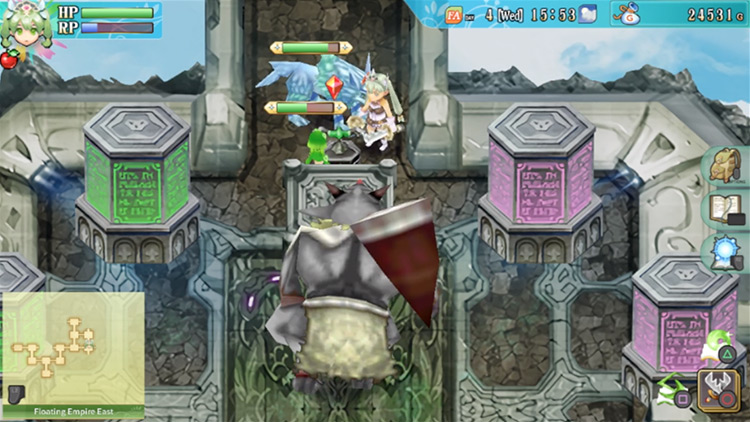
There’s a yellow switch right by the entrance of the next room.
Push the switch, then return to the previous room right above you.
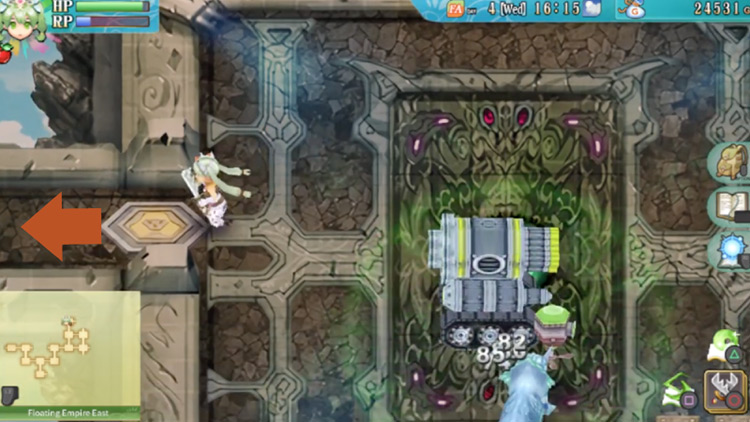
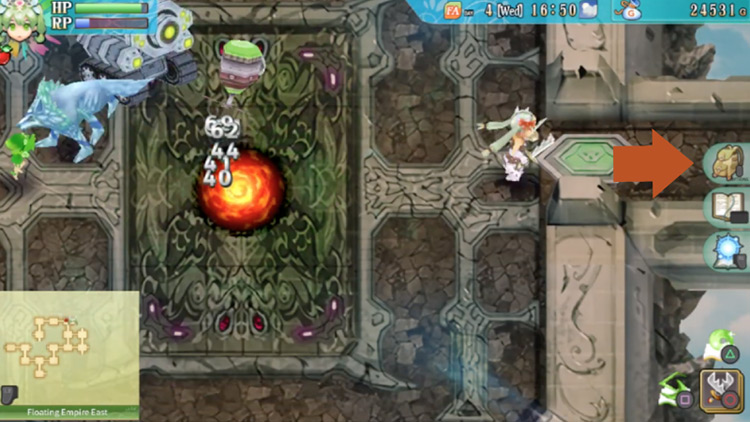
This time, head east.
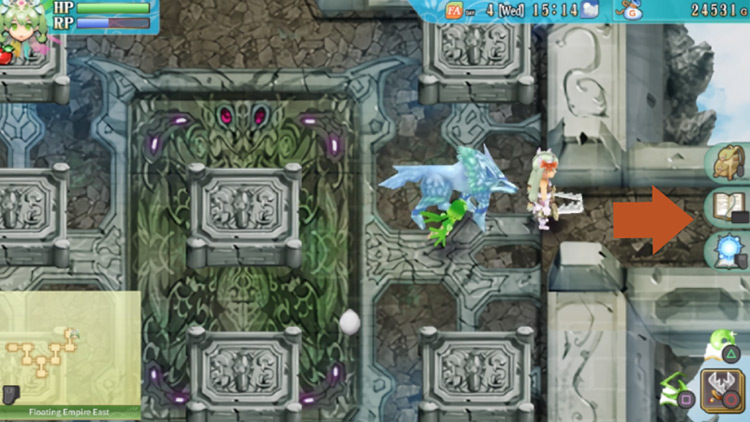
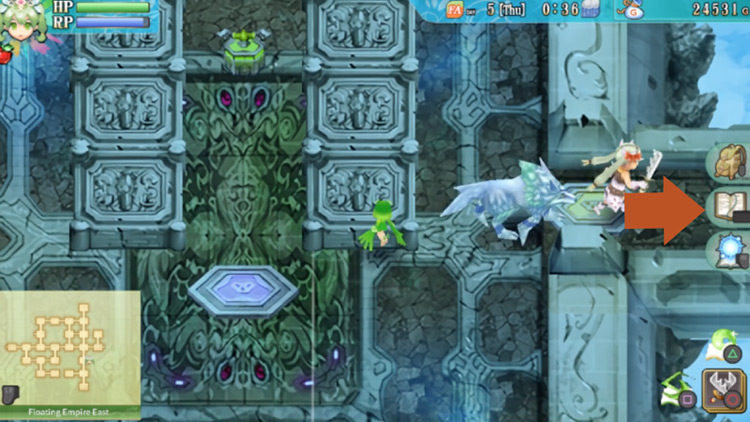
Once you get to the next room you should find a save spot, and you can head to the bottom section of the area to press the button there to activate a portal back to the entrance (if needed).
At this point, you can head east to fight the Floating Empire East’s mini-boss.

But we’ll quickly walk you through how to find all the other chests in the area before fighting the mini-boss, though this is optional.
(Optional) Finding the Chests
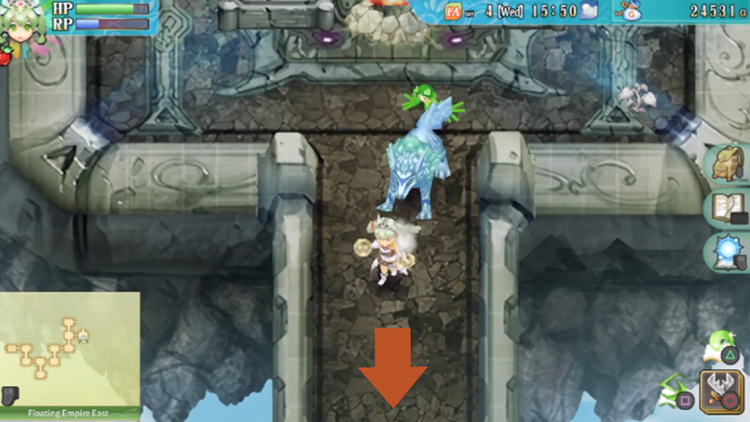
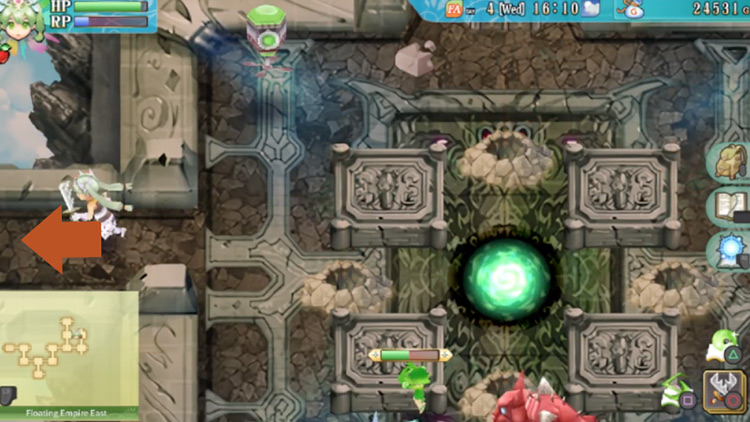
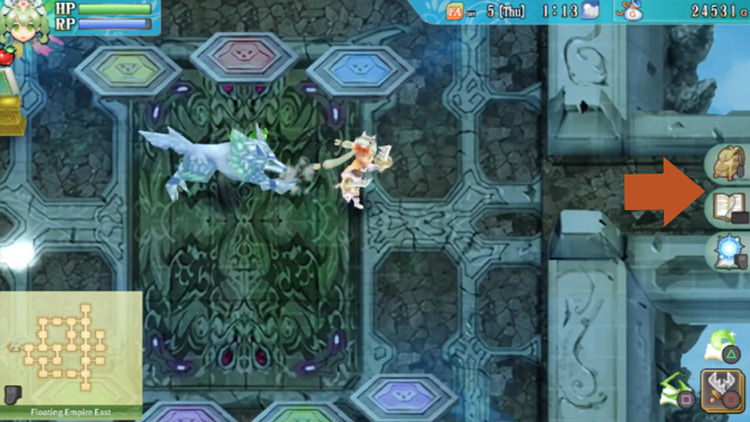
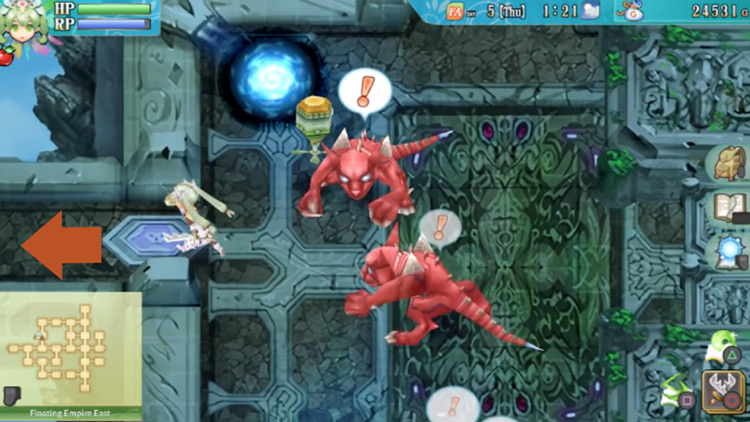
If you want to find more chests, you’ll need to head north from here.
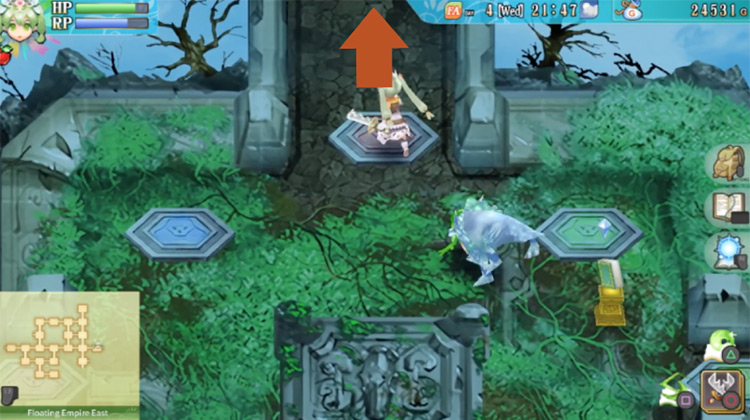
The next area will be filled with mobs.
Clear the entire area, then a portal will appear in the north. Take the portal.
(Optional) Finding the Purple Switch (Floating Empire East)
The portal will take you to the southeast region of the map.
There are barriers blocking the paths on your west and south here. Clear the area to dispel the barriers, then head south.
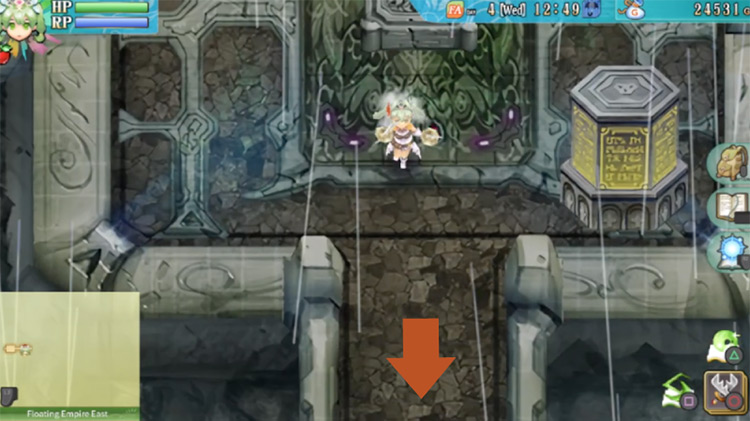
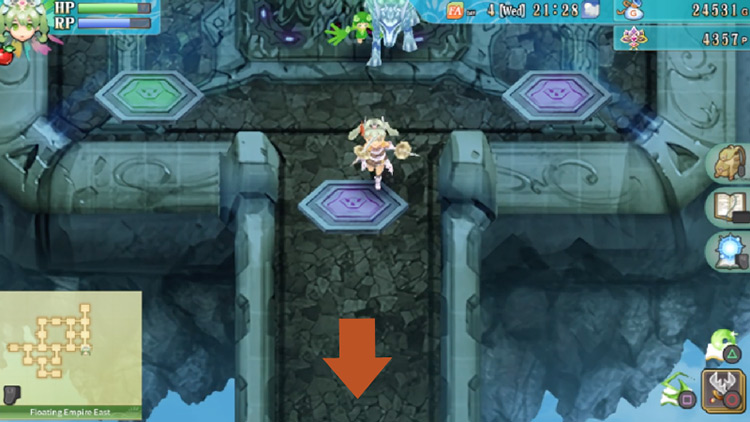
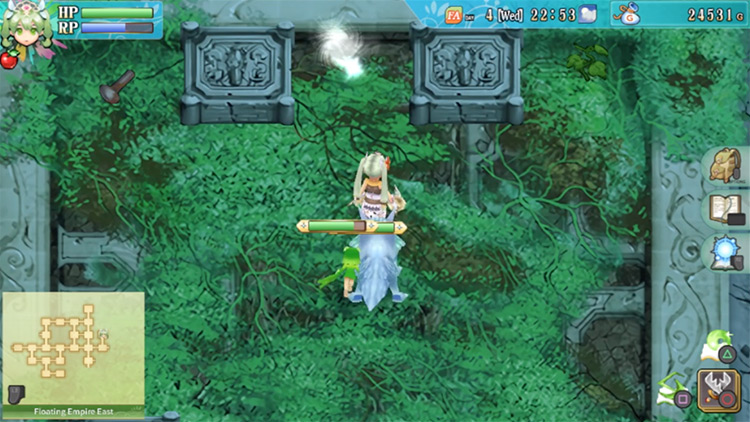
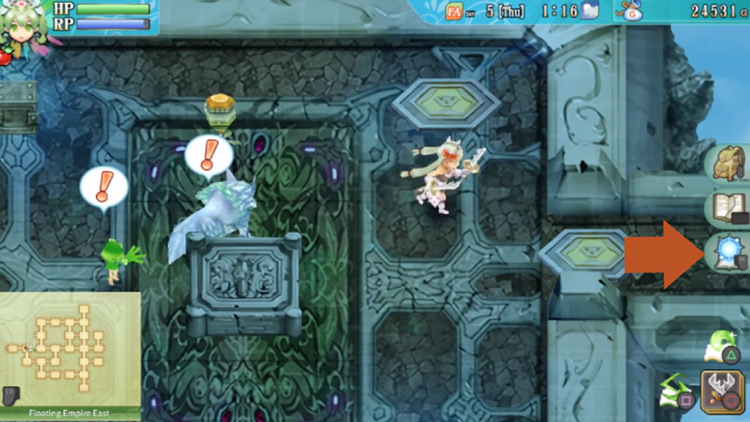
There’s a purple switch in the center of the next room.
Push the switch, then head back up north to the previous room.
(Optional) Getting Grand Impact
This time, head west.
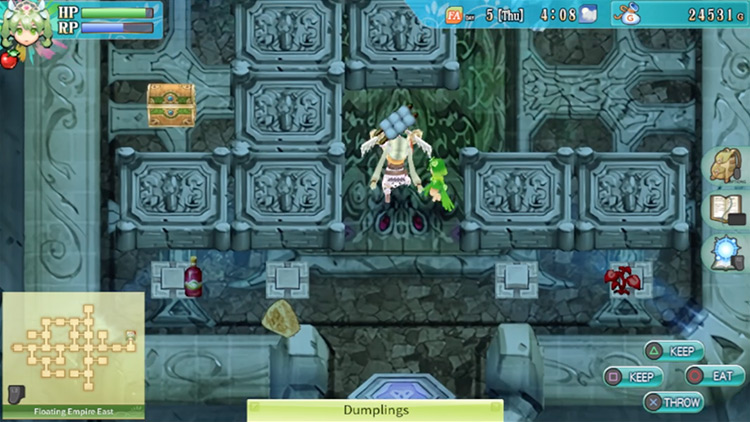
You’ll find a chest in the next room. Open it to get the Small Crystal inside.
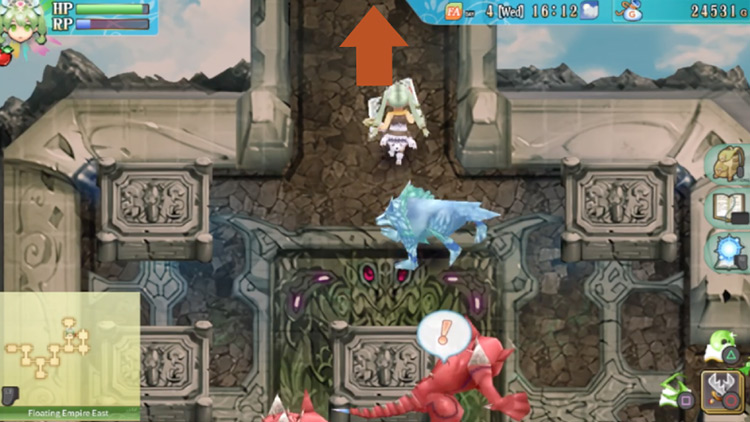
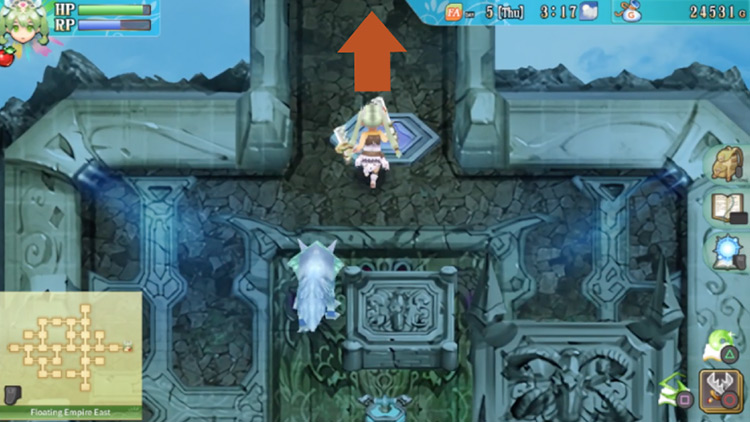
Then head back to the previous room on your right, and this time take the northern exit.
You’ll be back in the room with the yellow switch.
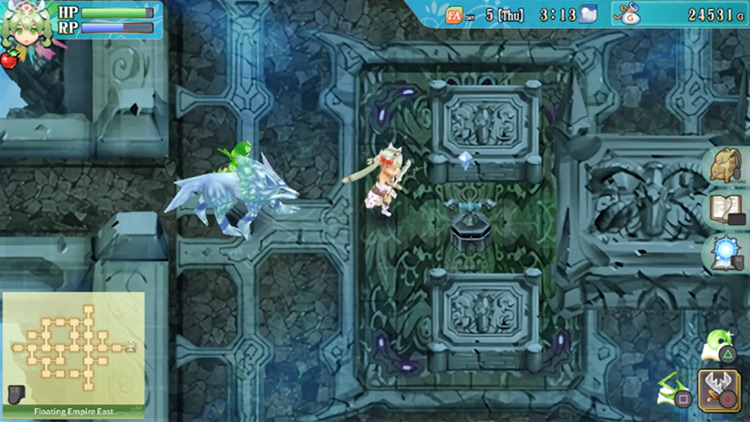
From here, head east.
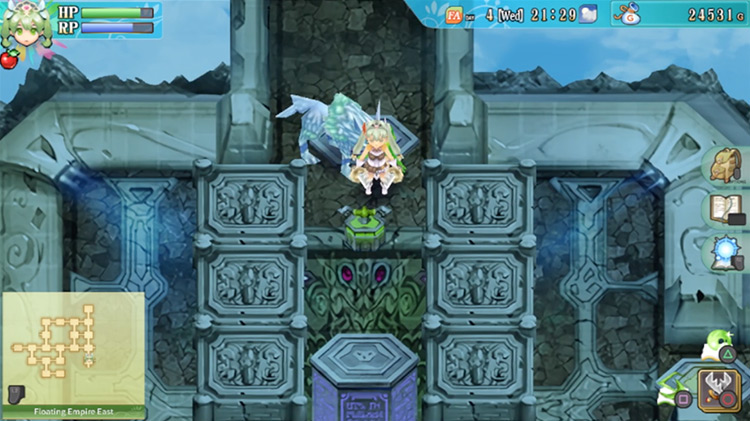
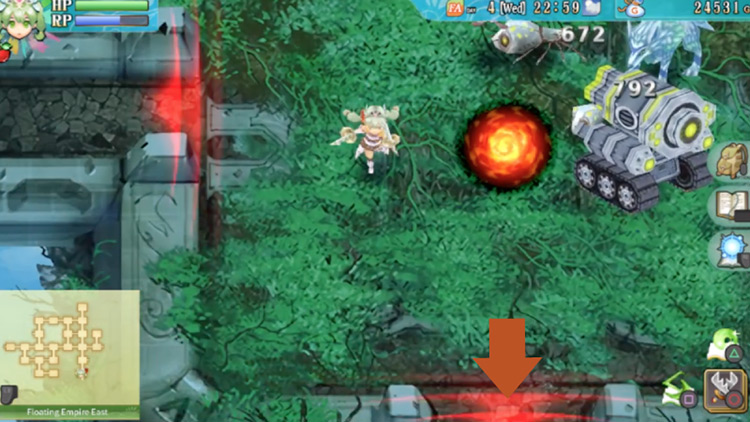
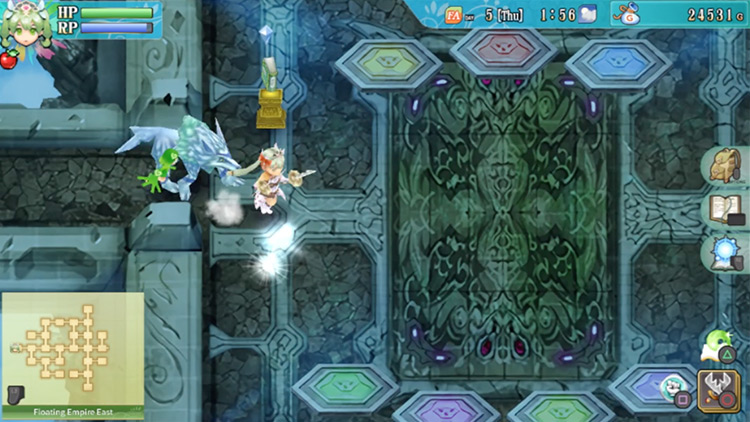
There’s a chest in the center of the next room, but it’s being blocked by four rock walls.
There’s also a hidden button in the lower right corner of the room. Leave an item on it, then the rock walls will come down.
Now you can open the chest to find a Grand Impact ability inside.
(Optional) Getting Avenger Rock & Round Break
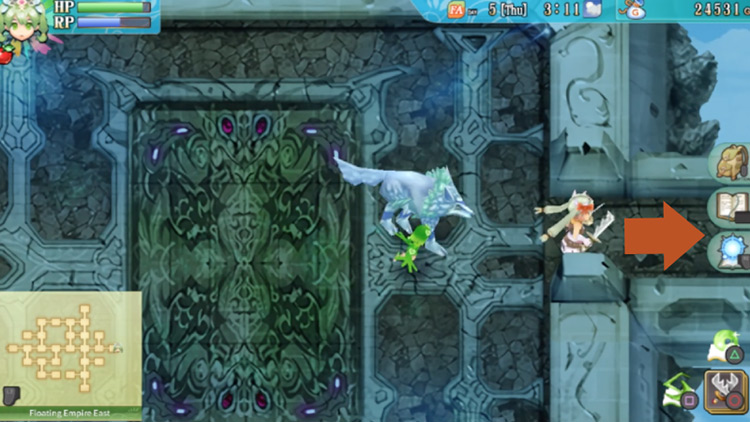
Use your teleport spell to warp back to the entrance.
Then go back to the room with the rows of multiple colored pillars. From there, head east.
Then go east again past the deactivated yellow pillars.
You’ll then be back in the room with the deactivated yellow and red pillars. From here, head north.

There will be a deactivated purple pillar along the path on the west.
Go through that path on the west.
In the next room, you’ll find two chests in the middle of the area.
- The top chest has an Avenger Rock spell inside
- The bottom chest has a Round Break ability
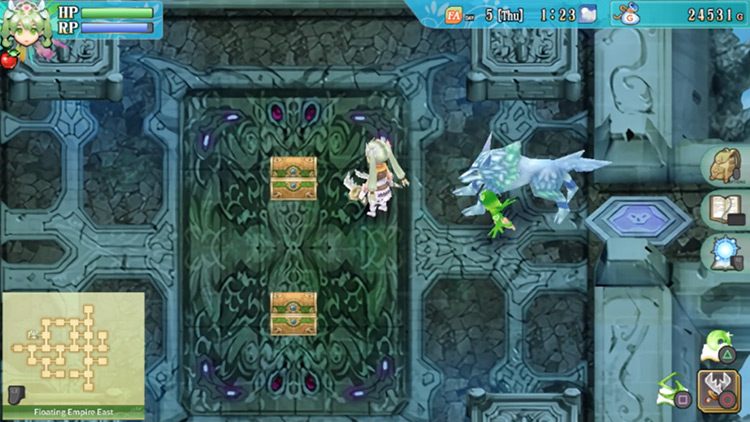
And that’s it! All treasure chests acquired.
Once you’re done here, you can head back to the entrance with the multiple colored pillars.
Then take the portal here to be transported back to the room just before the mini-boss area in the Floating Empire East.
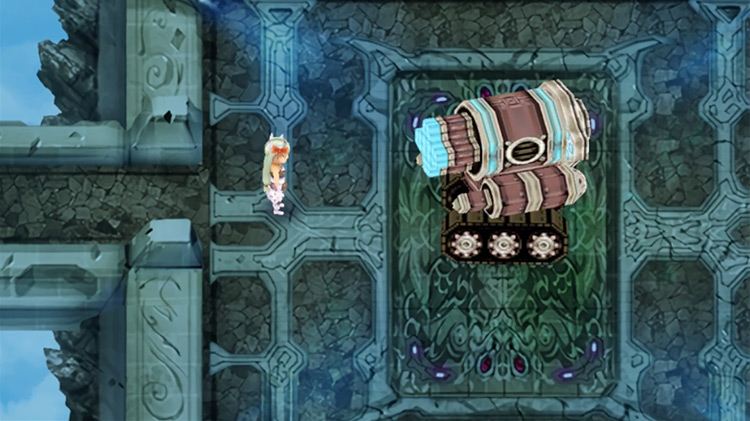
Floating Empire East’s Mini-Boss: Sechs Tank Lv. 140
| Sechs Tank Lv. 140 Attacks | |
|---|---|
| Normal Phase |
|
| Enraged Phase |
|
Once the tank is defeated, head east.
You’ll then find the last light blue switch for the final gate at the boss entrance.
Push the switch, then you’ll watch a short scene of the gate going down.
Floating Empire East Puzzle Chests
From the final blue switch area, you can head up north for some extra treasure locked behind a puzzle room.
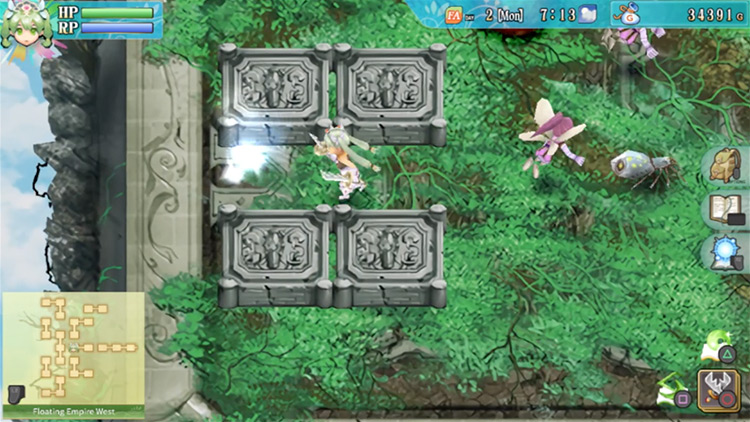
The next room has a puzzle using four buttons. Here’s how to solve it:
Place an item on the first, second, and fourth buttons only.
This will allow you to get to the chests in the room.
- The lower chest contains a recipe for Miracle Axe
- The upper chest has Gold Cabbage and Gold Pumpkin seeds
When you’re done here, you can return to the entrance of the Floating Empire and head for the final boss.
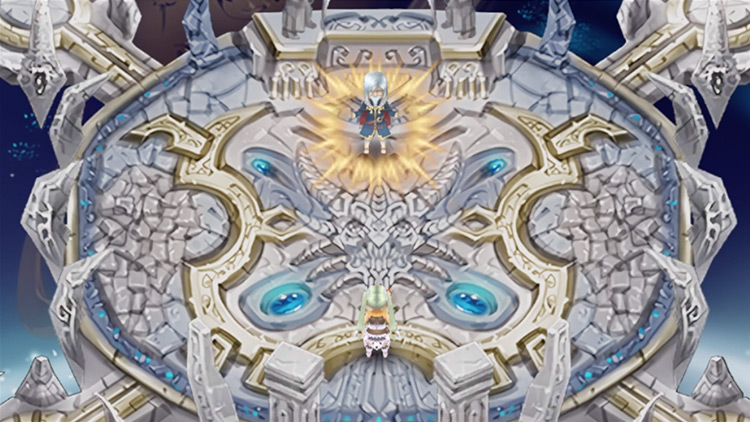
The boss room is up north at the intersection by the Floating Empire entrance (pictured below).
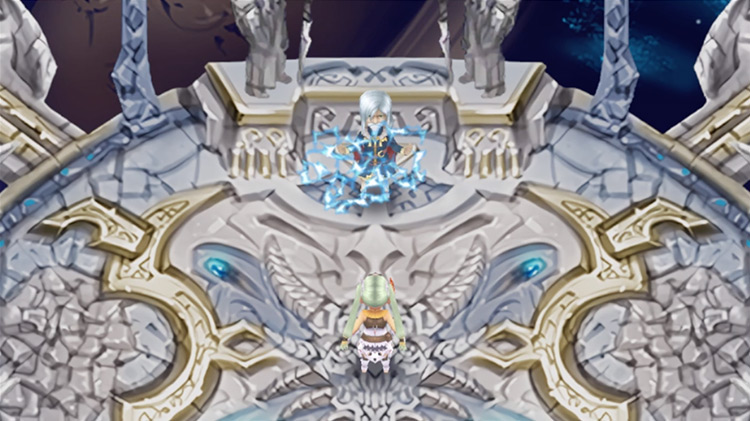
Boss Battle: How To Defeat Ethelberd
The final battle in the main story of Rune Factory 4 is against Ethelberd.
This is a fairly difficult fight, so make sure you’re well equipped and your level is high enough (ideally at least level 80 or higher).
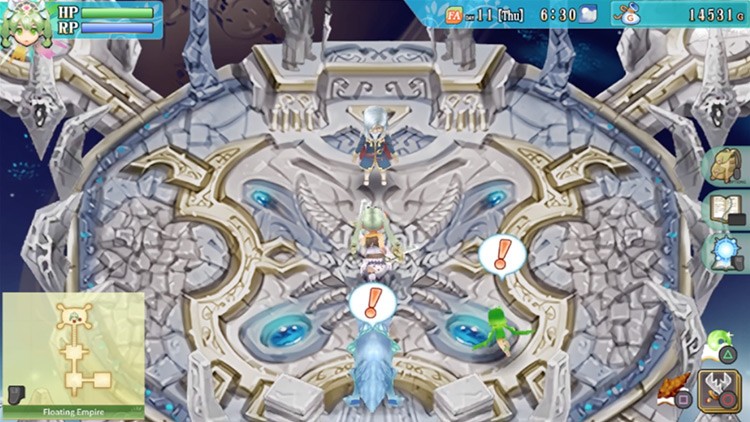
Tip: There are portals in each of the four corners of the platform where you’ll be fighting. You can use these portals to get around easily.
Phase 1: Normal Phase
| Ethelberd Normal Phase Attacks | |
|---|---|
| Attacks |
|
| Fighting Tips | Ethelberd will be gliding across the stage frequently. His speed makes it tedious to chase after him. Make use of the portals in the four corners of the room to get to where Ethelberd is quickly, and just deal as much damage as you can. |
Phase 2: Enraged Phase

| Enraged Phase Attacks | Attacks |
|
|---|---|
| Fighting Tips | The attack you’ll need to watch out for here is the growing ball of energy. If you’re caught in it, you will likely not survive the attack. Stand in the corners by the portals to avoid that attack and just keep dealing damage when you can. |
Beating Ethelberd
Once you’ve beaten Ethelberd in his enraged form, a cutscene will play out.
After the cutscene, you’ll go through several more battles. But these fights are scripted.
Just go through the battles until you finish the story.
Once the credits roll, you’ll see the events that happen after your fierce battle. It’s a beautiful ending to the main story, so I won’t spoil it for you!
And after all of this effort you can give yourself a pat on the back.
Congratulations on clearing the main story of Rune Factory 4!

-
Rune Factory 4
- The Floating Empire: Rune Factory 4 Walkthrough (Part 12)
Related Posts:
 Idra Cave: Rune Factory 4 Walkthrough (Part 9)
 Maya Road: Rune Factory 4 Walkthrough (Part 10)
 Sechs Territory: Rune Factory 4 Walkthrough (Part 11)
 The Delirium Lava Ruins: Rune Factory 4 Walkthrough (Part 7)
 Yokmir Cave: Rune Factory 4 Walkthrough (Part 5)
 The Water Ruins: Rune Factory 4 Walkthrough (Part 3)
 Obsidian Mansion: Rune Factory 4 Walkthrough (Part 4)
 Yokmir Forest: Rune Factory 4 Walkthrough (Part 2)