TABLE OF CONTENTS
- Full Walkthrough
- Finding the Silver Wolf
- Clearing the Purple Switch
- Clearing the Blue Switch
- Exploring the Snowy Outdoors for Chests
- Continuing the Sech Soldier Chase
- Entering the Cave
- Chasing after Ethelberd in the Cave
- Journal #2 + Extra Treasure
- The Family Portrait Location (inaccessible for now)
- Journal #3 + Boss Preperations
- Boss Fight: How To Beat Aquameleon
- Chapter Epilogue: Escape to the Floating Empire
| Summary Info | |
|---|---|
| Recommended Level | Level 80 |
| Monsters to Find |
|
| Field Items to Find |
|
Full Walkthrough
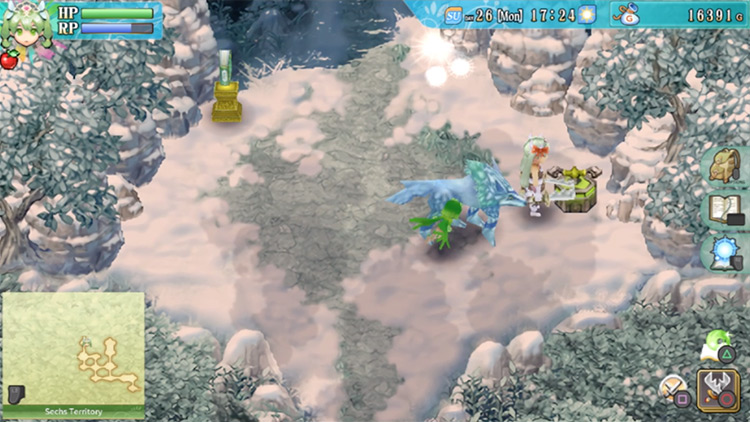
Your next ordeal is the treacherous Sechs Territory.
But before you enter the territory, you might want to clear out room for at least one new monster in your monster barn. There’s a starving Silver Wolf in the area that you’ll be able to tame.
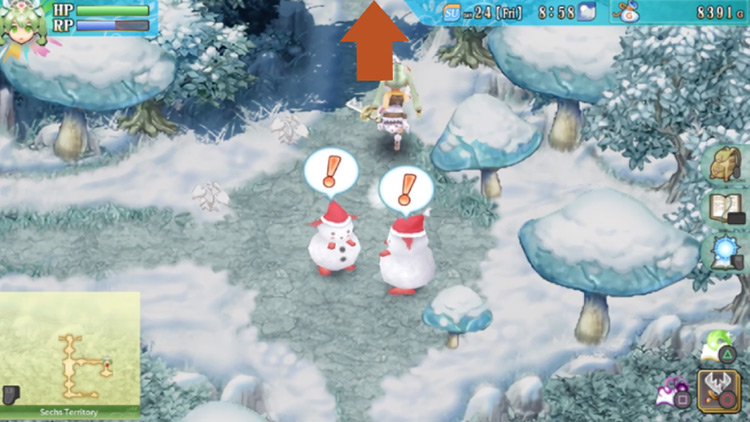
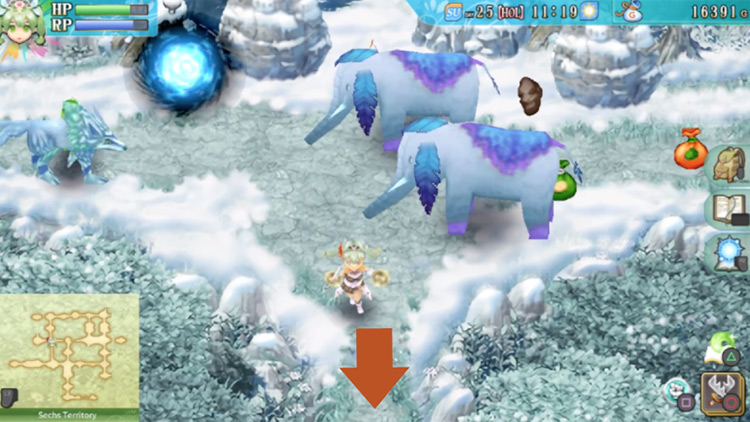
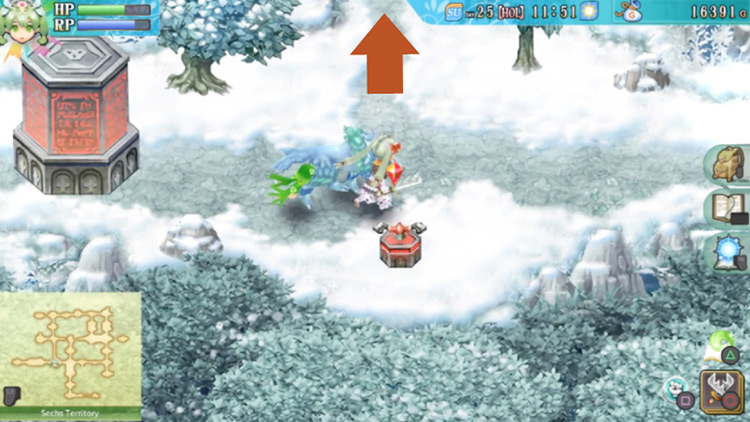
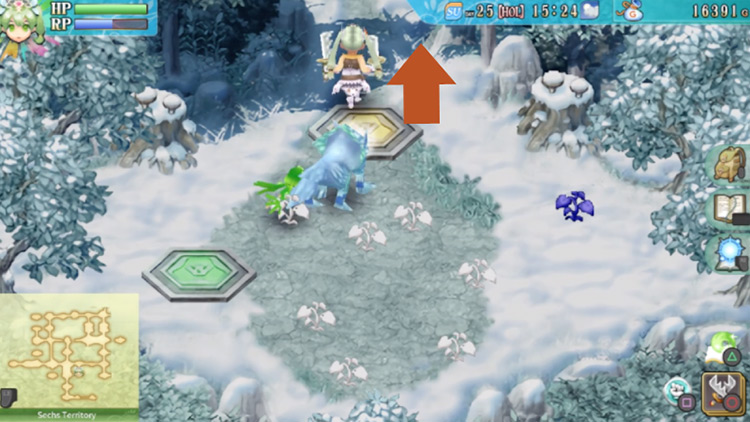
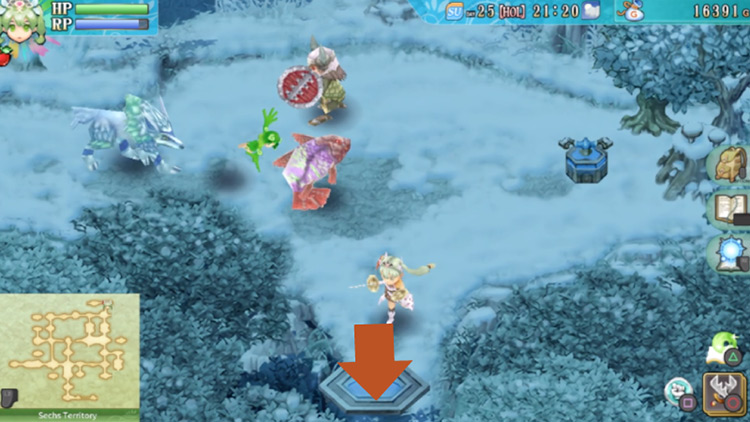
Once you’re ready to chase after the Sechs soldiers, head north deeper into the snowy terrain.
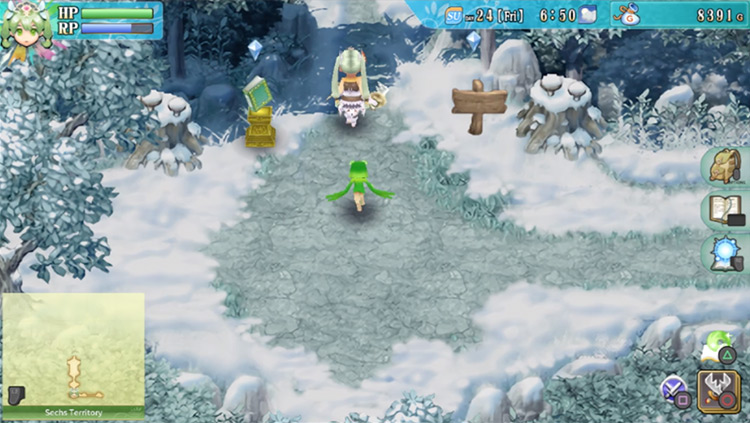
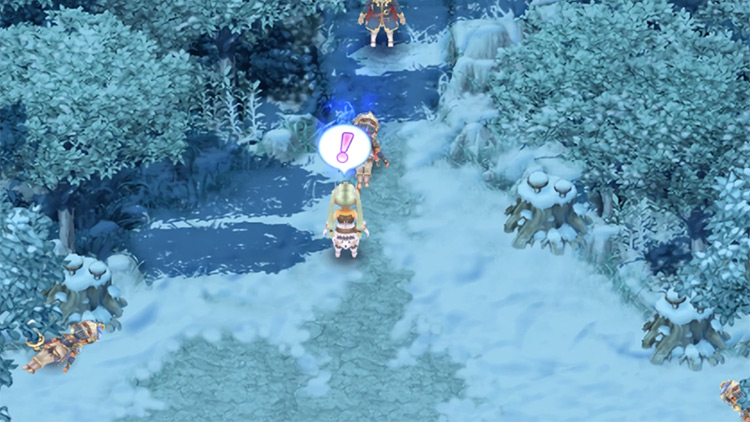
The first area you’ll be in is a short stretch with thickets of trees on either side. You’ll need to head north from here.
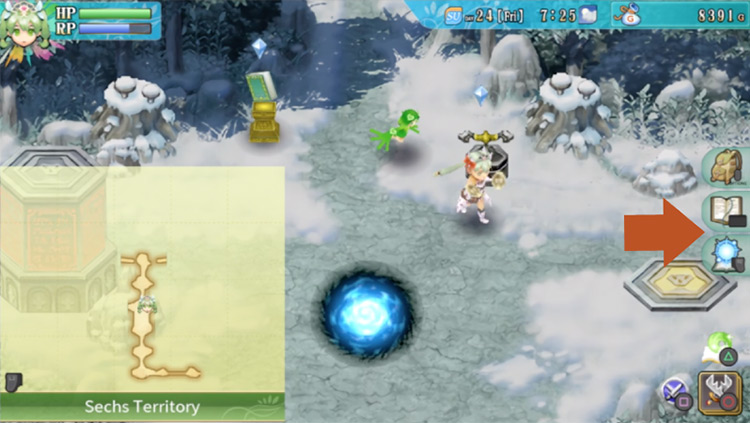
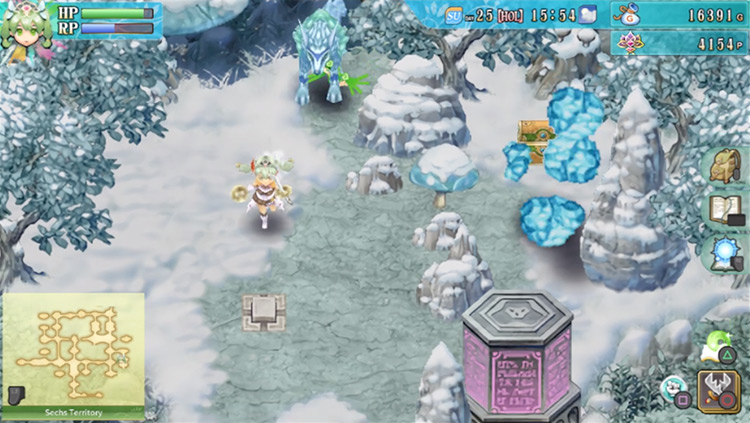
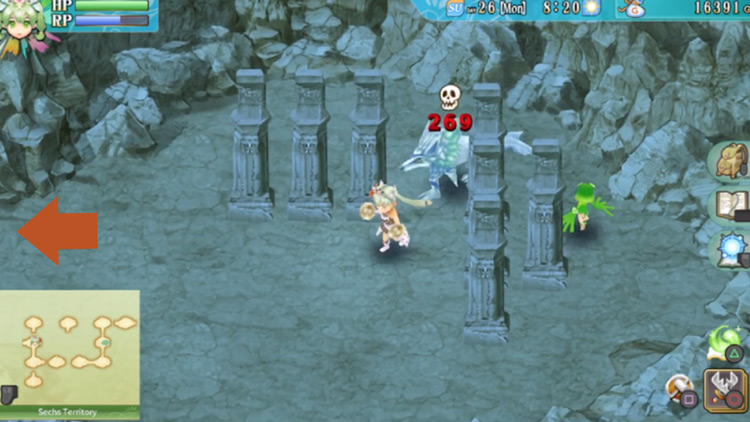
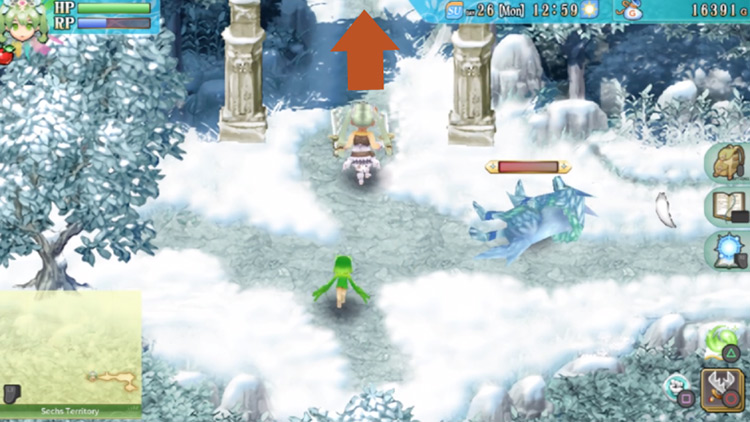
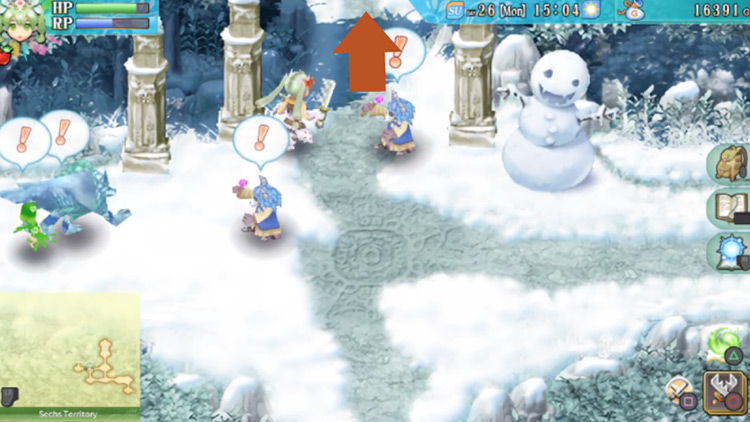
You’ll then find yourself on a long stretch of road. At the top of the area, you’ll find pillars blocking the paths on the east and the west.
There’s also a yellow switch and a journal for saving your game by the north exit. Plus there are pillars in the north that you need to get rid of.
To get to the switches for those pillars, you’ll first need to head east. So let’s start there!
Finding the Silver Wolf
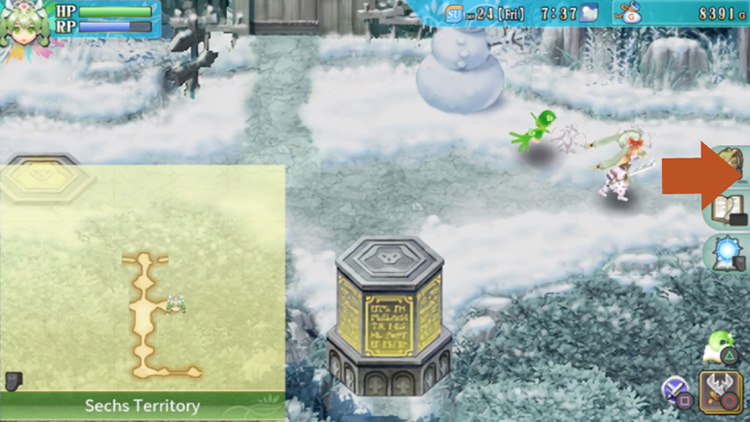
Push the yellow switch in the upper right corner directly next to the journal, then go through the path on the east.
You’ll then be on a short path with a house along the northern edge.
In this house is a kind traveller that will offer you fresh dishes daily. Feel free to speak to the traveller to get free food if you’d like, then head to the east exit of the path.
Next up is another short path. Head east again from here.
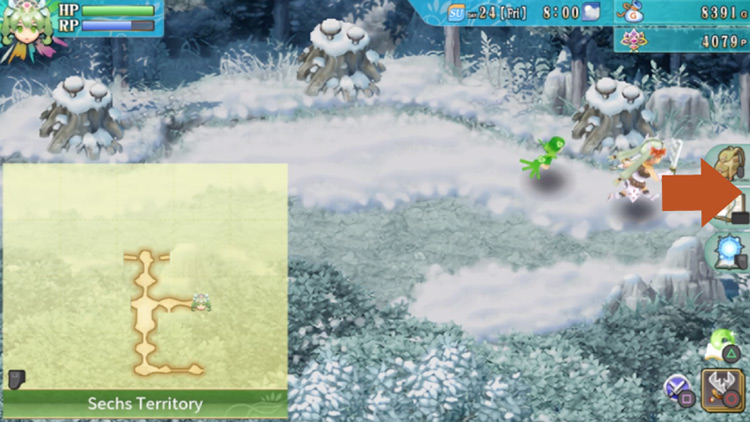
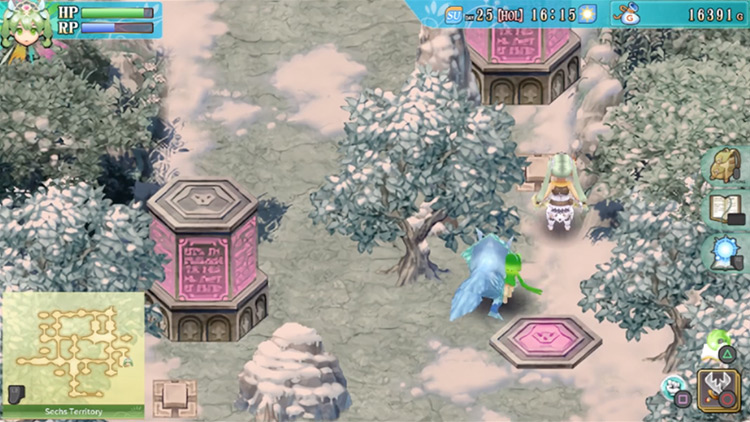
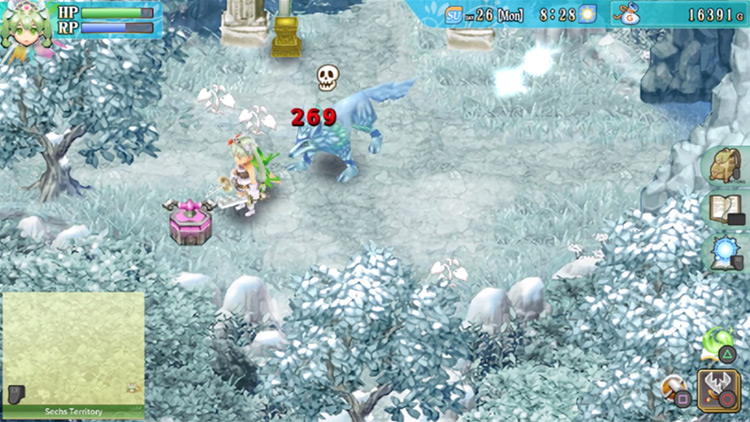
Then you’ll be in a small area with giant blue mushrooms sprouting around. Head south from here first.
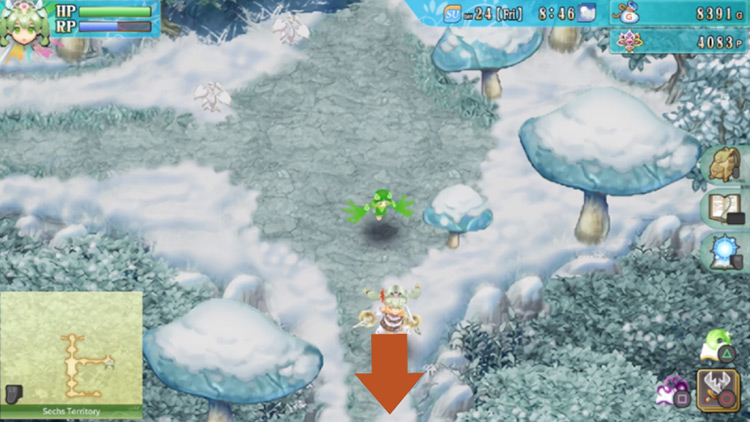
Giant mushrooms will be blocking the bottom section of the next area.
But there’s a button here that you can press. Push down the button to get rid of the pink pillar blocking the way at the bottom. Then return back to the area in the north.

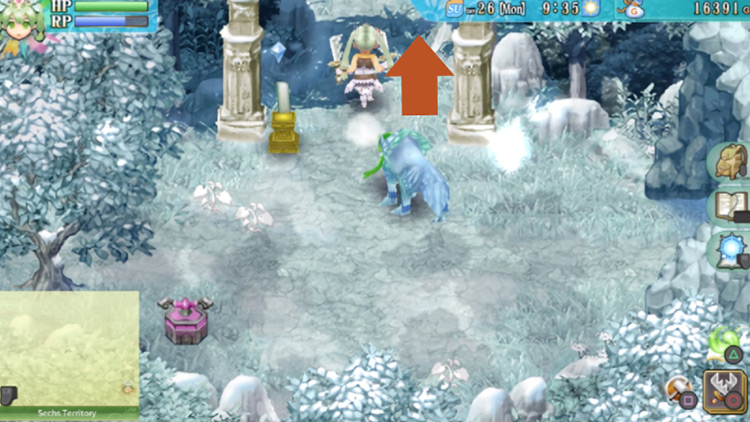
Once you’ve returned, you’ll then need to head north again.
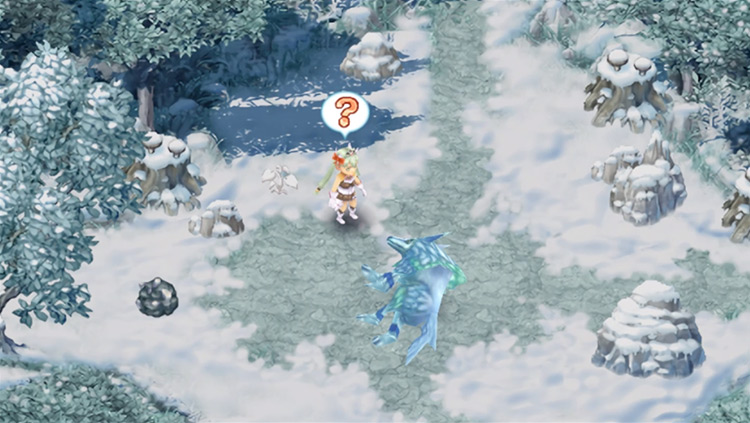
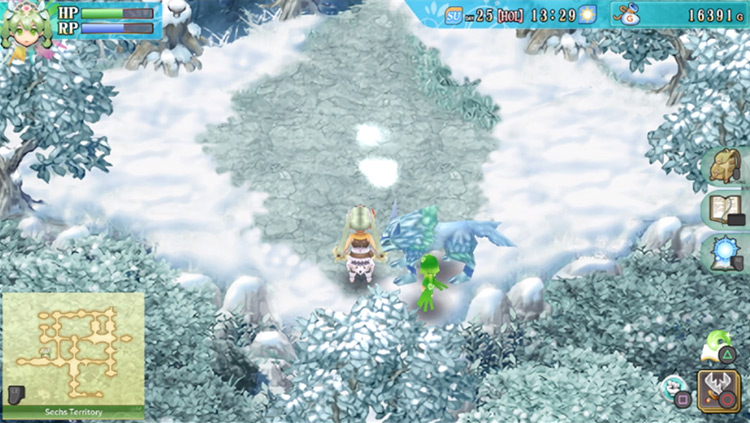
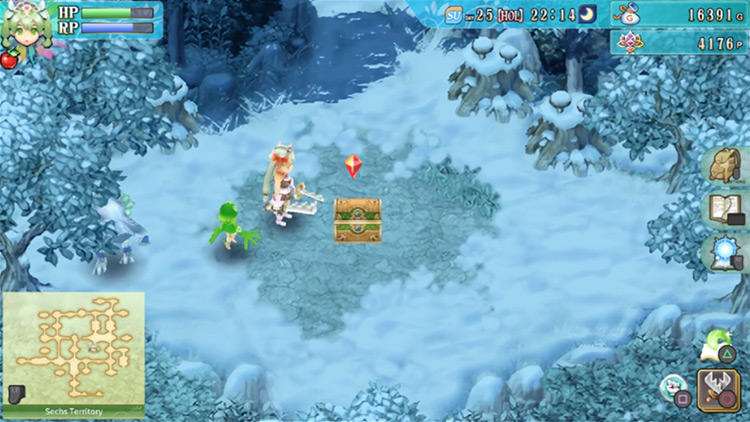
In the next area, you’ll find a passed-out Silver Wolf.
When you interact with the wolf, you’ll discover that it’s starving.
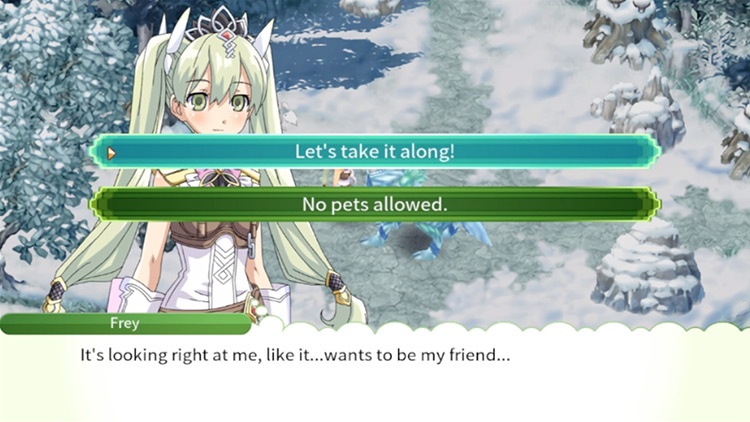
If you give it some food, it’ll be grateful and ask to accompany you on your journey.
- If you have space in your monster barn, you’ll be able to tame the Silver Wolf and it will join your party.
- If you don’t have space, you can come back for it when you’ve made room in your barn.
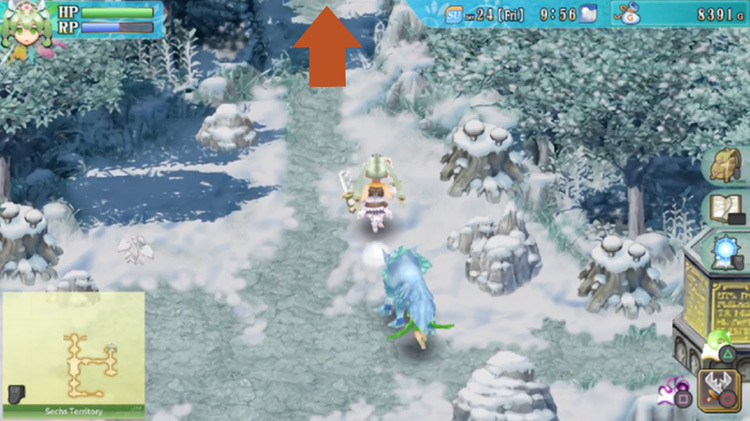
Either way, after you’re done here just head north.
Clearing the Purple Switch
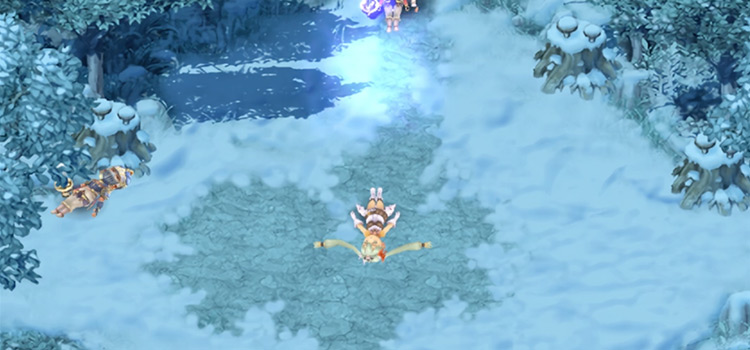
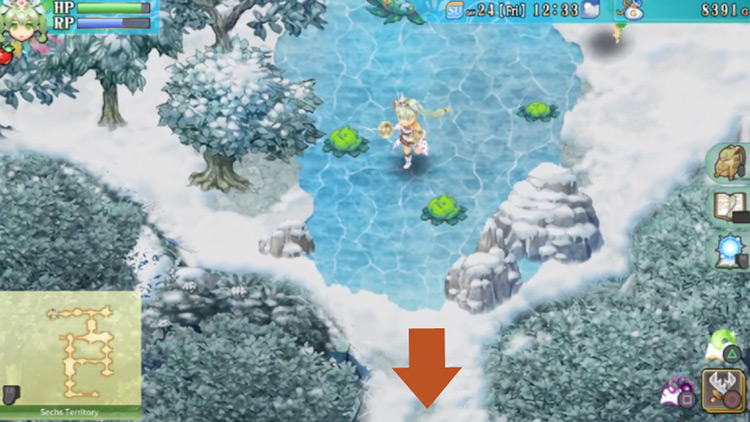
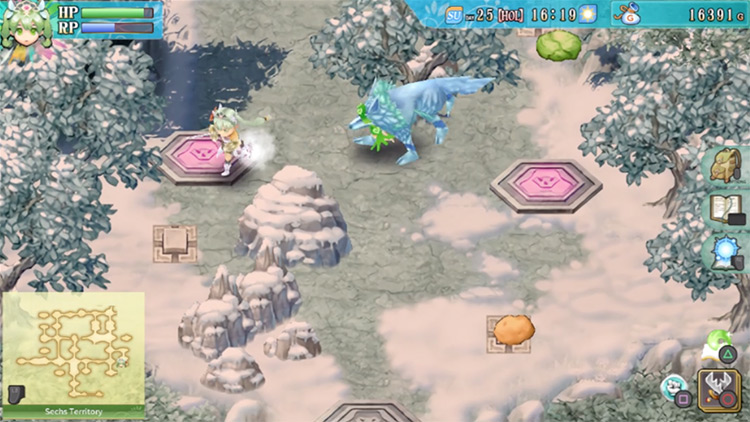
The next area is a wide clearing with a frozen pond in the west section. The frozen pond will be slippery when you run over it, so be cautious!
First, you’ll want to go through the path on the west.
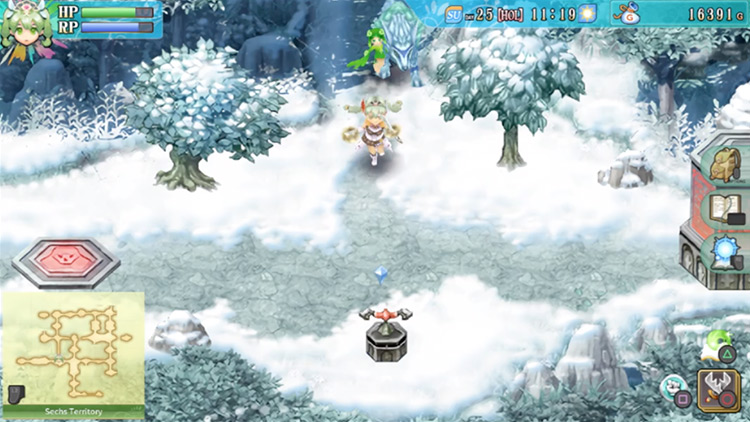
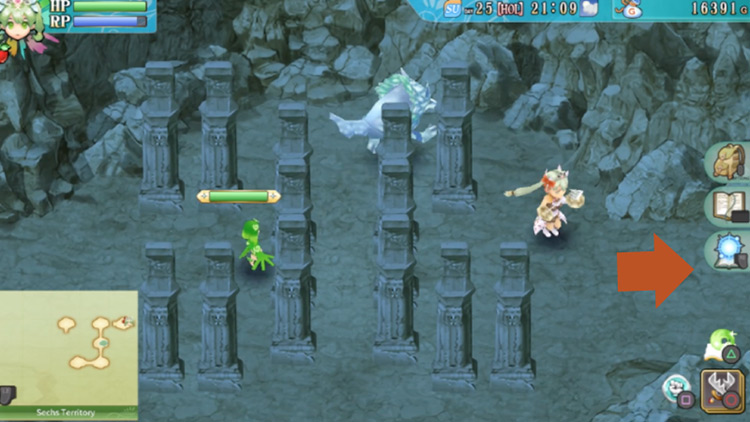
In the next area you’ll see two pillars and their corresponding colored switches on either side.
You can push the purple switch now to get rid of the purple pillar.
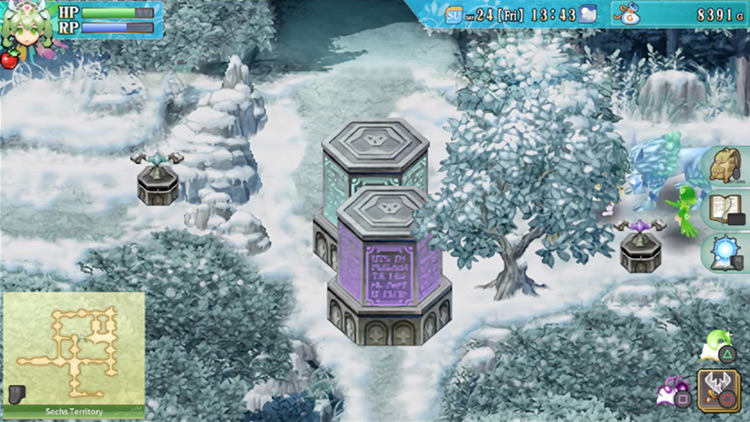
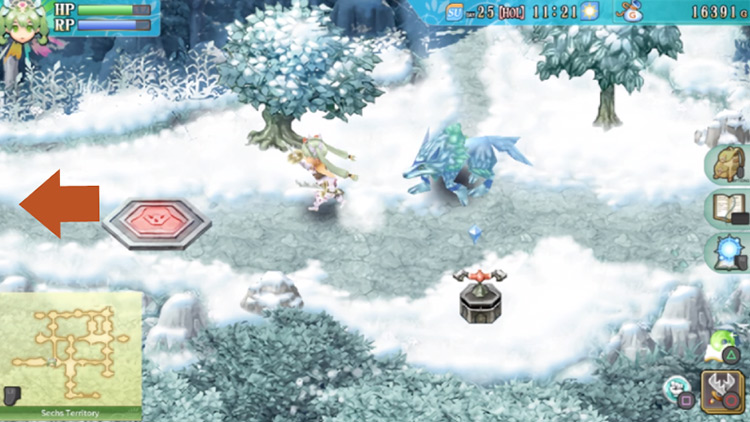
After that, you’re going to want to get to the light blue switch on the left side, so let’s chase after that next.
Clearing the Blue Switch
Return to the previous area by heading east. And then this time, head directly north of the frozen pond.
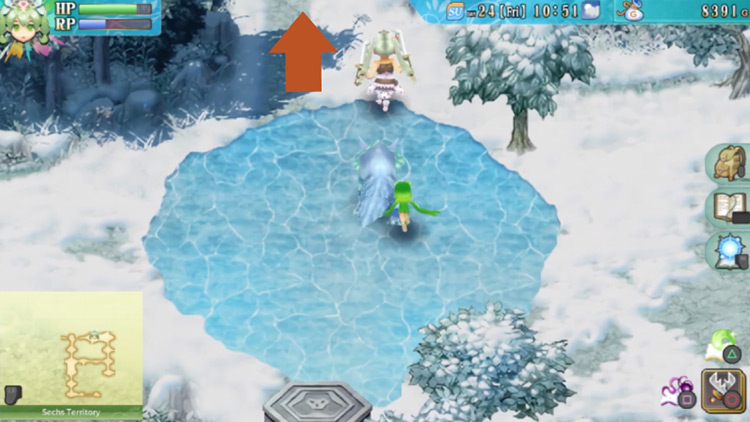
Next up is another long snowy stretch with a frozen pond in the upper section.
Proceed by heading through the path in the north.
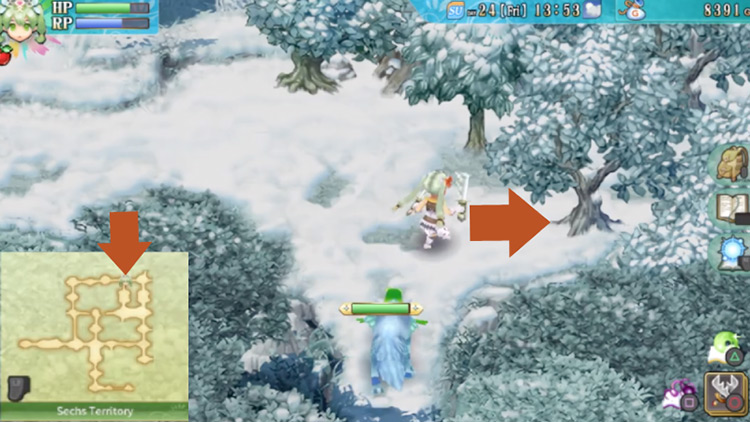
You’ll then arrive at a path with a thicket of trees covering the entire section on the right.
From here, head west.
Next is a small circular area with a clump of small trees in the center. Head west again here.
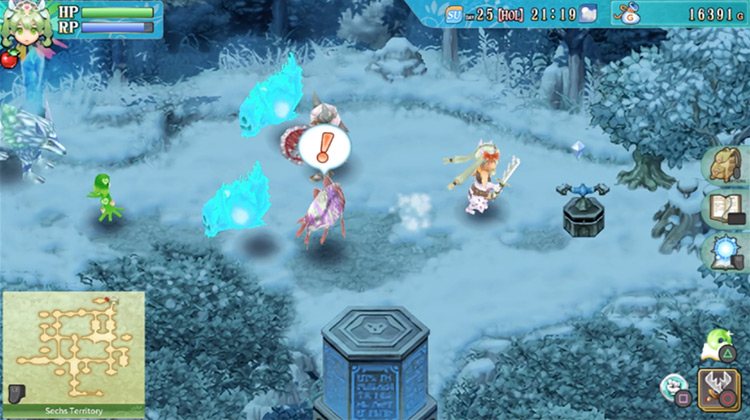
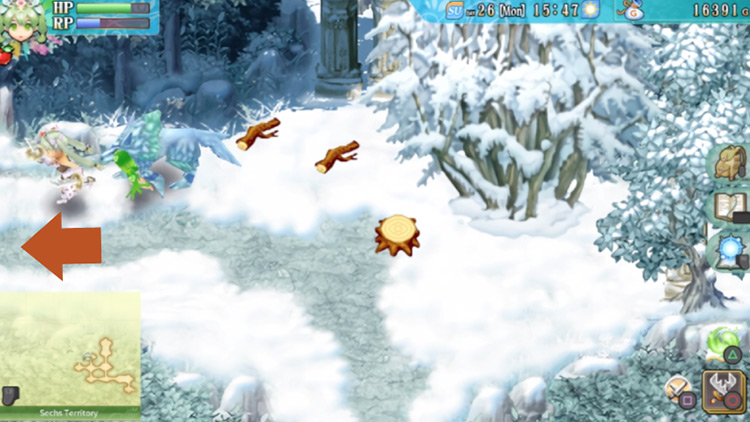
In the next area, you’ll find several carnivorous plants scattered around. Carefully make your way past them as you head all the way to the west once more.
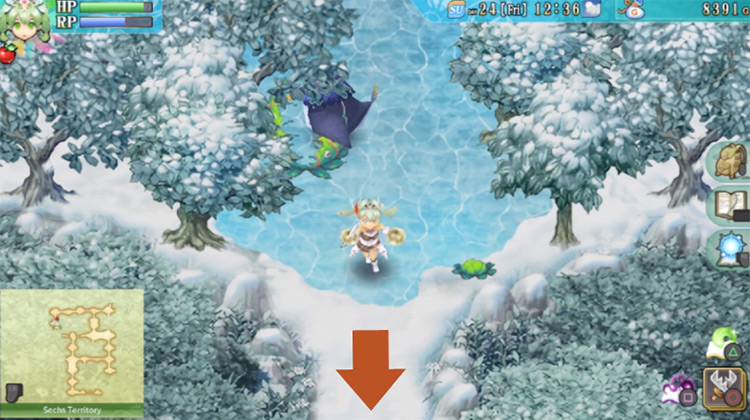
More carnivorous plants will be lying before you in the next area.
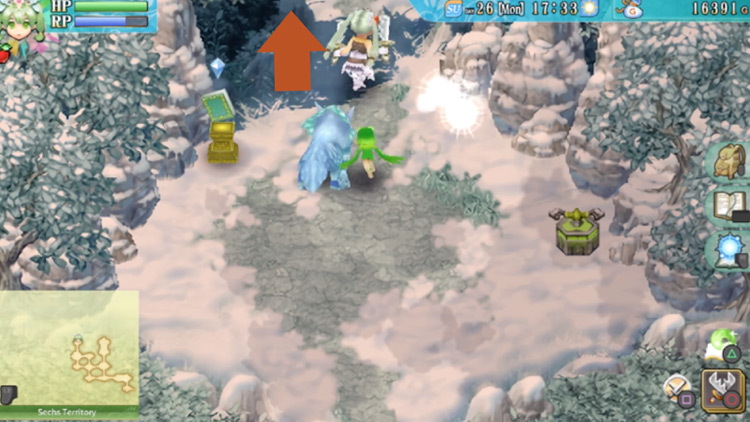
This time, they’ve somehow managed to sprout over a frozen pond.
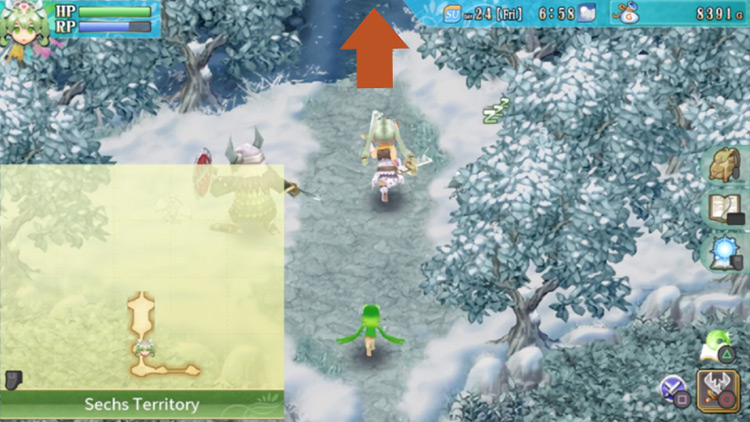
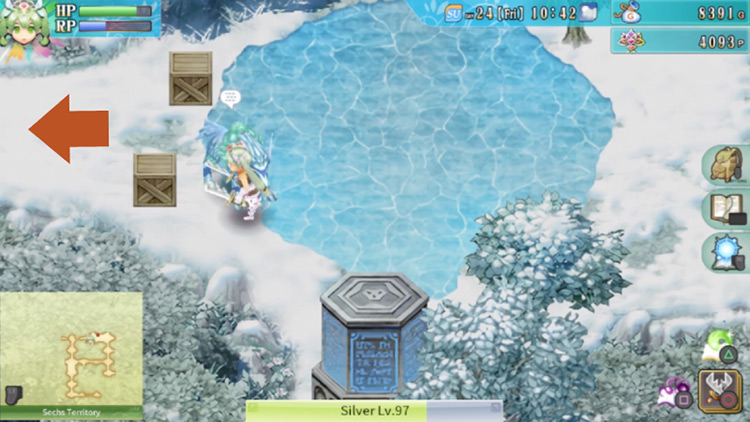
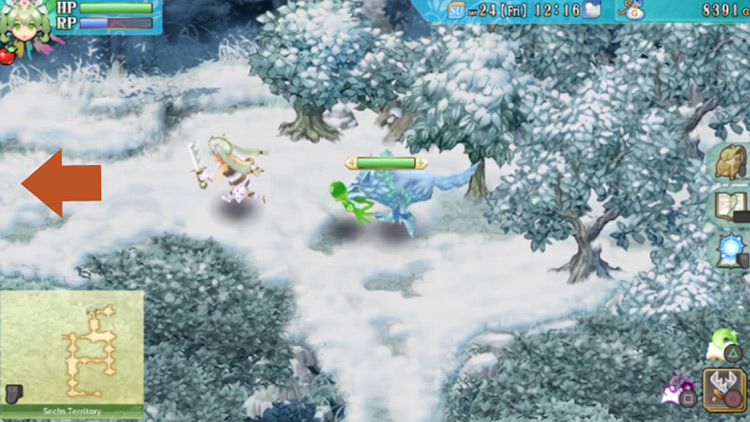
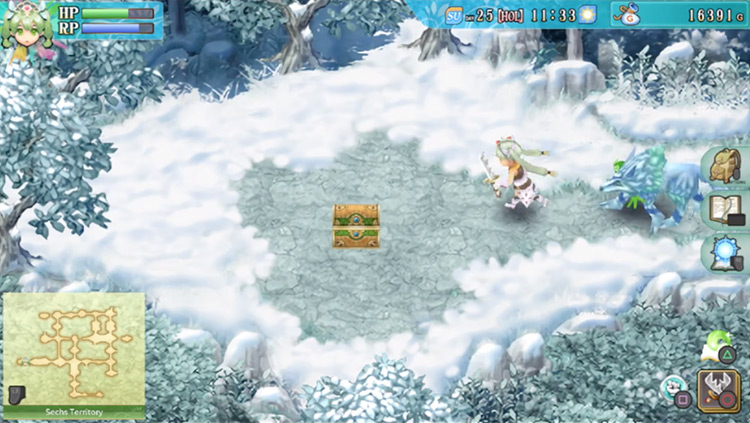
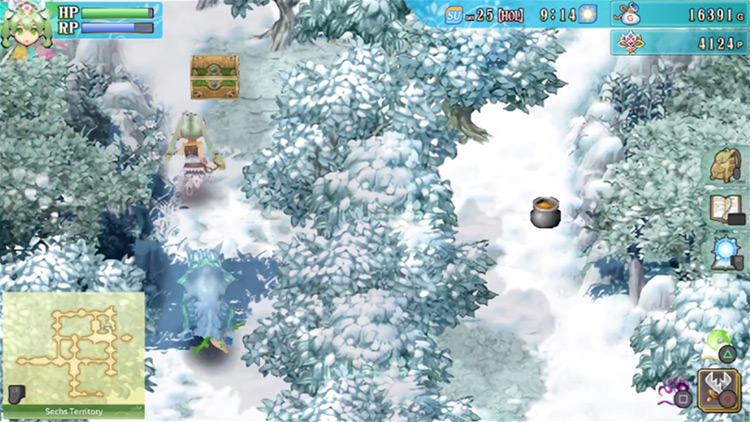
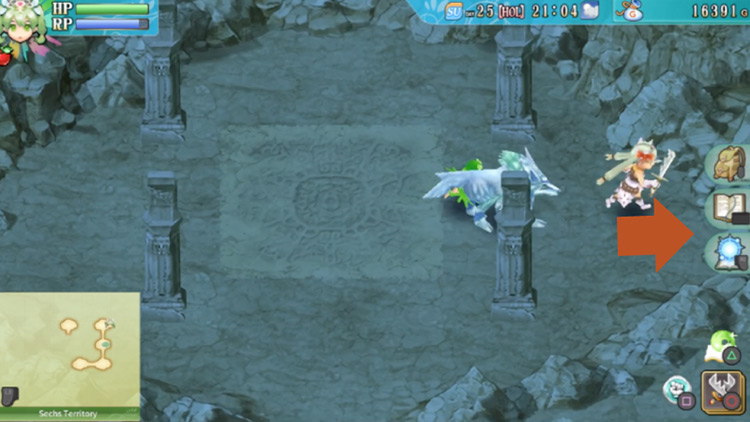
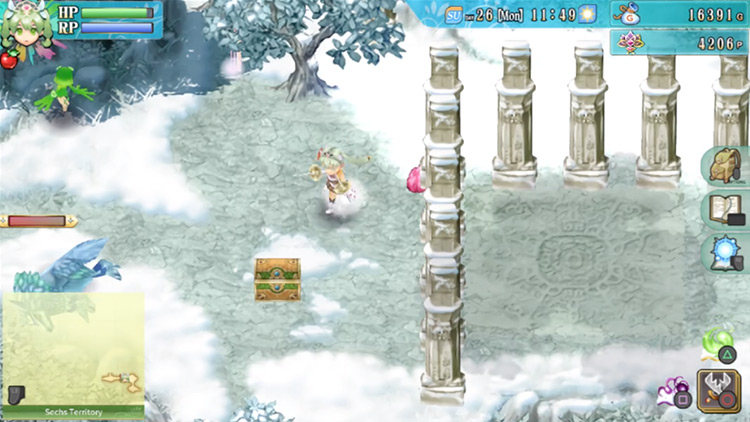
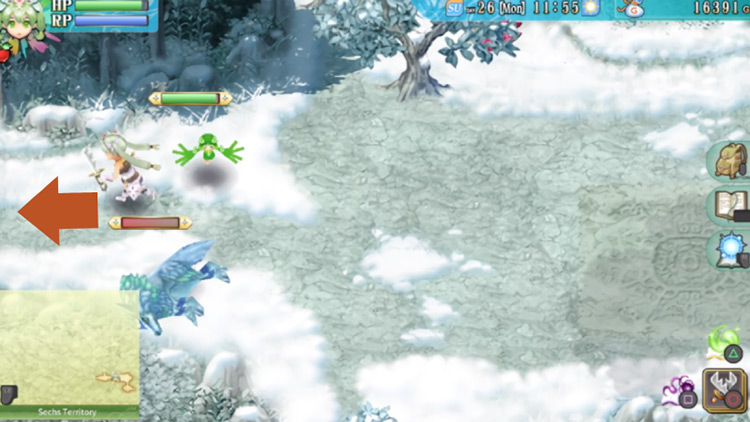
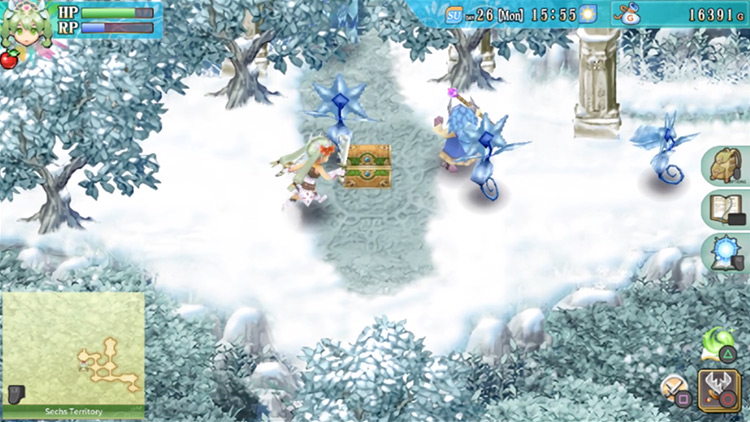
But there is a hidden path behind the thicket of trees on the left (pictured below with an arrow). Go through the trees and head to this path on the west.
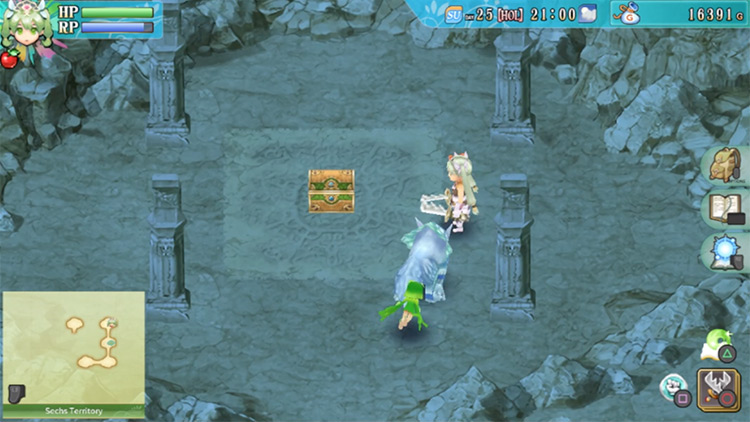
In the next area, you’ll see a treasure chest lying in the center. Open it to learn a recipe for Miracle Axe. Then return to the previous area on the right.

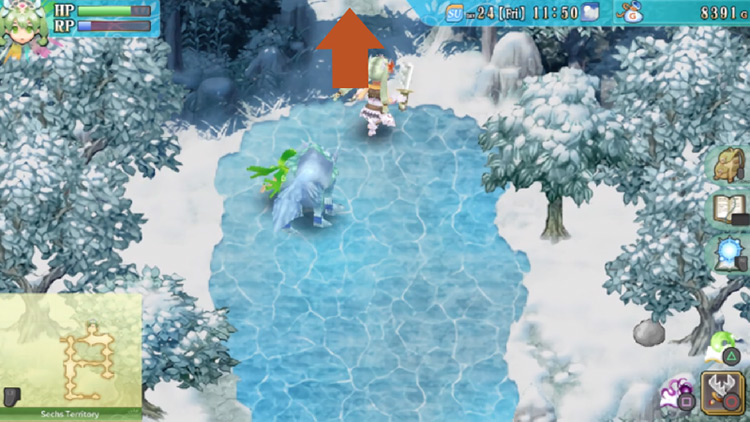
Now make your way over the frozen pond and take the path in the south.
You’ll have to cross over another large frozen pond in the next area. And more carnivorous plants will be lying here waiting for their next victim.
Carefully make your way all the way to the south from here.
You’ll then find yourself at an intersection. Head to the east.
Now you’ll be on the other side of the area you were at earlier.
Push the light blue switch to get rid of the light blue barrier blocking your way into the cave.
After that, head back to the intersection you were just in by going left.
Then take the path heading south.
You’ll find a red switch and two red pillars in the next area. You now have two options.
You can either:
- Chase after the Sechs soldiers immediately
- Or you can explore more of this snowy outdoor area to find all the treasure chests scattered around.
We’ll cover both options in this guide, so feel free to jump around to the relevant sections as needed.
Exploring the Snowy Outdoors for Chests
If you want to nab all the treasure chests scattered around the area before proceeding, you’ll need to find several hidden spots.
And we’ve got you covered!
First, head west going over the red pillar that’s in the ground.
Similar to several areas of Maya Road, in this area you’ll find strong gusts of wind blowing from the west and frozen boulders of ice falling from above.
Carefully make your way to the west end of this treacherous stretch.

You’ll then find a chest lying in the center of the next area. Open it to find a Rapid Move ability inside.
Then return to the area with the red switch and the two pillars.
Once you make it back to the area with the red switch, push it down.
The red pillar on the left will come back up. But another red pillar will come down elsewhere on the map.
To get to that spot, head north from the red switch.
You’ll then be back at the intersection from before. Take the path on the left from here.

You’ll then make it to the area with the red pillar.
Go through the path in the north from here.

At first, you will only find monsters when you enter the next area. You’ll need to defeat all the enemies here.
Once the area is clear, a treasure chest will appear in the center. Open it to find Magical Potions.
Then head back down to the previous area.

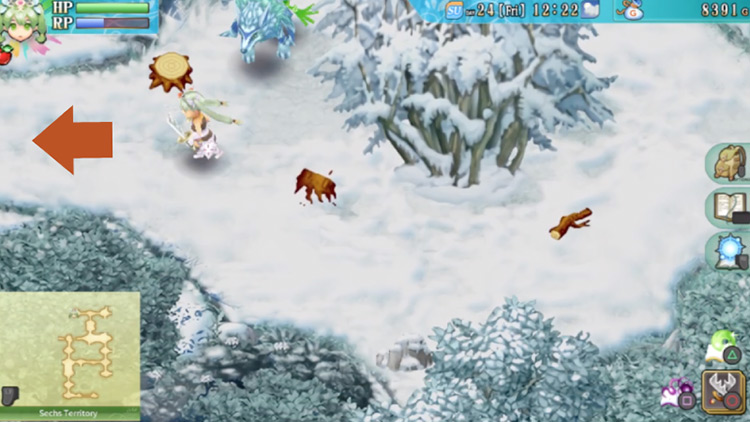
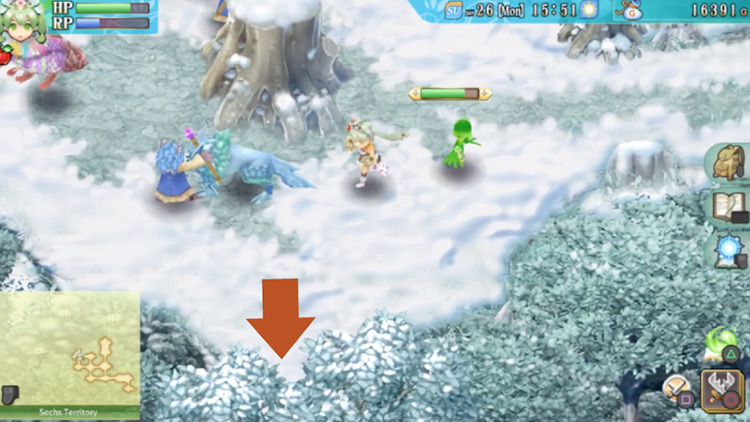
From here, go all the way south.
There’s actually a path hidden behind the trees here that you can take (pictured below).

Again, you’ll be faced with an area you’ll need to clear.
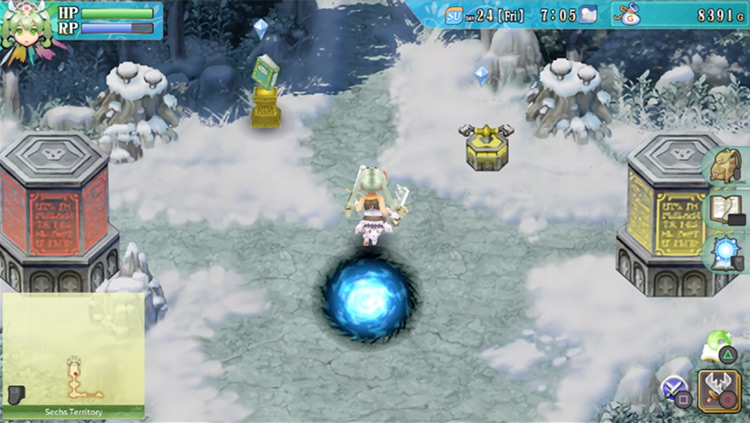
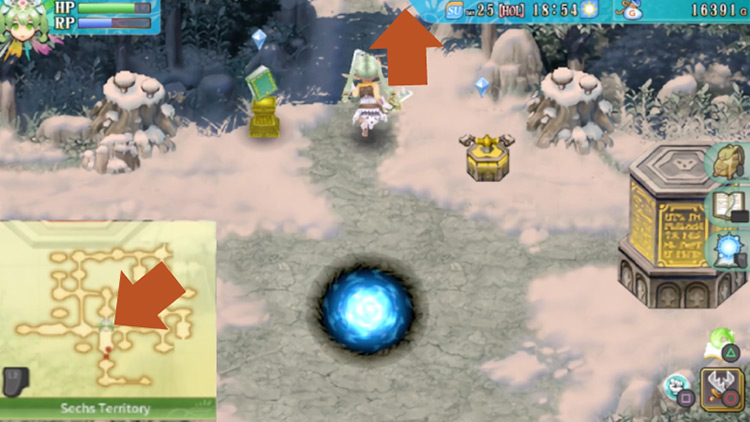
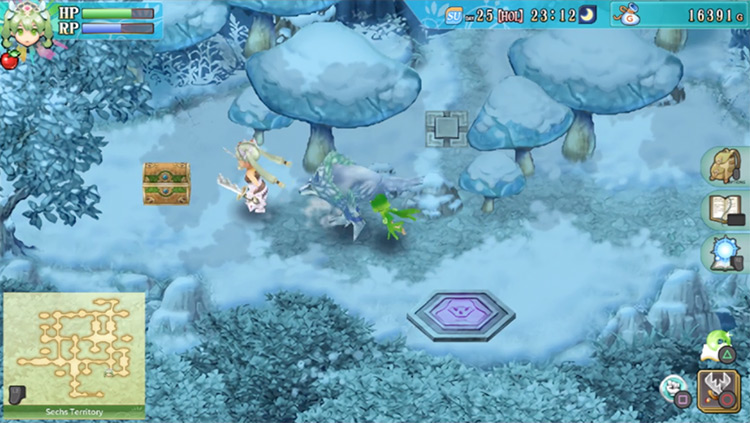
Once you clear the entire area, a portal will appear. Go through the portal when you’re ready.
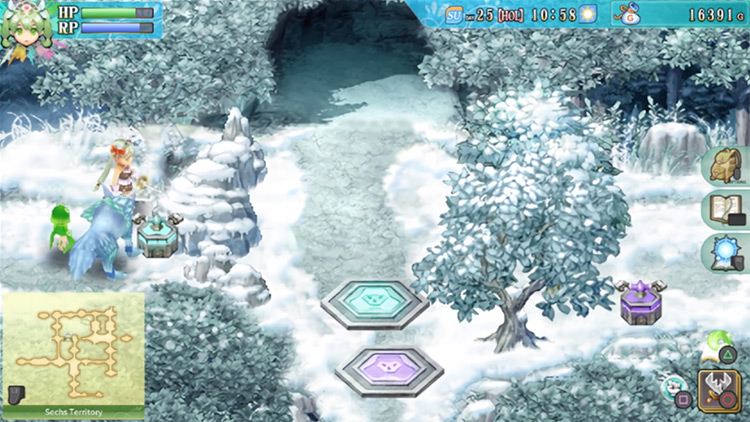
The portal will take you to a small clearing in the south west region of the map.
Here, you’ll find a green switch and a green pillar.
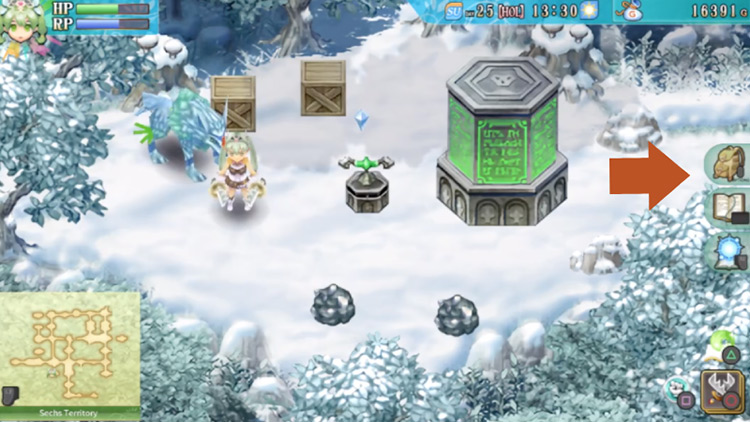
Push the switch to get rid of the pillar blocking your path on the right. Once you’ve done that, go through the path now unblocked.
You then will have returned to the area with the red and yellow pillars.
Go over to the yellow switch and push it. The yellow pillar on your right will come up, but this is OK.

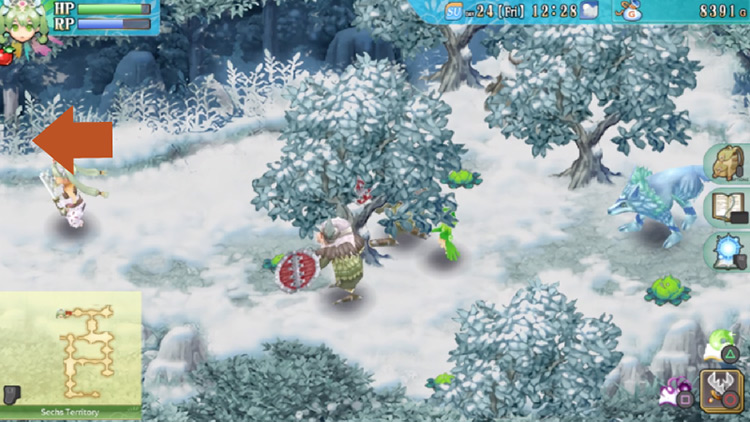
Then just head down to the lower section of this long stretch, and go towards the thicket of trees on the east edge.
There’s a secret passage through there as well (pictured below).
White grass will be sprouting all over the next area.
Also, a yellow pillar at the northern end will be deactivated thanks to the yellow switch you pushed earlier.
So go to the north from here.
Then you’ll be back at the kind traveller’s house.
Go towards the east from here.
At this short path you arrive in, head all the way east once more.
You’ll then be back in the area with the giant frozen mushrooms.
Go up north from here.

In the next area, you’ll notice that the yellow pillar to the east has been deactivated. So go through the path there on the right.

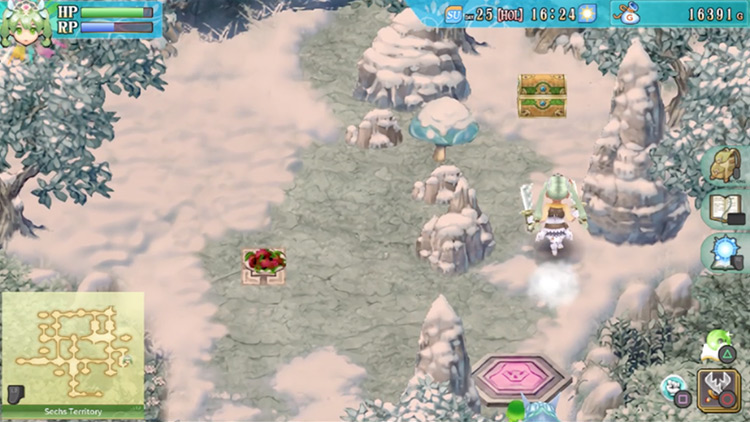
Next is an area with a couple of giant frozen mushrooms.
From here, head south towards where a red pillar used to be.
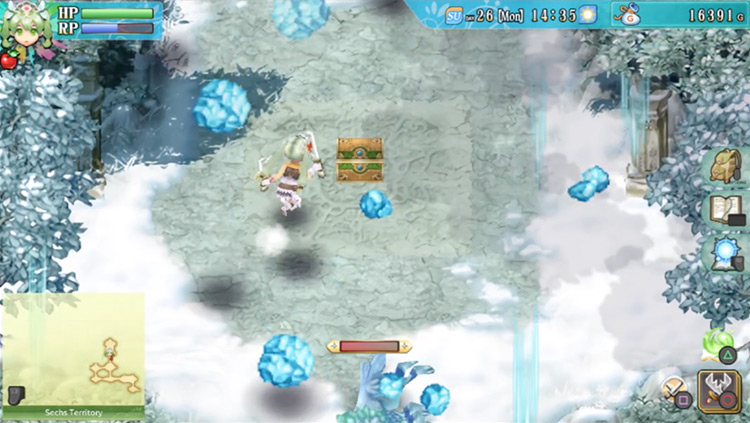
Next is an area with several magenta pillars and frozen boulders raining down a path toward a chest.
There’s a button right below you though, so leave an item on this button and then proceed further down south.
There’s another button in the southeast section of this area (pictured below).
Place another item on this button.

Then head up along the east edge of the area. You should see another button right next to the tree in the middle, right below a magenta pillar (pictured below).
Leave another item on this button.
Once the button has been pressed, a magenta pillar on the left side of the area will go down.
Head towards it, then leave another item on the button behind it.
Once that button has been pressed, the magenta pillar on the right side will come down.
The frozen boulders will have stopped raining down now, and the chest should now be accessible.
Open the chest to find a Steel Heart ability inside.
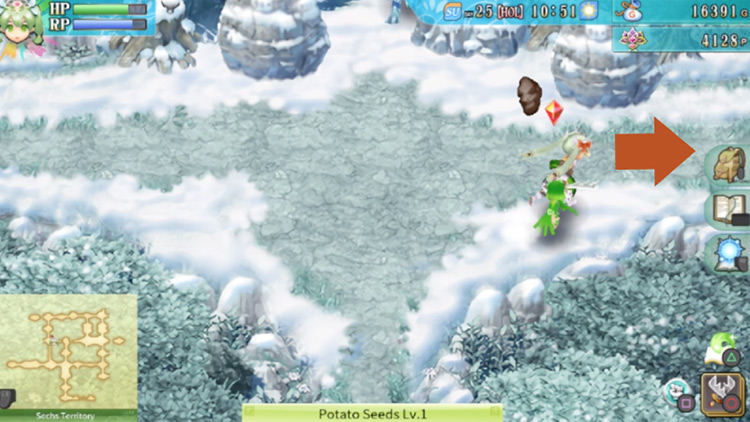
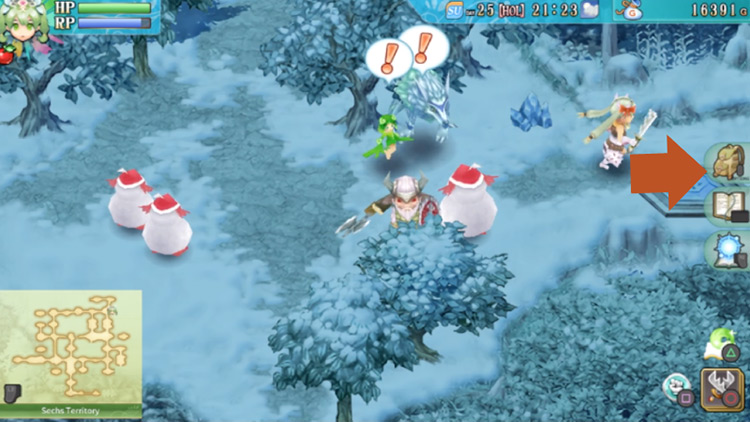
Next up is a chest in the northeast area of the map.
So head to the spot marked on the map below.
There’s actually a path hidden in the thicket of trees on the right. So head through the trees towards that path.
You’ll arrive at an area with blue pillars blocking the paths on the north and the east.
From here, head south.

You’ll then arrive in an area where a line of trees is cutting through the entire area vertically.
The entire section on your left will be inaccessible.
So head all the way to the south to find a chest at the very bottom with 8000G inside.

Next, you’ll want to go to the west section of this same area.
So return to the wide clearing with the frozen pond. This is marked on the map below.
From here, head to the east section of the clearing, but take the path in the north behind the clump of trees.

Once you get to the next area, destroy the Frozen Gate in the north.
Also clear all the mobs on the right side of the area with long-range attacks.
Once the place is clear, a chest will appear in the spot the Frozen Gate was in earlier. Open it to find a Cyclone ability inside.
The other secret areas on the map will require you to enter the cave, so you can proceed with the story from here!
Continuing the Sech Soldier Chase
Head back to the clearing with the red and yellow pillars (the area is marked on the map below).
Then head all the way north from here.
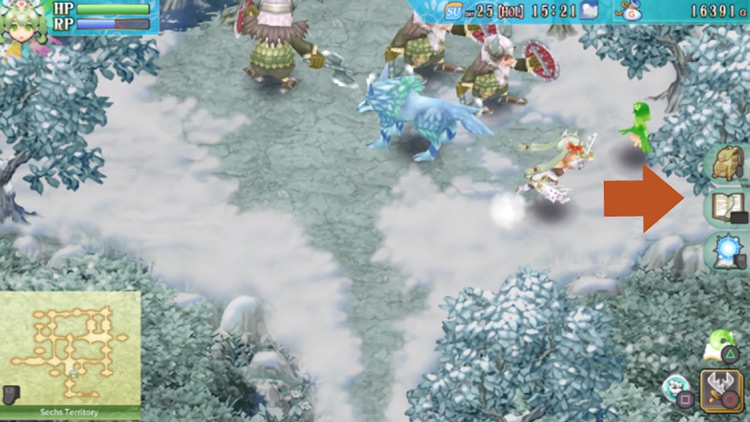
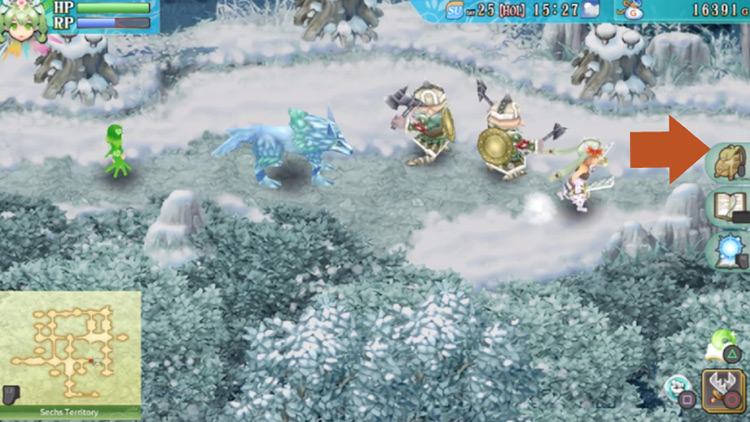
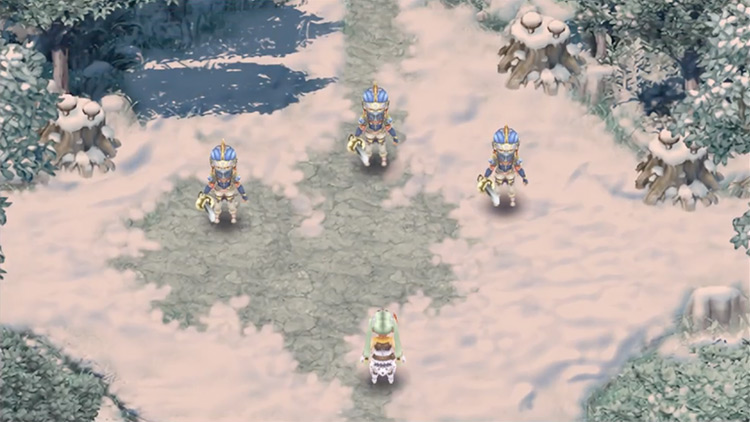
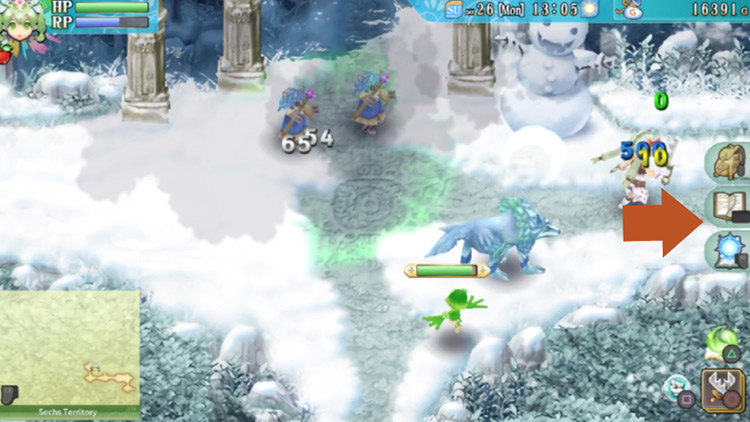
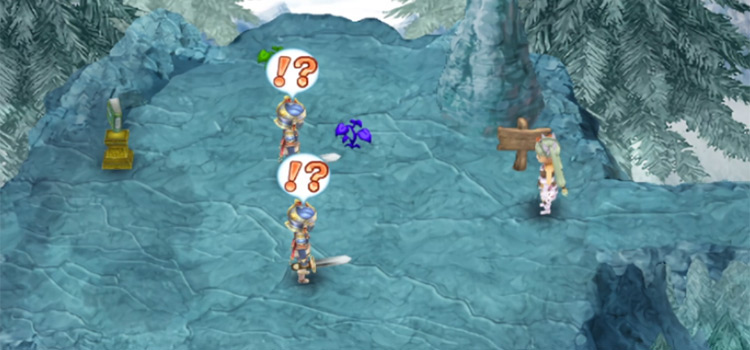
You’ll catch up to the Sechs soldiers once you enter the next area.
A short cutscene will play out, and the soldiers will end up turning into monsters that you’ll need to defeat.
But this will be a very easy fight.
Once you defeat them, Ethelberd will come to attack you and will deal significant damage.
Ethelberd will then take off with the Rune Sphere.
You’ll need to leave these poor soldiers behind and chase after him.
When you’re ready, head north.
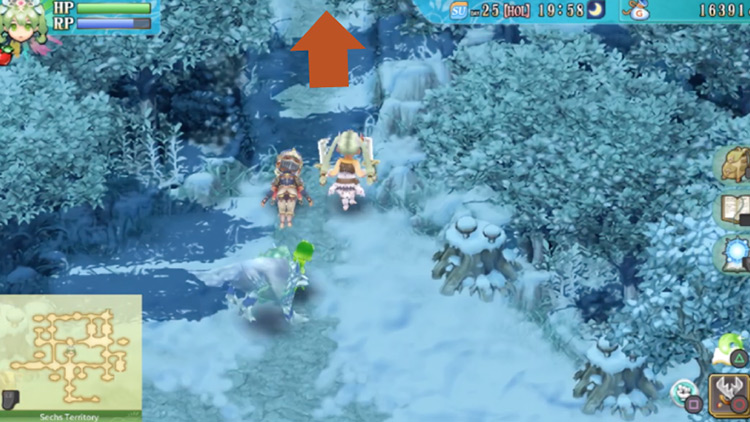
You’ll then find yourself before the opening of the cave, so head inside.
Entering the Cave
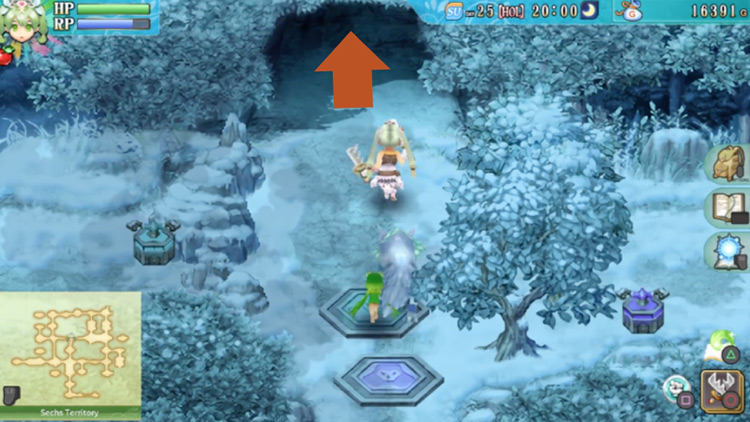
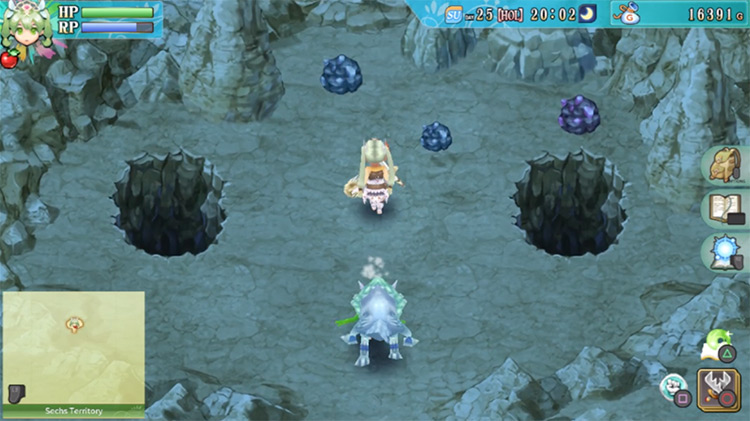
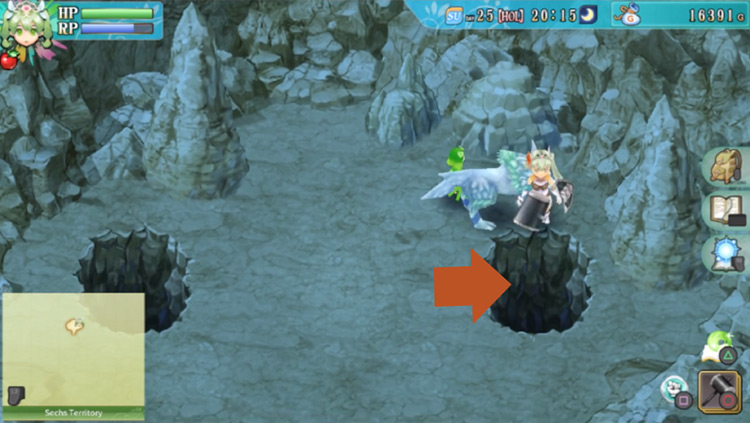
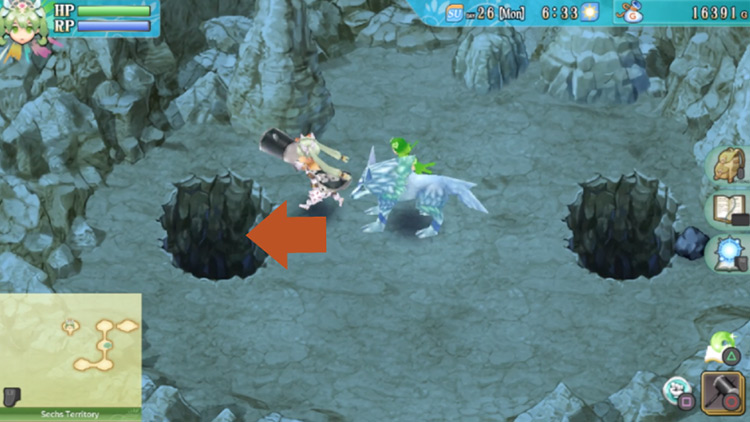
There are two holes you can jump into once you enter the cave.
The hole on the right leads to an optional path where you can find several chests, so we’ll split this up into separate sections for this walkthrough as well.
Optional Path: Finding More Treasure Chests
If you want to find the rest of the treasure chests around the Sechs Territory, jump into the hole on the right.
Once you land, head to the area on the east.
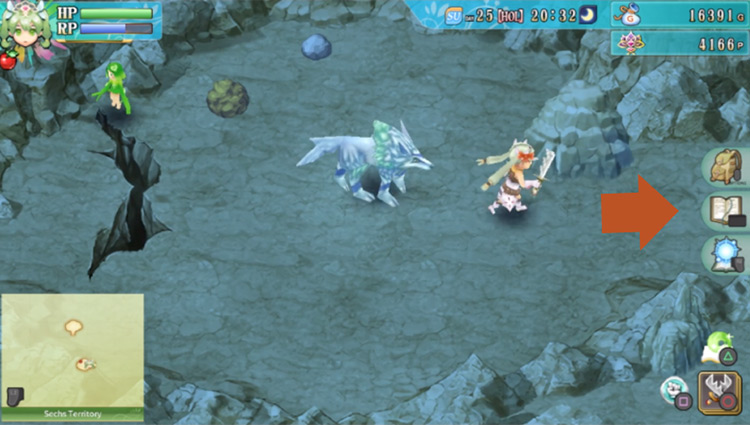
From the next area, head up north.
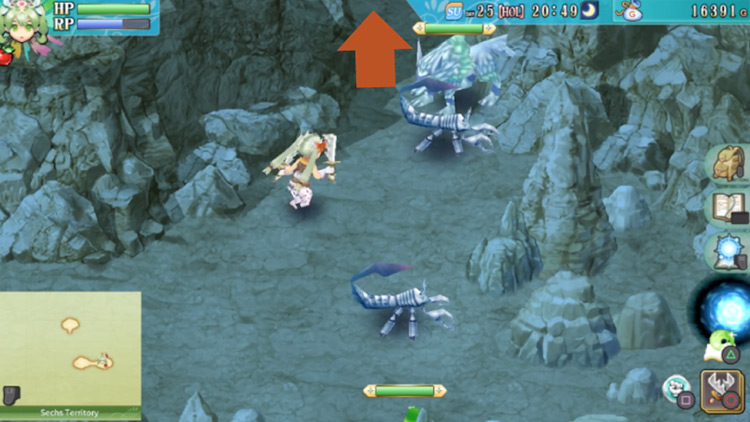
You’ll then find yourself in a small area with a large pond.
Go all the way up north from here.
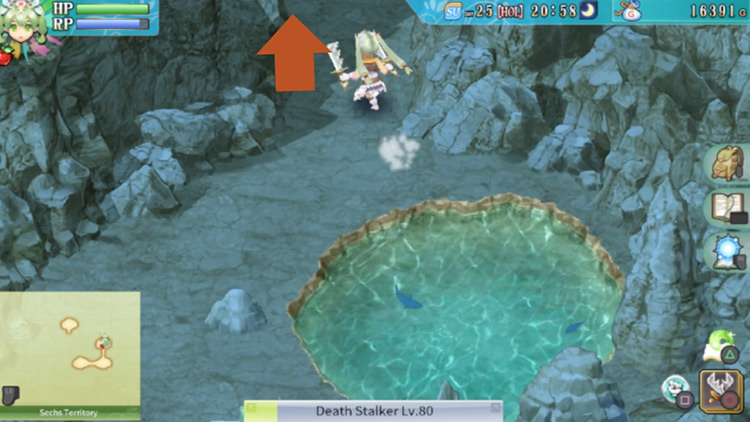
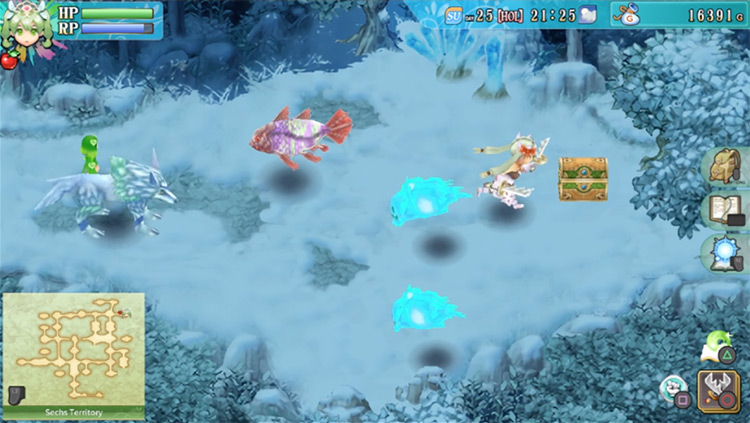
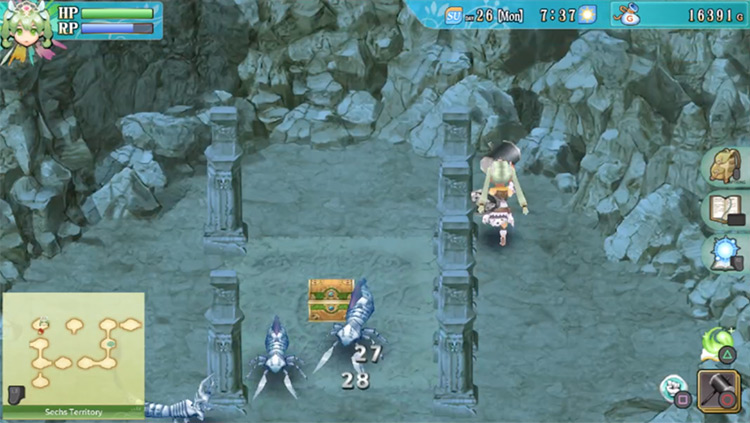
In the next area, you’ll find a treasure chest lying in the center.
Open it to find Mystery Potions inside.
After that, you’ll need to head east.
This next area has pillars that come up to block your way once you get close enough. To get through:
- Pass underneath the first set of pillars.
- Then go up in between the two center sets of pillars.
- After that, pass above the second set of pillars, and then you’ll be able to exit through the east.
You’ll then find yourself back outside.
Head all the way to the east and take the eastern exit.

In the next area is a blue switch on the right which activates the blue pillar in the south, as well as other blue pillars scattered around the Sechs Territory.
Once the blue switch has been pushed, head south.
Next, you’ll need to go through the path on the east.
A treasure chest will be lying on the snow along the east edge of the next area. Open it to find Ice Cream inside.
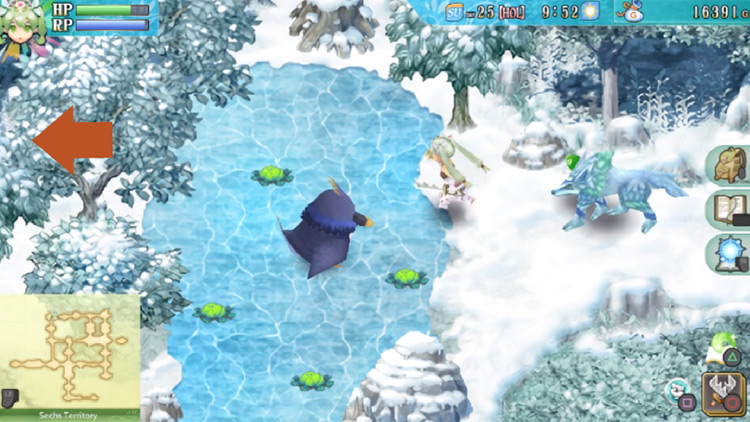
The next blue pillar is in another section of the map.
Head towards the wide area with the frozen pond (this is marked on the map below).
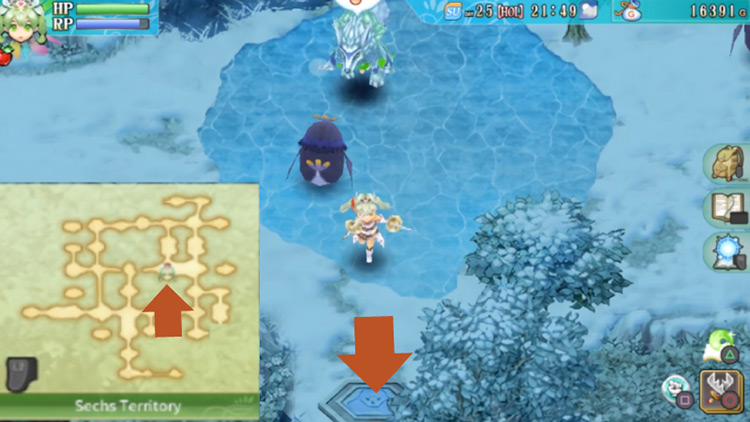
South of the frozen pond here is where a blue pillar was blocking a path. Head south from here.
The next area will be full of mobs that you will need to defeat.
So clear the entire area, then a treasure chest will appear in the center. Open it to find a Throwing Ring inside.
Next, head back to the area with the multiple magenta pillars and buttons. It’s marked on the map below.

Head all the way south and take the southern exit when you get there.
Next is a clearing with a green pillar lying underneath the path on the left. Go through that path.

The next area will look familiar to you because it’s where you pushed a button early on in your exploration.
Head all the way to the left to open a chest with a Master Cure spell inside.
And that’s the last of the treasure chests! You can now head back to the cave entrance to continue the story.
Chasing after Ethelberd in the Cave
From the cave entrance, jump into the hole on the left.
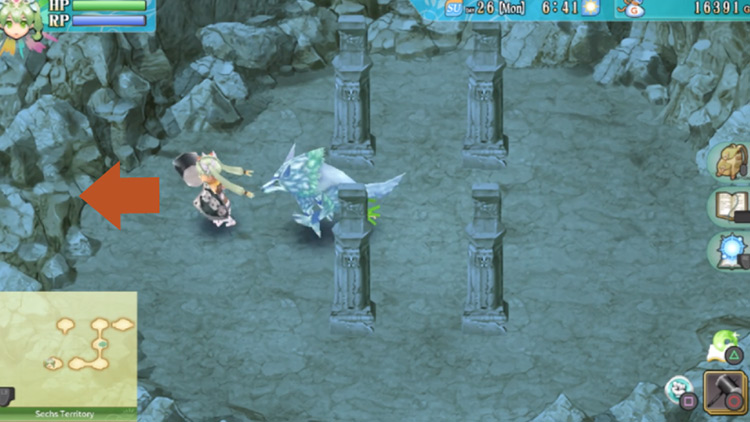
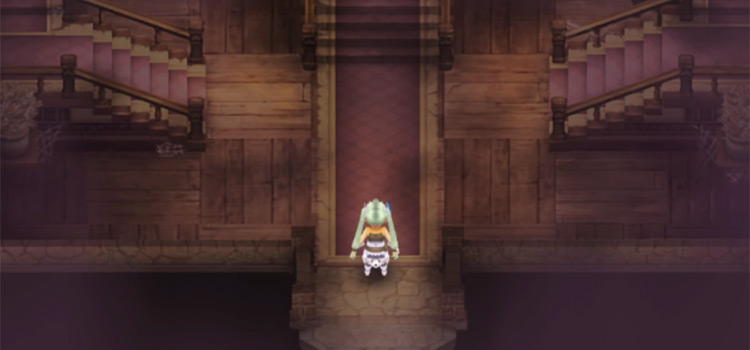
Once you land, you’ll notice that there are no visible exits around you.
Not to worry because there’s a hidden path along the west wall (indicated in the screenshot below).
Go through the hidden path to proceed.
Next is another area where pillars will shoot up as you get near them.
From here, head for the south wall where there’s another hidden path (pictured below).

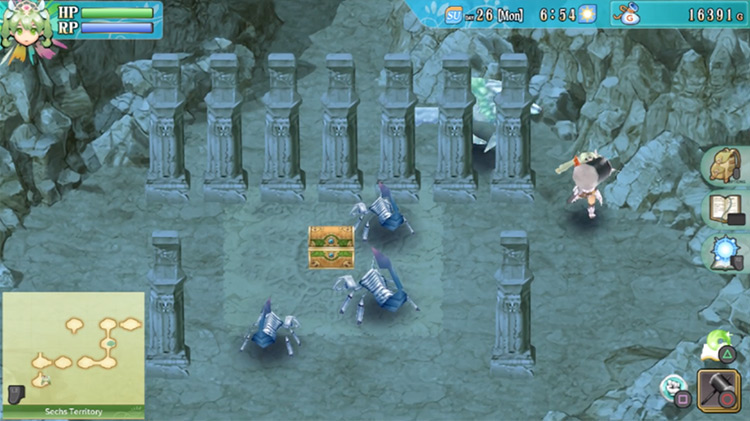
A treasure chest is lying in the center of the next area. A wall of pillars will block your way, but you can make it past them by going through a small gap on the right.
Open the chest to find a Rune Crystal inside.
Then head back up north to the previous area when you’re done.
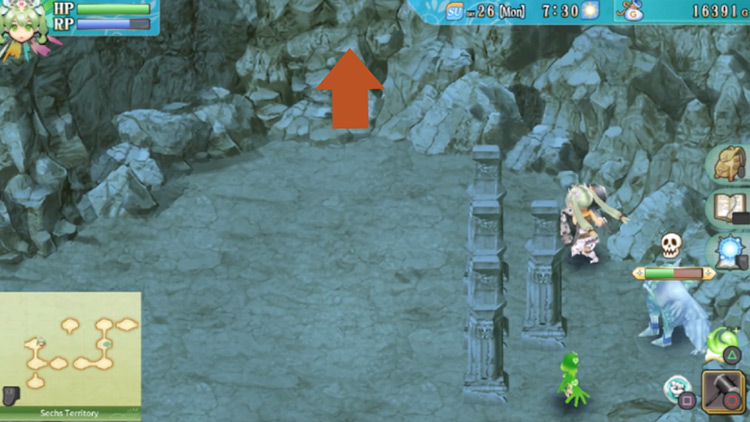
To get past the pillars in this area, run up along the west wall until you reach the top of the area – then head through the path in the north.
To get past the pillars in this next area, you need to circle around going east.
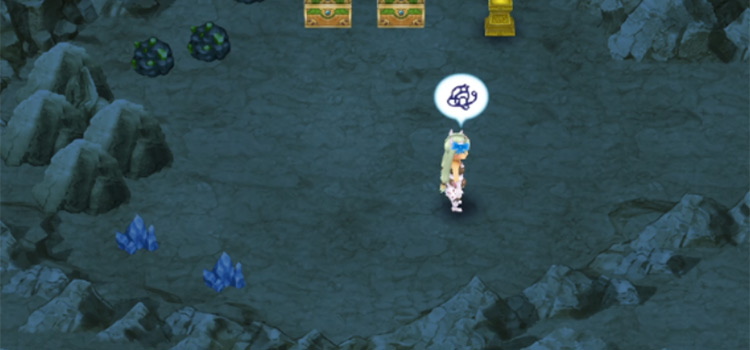
Once you get to the top of the area, go through the secret path hidden along the north wall pictured below.
Another chest is lying in the center of this secret area.
To get to the chest, head up all the way from the right side of the pillars. Then open the chest to find a Giga Swing ability inside.
Now return to the previous area by going back south, then go through a gap in between these pillars below.
Once you get through there, you can head all the way to the west to get to the next area.
The next area will have monsters firing long-range attacks at you from behind the walls of pillars.
Head all the way to the west from here.

You then will end up back outside.
Journal #2 + Extra Treasure
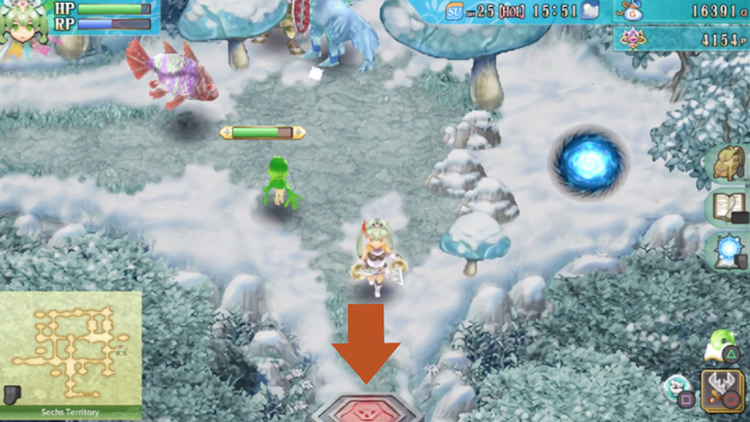
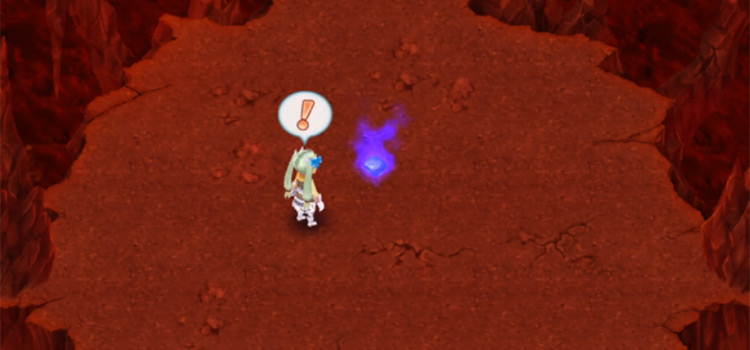
You’ll see a journal here to save your game as well as a pink switch.
Push the pink switch to activate a portal that will take you back to the entrance of the territory – but don’t go through the portal.
When you’re ready to proceed, head up north.
The next area will have a ton of mobs, as well as a frozen gate behind a wall of pillars.
If you clear the area, a treasure chest will appear next to the pillars. Defeat all the mobs here and use a long-range attack to destroy the frozen gate.
Then open the chest when it appears.
The chest will have a Straight Punch ability inside.
Once you’re done with this area, head west.
In the next area, the path heading north will be blocked by pillars that come up when you get close.
So from here, you’ll need to head west again.

Next up is a small clearing with a few mobs. Head north from here.
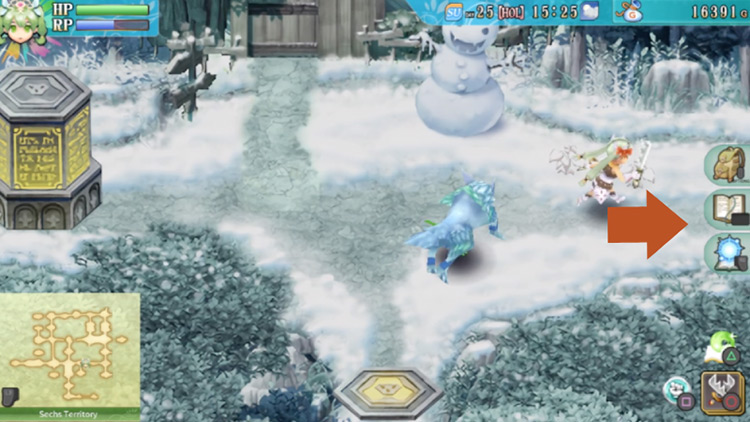
The next area will have a big snowman in the upper right corner.
Just take the exit to the east.
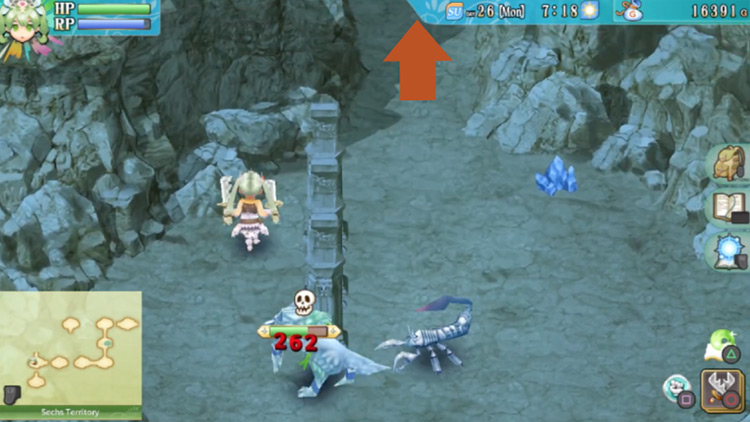
You’ll experience strong gusts of wind from the north when you enter the next area.
But work through the wind and get to the northern exit, then head north from here (pictured below).
Tip: Keep dashing if you find yourself being pushed back by the wind.

The next area is a long vertical stretch with strong winds blowing in from the north.
Clear all the mobs here, then treasure chests will appear in the upper and lower sections of the area. You’ll find a Twin Attack ability inside the upper treasure chest.

The lower treasure chest will have an Explosion spell inside.
When you’re done here, head back south and then go back to the intersection with the big snowman.
You’ll need to go through the path in the north here. There will be pillars that block this path when you get close, but you can pass through a gap in between them on the left.
The next area will have a thicket of trees in the upper right corner.
From here, head west.
There will be a giant tree stump in the center of the next area.
From here, you’ll can head south first for an optional treasure chest.
The chest contains a bunch of Mystery Potions.
Open the chest to pick them up, then head back to the area with the big stump in the center.
The Family Portrait Location (inaccessible for now)
You’ll notice that the path heading west from here is blocked by a strange-looking statue.
There’s actually a family portrait carved into the statue. You won’t be able to activate the family portrait for now, but later on you can come back with your wife and child to unlock it.
For now, head north.

Journal #3 + Boss Preperations
The next area will have a journal and a yellow-green switch.
You can push the switch to activate a portal that can take you back to the entrance, but again you don’t want to go into the portal yet.
Instead we’re getting ready for a boss battle with Aquaticus.
When you’re ready, head up north.
The next area will be where you face the Sech Territory’s boss.
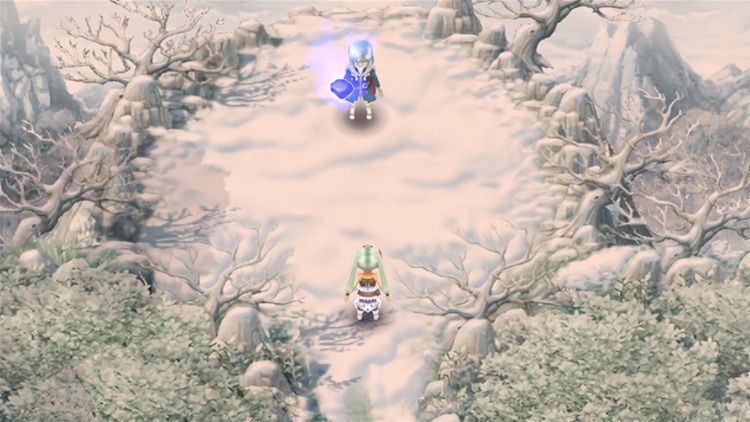
Ethelberd is waiting for you in the next area.
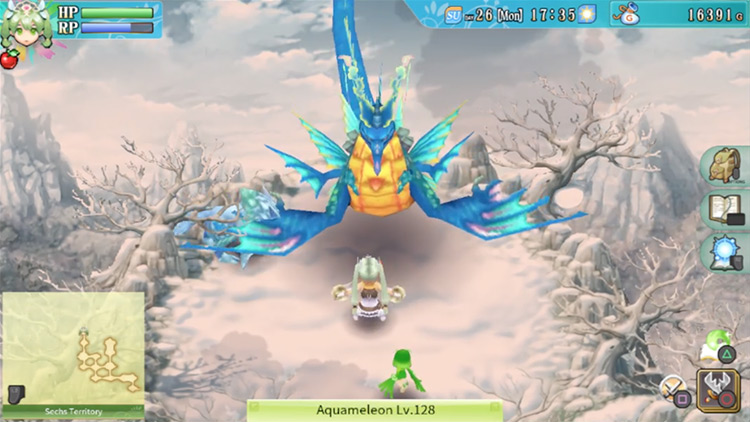
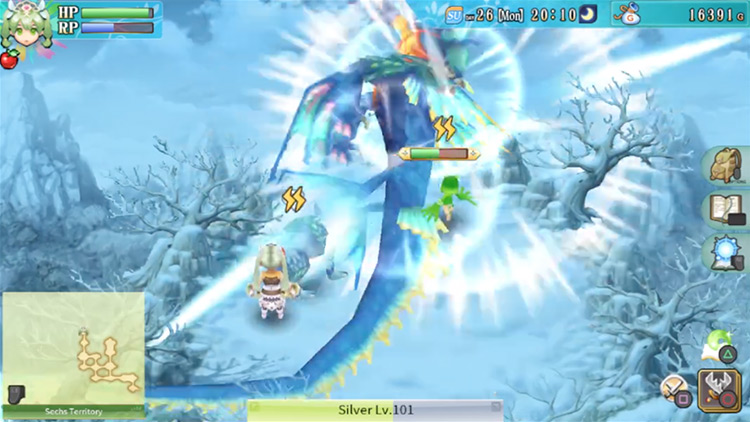
At the end of a short cutscene, Ethelberd will have you face off against Aquameleon.
Boss Fight: How To Beat Aquameleon

Phase 1: Normal Phase
| Aquameleon Normal Phase | |
|---|---|
| Attacks |
|
| Fighting Tips | The most tedious attack to deal with here is the bubble attack that inflicts both paralysis and sleep on its victims. Make sure to dodge that, and you’ll find this part of the fight quite easy as long as you can keep dealing damage. |
Phase 2: Enraged Phase

| Aquameleon Enraged Phase | |
|---|---|
| Attacks | In this phase, Aquameleon will perform the same attacks as the previous one. In addition to those are the following:
|
| Fighting Tips | The sprites will be pestering you throughout this fight. Keep moving around and keep your eye on the sprites so that you don’t get caught in their lasers. Just keep dishing out damage until Aquameleon falls. |
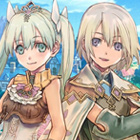
Chapter Epilogue: Escape to the Floating Empire

Once Aquameleon is defeated, Ethelberd will show up again.
A cutscene will play out and it will conclude with Ethelberd escaping to the Floating Empire.
You’ll end up back in Selphia Town afterwards, and you’ll need to prepare for the next and final fight against the Sechs.
Next: The Floating Empire: Rune Factory 4 Walkthrough (Part 12)
-
Rune Factory 4
- Sechs Territory: Rune Factory 4 Walkthrough (Part 11)
Related Posts:
 The Floating Empire: Rune Factory 4 Walkthrough (Part 12)
 Idra Cave: Rune Factory 4 Walkthrough (Part 9)
 Maya Road: Rune Factory 4 Walkthrough (Part 10)
 Yokmir Cave: Rune Factory 4 Walkthrough (Part 5)
 The Delirium Lava Ruins: Rune Factory 4 Walkthrough (Part 7)
 The Water Ruins: Rune Factory 4 Walkthrough (Part 3)
 Obsidian Mansion: Rune Factory 4 Walkthrough (Part 4)
 The Rune Spheres & Chimera: Rune Factory 4 Walkthrough (Part 6)