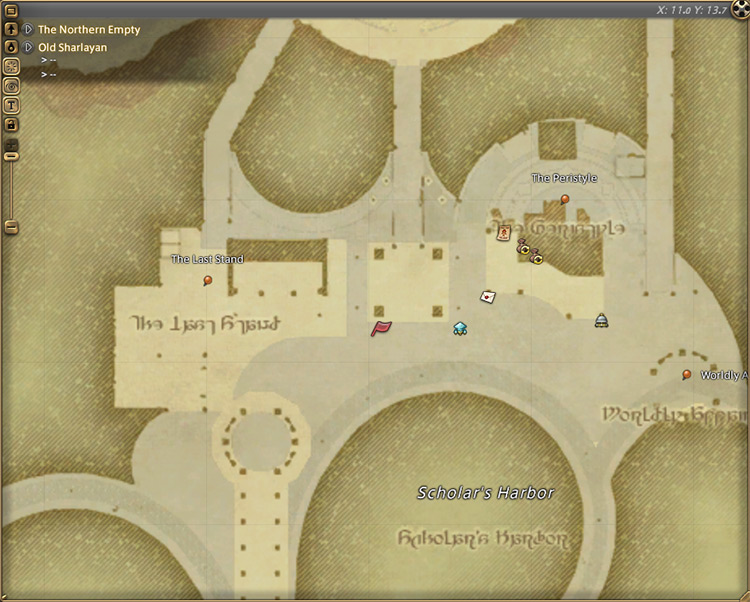
You can unlock the Level 90 dungeon The Stigma Dreamscape by accepting the Level 90 quest “Where No Loporrit Has Gone Before” from Jammingway in Old Sharlayan (X:11.0, Y:13.7).
This quest can only be unlocked after finishing the final MSQ for patch 6.0 of the Endwalker expansion.
TABLE OF CONTENTS
Step-by-Step Unlock Guide
- Complete the Level 90 MSQ “Endwalker” from Alphinaud in Ultima Thule (X:21.5, Y:21.5).
- Accept the Level 90 quest “Where No Loporrit Has Gone Before” from Jammingway in Old Sharlayan (X:11.0, Y:13.7).
- Rendezvous with Jammingway at Thaumazein in Labyrinthos (X14:4. Y:27.6).
- Speak with Jammingway in Ultima Thule (X:13.7, Y:33.6).
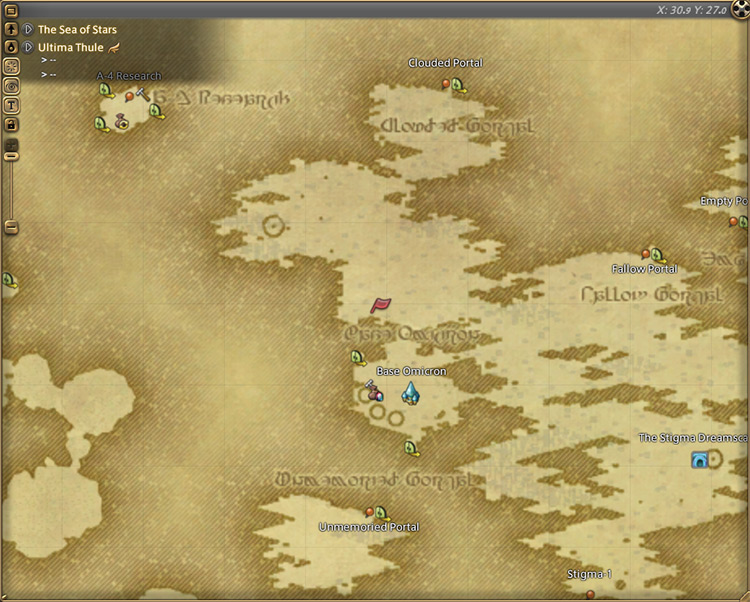
- Follow Jammingway to Base Omicron in Ultima Thule (X:30:9, Y:27.0).
- Talk to N-7000 in Ultima Thule (X:34.7, Y:28.8).
Detailed Unlocking Guide
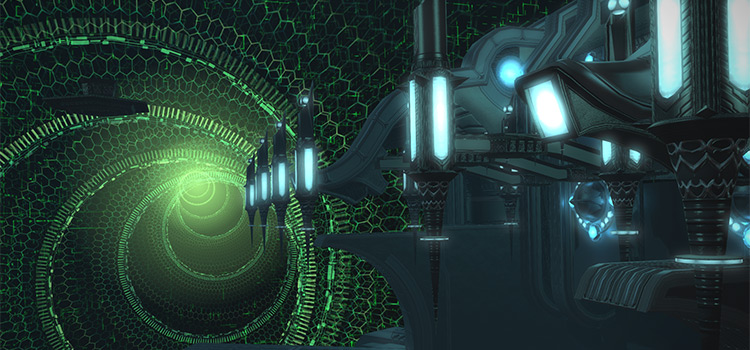
The Stigma Dreamscape is one of the expert-level dungeons introduced in the Endwalker expansion. It can only be unlocked after you complete the Level 90 MSQ “Endwalker” from Alphinaud in Ultima Thule (X:21.5, Y:21.5).
This MSQ wraps up the story for patch 6.0 of the expansion and allows you to unlock its endgame dungeons.
After completing it, talk to Jammingway in Old Sharlayan (X:11.0, Y:13.7) and accept the Level 90 quest “Where No Loporrit Has Gone Before” to begin.
Jammingway, the communications officer aboard Ragnarok, recently received a distress signal from Ultima Thule and requires your assistance in investigating its source. Head to the Thaumazein in Labyrinthos (X:14.4, Y:27.6) to continue.
For reasons unknown to Jammingway, Ragnarok doesn’t require as much aether to travel between Labyrinthos and Ultima Thule as it did during the first voyage. It’s as if the ship exists in both places at the same time.
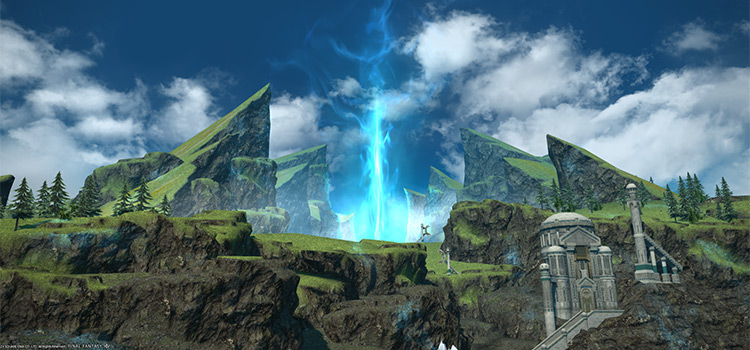
After talking to your rabbit-like companion, you’ll reappear in Ultima Thule (X:13.7, Y:33.6).
Unfortunately, this connection between the two places puts Labyrinthos at risk should the distress signal in Ultima Thule be more than just a false alarm.
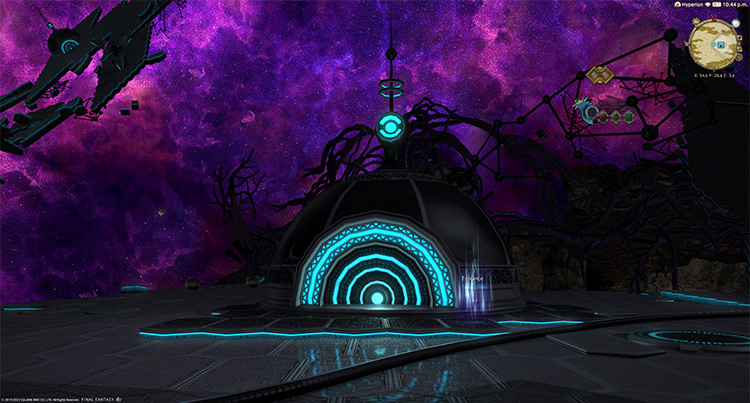
Follow Jammingway to Base Omicron in Ultima Thule (X:30:9, Y:27.0) to investigate further.
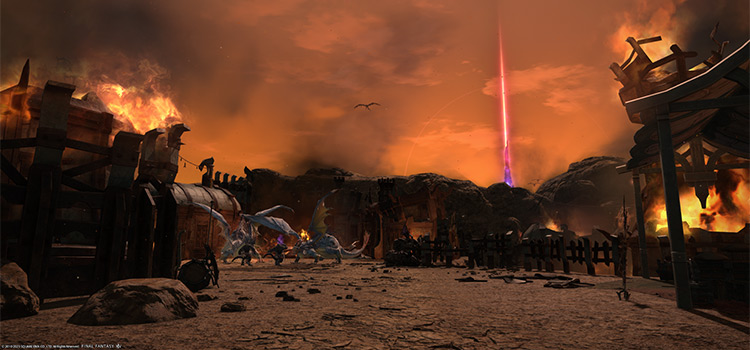
At the base, you discover that an Omicron named N-7000 was responsible for the distress signal.
It warns you about a reawakened militaristic matrix named Stigma-4 that is currently amassing weapons of mass destruction to annihilate Etheirys.
N-7000 proposes a plan where it will hack into Stigma-4’s memory cache to generate a virtual environment where you and your friends can enter. Once inside, you can defeat a simulated version of Stigma-4 and its allies to dissuade them from invading Etheirys.
Once the plan is in place, talk to N-7000 in Ultima Thule (X:34.7, Y:28.8) to unlock The Stigma Dreamscape. This dungeon requires at least a Level 90 Disciple of War or Magic job and an average item level of 540 to enter.
Boss #1: Proto-Omega
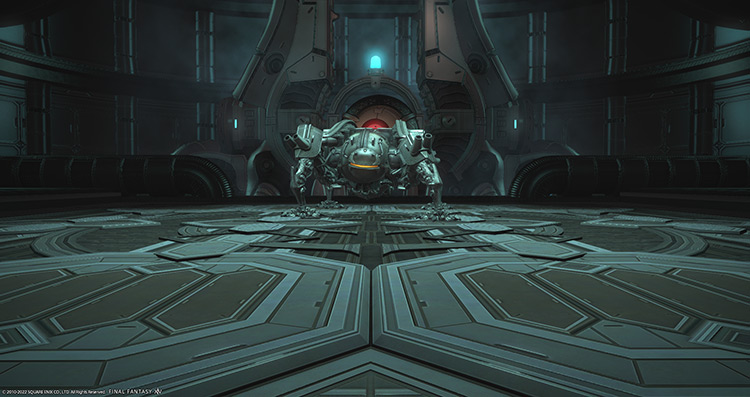
Most of the boss’ attacks apply a stacking “Vulnerability Up” debuff for 60 seconds. After the boss’ first attack, the outer edges of the arena will become a danger zone that applies a constant “Bleeding” DoT to anyone that touches it.
Mechanics
- Side Cannons: A room-wide attack that covers one of the boss’ flanks.
- Rear or Forward Interceptors: A room-wide attack that covers either the boss’ front or back.
- Chemical Missile: Targeted circle AoEs on three players that drop “Burning” DoT puddles. Drop your puddles closely together.
- Electric Slide: A random player will be marked with a stack marker that will knock players back afterward. Stack with the affected player and position yourselves to be knocked into a safe space away from the DoT puddles. Alternatively, you can use knockback-immunity skills.
- Guided Missiles: Two players will be tethered to missiles that will slowly follow them around. These missiles will explode on impact, applying more vulnerability debuffs and DoT puddles. Kite the missiles around until they disappear.
- Mustard Bomb: A red tankbuster marker on the primary target that applies a 12-second “Bleeding” DoT. Mitigate and heal through the damage.
Rewards
| Name | Type | Rarity |
|---|---|---|
| The Last Earring of Aiming | Earrings | Dungeon (Green) |
| The Last Earring of Casting | Earrings | Dungeon (Green) |
| The Last Earring of Fending | Earrings | Dungeon (Green) |
| The Last Earring of Healing | Earrings | Dungeon (Green) |
| The Last Earring of Slaying | Earrings | Dungeon (Green) |
| The Last Necklace of Aiming | Necklace | Dungeon (Green) |
| The Last Necklace of Casting | Necklace | Dungeon (Green) |
| The Last Necklace of Fending | Necklace | Dungeon (Green) |
| The Last Necklace of Healing | Necklace | Dungeon (Green) |
| The Last Necklace of Slaying | Necklace | Dungeon (Green) |
Boss #2: Arch-Lambda
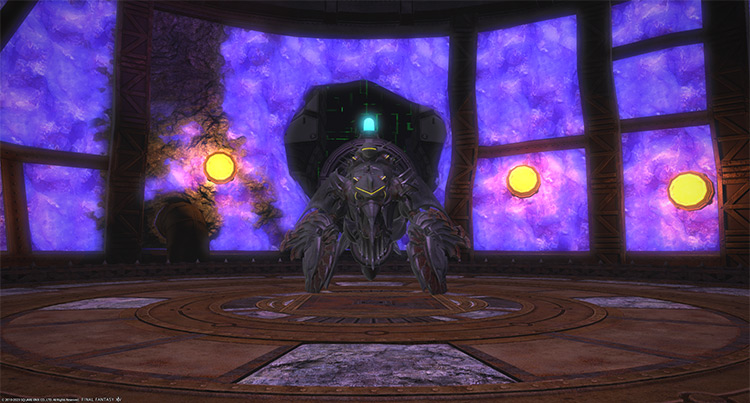
Most of the boss’ attacks apply a stacking “Vulnerability Up” debuff for 60 seconds.
Mechanics
- Wheel: A red tankbuster marker on the primary target. Shield and heal through the damage.
- Auto-mobile Assault Cannon + Wave Cannon: The boss will move to the center and telegraph a column attack four times in a row before rushing across the room. Immediately after, the boss will use a 180-degree AoE that covers its entire line of sight. Stay out of the boss’ path and run behind it once it uses “Wave Cannon.”
- Atomic Flame: A room-wide AoE attack.
- Auto-mobile Sniper Cannon: The boss will telegraph a column attack with numbered markers (1 to 4) on top of it. At the same time, all players will receive numbered markers (1 to 4) on top of their heads. Stand beside your corresponding number on the telegraphed column attack to avoid overlapping damage.
Rewards
| Name | Type | Rarity |
|---|---|---|
| The Last Bracelet of Aiming | Bracelets | Dungeon (Green) |
| The Last Bracelet of Casting | Bracelets | Dungeon (Green) |
| The Last Bracelet of Fending | Bracelets | Dungeon (Green) |
| The Last Bracelet of Healing | Bracelets | Dungeon (Green) |
| The Last Bracelet of Slaying | Bracelets | Dungeon (Green) |
| The Last Ring of Aiming | Ring | Dungeon (Green) |
| The Last Ring of Casting | Ring | Dungeon (Green) |
| The Last Ring of Fending | Ring | Dungeon (Green) |
| The Last Ring of Healing | Ring | Dungeon (Green) |
| The Last Ring of Slaying | Ring | Dungeon (Green) |
| Battledance Materia IX | Materia | Basic |
| Heavens’ Eye Materia IX | Materia | Basic |
| Piety Materia IX | Materia | Basic |
| Quickarm Materia IX | Materia | Basic |
| Quicktongue Materia IX | Materia | Basic |
| Savage Aim Materia IX | Materia | Basic |
| Savage Might Materia IX | Materia | Basic |
Boss #3: Stigma-4
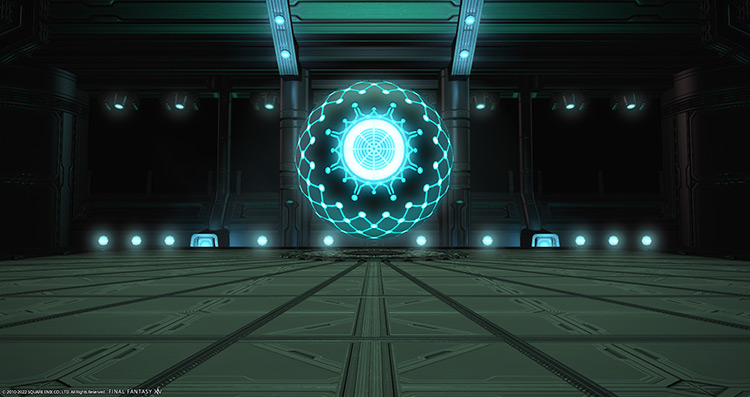
Most of the boss’ attacks apply a stacking “Vulnerability Up” debuff for 60 seconds. A few seconds into the fight, the outer edges of the arena will turn into a danger zone that applies a continuous “Burns” DoT to anyone that walks into it.
Mechanics
- AI Takeover: The boss will spawn mobs that need to be killed before they self-destruct.
- Omega Frame: Casts “Proto-wave Cannon” that works similarly to “Side Cannons” from the first boss.
- Hybrid Dragon: Casts “Fire Breath,” a massive frontal cone AoE.
- Proto-Rocket Punch x6: Casts “Rush” column attacks that can knock players back.
- Self-Destruct (AI Mobs): A room-wide AoE attack that deals high damage. Kill the mobs before they finish casting this attack.
- Transformation: The boss will periodically transform into one of two shapes that will determine the incoming attack:
- Helix Spiral: A large point-blank AoE.
- Double Ring: A room-wide donut AoE.
- Mindhack: All players will receive a directional debuff that will force them to run toward a certain direction after 10 seconds. Pre-position yourselves to avoid the incoming “Helix Spiral” or “Double Ring” attack.
- Atomic Ray: A room-wide AoE attack that applies a 10-second “Bleeding” DoT.
- Multi-AI Takeover: Spawns two of the three possible AI takeovers mentioned above.
Rewards
| Name | Type | Rarity |
|---|---|---|
| The Last Earring of Aiming | Earrings | Dungeon (Green) |
| The Last Earring of Casting | Earrings | Dungeon (Green) |
| The Last Earring of Fending | Earrings | Dungeon (Green) |
| The Last Earring of Healing | Earrings | Dungeon (Green) |
| The Last Earring of Slaying | Earrings | Dungeon (Green) |
| The Last Necklace of Aiming | Necklace | Dungeon (Green) |
| The Last Necklace of Casting | Necklace | Dungeon (Green) |
| The Last Necklace of Fending | Necklace | Dungeon (Green) |
| The Last Necklace of Healing | Necklace | Dungeon (Green) |
| The Last Necklace of Slaying | Necklace | Dungeon (Green) |
| Optimus Omicron | Minion | Basic |
Extra Treasure Coffers
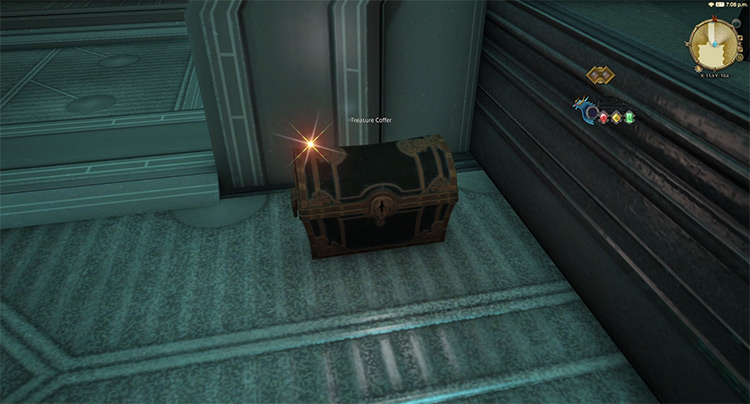
Apart from the boss rewards, there are four treasure coffers located throughout the dungeon that you can open for more gear and materia rewards:
- (X:14.1, Y:9.3)
- (X:11.0, Y:10.2)
- (X:11.4, Y:12.3)
- (X:11.3, Y:9.9)
-
Final Fantasy XIV
- FFXIV The Stigma Dreamscape: Unlock + Dungeon Guide
Related Posts:
 FFXIV The Fell Court of Troia: Unlock + Dungeon Guide
 FFXIV Alzadaal’s Legacy: How To Unlock + Dungeon Guide
 FFXIV The Dead Ends: Dungeon Boss Guide + Lore Readings
 FFXIV Lapis Manalis: Unlock + Dungeon Boss Guide
 FFXIV The Aetherfont: Unlock + Dungeon Boss Guide
 FFXIV Paglth’an: How To Unlock + Dungeon Guide
 FFXIV Dohn Mheg: How To Unlock + Boss Guide
 FFXIV Anamnesis Anyder: How To Unlock + Boss Guide