| Red Shard Locations | ||
|---|---|---|
| # | Method | Repeatable? |
| 1 | Route 124 — on a northern island | No |
| 2 | Route 127 — underwater, southwest area (hidden) | No |
| 3 | Mirage Mountain (northeast of Route 125) — northeast corner | No |
| 4 | Mirage Caves — possible hidden item | Yes |
| Blue Shard Locations | ||
|---|---|---|
| # | Method | Repeatable? |
| 1 | Route 124 — on a western island | No |
| 2 | Route 126 — underwater, northwest side of the crater (hidden) | No |
| 3 | Route 129 — underwater, southeast area (hidden) | No |
| 4 | Mirage Mountain (south of Route 129) — on a western cliff | No |
| 5 | Mirage Caves — possible hidden item | Yes |
| Yellow Shard Locations | ||
|---|---|---|
| # | Method | Repeatable? |
| 1 | Route 107 — underwater, southeast area (hidden) | No |
| 2 | Route 124 — on a southern island | No |
| 3 | Route 126 — underwater, east side of the crater (hidden) | No |
| 4 | Mirage Cave (west of Route 115) — center of the cave | No |
| 5 | Mirage Mountains — possible hidden item | Yes |
| Green Shard Locations | ||
|---|---|---|
| # | Method | Repeatable? |
| 1 | Route 124 — underwater, north of the Treasure Hunter’s house (hidden) | No |
| 2 | Route 126 — on a northwest island | No |
| 3 | Route 130 — underwater, east side of the route (hidden) | No |
| 4 | Mirage Forest (east of Mossdeep City) — end of the left pathway | No |
| 5 | Mirage Mountains — possible hidden item | Yes |
TABLE OF CONTENTS
Prerequisites
To access the locations of every shard listed above, you’ll need the following:
- A Pokémon that knows HM03 Surf and HM07 Dive to navigate routes with underwater sections.
- The Eon Flute, a key item which allows you to soar through the skies of Hoenn, providing access to Mirage Spots.
- The Dowsing Machine, a key item which helps locate hidden items in Mirage Spots.
- And to fully explore certain Mirage Spots you’ll need Pokémon that know HM01 Cut, HM04 Strength, and HM06 Rock Smash to get past various obstacles.
Note that some shard locations are accessible with just one or some of these prerequisites. So you can acquire colored shards before having all of these prerequisites completed.
All Red Shard Locations
Non-Repeatable
Location #1 – Route 124
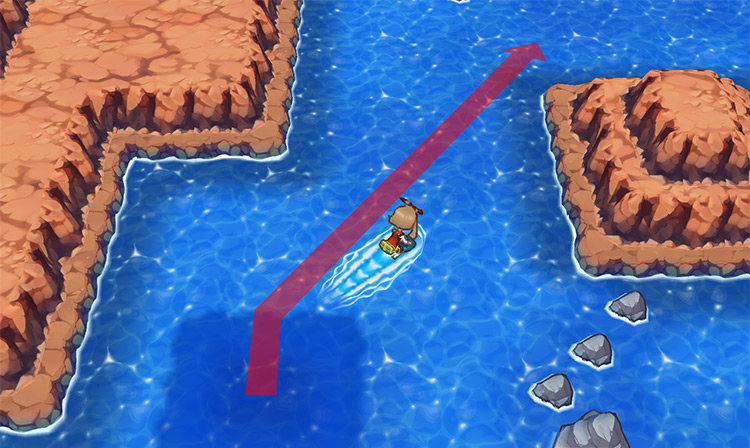
Step 1: Fly back to Route 124. Then immediately surf north until you find a diving spot.
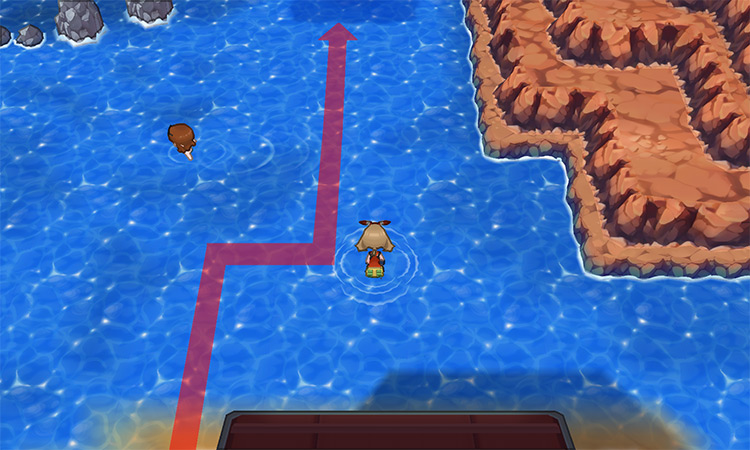
Step 2: After using Dive on this spot, navigate north to the location where light filters from above. Then use Dive again to resurface at the end of the path.
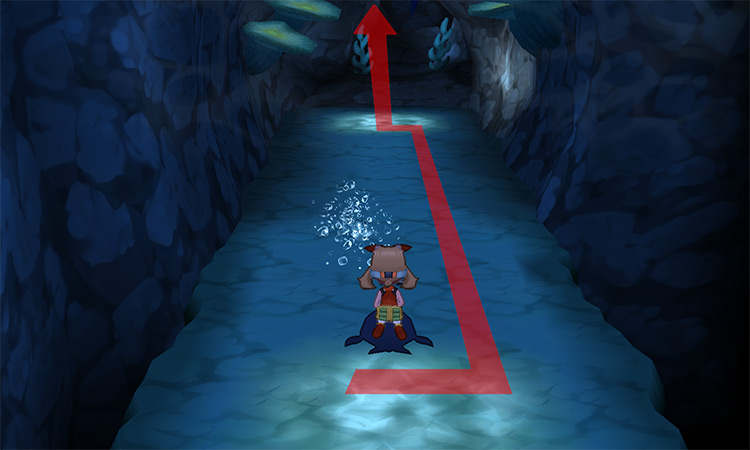
Step 3: Once you’re back on the surface, walk west toward the island and go up the nearby staircase.
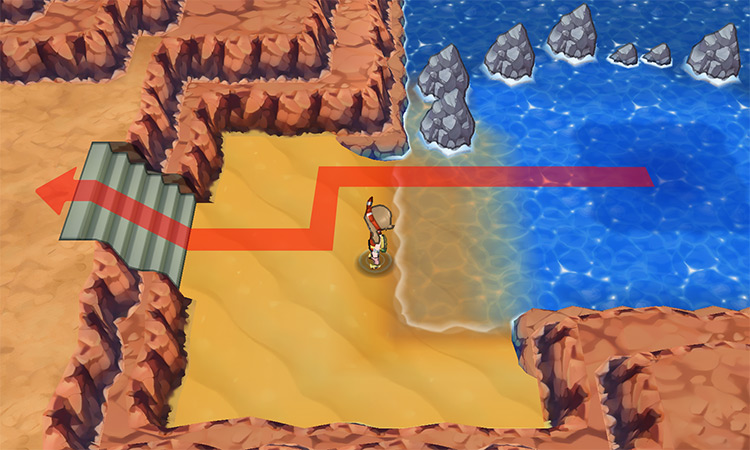
Step 4: In the center of the island you’ll see a Red Shard on the ground. To get the Red Shard just walk around the left side of this area and descend the stairs.
Location #2 – Route 127 (underwater)
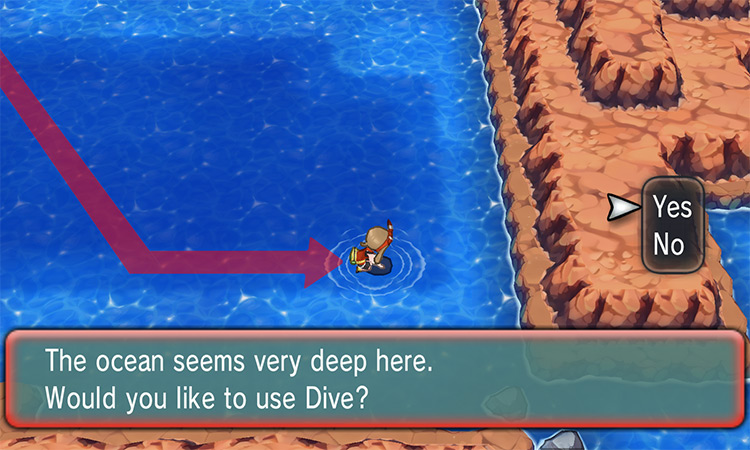
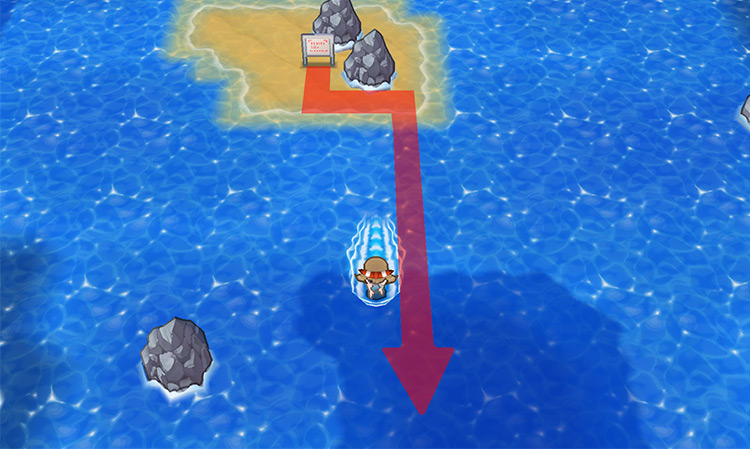
Step 1: Fly back to Route 127. Then surf south between the rock formations.
Step 2: Keep going until you come across a diving spot, then use Dive.
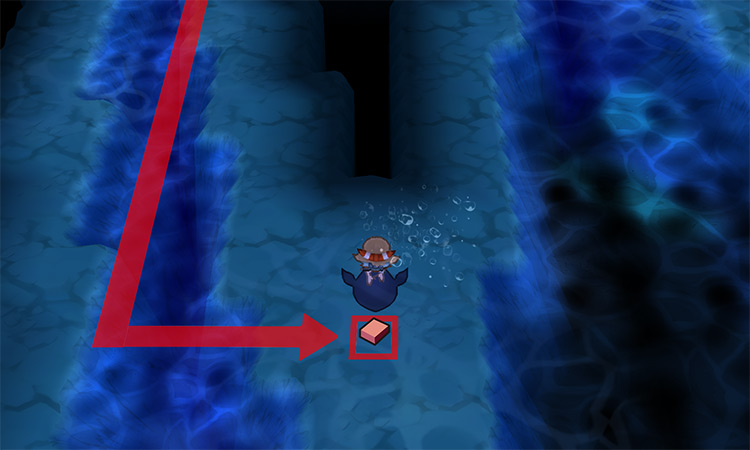
Step 3: Continue south until you’re between two water veins. In the spot marked in the screenshot below, you’ll find a hidden Red Shard.
Location #3 – Mirage Mountain (northeast of Route 125)
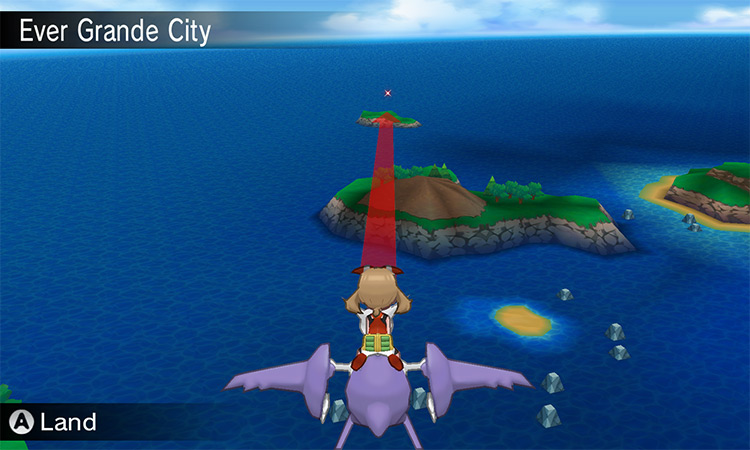
Step 1: Using the Eon Flute, check if the Mirage Mountain located northeast of Route 125 is accessible. If it is, fly there.
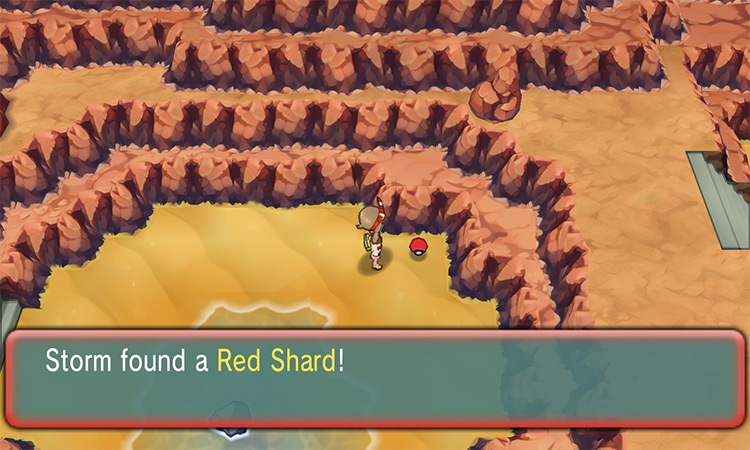
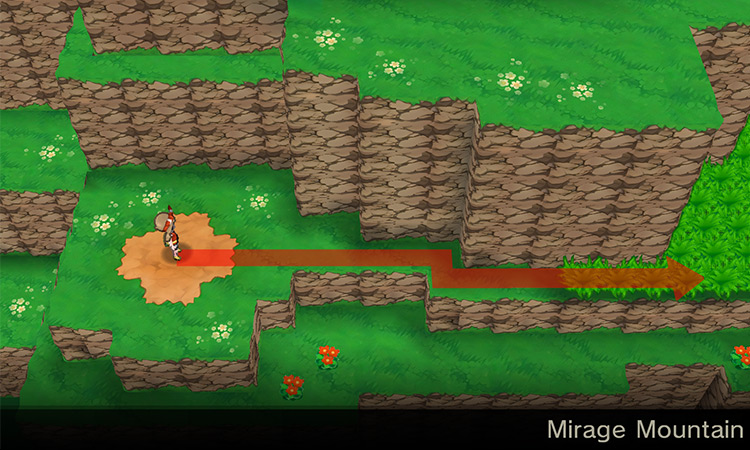
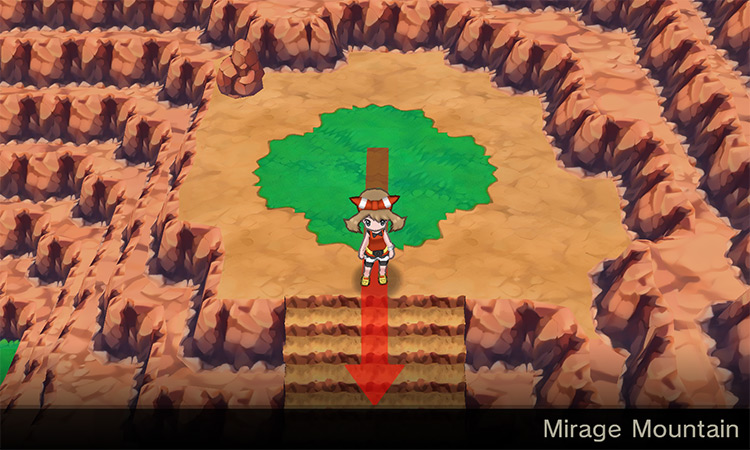
Step 2: When you arrive at the Mirage Mountain, head east along the narrow path into the tall grass.
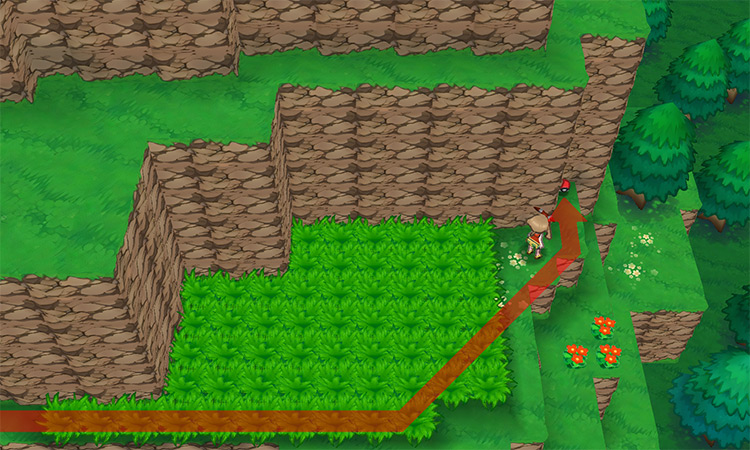
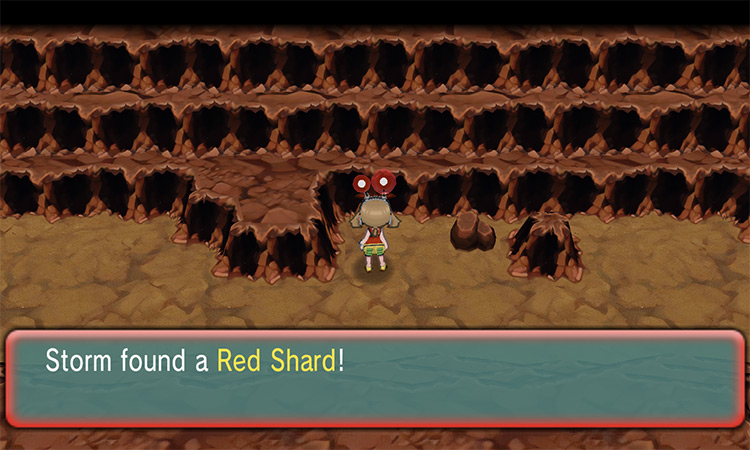
Step 3: Finally, proceed to the northeast corner of the area and pick up the Red Shard.
Repeatable
Mirage Caves
Each Mirage Spot in ORAS contains hidden items, like Red Shards, which can be found using the Dowsing Machine.
In Mirage Caves you have the chance to obtain one of the following items:
| Mirage Spot | Mirage Caves |
| Possible Items |
|
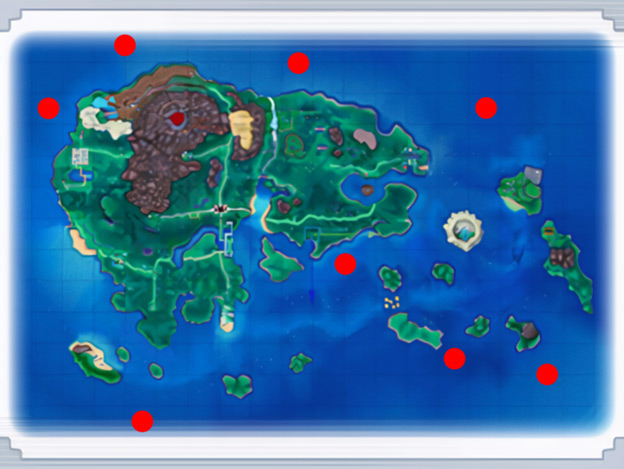
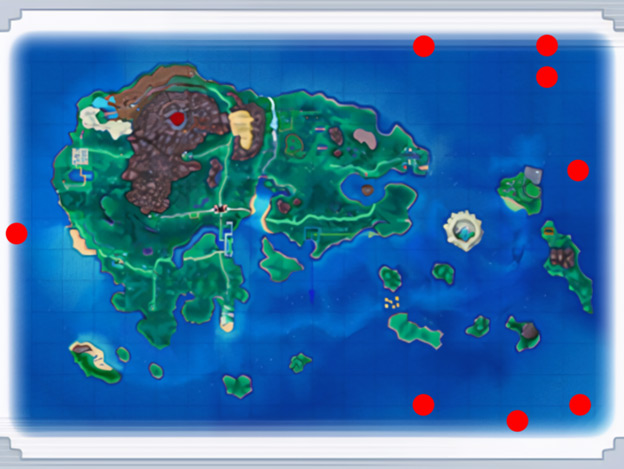
The map below highlights all possible Mirage Cave locations. If none of the Mirage Caves below are currently active, you can adjust the time settings on your 3DS or emulator until any of them appear.
| Mirage Cave Locations | Map of the Hoenn Region |
|---|---|
| South of Route 107 |
 |
| North of Fallarbor Town | |
| West of Route 115 | |
| North of Fortree City | |
| North of Route 124 | |
| Southeast of Route 129 | |
| South of Route 131 | |
| North of Route 132 |
All Blue Shard Locations
Non-Repeatable
Location #1 – Route 124
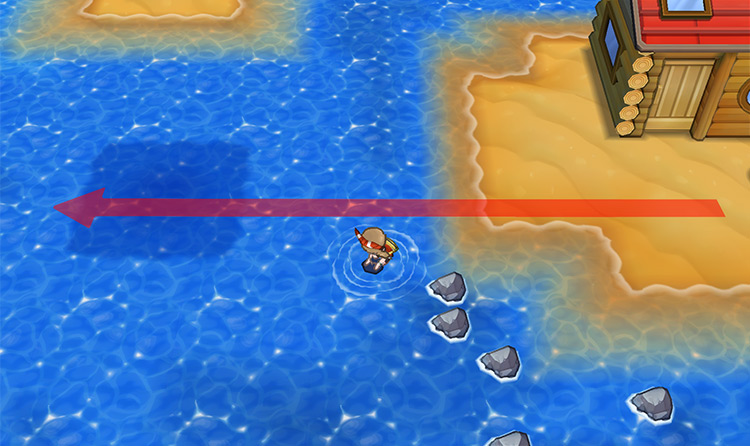
Step 1: Fly back to Route 124 and surf westward, passing by the first diving spot. The one you’re looking for is further to the west.
Step 2: Eventually you’ll encounter Sis & Bro Rita & Sam. You can choose to battle them or navigate around them to reach the diving spot in the southwest corner of this area. Use Dive here.
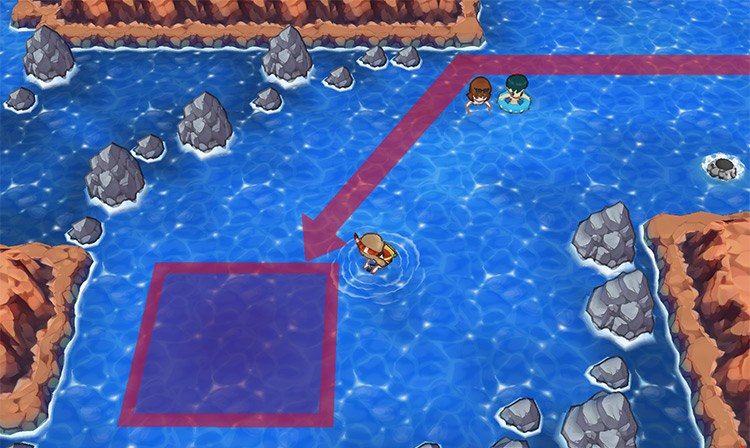
Step 3: While underwater, navigate west to the location where light filters from above. Then, use Dive again to resurface.
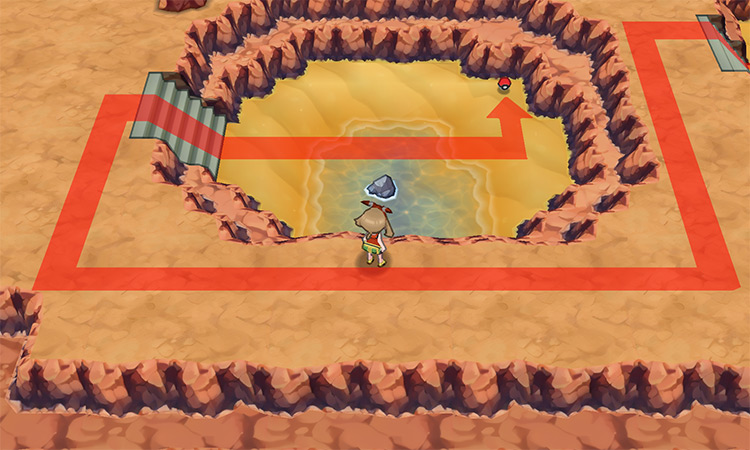
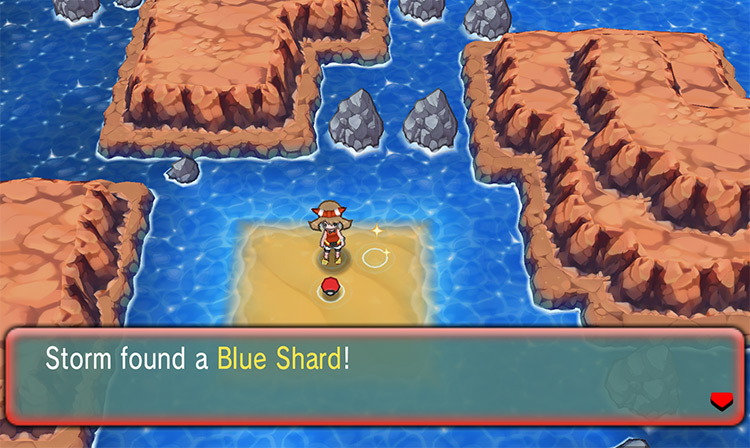
Step 4: Back on the surface, head north and grab the Blue Shard sitting on the center of the island.
Location #2 – Route 126 (underwater)
Step 1: Fly back to Route 126 and surf westward along the diving spot north of the crater.
Step 2: Once you reach the northwest corner of the diving spot, surf slightly south and Dive in that area (highlighted in the screenshot below).
Step 3: While underwater, look for a small hidden area on your left side. Surf west to reach it.
Step 4: Head north here, and in the marked spot on the ground in the screenshot below you’ll find a hidden Blue Shard.
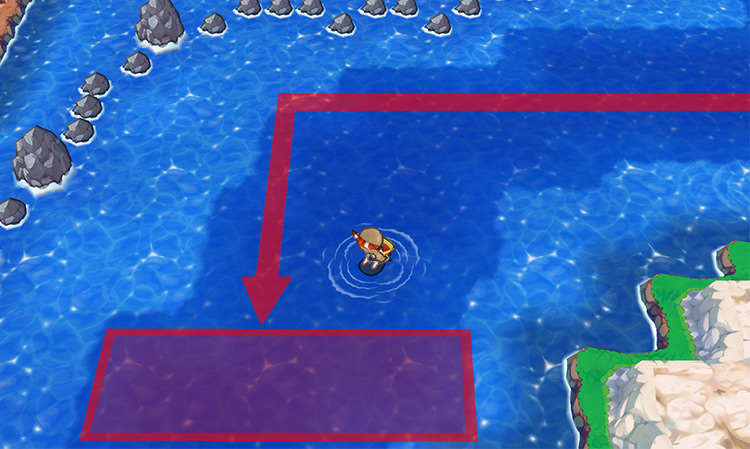
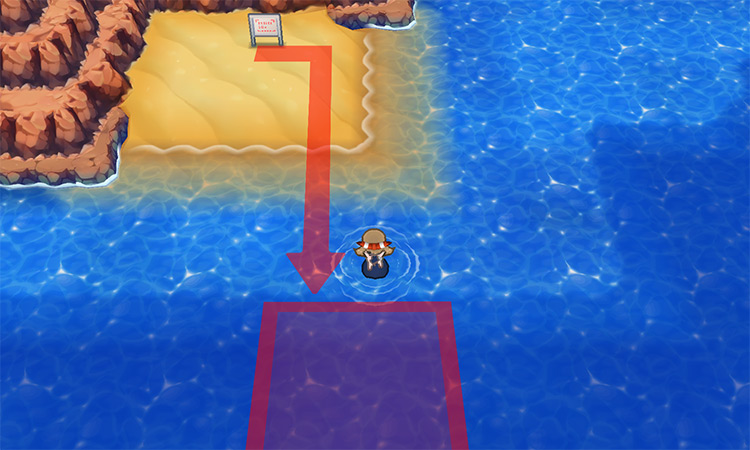
Location #3 – Route 129 (underwater)
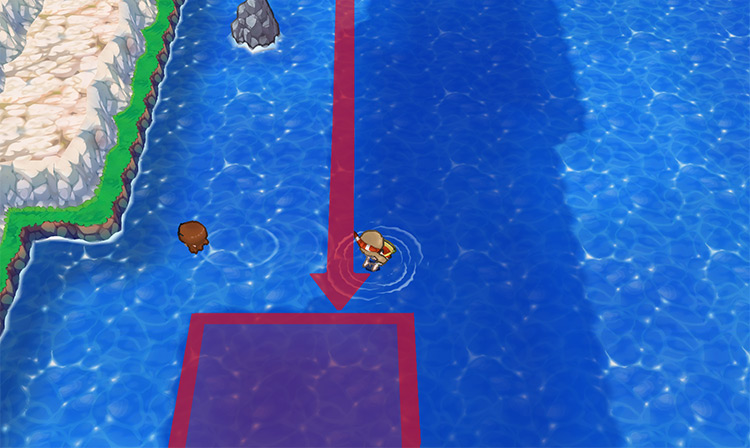
Step 1: Head back to Route 129 and surf eastward along the diving spot.
Step 2: Continue east until you reach the southeastern-most edge of the diving spot, then use Dive there.
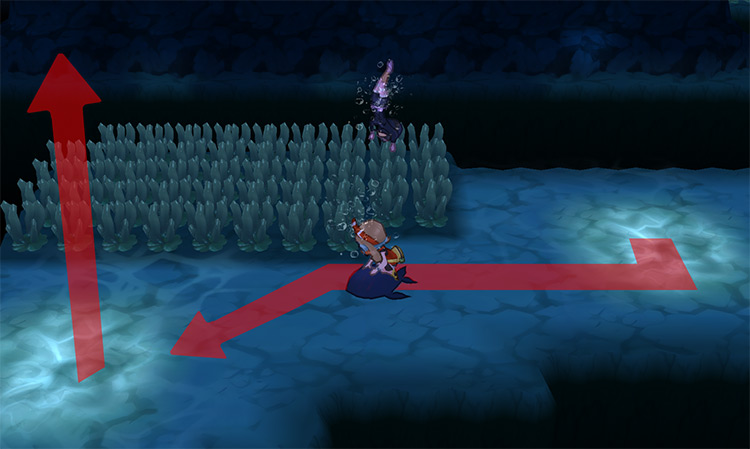
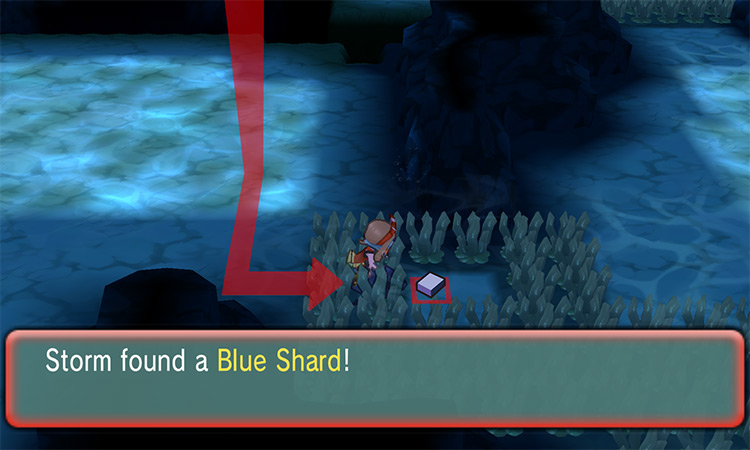
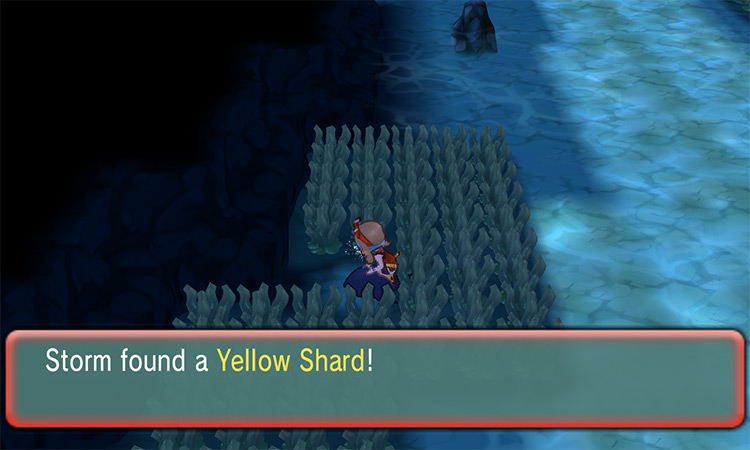
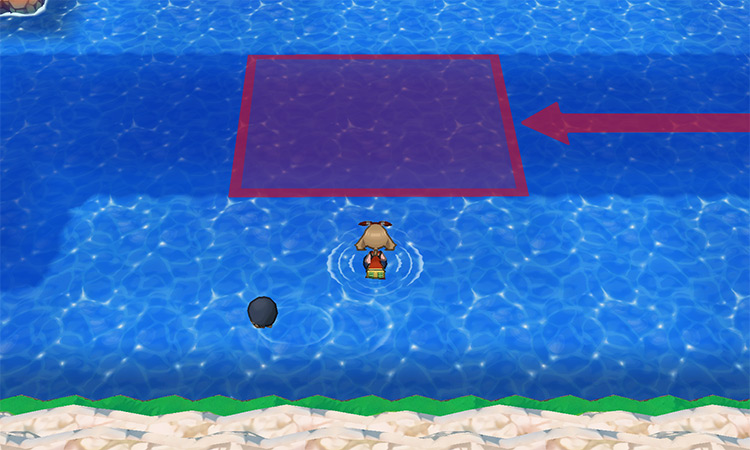
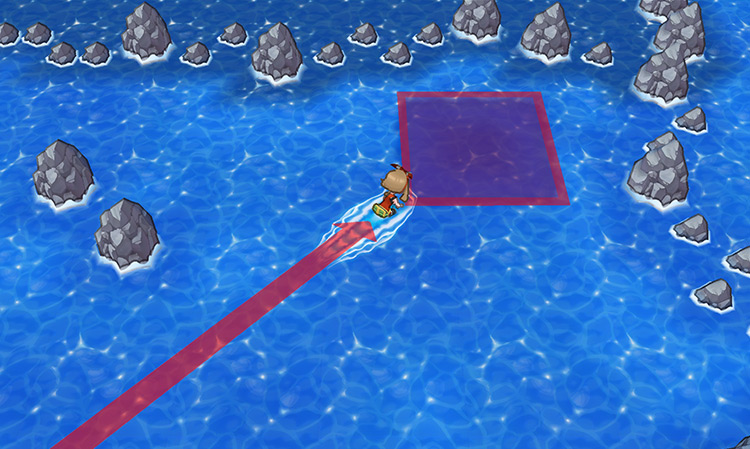
Step 3: While underwater, surf toward the rectangle of bare seafloor amid the seaweed patch southeast from your location.
You’ll find a hidden Blue Shard in the spot marked in the screenshot below.
Location #4 – Mirage Mountain (south of Route 129)
Step 1: Using the Eon Flute, check if the Mirage Mountain located south of Route 129 is accessible. If it is, fly there.
Step 2: When you arrive at the Mirage Mountain, follow the south path and head down two sets of stairs.
Step 3: After descending the stairs, head northwest through the tall grass.
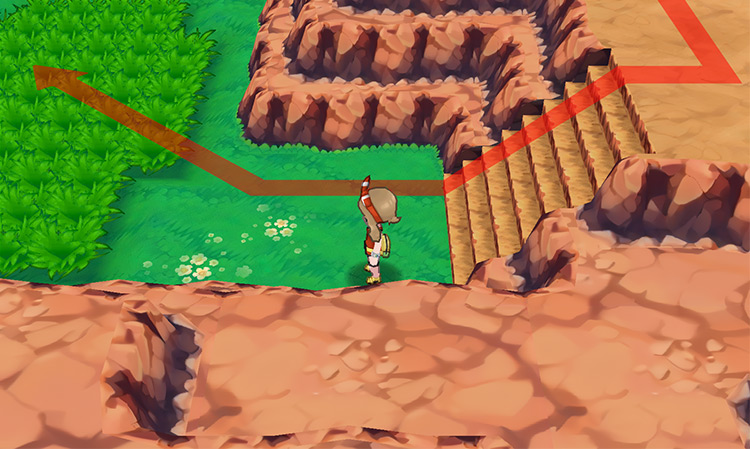
Step 4: Finally, climb the stairs on your left and pick up the Blue Shard at the end of the path.

Repeatable
Mirage Caves
Each Mirage Spot contains hidden items, like Blue Shards, which can be found using the Dowsing Machine.
In Mirage Caves you have the chance to obtain one of the following items:
| Mirage Spot | Mirage Caves |
| Possible Items |
|
The map below highlights all possible Mirage Cave locations. If none of the Mirage Caves below are currently active, you can adjust the time settings on your 3DS or emulator until any of them appear.
| Mirage Cave Locations | Map of the Hoenn Region |
|---|---|
| South of Route 107 |
|
| North of Fallarbor Town | |
| West of Route 115 | |
| North of Fortree City | |
| North of Route 124 | |
| Southeast of Route 129 | |
| South of Route 131 | |
| North of Route 132 |
All Yellow Shard Locations
Non-Repeatable
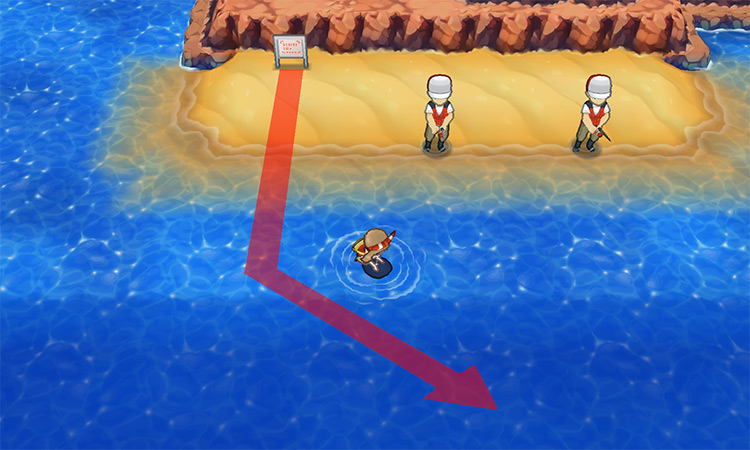
Location #1 – Route 107 (underwater)
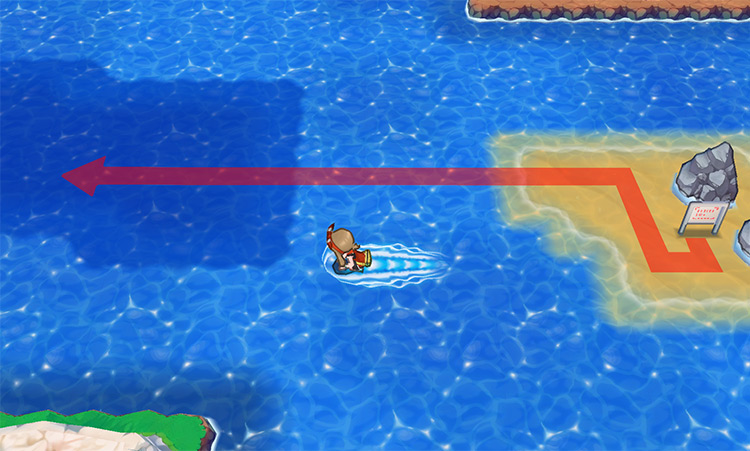
Step 1: Fly back to Route 107. Then head off the island and surf eastward.
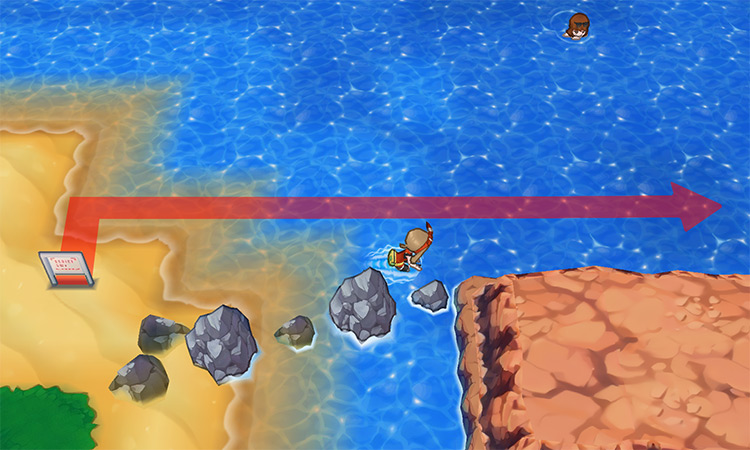
Step 2: Keep surfing east & travel along the southern side of the route’s rock formations.

Step 3: Eventually, you’ll come across a swimmer near a diving spot. Whether you battle or avoid him, use Dive in that area.

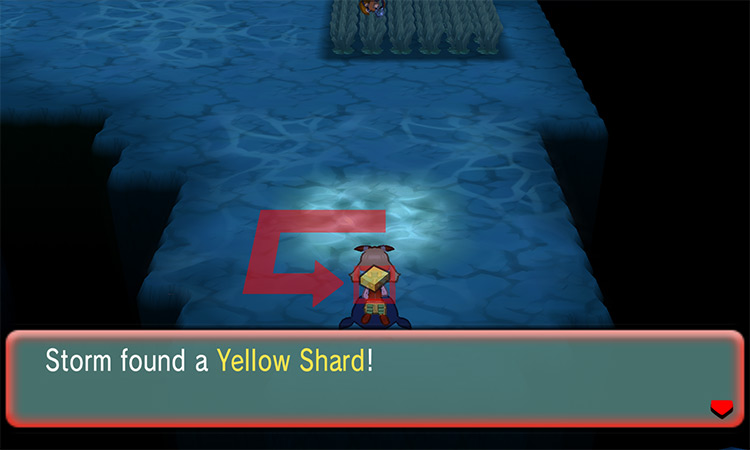
Step 4: While underwater, head one tile south from the location where light filters from above. There, you’ll find the hidden Yellow Shard as shown in the screenshot below.
Location #2 – Route 124
Step 1: Fly back to Route 124 and surf westward, passing by the first diving spot. The one you’re looking for is further to the west.
Step 2: Eventually, you’ll encounter Sis & Bro Rita & Sam.
You can choose to battle them or navigate around them to reach the diving spot in the southwest corner. Use Dive here.
Step 3: While underwater, continue westward past the first diving spot. Then head south toward the seaweed patch.
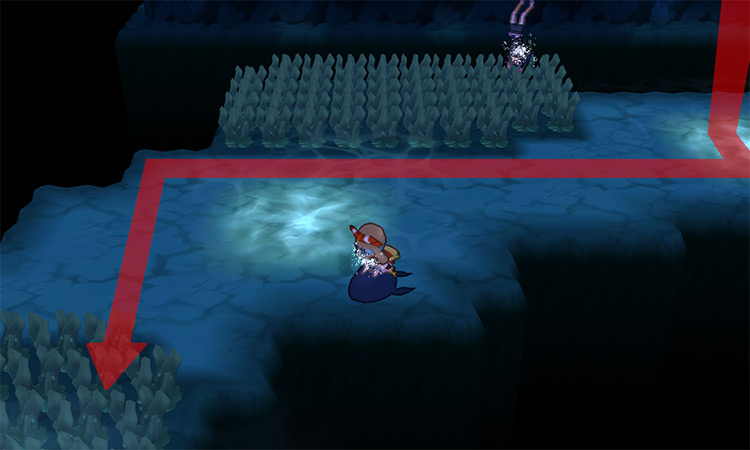
Step 4: Make a right turn at the corner and surf east until you come across another spot where light filters from above. Then use Dive once more to resurface.
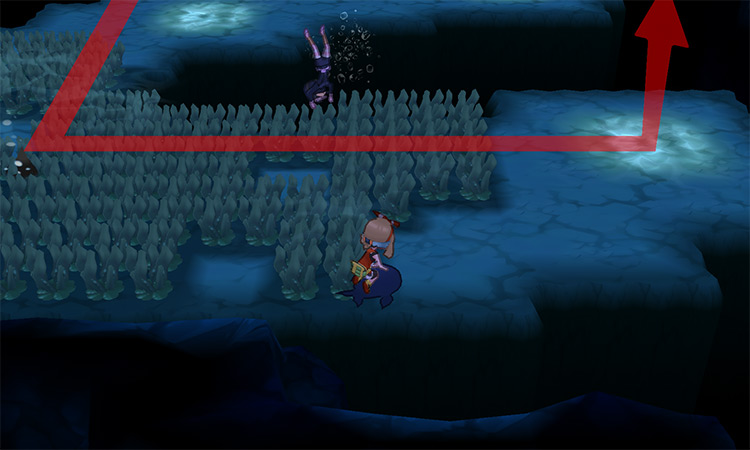
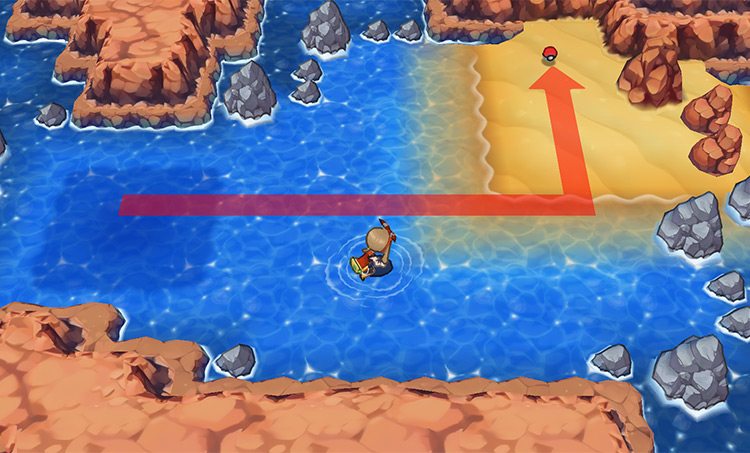
Step 5: Back on the surface, proceed northeast to the nearby island and obtain the Yellow Shard.
Location #3 – Route 126 (underwater)
Step 1: Fly back to Route 126 and surf south towards the diving spot that’s located to the right of the crater.
Step 2: Continue surfing after passing by a rock and a brown-haired swimmer, then use Dive anywhere near that area.
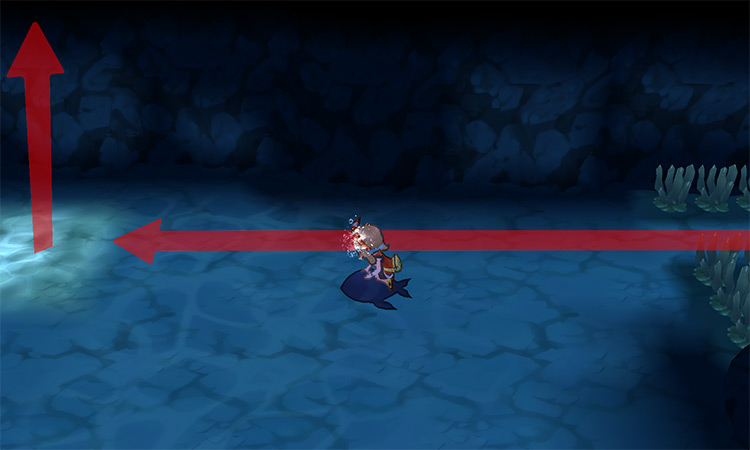
Step 3: While underwater, move west toward the marked spot in the screenshot below. On the bare seafloor near the crater amid the seaweed, you’ll find a hidden Yellow Shard.
Location #4 – Mirage Cave (west of Route 115)
Step 1: Using the Eon Flute, check if the Mirage Cave located west of Route 115 is accessible. If it is, fly there.
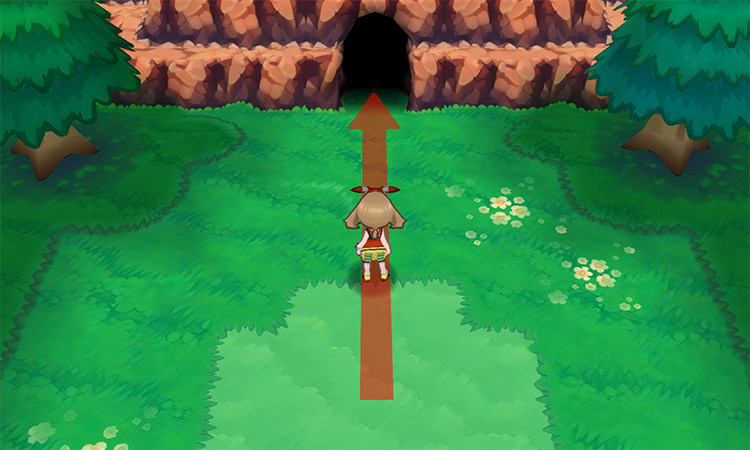
Step 2: When you arrive at the Mirage Cave, head north towards the cave’s entrance.
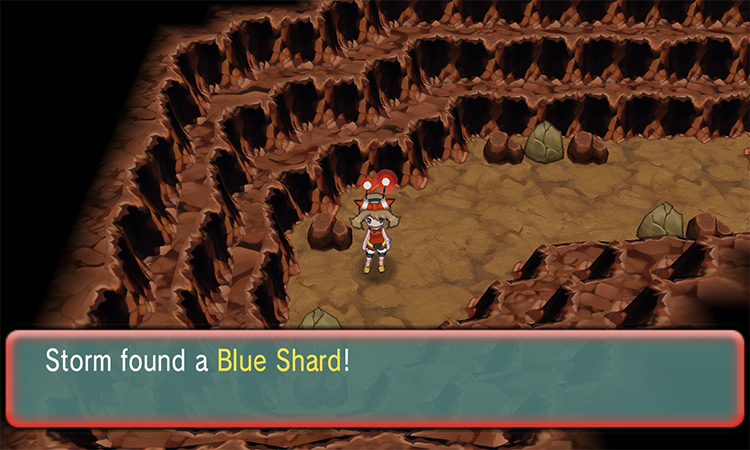
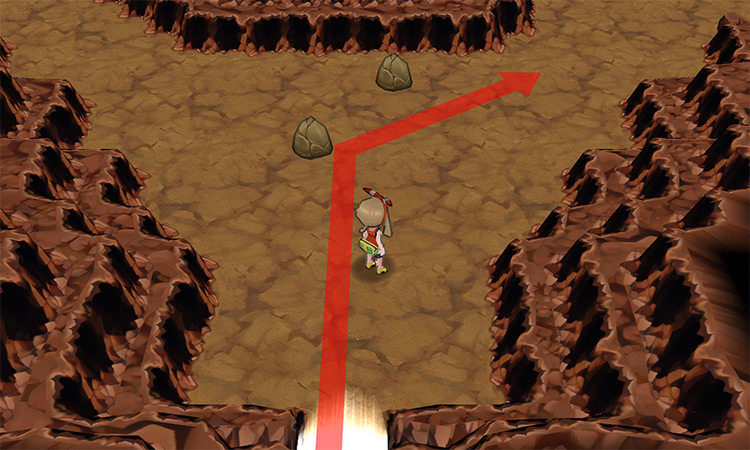
Step 3: Inside the cave, proceed to the right side.
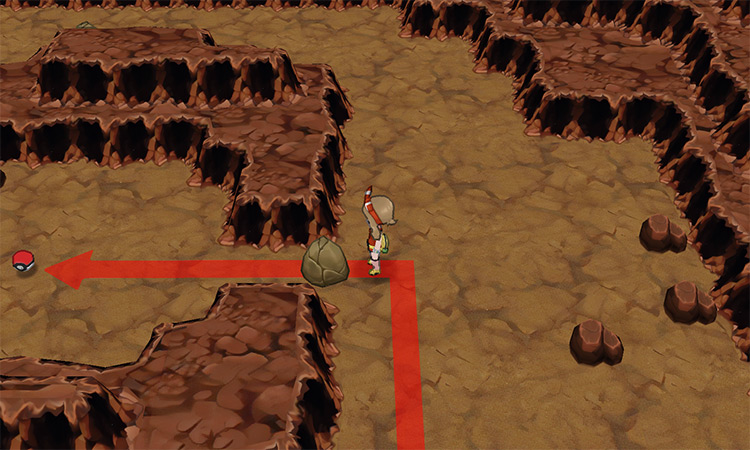
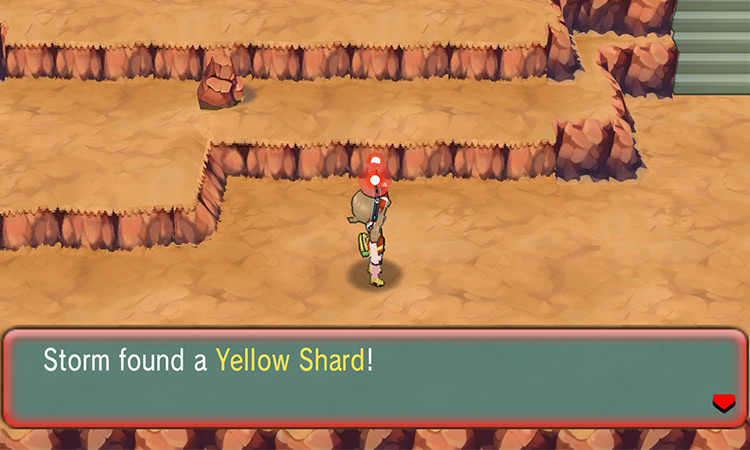
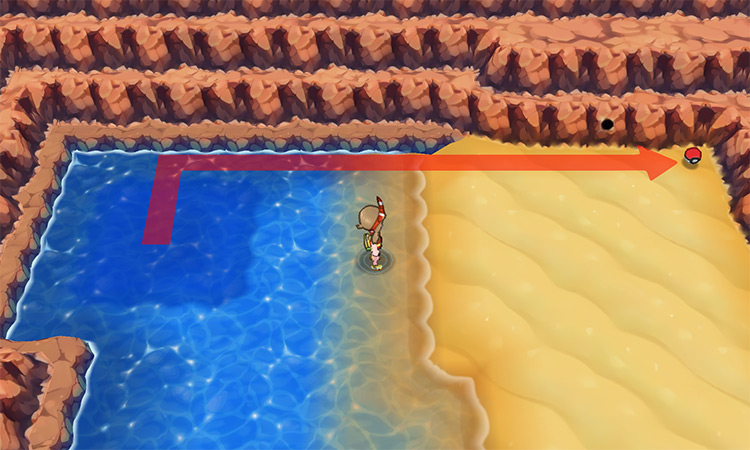
Step 4: Then use Rock Smash to break the rock blocking the way towards a small area. When the path is clear, go inside and pick up the Yellow Shard located in the center of the cave.
Repeatable
Mirage Mountains
Each Mirage Spot contains hidden items, like Yellow Shards, which can be found using the Dowsing Machine.
In Mirage Mountains you have the chance to obtain one of the following items:
| Mirage Spot | Mirage Mountain |
| Possible Items |
|
The map below highlights all possible Mirage Mountain locations. If none of the Mirage Mountains below are currently active, you can adjust the time settings on your 3DS or emulator until any of them appear.
| Mirage Mountain Locations | Map of the Hoenn Region |
|---|---|
| West of Route 104 |
 |
| North of Lilycove City | |
| North of Route 125 | |
| Northeast of Route 125 | |
| East of Route 125 | |
| Southeast of Route 129 | |
| South of Route 129 | |
| South of Route 131 |
All Green Shard Locations
Non-Repeatable
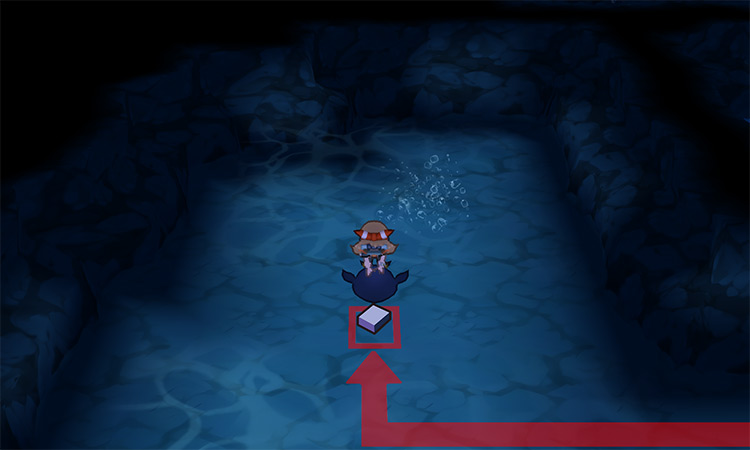
Location #1 – Route 124 (underwater)
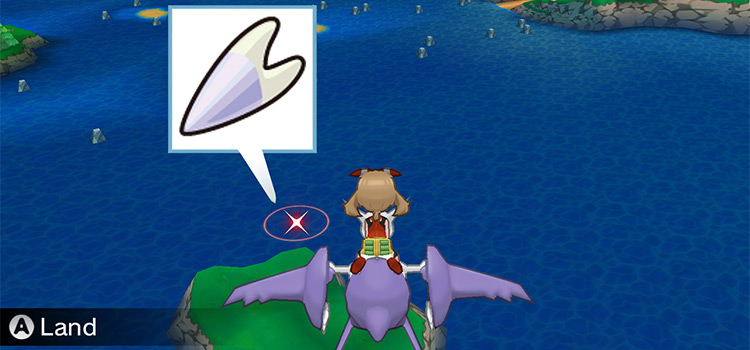
Step 1: Fly back to Route 124. Then immediately surf north until you find a diving spot.
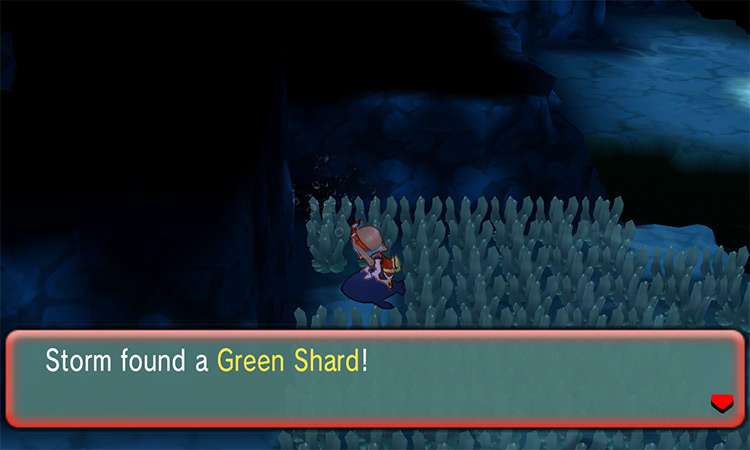
Step 2: After using Dive, move north for a couple of tiles along the central path.
Continue to press A until you acquire the hidden Green Shard. The precise location of the item is shown in the screenshot below.

Location #2 – Route 126
Step 1: Fly back to Route 126 and surf westward along the diving spot north of the crater.
Step 2: Upon reaching the north side of the crater where a black-haired swimmer is located, use Dive anywhere near this area.
Step 3: While underwater, navigate northwest towards the area where light filters from above. Then use Dive again to resurface.
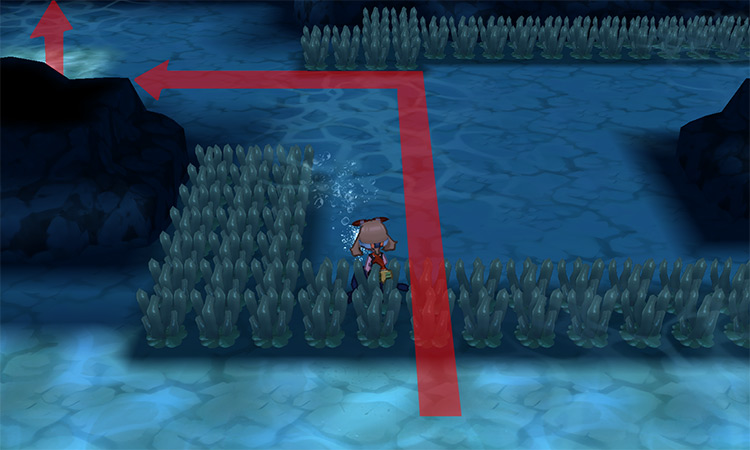
Step 4: Once back on the surface, you’ll be on the isolated northwest side of the route. From here, you’ll need to surf northeast to reach the Green Shard’s location.
Step 5: Continue surfing until you reach the northeast corner of this section. Then use Dive to submerge once more.
Step 6: When you’re back underwater, surf westward.

Step 7: After surfing past a seaweed patch, you’ll eventually find another diving spot where light filters from above. Use Dive here to resurface.
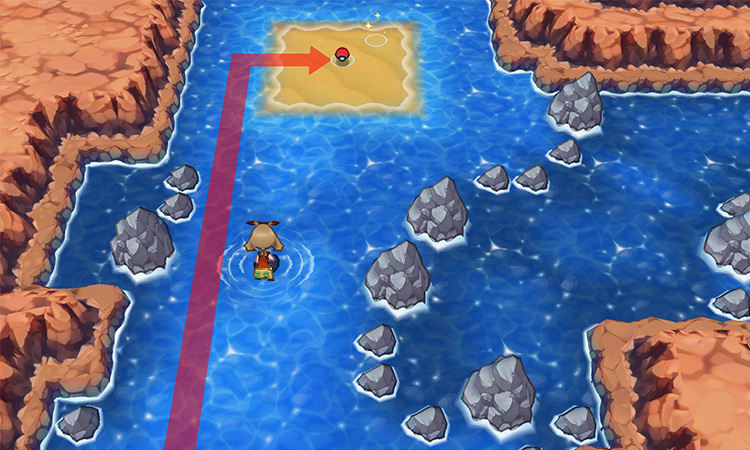
Step 8: Finally, you should find yourself in the northwest part of Route 126.
Make your way to the nearby island and pick up the Green Shard on the top-right corner.
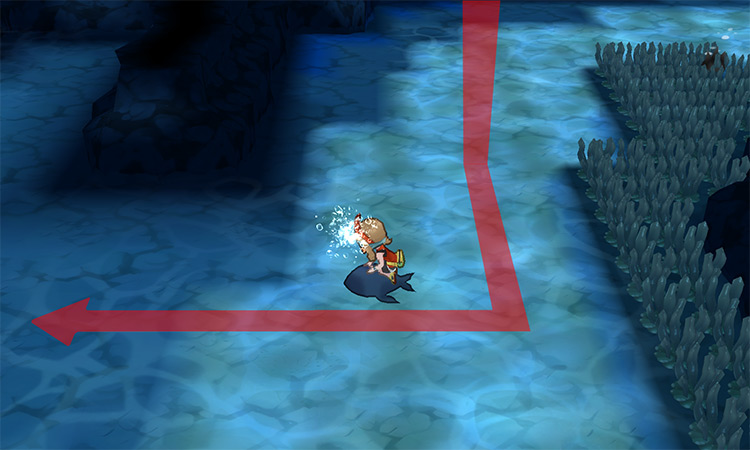
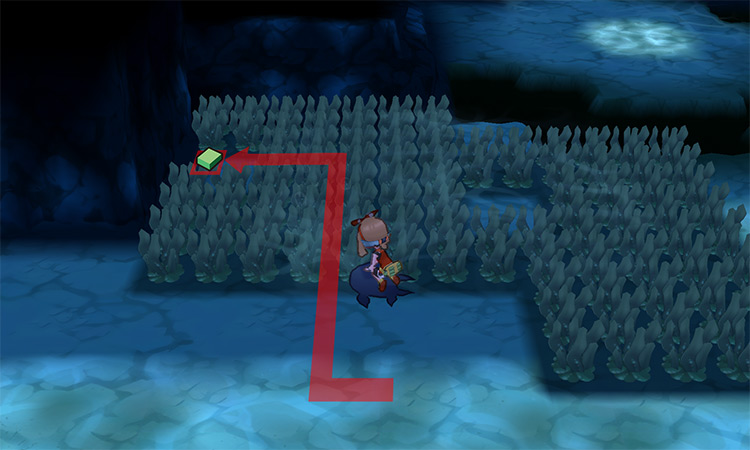
Location #3 – Route 130 (underwater)
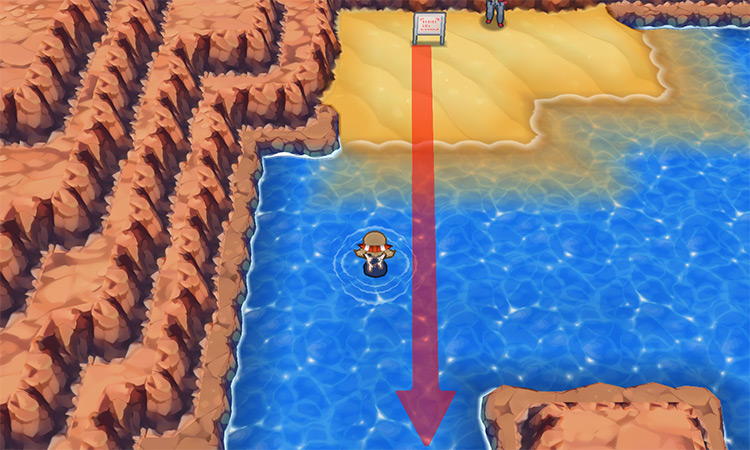
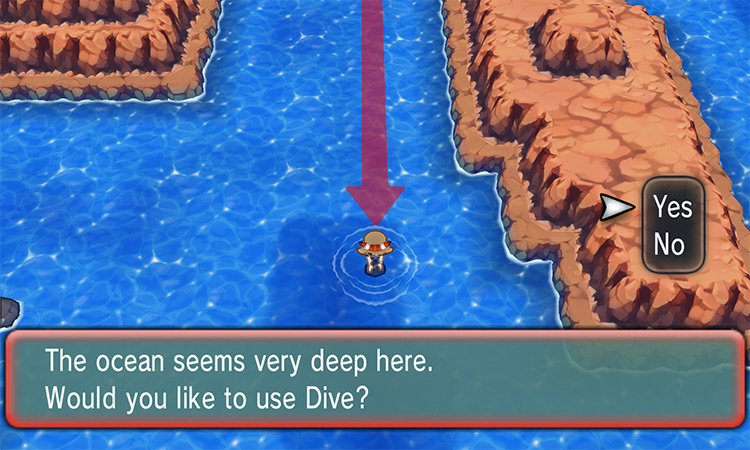
Step 1: Go back to Route 130 and immediately use Dive at the diving spot directly south of your current location.
Step 2: While underwater, surf towards the bare seafloor to the northwest side of the area.
You’ll find a Green Shard hidden by the wall amid the seaweed, as shown in the screenshot below.
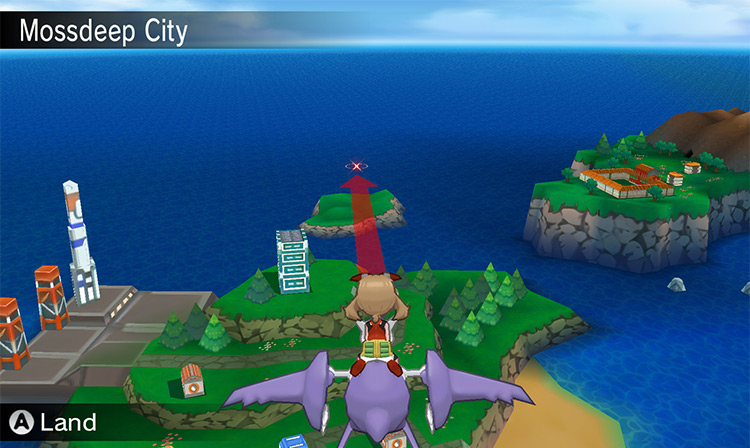
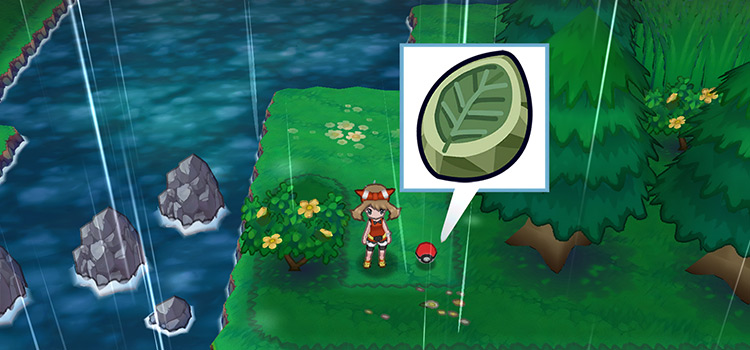
Location #4 – Mirage Forest (east of Mossdeep City)
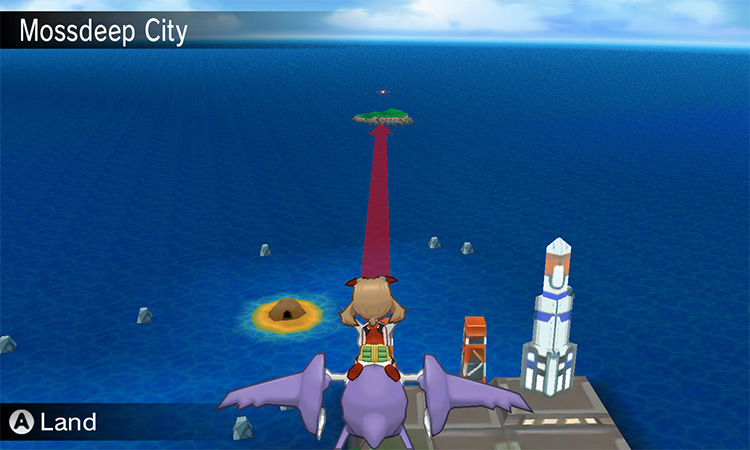
Step 1: Using the Eon Flute, check if the Mirage Forest located east of Mossdeep City is accessible. If it is, fly there.
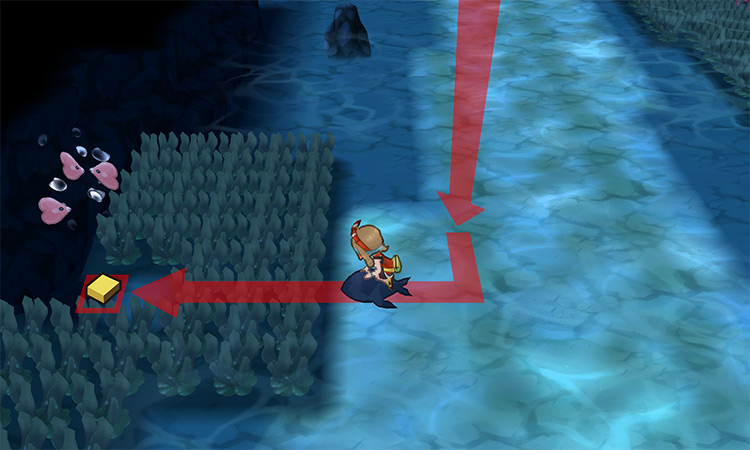
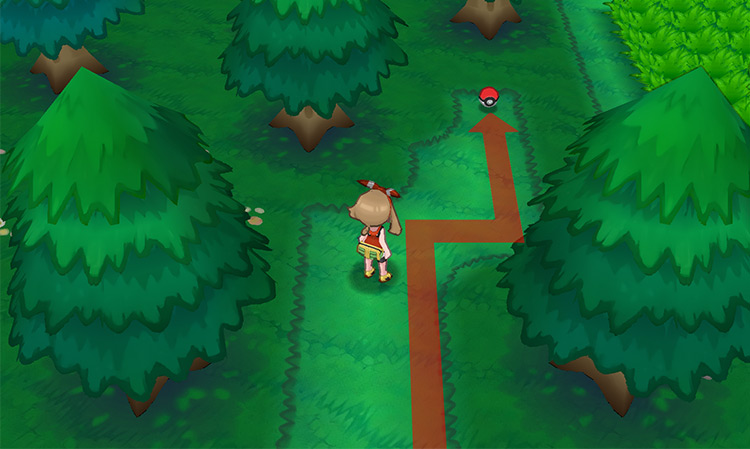
Step 2: When you arrive at this Mirage Forest, head to the left side of the area where a prickly tree is.
Use Cut to clear the path, and then move north along the narrow pathway.
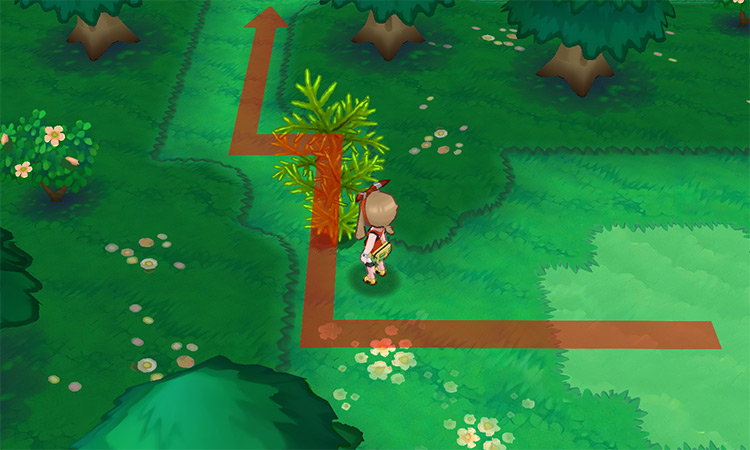
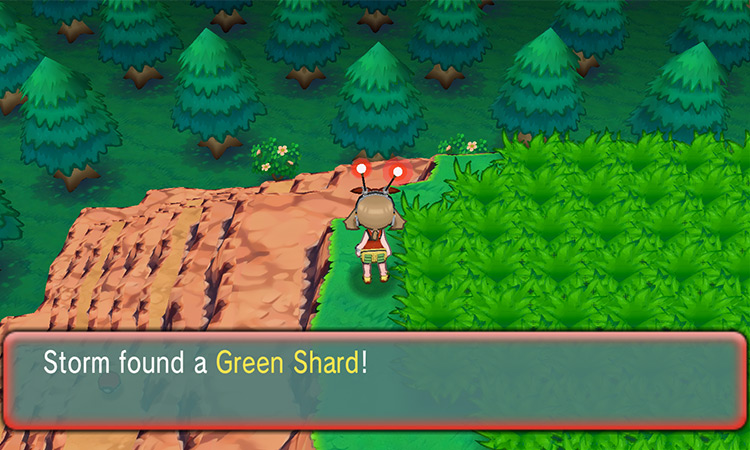
Step 3: At the end of the path you’ll be able to pick up a Green Shard.
Repeatable
Mirage Mountains
Each Mirage Spot contains hidden items, like Green Shards, which can be found using the Dowsing Machine.
In Mirage Mountains you have the chance to obtain one of the following items:
| Mirage Spot | Mirage Mountain |
| Possible Items |
|
The map below highlights all possible Mirage Mountain locations. If none of the Mirage Mountains below are currently active, you can adjust the time settings on your 3DS or emulator until any of them appear.
| Mirage Mountain Locations | Map of the Hoenn Region |
|---|---|
| West of Route 104 |
|
| North of Lilycove City | |
| North of Route 125 | |
| Northeast of Route 125 | |
| East of Route 125 | |
| Southeast of Route 129 | |
| South of Route 129 | |
| South of Route 131 |
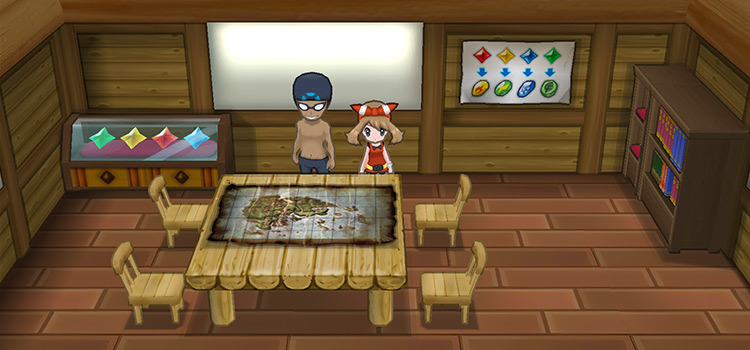
Where to Exchange Shards
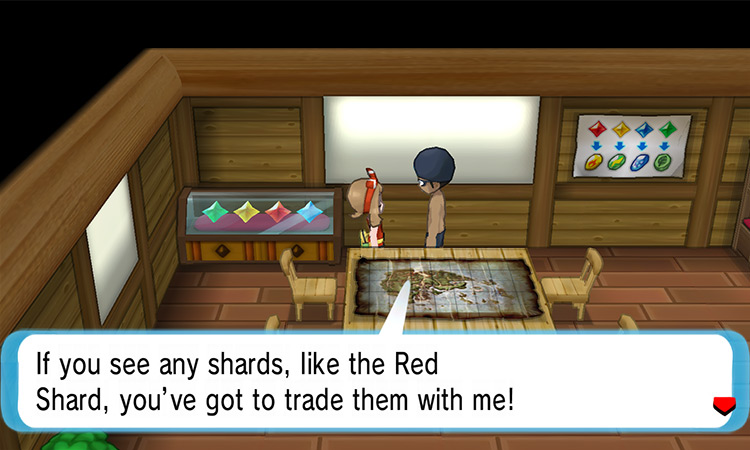
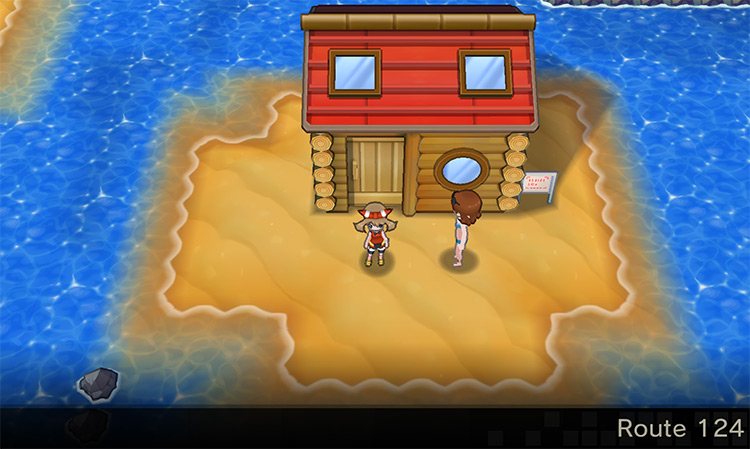
The shards you’ve obtained can be exchanged for various Evolution Stones with an NPC known as the Treasure Hunter. He resides in an island house on Route 124, situated between Lilycove City and Mossdeep City.
Inside the Treasure Hunter’s house, you can trade one colored Shard for a corresponding Evolution Stone. Here’s the full list of shards that can be traded for Evolution Stones:
| Shard | Evolution Stone |
|---|---|
| Red Shard | Fire Stone |
| Blue Shard | Water Stone |
| Yellow Shard | Thunder Stone |
| Green Shard | Leaf Stone |
Simply fly back to Route 124 and you’ll land on the island where his house is at.
-
Pokémon ORAS
- All Shard Locations (Red, Blue, Yellow, Green) – Pokémon ORAS
Related Posts:
 All Arceus Plate Locations in Pokémon ORAS (All 17 Plates)
 How To Get Deep Sea Scales in Pokémon ORAS
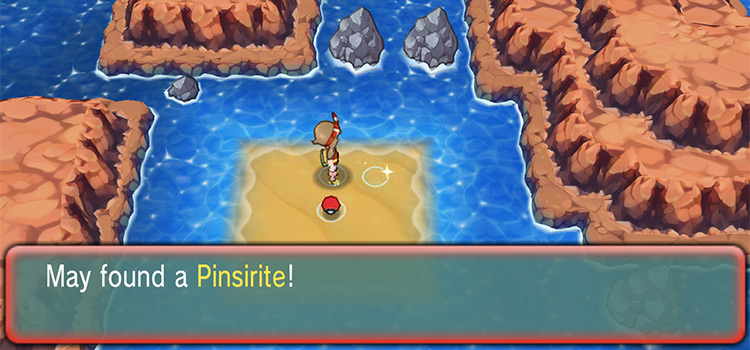 Where To Get the Pinsirite in Pokémon ORAS
 How To Get the Aqua Suit/Magma Suit in Pokémon ORAS
 How To Get Deep Sea Tooths in Pokémon ORAS
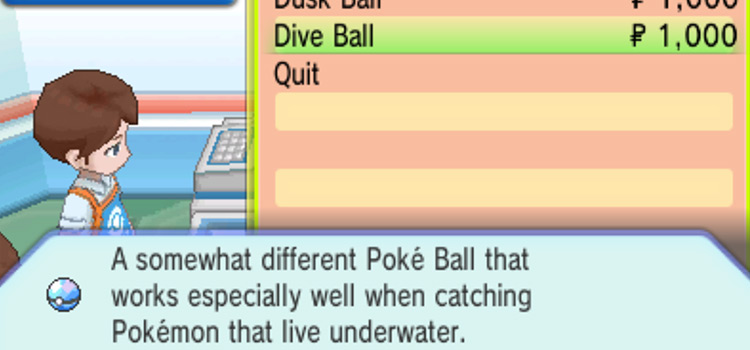 Where To Get Dive Balls in Pokémon ORAS
 How To Get Lagging Tails in Pokémon ORAS
 Where To Get Leaf Stones in Pokémon ORAS (All Locations)